How To Harvest Garlic
Understanding the Garlic Plant Life Cycle
The Stages of Garlic Growth
The growth and development of a garlic plant involve four main stages: planting, sprouting, bulbing, and maturing. Garlic is a versatile crop that can be planted in both the spring and the fall. However, successful garlic growers often prefer fall planting because it allows the crop more time to develop large, flavorful bulbs.
After planting, the growth process continues with sprouting, which occurs when the garlic breaks through the soil surface and begins to sprout leaves. This stage often takes place during the early spring months. The bulbing stage happens when the garlic plant starts to form bulbs beneath the soil, typically in the late spring or early summer. Finally, maturation is when the bulb reaches its full size and is ready for harvest.
Understanding the garlic plant life cycle is crucial as it provides direction on when the most appropriate time to harvest is, resulting in prime taste and quality.
Identifying the Right Time to Harvest
Identifying the right time to harvest garlic is also vital. While general guidelines suggest harvesting garlic when the lower leaves turn yellow-brown and the upper part remains green, several other factors come into play. Firstly, the type of garlic being grown can impact the harvest time. For example, hardneck garlic types are typically ready to harvest earlier than softneck types.
Secondly, weather conditions can affect when garlic should be harvested. Extreme weather, such as a particularly wet or dry season, can speed up or delay the harvest time. Thus, while the color of the leaves is a good indicator, the plant's overall health and the surrounding conditions should also be considered to ensure the garlic is harvested at the right moment.
Finally, one of the most reliable methods to check if the garlic is ready for harvest is the 'slice method.' This involves pulling up a bulb and cutting it in half. If the cloves fill out the skins, then it's time to harvest.
Strategies to Increase Garlic Yield
Aside from knowing when to harvest, several strategies can help increase garlic yield. Firstly, soil preparation plays a significant role. Garlic prefers well-drained soil rich in organic matter. Therefore, adding compost or aged manure to the soil before planting can significantly improve the garlic crop. Also, applying a layer of mulch after planting can help retain soil moisture and keep weeds at bay.
Secondly, careful watering practices can help increase yield. While garlic necessitates regular watering, overwatering can lead to bulb rot. Therefore, it's suggested to water garlic deeply but infrequently. Monitor the soil moisture levels to ensure it stays evenly moist but never waterlogged.
Lastly, feeding the garlic with a high-nitrogen fertilizer in the early spring can boost growth and result in larger bulbs. But it should be noted that fertilization should be stopped once the garlic begins to bulb to prevent undesired leaf growth.
Proper Garlic Harvesting Techniques
Harvesting Garlic without Damaging the Bulbs
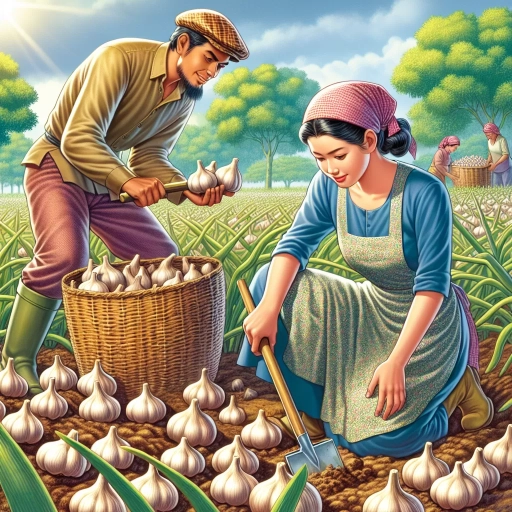
Harvesting garlic without damaging the bulbs is critical for both the taste and storage of the garlic. Overly aggressive or careless harvesting can bruise the bulbs, leading to spoilage. To prevent any damage, it's advised to loosen the soil around the garlic with a spading fork before pulling the bulbs out. Try to reach as deep as possible to avoid breaking any bulbs or leaving any cloves behind, which could lead to disease in your next planting.
Another tactic that can help in proper garlic harvest is to pull the garlic plants by the base rather than by the leaves. This helps prevent the stems from breaking away from the bulbs, ensuring that the bulb stays intact. For those who are unable to smoothly pull the garlic, they should dig around the bulb to free it from the soil for harvesting.
Also, garlic bulbs should be harvested when the soil is dry. If the soil is wet, it may stick to the bulbs and cause them to rot during the curing process. After harvesting, brush off any loose soil, but refrain from washing the bulbs as moisture can lead to spoilage.
Curing Garlic for Long-Term Storage
Curing is a process which allows garlic to dry for storage. Following the correct process can ensure that the harvested garlic lasts longer. Firstly, after harvesting, tie the garlic in bundles and hang them in a well-ventilated, shady spot. It takes about two weeks for garlic to cure properly.
During this period, the outer layers of the bulb skin dry and close around the cloves, preventing them from molding or losing potency. It's essential to handle the garlic gently during curing, as any bruising can cause the bulbs to rot. Also, exposure to direct sunlight during curing can bleach the bulbs and reduce their storage life.
Finally, once the garlic is cured, the garlic should be stored in a cool, dry place with plenty of airflow. If kept properly, harvested garlic can last up to eight months.
Frequently Made Garlic Harvesting Mistakes and How to Avoid Them
While the process of harvesting garlic might seem straightforward, mistakes can be made that affect the quality of the harvested bulbs. One common mistake is waiting too long to harvest. When garlic is left in the ground for too long, the bulbs can split open, and the cloves can begin to deteriorate within a few weeks of harvest. To avoid this, use the leaf color and the 'slice method' as guides to determine the optimal harvest time.
Another frequently made mistake is not taking proper care of the harvested garlic. Common mishaps include handling the bulbs roughly, leaving them in the sun, or washing them right after harvesting. All these actions can damage the bulbs and reduce their storage life. Instead, handle the bulbs gently, cure them appropriately, and store them properly.
Lastly, some gardeners make the mistake of not rotating their garlic crops. Continuous planting of garlic in the same location can lead to a build-up of diseases and pests. To prevent this, it's advised to rotate the garlic crop location every 2-3 years.