How To Paint A Car
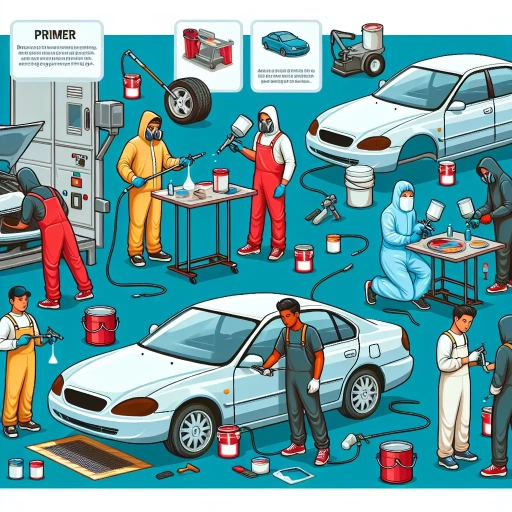 Painting a car is no easy task, it's an intricate process that demands time, patience, and precision. Yet, with the right tools, technique, and understanding, you can give your vehicle a well-deserved makeover on your own. This comprehensive guide will not only help you grasp the rudimentary elements involved in car painting but also guide you through a systematic, step-by-step process to achieve a professional-grade finish. Moreover, it doesn’t end at the last spray of paint; maintaining that fresh coat is equally critical for its longevity. Therefore, we’ll go beyond the painting process and delve into post-painting maintenance and care as well. Let's strap on your overalls, slide into your safety gloves, and step into the technicolored world of automotive painting, starting with the ever-important foundation of understanding the basics of car painting.
Understanding the Basics of Car Painting
Understanding the fundamental aspects of car painting is essential for anyone looking to attempt this task. It's a meticulous process that requires careful preparation, an understanding of the right paint and equipment, and a handful of tips and tricks to ensure a successful outcome. These three elements form the basis of this comprehensive guide aiming to simplify the potentially daunting task of car painting. First, we delve into the importance of adequate preparation - a critical preliminary step often overlooked. This involves everything from ensuring a clean, dust-free surface to using a quality primer to facilitate the painting process. Secondly, we address the process of choosing the right paint and equipment that makes all the difference in achieving a professional finish. Lastly, equipped with effective tips and tricks, even a daunting car painting project can turn into an enjoyable and rewarding one. As we transition into our first topic, let's highlight the significance of proper preparation in car painting. A strong foundation laid during the preparatory phase can truly enhance the overall quality and durability of the final paint job.
The Importance of Proper Preparation
The Importance of Proper Preparation In the intricate process of painting a car, your foundations matter as much as the final brush strokes – hence the critical importance of proper preparation. In our commitment to comprehensively understanding car painting basics, we delve into the essential principles and practices of preparation. Just like an artist primes a canvas before expressing their artistic vision, a car painting project needs due diligence in preparation to gain satisfactory results. Neglecting this crucial stage can lead to inefficiencies in the paint job, which might result in needs for costly touch-ups, or worse, a complete do-over. Firstly, a comprehensive inspection of the car's body is imperative. This systematic surveillance plays an essential role in identifying any cracks, rust spots or dents that could prove detrimental to the end product if overlooked. Besides potential hardware inconveniences, body imperfections stand to disrupt the smoothness and uniformity of the paint job. After carrying out the inspection, the next step involves a proper cleaning of your vehicle. With a mixture of warm water and mild detergent, wash the car thoroughly, making sure to remove any residue—dirt, wax, or grease—that might hinder the paint's ability to adhere to the car’s body. Using a microfiber cloth can help ensure a scratch-free clean. Subsequently, the car needs to be dried meticulously to ensure no water spots are left behind, as they can interfere with the paint adhesion as well. This step often calls for a significant amount of patience due to its thoroughness, but it is a vital component of preparation. The final stage of the process is masking and sanding. It is paramount to cover areas you don't wish to be painted, such as windows, mirrors, and door handles, to avoid an undesirable aesthetic. Simultaneously, the car body should be lightly sanded to create a surface conducive to paint adhesion. This time-consuming task is fueled by attention to detail and previous stages' success. Emphasizing the importance of proper preparation before diving into the actual painting process ensures a quality finish that not only looks good but also lasts. While it may seem tedious and time-consuming, the prep stage is your assurance of a seamless, high-quality outcome, making it an indispensable aspect of understanding the basics of car painting. The time invested in the proper preparation of your car's body pays off in the form of a sleek and durable paint job that commands admiring glances on the road. Investing in preparation is investing in the longevity and aesthetic of your vehicle.
Choosing the Right Paint and Equipment
Choosing the right paint and equipment is a crucial step in the car painting process and significantly impacts the end result. The quality and type of paint you select will not only contribute to the overall look but will also determine how durable and resilient your painting job will be. For many enthusiasts, the use of urethane paints brings about a professional finish while being durable. On one side, you have single-stage paints, effectively covering in just one application, but may lack depth in its color. On the other side, base-coat/clear-coat systems are preferred for their color variety and deep, glossy finish but often involve a more complex process. As for selecting the right equipment, you might want to seriously consider investing in a good quality spray gun, drawing a significant line between an acceptable job and an excellent job. There are various types of spray guns available in the market, such as siphon, gravity, and pressure feed guns. Your choice should depend on the specific project requirement and your usability comfort. Moreover, an air compressor with a higher CFM (cubic feet per minute) rating can ensure an uninterrupted and smooth painting process. Personal Protective Equipment (PPE) such as overalls, gloves, respirators, and eye protection are also an essential part of your painting toolkit to ensure safety whilst working. In addition to the paint and equipment, surface preparation tools like sanders and body fillers are equally important. It's all in the details when it comes to bodywork, the unseen preliminaries that set the stage for the spectacular final act of painting. Choosing quality materials might seem hard on your wallet initially, but the investment pays off in long-run satisfaction with the job done. Eventually, taking the time to understand, research, and invest in the right paint and equipment will be the difference between a mediocre and a professional-looking finish. Remember to always test your chosen paint and equipment on an unseen part of the car or a separate test panel to ensure it matches your expectations before going in for the full car paint job. This trial and error process will ensure you are well-trained and prepared for the main task, eliminating chances of last-minute surprises. It's all about striking the right balance between the art of selection and the science of application. Investing time and thought in this critical stage will hence make your car painting experience enjoyable and rewarding.
Tips and Tricks for a Successful Car Painting Project
Mastering the art of car painting demands not only understanding the basics, but also successfully implementing numerous tips and tricks that professionals swear by. One of the key factors in achieving a smooth, glossy car paint finish is proper surface preparation. Prior to any layer of paint being applied, the surface must be clean, dry, and free of rust, grease, or wax. You can guarantee this through a diligent cleaning, followed by sanding the surface using sandpaper with an appropriate grit. Priming is a step many overlook, yet it creates an adhesive surface for the paint, improving longevity and overall look. Another invaluable tip is to invest in high-quality automotive paint and equipment. While it might seem tempting to work within a tight budget, choosing inexpensive options can lead to a poor paint job that may peel, crack, or fade prematurely. High-quality paints contain more pigments and less solvent, leading to durable, richer color. Technique also comes into play when it comes to a successful car painting project. The best approach is to apply multiple thin layers of paint rather than one thick layer, which could result in runs and drips. Each layer should be given ample time to dry before applying the next. This might demand patience, but the result is a smooth, professional-grade finish. Lastly, understanding the role of the environment is crucial. Painting should ideally be done under a controlled, dust-free environment to avoid contaminating the wet paint. The temperature, too, plays significant role - cooler, less humid conditions are best, as they help the paint to dry evenly. The journey through a successful car painting project thus involves more than just understanding the basics. It requires an appreciation for the finer details - the right materials, proper surface preparation, the best technique, and ideal environmental conditions. By integrating these tips and tricks, even a novice can achieve a car paint job that looks professionally done.
Step-by-Step Process of Painting a Car
Whether you're a DIY enthusiast seeking a new project or just looking to save money on professional painting services, you'll find a step-by-step guide to painting a car an immensely helpful resource. Our comprehensive article is designed to guide you through the meticulous process with ease, attention to detail, and precision, so that you can achieve a smooth and shiny car exterior you've always dreamed of. It critically underscores three pertinent stages in the painting process – Preparing the Car Surface for Painting, Applying Primer and Base Coat, and Applying the Final Coat and Finishing Touches. Each stage calls for a unique set of methodologies and techniques, all of which contribute to the final results. Let's dive into the first stage, which forms a crucial foundation for all the subsequent steps - preparing the car surface for painting. This phase is all about ensuring the surface is clean, smooth, and ready to welcome the transformative strokes of the primer and paint.
Preparing the Car Surface for Painting
While the idea of repainting your vehicle might conjure up images of simply picking up a brush and applying color, the preparation phase is more crucial and often overlooked. Before a single speck of paint graces your vehicle, understanding how to prepare the car surface for painting is essential for a flawless finish. To start with, it's vital to understand that your vehicle's body isn't just a canvas awaiting a splash of color - it's a complex surface composed of various substances, including old paint, corrosion, and bare metal, all of which react differently to new paint. The key to a successful paint job is, thus, proper surface preparation, which ensures the new paint adheres optimally to give your car an attractive new lease of life. Firstly, you should thoroughly clean your car to remove dirt, grease, and other contaminants that could interfere with the painting process. Automotive soap added to water, a sponge, and some elbow grease will suffice. More importantly, use a wax and grease remover to further clean the car surface, removing any residues that may prevent the paint from sticking well. Once you're confident your car is squeaky clean, the next step is sanding. The purpose of sanding the old paint off your car is twofold - it removes any surface rust and creates a rough area for the primer, and later the paint, to adhere to. Using a dual action sander at this stage can make the process speedier and more efficient, though manual sanding with grit sandpaper is also acceptable. Similarly, addressing rusty patches is an inescapable part of preparing the surface. You can use a wire brush or a rust remover to achieve this. Dealing with these pesky problems now will save heartache down the line, as untreated rust will eventually erupt through your fresh new paint job in an unsightly manner. Once the surface is clean, smooth, and rust-free, you should apply a primer that fills in scratches or dings and offers a good base for the paint. The primer acts as a foundation, helping the topcoat stick better while improving the color's longevity. Overall, meticulously preparing the car surface for painting might seem like a time-consuming and laborious task. Nevertheless, the time and effort invested in the preparation stage lay the groundwork for a stunning, high-quality finish that breathes new life into your car. As the old saying goes, 'before anything else, preparation is the key to success'. This statement holds no truer than in the process of painting a car.
Applying Primer and Base Coat
Applying Primer and Base Coat is a crucial stage in the process of painting a car. Acting as a foundation, the primer ensures the car surface's readiness for the base coat application. Critical for the longevity and appearance of the final paint job, the primer provides several functions: it adheres to the car's metal or previous layer of paint, it fills any minor imperfections or scratches to promote a smooth surface, and it forms a barrier that prevents any rust. To initiate this process, sand down your vehicle's surfaces to create a mechanical bond for the primer. This step might intimidate novices, but don't worry. Use a dual-action orbital sander with a finish equivalent to 220- to 400-grit sandpaper. This tool swiftly removes old paint, rust, and any irregularities on the car body. Be patient and methodical, focusing on section after section to ensure a consistent sanding result. After thoroughly cleaning off the sanding residue, it's time to apply your primer; a fundamental step where proper application guarantees a luxurious finish. Select a high-quality, automotive-grade primer formulated to bond with the material under it and the paint you'll apply over it. Equally important is the choice of the spray gun, keeping the nozzle's appropriate distance and maintaining consistent strokes for an even application. Typically, three to four layers of primer is recommended, ensuring each layer is dry before applying the next. Once the primer is applied and has adequately cured - normally a 24 hours "wait" duration - a light sanding is needed. This step contributes to a perfectly smooth finish, preparing the surface for the base coat. Following the primer application is the application of the base coat. This layer is the car's main color seen by the naked eye. This stage is just as important as the primer, as it determines the car’s aesthetic appeal. Aim for several thin layers of base coat rather than a single thick one. It not only reduces the risk of running or dripping paint but also provides a deeper, more vibrant color. As with the primer, allow each coat to dry completely before applying the next. Executing these steps with precision and skill is key to a successful car paint job. Going through the process meticulously might seem like a painstaking task, but it's well worth the effort when you finally see the impressive result. The application of the primer and base coat indeed serves as the backbone to a well-done, professional-grade car painting job.
Applying the Final Coat and Finishing Touches
Applying the final coat and finishing touches to your car paint job is an art and science that requires a meticulous approach. This phase is unquestionably critical as it harmonizes all the hard work carried out in the previous painting stages, bringing out the sophisticated glossy finish every car owner dreams of. As part of the step-by-step process of painting a car, the application of the final coat is the grand finale that completes the painting show. It provides the finishing veneer which brings out the car's sheen, rectifying any grinning effects potentially present in the undercoat. After carefully prepping the car, laying down a primer, and applying a base color, your carefulness in handling the final coat and finishing touches could distinguish a professional paint job from an amateur. To start, you must ensure that the surface of the car is smooth with no remnant dust or sand particles. The final coat should be applied with steady, overlapping strokes at a regular pace. The essence is to lay down paint uniformly across the surface and avoid sagging, a common problem when the coat is too heavy. The technique is crucial here; you should hold your spray gun about six inches away for optimum results. Remember, this final coat is the layer that everyone sees, that showcases the exquisite new color of your car, so patience is key. Allow significant drying time between each coat, as rushing this process could ruin the finish. You might be eager to see your freshly painted car hit the road, but waiting for that perfect dry could bring the difference between a spectacular finish and a shoddy one. Then come the finishing touches. This begins with a thorough inspection of your work. Looking closely, in varying lights, ensures that inconsistencies are spotted and corrected, and buffing is evenly executed. You can now address minor imperfections like dust nibs or minor runs using a polish or wax, delivering that factory-grade shine. Employing a cutting compound to refine the paint level is also beneficial. Follow this up by buffing the car with a polishing compound to enhance the brightness and shine to your desired taste. The finishing touch could also involve installing a paint protection film that shields against scratches and chips, thus prolonging the life of your repainting job. These final steps demand diligence and a keen eye for detail but always result in a gleaming car paint job that glimmers with pride. Applying the final coat and finishing touches when painting your car cannot be understated. Being a key phase in the car repainting process, it's transformative, breathing new life and gleaming style into your vehicle. By executing it well, you not only achieve a protective shell over your ride but also demonstrate a clear sign of your aesthetic elegance.
Post-Painting Maintenance and Care
Preserving the pristine look of a freshly painted car involves a strategic approach; starting from the initial care after painting, incorporating long-term maintenance strategies, to overcoming common car paint issues. Relishing the gloss and vibrancy of a new paint job is an aesthetic pleasure we all enjoy, but maintaining that freshness requires conscious effort and smart tactics. Initially, after a paint job, the car must be treated with tremendous care; the paint needs time to cure and harden, hence particular measures should be taken to avoid premature damage or contamination. Long-term, a comprehensive maintenance strategy will help you extend the lifespan of your paint job and keep the sheen intact. It's about keeping the right balance between cleaning, washing, waxing, and buffing. Finally, inevitable paint defects will appear over time, but with the right techniques and tools, these challenges can be easily managed. Now, let's delve into the first facet of this discussion - Initial Care and Maintenance After Painting, which sets the foundation for a lasting, gleaming paint job.
Initial Care and Maintenance After Painting
To ensure the longevity and shine of your newly painted car's veneer, initiating crucial post-painting maintenance and care is indispensable. Initial care and maintenance after painting a car involve meticulous efforts but are entirely worth every minute spent. Your car has just gotten a new lease of life, and your responsibility is to keep it looking its best. The first step after letting the paint job dry thoroughly is to avoid washing the car for at least a week. This time allows the paint to cure entirely, preventing any potential harm caused by harsh cleaning chemicals or abrasive sponges. Further, within the first month of a new paint job, avoid using any wax or polish on the car. These substances can impair the curing process of the paint. Instead, stick to simple washing with mild soap and water, and ensure not to scrub the surface too hard. Remember, it's both the gleam and the integrity of the paint job that we're trying to maintain here, so gentleness is key. Again, the environment the car is kept in plays an integral role. Try to shelter the car as much as possible within the first few months post-painting. Protecting your vehicle from the elements - such as extreme sun, heat, and frost - will maintain the quality of the paint job despite weather conditions. Exposing to extreme temperatures or direct sunlight can cause the paint to fade away prematurely, or develop a dull sheen. Similarly, corrosive elements like bird droppings or tree sap can do far more damage than one would expect and impair your car's shiny new look. Remember that prevention is always easier than cure, and taking these protective measures can save substantial time and costly repairs in the future. Additionally, during this period, try avoiding rough terrains or dusty areas to keep contaminants from sticking to the paint. Routine maintenance checks should include looking out for any chips or cracks – promptly rectify any irregularities found to prevent further damage. To summarize, initial care and maintenance after painting your car is largely about prevention and prompt, gentle cleaning. Adopt these practices as part of your car maintenance routine, and your car's paint job will maintain its luster and integrity for longer periods, ensuring that your vehicle remains the envy of the block. Adhering to these strategies does not only preserve the aesthetic appeal but also adds to your car's durability and longevity, making it a worthy investment.
Long-Term Maintenance Strategies
Long-Term Maintenance Strategies After painting your car to attain a stunning new appearance, it is crucial to implement a robust, long-term maintenance strategy to prolong this glossy sheen. The longevity and aesthetic appeal of your car's paint job can be significantly enhanced by adopting proactive care measures. One cardinal rule of long-term paint maintenance is regular cleaning. Over time, dust, grime, road salt, bird droppings, and other pollutants can cause the paint to lose its gloss and start peeling off. To prevent this, regularly wash your car with a gentle, automotive-approved cleaner and soft cloth, ensuring to rinse thoroughly with water. Another essential strategy to protect your vehicle's paintwork is to use sealants or wax. Applied after cleaning, these products function as protective barriers, locking out elements that can damage the paint, such as UV radiation and acid rain. This protective layer also gives the car an appealing glossy finish, enhancing the depth and quality of the paint color. Keep in mind, using high-quality automotive wax can provide a buffer for the paint, resisting minor scrapes and impacts. Be mindful of where you park the vehicle. Exposing the car to direct sunlight for extended periods can lead to paint fading, mainly if it is a dark color. Similarly, parking under trees might attract bird droppings, while parking in an open area might expose the car to airborne pollutants. By sheltering the vehicle, you reduce exposure to these factors, therefore preserving the appealing aesthetics of the car’s paintwork. Incorporate routine inspections into your maintenance regime. Small problems can escalate if not dealt with promptly. Check for any signs of rust or chipping, as these are indicators that the protective coatings are compromised and that action is required. If you detect these issues early, you can take the car to a professional for a touch-up paint job, preventing a small issue from becoming a larger, more expensive problem. In the long-term, focusing on maintenance changes your perspective from reactive to proactive, helping you prevent paint damage before it happens. With the right steps taken, you can maintain the appealing look of your car's paint job, safeguarding your investment and ensuring your vehicle remains a source of pride for many years to come. Through a combination of cleaning, waxing, strategic parking and regular inspections, you create a comprehensive strategy that keeps your newly painted car in excellent condition.
Overcoming Common Car Paint Issues
Overcoming common car paint issues is an integral part of post-painting maintenance and care, and crucial knowledge for any car owner or hobbyist. Equipped with this information, you'll be armed with not just the procedural know-how, but also the proactive tactics that can fortify the lifespan and vibrancy of your car's finish. The elements your car is exposed to on a daily basis contributes to the wear and tear of its paint job. Sun, rain, tree sap, bird droppings or even rocks can cause scratches, oxidation and faded paints. Ignorance of these problems can lead to more severe damage, including chipping and rusting, impacting not just the aesthetics but the actual structure of the car. Strategic car paint care starts with knowledge and preemptive actions. Use a car cover whenever possible, especially if you are parking outside for extended periods. High-quality wax-sealers can create a protective coat that guards against scratches and weather-induced issues. Regular cleaning is just as vital - and when cleaning, it is equally imperative to avoid harsh materials or contrasting temperatures that might affect the paint. When damage does occur, don't despair or rush to an expensive paint shop; minor scratches or blemishes can usually be managed at home. Use a reliable rubbing compound to eliminate shallow scratches. Deeper ones may need filler and paint. Remember, it's important to select a touch-up paint that matches your car's color code, which you can usually find in your vehicle's service handbook or door jamb. Lastly, let's not forget about oxidation, that dreaded enemy of car paint that results in that all-too-familiar dull or faded look. Oxidation arises when paint is regularly exposed to the sun and degrades over time. A good buff and polish can usually remove oxidation, restoring the bright and shiny gloss of your car. In more severe cases, a new paint job might be necessary. Overcoming common car paint issues is one part nimble vigilance, one part proactive care. By incorporating these tips into your post-painting care routine, you'll ensure the longevity and luster of your car's paint, preserving that gratifying, showroom-fresh appearance that you love. In today's age, where a car is not just a vehicle but a part of our personal statement, a smooth, gleaming paint job communicates your attention to detail and consideration for aesthetics.