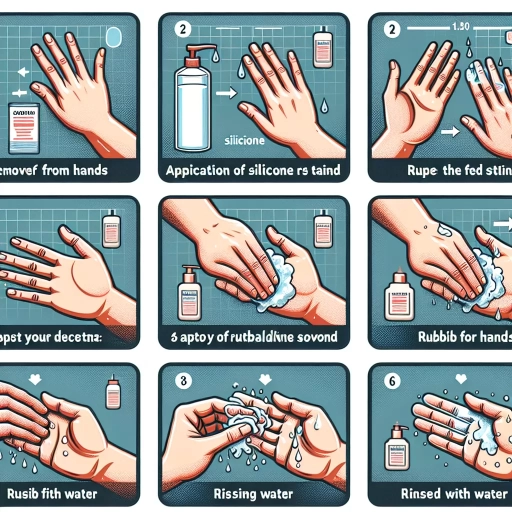
How To Get Silicone Off Hands
 Silicone is an incredibly versatile material used in various applications, from bathroom sealants to crafting projects. However, handling silicone can often result in a sticky situation – it clings onto your hands and doesn’t easily wash off with water. Learning how to get silicone off your hands effectively is a crucial skill that can save you from a lot of frustration. This comprehensive guide will provide you with a step-by-step approach to this common problem. We commence with the foundational aspects of silicone removal in our first section, 'Preparation is Key: Understanding the Basics of Silicone Removal'. We then proceed to delve into two primary methods of removal: 'Method 1: Using Solvents and Chemicals' and 'Method 2: Using Physical Methods'. Each section will equip you with practical techniques to successfully and safely rid your hands of stubborn silicone residue. But before we dive into specific strategies, let's first focus on the preparation involved in these processes and fundamental information about silicone removal.
Preparation is Key: Understanding the Basics of Silicone Removal
of the introduction is not merely acknowledging the task at hand, but bringing a substantial understanding and preparation tools. The complexity of silicone removal should not be undervalued. This process, if not done correctly, could tarnish surfaces and potentially harm the skin. Analyzing this scenario in three pivotal steps will potentially alleviate any arising issues. First, understanding the importance of "Assessing the Situation" is crucial, as it will determine which approach to employ. This step will demand your keen sense of observation and judgement. Second is understanding the need for "Choosing the Right Tools and Materials"; having the correct utensils is half the job done correctly. The wrong tool can inflict more damage to the surfaces, which leads to additional repair work. Last but not least, "Preventing Damage to Skin and Surfaces" is vital, as human safety and preserving the integrity of our work surface is at stake. Now, it is time to delve into the intricacies of the first step, “Assessing the situation”, which is the cornerstone of successful silicone removal.
Assessing the Situation
Embedded in the process of efficiently removing silicone from hands is the pivotal act of assessing the situation. This determining stage carries immense significance as it lays the foundation for every step that follows. Without a well-defined cognizance of where the silicone is entrenched and the gravity of its saturation, the removal process could become haphazard, engendering subpar outcomes. In assessing the situation, you first need to take into consideration the quantity of silicone spread all over your hands. If the silicone deposit is copious, it could complicate the removal process and might require multiple cleaning rounds to be successfully expurgated. On the other hand, minor silicone traces can be removed conveniently, with a single round of cleaning, employing modest cleaning materials and minimal effort. The type of silicone on your hands is another illuminating aspect that requires scrupulous attention during the assessment stage. Various types of silicone exhibit divergent characteristics when it comes to their removal. For instance, cured silicone is significantly more challenging to remove than uncured silicone and may necessitate the use of stronger cleaning agents. The nature of your skin is also a poignant factor to regard during the assessment process. If your skin is sensitive, your primary concern should be finding a removal method that will not only be successful in removing the silicone but will also prevent any damage to your skin. Your skin type will thus dictate the choice of cleaning agents and influence the subsequent removal technique adopted. Moreover, scrutinizing the tools at your disposal can dramatically shift your approach to silicone removal. An assortment of tools like silicone removing solvents, rubbing alcohol, dish soap, or even baking soda, all carry different capacities in terms of effectiveness, convenience, and skin compatibility. Assessing what's accessible allows you to devise an effective plan of action that best suits your unique situation. Finally, assessing your specific circumstances, availability of time, and patience required play a vital role. If you have the luxury of time, you can perhaps explore multiple methods, try gentler options or even allow more time for the silicone to degrade naturally. However, if you're under time constraints, your preferred method would optimally be something quick yet efficient. In conclusion, assessing the situation before implementing any action is an indispensable part of the silicone removal process. It helps streamline your approach, prevents potential missteps, and ensures a successful, quick, safe, and easy silicone removal from your hands. The act of assessing the situation truly accentuates the principle that preparation is indeed the key in understanding the basics of silicone removal.
Choosing the Right Tools and Materials
Choosing the appropriate tools and materials is arguably the most significant factor when you plan to do silicone removal, particularly when you are dealing with hands. Regardless if you are a DIY enthusiast or a professional contractor, it is worth investing in high-quality silicone removing tools. One of the most common and user-friendly tools for silicone removal is a specially designed silicone removal tool, often crafted with a firm but non-abrasive plastic that makes scraping away cured silicone a cinch. Still, bear in mind that some specialty tools may even feature different types of edges suitable for various tasks at hand. For example, some edges might be perfect for removing large swaths of silicone, while others might be tailored to detail work. Choosing the right tool for the specific job can significantly increase efficiency and provide a more polished end result. For dealing with silicone on hands, materials that can help speed up the process include rubbing alcohol, an exfoliating glove, and work soap. Rubbing alcohol is highly effective at breaking down the silicone and removing it from the skin. An exfoliating glove can assist with rubbing it off without causing damage or irritation to the skin. However, always remember to moisturize the hands afterward as both the alcohol and exfoliation process can be drying. Work soap is specially designed to remove tough substances from hands, including silicones. Safety equipment like safety goggles and gloves are also an essential part of your kit. Removing silicone often involves sharp tools or abrasives. To prevent injury, wear protective gloves that will keep the skin safe from scratches or any potential harm. Opting for a cleaning solution is another critical factor to be contemplated in silicone removal. Different silicone residue would require different types of cleaners. For instance, to take off silicone sealer from hard surfaces, one can perform the task effectively using mineral spirits or rubbing alcohol. On delicate surfaces like clothes, however, a spot-test with a silicone digester is an admirable choice since this could help prevent damage. To sum up, selecting the right tools and materials for silicone removal is key to a successful and safe process. Whether that includes specialized silicone removal tools, rubbing alcohol, an exfoliating glove, work soaps, safety goggles, gloves, or silicone digesters, make sure you're equipped with necessary items to securely and effectively realize your silicone removal task. Proposing adequate time in preparation will pay off in the execution, ensuring smoother and more professional results.
Preventing Damage to Skin and Surfaces
Preventing damage to skin and surfaces is a critical step in the process of silicone removal. It begins with understanding the properties of silicone and the impact it can have on various materials. For example, silicone can stick to a multitude of surfaces, including metal, glass, stone, and more importantly, skin. Despite its sticky nature, it's important to avoid using sharp tools or abrasive substances for silicone removal because these can easily damage the surface or harm your skin. Although it may be tempting to scrape silicone off with a knife or scrub it away with a steel sponge, this can leave permanent scratches on the material and cause painful cuts or abrasions on your skin. Instead, safety should always be the first priority. Use gloves to protect your hands and a silicone remover tool that is designed to seamlessly take off silicone without causing harm. These tools, such as silicone caulk remover tools or silicone sealant remover tools, typically have a plastic or rubber edge that is sturdy enough to remove silicone but gentle enough not to damage the surface. For removal from skin, a similar approach of mildness should be applied. Silicone can dry out and cling to the skin, possibly causing irritation and even skin damage in severe cases. ACS Reagent Chemicals recommends using a moisturizing soap or a solution of warm water and mild detergent to gently clean the silicone residue. It's also essential to moisturize after cleaning, as the removal process can be harsh on the skin and cause it to dry out further. Moreover, one noteworthy point is to remember not to rush the process. Letting the removal products sit for the proper amount of time will allow them to break down the silicone effectively. Quick removal efforts can increase the chances of skin irritation and surface damage. In conclusion, the fundamental principle in preventing skin and surface damage while removing silicone lies in opting for gentle methods and tools, exercising patience, maintaining regular moisturizing, and of course, adequate preparation. This thorough preparation and conscious understanding of silicone removal basics not only protect your hands and surfaces but also ensure a clean and damage-free project result.
Method 1: Using Solvents and Chemicals
Breaking down stubborn residues or contaminants often requires utilizing various chemicals and solvents. Utilizing the correct solvent is crucial to handle the task at hand without causing unnecessary damage. This article serves as a guide, detailing three essential steps when working with solvents and chemicals. These steps include identifying the right solvent for the job, applying it safely and effectively, and the critical procedures of neutralizing and rinsing the area post-application. Selecting the appropriate solvent requires a comprehensive understanding of the substance to be removed and the surface it's adhered to. Missteps in choice can lead to ineffective results or worse, potential damage. Equally important is understanding how to safely apply the solvent to prevent any negative health implications or further harm. Lastly, properly neutralizing and rinsing the area will ensure the residue is entirely removed and leaves the surface pristine and safe. With this information, users can tackle troublesome residues and contaminants with confidence. Transitioning into our first point, let's delve into the process of identifying the most suitable solvent for your specific job.
Identifying the Right Solvent for the Job
The success of removing silicone off your hands substantially depends on the efficacy of the solvent utilized in the process. Selecting the right solvent is paramount as different varieties offer varying levels of effectiveness. The task involves understanding the chemical nature of silicone and the properties of potential solvents. Silicone is a versatile material, known for its water-repelling abilities and high resistance to varying temperatures. Therefore, it would be ineffective to use a solvent that is water-based or reacts adversely to temperature changes. A preferred option is the use of organic compounds such as acetone or isopropyl alcohol. Both are known for their swift and effective dissolution capabilities, especially with robust materials like silicone. Acetone, a common ingredient in nail polish remover, breaks down the silicone's chemical structure, making it easier to wipe or scrub away. Similarly, isopropyl alcohol weakens the bond between the silicone and the skin, facilitating easier removal. It is important to perform a patch test to ensure that your skin doesn't react adversely to these organic solvents. Always ensure to use gloves and work in a well-ventilated area to avoid inhaling harmful fumes. Yet, perhaps you are seeking an alternative solution that is more environmentally friendly and less harsh on the skin. In such a case, consider using a citrus-based solvent. Derived from the peels of citrus fruits, these solvents are biodegradable and non-toxic, providing a safer option for you and the environment. Citrus-based solvents possess powerful adhesive removal properties and can efficiently tackle the obstinate silicone residuals. However, despite being mild compared to their organic counterparts, they should also be used wisely, ensuring adequate skin protection and a ventilated working space. It's worth mentioning that not every solvent yields instant results. Depending on the concentration of the silicone, the quantity of the solvent used, and the duration of exposure, multiple applications might be necessary. However, regardless of the chosen solution—acetone, isopropyl alcohol, or a citrus-based solvent—persistence is vital. Each application progressively weakens the silicone, making its complete removal only a matter of time and consistent effort. Therefore, properly identifying the right solvent for the job is crucial as it directly influences the effectiveness of the method as well as the convenience of the process. In conclusion, the solvent chosen to remove silicone from your hands should ideally be efficient, safe, and environment-friendly. Whether you opt for an organic compound or a citrus-based solvent, always ensure to use it sensibly and in a way that doesn't harm your skin or the environment. Through understanding the properties of silicone and the potential of various solvents, you can identify the right weapon for this common but slightly tricky task.
Applying the Solvent Safely and Effectively
Applying solvents must be carried out with utmost care and precision to ensure they work effectively without causing any harm. The first essential step involves selecting a suitable solvent. Acetone, often found in nail polish removers, or rubbing alcohol can be used as solvents to remove silicone from the skin. Depending on the solvent's potency, it can either be used directly or diluted using water. However, these substances can be harmful, causing dryness and irritation to the skin or even leading to chemical burns. Therefore, when applying, ensure to use a sufficient amount of solvent - too little may be ineffective, while excessive amounts can lead to harm. Next, using a soft cloth or sponge, soaked, but not dripping, with the solvent, rub the silicone spots gently. Ensure to wear disposable gloves to protect your hands from direct contact with the solvent and the silicone. While rubbing, the silicone will begin to loosen and roll off the skin. If some stubborn spots persist, a repeat of the process may be necessary. Besides, some solvents may require being left on the skin for a few minutes before rubbing off to achieve better results. You should be conscious of the fact that some solvents are highly flammable. Consequently, avoid using them near open flames or heat sources to prevent accidental fires. Ventilation is crucial when using solvents. Solvents often produce fumes that can be harmful when inhaled. Therefore, ensure to work in well-ventilated places or use a face mask if needed. After removing the silicone, wash your hands thoroughly with warm water and soap to eliminate the residues of the solvent and silicone pieces. This step will help prevent possible skin irritation or dryness that could result from prolonged contact with these substances. Following this, apply a moisturizing cream to restore your skin's natural moisture and ensure it remains supple and healthy. Given that some people may have allergic reactions to certain solvents, it's imperative to carry out a patch test. This involves applying a small quantity to a small skin area and waiting for a few minutes to observe any adverse effects like redness, itchiness, or burning sensation, among others. If no reaction occurs, it's safe to proceed; otherwise, consider seeking medical attention. To conclude, applying solvents safely and effectively involves deliberate efforts and caution. Always remember that the goal is not just to clean silicones off your hands, but to do so without inflicting harm to yourself or others. Further, ensure to adhere to safety instructions on the solvent package and seek professional help when unsure. By doing so, you can successfully rid of silicone blemish without compromising your safety and health.
Neutralizing and Rinsing the Area
After applying solvents and chemicals to remove silicone from your hands or surface, it's crucial that they are neutralized and rinsed thoroughly. This process is significant as it prevents chemical reactions or damages to the skin and ensures that removed silicone doesn't adhere back to the surface. We will discuss the importance and method of neutralizing and rinsing the hands or surface area in this section. Neutralizing merely refers to balancing the pH level. Several solvents and chemicals utilized in the silicone removal process are highly alkaline or acidic. Long exposure or inadequately rinsed solvents can be hazardous to your skin, causing irritations, burns, or other severe problems. It is, therefore, vital to neutralize the area to render such solvents harmless. The easiest way to neutralize a solvent is by using its counterpart. If the solvent is acidic, use an alkali solution and vice versa. You can mix a teaspoon of baking soda (alkali) in a cup of water and rinse your hands with the solution to neutralize most acidic solvents. For alkaline solvents, a mild vinegar rinse should do the trick. After neutralizing, rinsing the area is the next key step. Thorough rinsing ensures that you remove all silicon particles and any remaining solvent chemicals from your hands or surface. Water is the most accessible and safest substance to rinse your hands or area. Always use a lot of water to completely wash away silicon dust and residual chemicals. While rinsing might seem like a simple task, it's essential not to rush the process. Pay attention to every area, focusing on corners, cracks, or underneath the nails where silicone or chemicals might hide. Dry your hands or surface with a clean towel once all the silicone and chemicals are completely rinsed off. We might tend to overlook the importance of neutralizing and rinsing during the silicone removal process. However, they are significant steps to ensure safety and complete silicone removal. Consequently, the correct execution of these processes ensures you get a clean, silicone-free finish, and your skin or surface remains undamaged.
Method 2: Using Physical Methods
Silicone is a common material used in many elements of construction and design. However, the process of removing silicone can sometimes prove to be challenging. There are several effective methods to do this, each leveraging a different tool or technique. In order to successfully remove silicone, users often employ a variety of physical methods. These methods include the use of glues or adhesives along with tape, applying heat and pressure, as well as scraping and peeling the silicone off. Each technique has its strengths and can be particularly effective depending on the state and extent of the silicone. In the next few paragraphs, we will delve into the specifics of each technique, starting with using adhesives and tape. This method proves to be an effective starting point. The use of sticky substances can significantly enhance the process of removing silicone, making it less challenging and more manageable. Thus, the adhesion technique becomes a crucial first step in our journey to successful silicone removal.
Using Adhesives and Tape to Remove Silicone
While many are familiar with the use of physical methods such as rubbing, scraping, or washing to remove silicone from surfaces, an often overlooked yet equally effective procedure involves using readily available substances like adhesive and tape. Though this process may seem paradoxical, as one might think the adhesive will further complicate the situation, it works impressively well with silicone removal. Silicone is a potent agent widely useful due to its high-level resistance to water and heat. While these attributes make it a perfect sealant or adhesive in various instances, they can be problematic when the silicone spills on your hands or unintended surfaces. So, how exactly does one utilize adhesives and tape for silicone removal? To begin, if the silicone has dried on a surface, you could consider using adhesive to pull it off. Start by applying a strong adhesive such as super glue on the silicone stain. Allow the adhesive to bind with the silicone briefly, then peel off. The process takes advantage of the stronger bond formed between the adhesive and the silicone to detach it from the surface. Moreover, the use of tape, especially duct tape, proves quite resourceful. The tape method works best for fresh or partially dried silicone. Quickly before the silicone dries, place a piece of duct tape on it, press it well to ensure proper contact, and then rip it off like a bandage. The sticky side of the tape attaches to the silicone, so when you pull it off, the silicone comes along with it. Both the adhesive and tape methods are most effective when coupled with other physically induced removal processes, such as peeling or washing off the residue silicone. Though these may be unconventional silicone removal strategies, they offer efficient remedies and will leave your hands or surfaces free from silicone. However, it is important to remember to handle strong adhesives and tapes with care, as they can cause skin irritation or damage some surfaces. Further, it's often pertinent to attempt to remove silicone as soon as possible, as once it cures, it becomes significantly harder to deal with. Lastly, you must always remember that patience and diligence are key factors in completely all silicone traces on surfaces or hands. To sum up, the use of adhesives and tapes presents a creative and effective approach to removing silicone. It’s a simple process that calls for materials commonly found in your household, making it not only efficient but also convenient. So next time you get that stubborn silicone on hands, don't fret - reach out for that duct tape or super glue. This ingenious technique may just be the quick save you need.
Employing Heat and Pressure to Loosen the Silicone
Heat and pressure are also potent allies in the process of removing silicone from your hands. These are physical methods that are generally safe to use and highly effective especially when you need to deal with a considerably large amount of silicone. The role of heat in loosening the bond of silicone is crucial. Silicone is a type of polymer that is highly heat-resistant. However, exposing it to sustained periods of heat can slowly weaken its bonds, making it pliable and easier to remove. Ideally, this process would involve dipping the silicone-coated hands in a container filled with warm water. The water temperature should be around 40 to 50 degrees Celsius, any higher and it exposes the skin to the unnecessary risk of burns. Keep your hands submerged in the warm water for about 15-20 minutes or until the silicone becomes noticeably softer. Apart from softening the silicone, the warm water will also help to open your skin pores which can aid in the removal of smaller silicone parts that have seeped into the skin. Pressure, the other part of this method, is utilized after the application of heat. We apply pressure to the softened silicone to dislodge it from the skin. This can be done through scrubbing. Use a soft brush or a piece of cloth to avoid causing undue harm to your skin. Start gently, then slowly increase the pressure as necessary. Ensure you scrub in a circular pattern to lift and roll off the silicone effectively. It's also advised to combine this method with a silicone removal product for better results - apply the product after dipping your hands in warm water, and just before scrubbing. The heat and the product tag team to loosen silicone bond while the pressure from the scrubbing physically removes it. Repeat the process as necessary, remembering that the goal is always to remove silicone without harming your skin. This heat and pressure approach has been proven to work particularly well for silicone remnant lodged within the lines and creases of your hand, as well as those adhering tightly to thicker skin parts such as the fingertips. Nevertheless, always remember to protect your skin during the process and to hydrate it afterward, as the exposure to warm water and the scrubbing may cause skin dryness.
Scraping and Peeling the Silicone Off
Scraping and peeling are fundamental physical methods often employed to remove silicone off hands, and are particularly effective when the silicone has already hardened. Begin by gently scraping the silicone off your skin using the edge of a plastic spoon or a similar non-sharp object. Caution is paramount during this process; you want to ensure that skin isn't harmed or irritated. Once the bulk of the silicone is scraped off, it's then possible to peel away any remaining silicone residue. Nevertheless, this technique isn't foolproof. Despite the silicone's hardened state, it's tenacious, meaning some residue may still linger after scraping and peeling. To tackle this, take a piece of tape - masking or duct tape works best - and stick it onto the remaining silicone patches. Apply some pressure to ensure good adhesion between the tape and silicone. Then, peel the tape off in a swift motion. The goal here is to utilize the sticky side of the tape to lift and remove the stubborn silicone particles off the skin. The beauty of this method is you can repeat the tape process as frequently as necessary until all silicone is removed. However, you must be sensitive to any indications of skin irritation or discomfort. Overly aggressive or repeated scraping and peeling could potentially damage your skin. If redness or soreness appears, it's time to take a break and let your skin rest. It's also worth mentioning the benefit of using an exfoliating scrub after the scraping and peeling process. This not only aids in removing final traces of silicone but also helps in sloughing off any dead skin cells affected during the process. The scrub's slight abrasiveness can help reveal fresh, undamaged skin underneath. An essential thing to keep in mind is, this method utilizes physical force that may vary depending on the extent of silicone coverage and how deeply it has set into the skin. It may take several rounds of scraping, peeling and scrubbing before all silicone residue is completely cleared. Your patience and perseverance are essential here. In conclusion, scraping and peeling form the heart of physical methods used in getting rid of hardened silicone off hands. While being an efficient method, the importance of safety and consideration towards your skin during the process cannot be underestimated. Regularly monitoring your skin for any signs of irritation helps ensure an effective, safe silicone removal while minimizing the risk of skin damage. This method, though relatively straightforward and inexpensive, warrants patience allowing for an optimal result of cleaner, silicone-free hands.