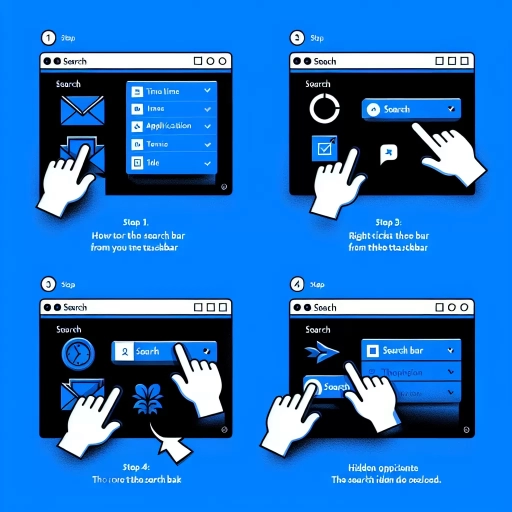
How To Remove Search Bar From Taskbar
The search bar on the taskbar in Windows 10 and 11 can be a convenient feature for quickly searching for files, apps, and settings. However, some users may find it unnecessary or prefer a cleaner look for their taskbar. Fortunately, removing the search bar from the taskbar is a relatively simple process that can be done in a few different ways. In this article, we will explore three methods for removing the search bar from the taskbar: using the Taskbar Settings, the Group Policy Editor, and the Windows Registry Editor. Each of these methods has its own advantages and disadvantages, and we will discuss them in detail. If you're looking for a straightforward and easy-to-use method, you can start by using the Taskbar Settings, which we will cover in the next section.
Method 1: Using the Taskbar Settings
The Windows 10 taskbar is a powerful tool that provides quick access to frequently used apps, files, and system settings. However, some users may find the search bar on the taskbar unnecessary or distracting. Fortunately, disabling the search bar is a straightforward process that can be completed in a few steps. To do this, you can use the Taskbar settings, which offer a range of customization options. In this article, we will explore how to disable the search bar on the Windows 10 taskbar using the Taskbar settings. We will cover accessing the Taskbar settings, disabling the search bar option, and confirming the changes. By following these steps, you can easily remove the search bar from your taskbar and free up space for other important icons and shortcuts. To get started, let's first access the Taskbar settings.
Accessing the Taskbar Settings
To access the Taskbar settings, click on the Start button located at the bottom left corner of your screen, then click on the Settings icon that resembles a gear. This will open the Windows Settings app. From there, click on the "Personalization" option, which is represented by a paintbrush icon. In the Personalization window, click on the "Taskbar" option from the left menu. This will take you to the Taskbar settings page, where you can customize various aspects of the Taskbar, including the search bar. Alternatively, you can also access the Taskbar settings by right-clicking on an empty area of the Taskbar and selecting "Taskbar settings" from the context menu. This will directly open the Taskbar settings page, allowing you to make changes to the Taskbar's appearance and behavior. By accessing the Taskbar settings, you can easily remove the search bar from the Taskbar, as well as make other customizations to enhance your Windows experience.
Disabling the Search Bar Option
To disable the search bar option, you can follow a straightforward process that involves accessing the Taskbar settings. This method allows you to remove the search bar from the taskbar, thereby decluttering your desktop and streamlining your workflow. To begin, click on the Start button and select the "Settings" option, which is represented by a gear icon. This will open the Windows Settings app, where you can navigate to the "Personalization" section. Within Personalization, click on the "Taskbar" option, which is usually located on the left-hand side of the window. In the Taskbar settings, scroll down to the "Search" section, where you will find a toggle switch labeled "Show search icon." Clicking on this toggle switch will disable the search bar option, effectively removing it from the taskbar. Alternatively, you can also choose to show the search icon as a button or hide it altogether, depending on your preferences. By disabling the search bar option, you can free up space on your taskbar and reduce distractions, allowing you to focus on your work or other activities. This method is particularly useful for users who prefer a minimalist desktop setup or those who rarely use the search function. Overall, disabling the search bar option is a simple and effective way to customize your taskbar and enhance your overall Windows experience.
Confirming the Changes
To confirm the changes, click on the "Apply" button and then click "OK" to close the Taskbar settings window. This will save the changes you made and remove the search bar from your taskbar. You can also click on the "Restart" button to restart your computer and apply the changes. Alternatively, you can simply close the Taskbar settings window and the changes will be applied automatically. Once you've confirmed the changes, you should no longer see the search bar on your taskbar. If you want to restore the search bar, you can follow the same steps and toggle the switch back to the "On" position. Confirming the changes is an important step to ensure that the search bar is removed from your taskbar and that your changes are saved. By doing so, you can enjoy a clutter-free taskbar and a more streamlined user experience.
Method 2: Using the Group Policy Editor
If you're looking to remove the search bar from your Windows 10 taskbar, you have a few options. One of the most effective methods is by using the Group Policy Editor. This method involves making changes to your system's policies to disable the search bar. To do this, you'll need to open the Group Policy Editor, locate the search bar policy, and then enable the policy to remove the search bar. By following these steps, you can easily remove the search bar from your taskbar and free up some space. In this article, we'll walk you through the process of using the Group Policy Editor to remove the search bar. First, we'll show you how to open the Group Policy Editor.
Opening the Group Policy Editor
To open the Group Policy Editor, you can follow these steps. First, press the Windows key + R to open the Run dialog box. Then, type "gpedit.msc" in the box and press Enter. This will launch the Group Policy Editor. Alternatively, you can also search for "gpedit.msc" in the Start menu and click on the result to open it. If you are using Windows 10 Home edition, you may not have access to the Group Policy Editor, as it is only available in the Pro and Enterprise editions. In this case, you can use the Registry Editor instead. Once the Group Policy Editor is open, you can navigate to the "User Configuration" section and then to "Administrative Templates" to find the policy settings related to the taskbar. From there, you can make changes to the settings to remove the search bar from the taskbar. Note that making changes to the Group Policy Editor requires administrative privileges, so you may need to run the editor as an administrator if you are not already logged in with an administrator account.
Locating the Search Bar Policy
To locate the Search bar policy in the Group Policy Editor, navigate through the following steps. First, open the Group Policy Editor by typing "gpedit.msc" in the Run dialog box (Windows key + R) and pressing Enter. Once the Group Policy Editor is open, expand the "User Configuration" section in the left-hand pane. Next, click on "Administrative Templates" and then select "Start Menu and Taskbar." Within the "Start Menu and Taskbar" section, scroll down and find the policy labeled "Remove Search bar from Taskbar." This policy is usually located towards the bottom of the list. If you're having trouble finding it, you can use the "Filter" option at the top right corner of the Group Policy Editor window to narrow down the list of available policies. Once you've located the "Remove Search bar from Taskbar" policy, you can proceed to edit it to remove the Search bar from the Taskbar.
Enabling the Policy to Remove the Search Bar
To enable the policy to remove the search bar, navigate to the "Computer Configuration" section in the Group Policy Editor. From there, click on "Administrative Templates" and then select "Windows Components" followed by "Windows Search". In the right-hand pane, locate the policy labeled "Allow Cortana" and double-click on it. A new window will appear, and you should select the "Disabled" option to prevent Cortana from running. Additionally, you can also disable the "Allow search to use location" policy to further restrict the search functionality. Once you've made these changes, click "Apply" and then "OK" to save the policy settings. After enabling this policy, the search bar should be removed from the taskbar, and users will no longer be able to access the search functionality. It's essential to note that this method requires administrative privileges and may not be suitable for all users, especially those who rely heavily on the search feature. By disabling the search bar, you can help improve system performance and reduce distractions, but it's crucial to weigh the benefits against the potential drawbacks before implementing this policy.
Method 3: Using the Windows Registry Editor
If you're looking to remove the search bar from your Windows 10 taskbar, you're in luck because there are several methods to do so. One of the most effective methods is by using the Windows Registry Editor. This method involves modifying a specific registry key to disable the search bar. To start, you'll need to open the Windows Registry Editor, which can be done by searching for "regedit" in the Start menu or by using the Windows key + R shortcut. Once you've opened the Registry Editor, you'll need to locate the search bar registry key, which is usually found in the HKEY_CURRENT_USER\Software\Microsoft\Windows\CurrentVersion\Search folder. After locating the key, you'll need to modify it to remove the search bar. By following these steps, you can successfully remove the search bar from your Windows 10 taskbar. To begin, let's start by opening the Windows Registry Editor.
Opening the Windows Registry Editor
To open the Windows Registry Editor, you can follow a few simple steps. First, press the Windows key + R to open the Run dialog box. In the Run dialog box, type "regedit" and press Enter. This will launch the Windows Registry Editor. Alternatively, you can also search for "regedit" in the Start menu and click on the result to open the Registry Editor. If you are prompted by the User Account Control (UAC) to allow the Registry Editor to make changes to your device, click "Yes" to proceed. Once the Registry Editor is open, you will see a hierarchical structure of registry keys and values. You can navigate through the registry by expanding the folders and clicking on the keys to view their contents. Be cautious when making changes to the registry, as incorrect modifications can cause system instability or other issues. It is recommended to create a backup of the registry before making any changes. To do this, click on "File" and select "Export" to save a copy of the registry to a file. This will allow you to restore the registry to its previous state in case something goes wrong. With the Registry Editor open, you can now proceed to make the necessary changes to remove the search bar from the taskbar.
Locating the Search Bar Registry Key
To locate the Search bar registry key, navigate to the Windows Registry Editor. Press the Windows key + R to open the Run dialog box, type "regedit," and press Enter. In the Registry Editor, go to the following path: HKEY_CURRENT_USER\Software\Microsoft\Windows\CurrentVersion\Search. Here, you'll find the Search bar registry key, which controls the visibility and behavior of the Search bar on the taskbar. Be cautious when editing registry keys, as incorrect changes can cause system instability. Before making any changes, consider creating a backup of the registry or a system restore point. In the Search key, look for the "SearchboxTaskbarMode" DWORD value, which determines the Search bar's state. A value of 0 hides the Search bar, while a value of 1 displays it. You can modify this value to toggle the Search bar's visibility. Additionally, you can also delete the Search key to reset the Search bar's settings to their default state. However, be aware that deleting the key may also remove any custom Search bar settings you've configured.
Modifying the Registry Key to Remove the Search Bar
To modify the registry key and remove the search bar from the taskbar, you'll need to access the Windows Registry Editor. This method requires caution, as incorrect modifications can cause system instability. First, press the Windows key + R to open the Run dialog box, type "regedit," and press Enter. In the Registry Editor, navigate to the key "HKEY_CURRENT_USER\Software\Microsoft\Windows\CurrentVersion\Search." Look for the DWORD value "SearchBarEnabledIn1X" and double-click it. Change the value from 1 to 0, then click "OK." If the value doesn't exist, create a new DWORD (32-bit) value with the name "SearchBarEnabledIn1X" and set it to 0. After modifying the registry key, restart your computer or log off and log back in to apply the changes. The search bar should now be removed from the taskbar. Note that modifying the registry can have unintended consequences, so it's essential to be cautious and only make changes if you're comfortable with the process. Additionally, if you're using a 64-bit version of Windows, you may need to navigate to the "HKEY_LOCAL_MACHINE\SOFTWARE\Microsoft\Windows\CurrentVersion\Search" key instead.