How To Turn Off Notifications On Airpods
Here is the introduction paragraph: Are you tired of being bombarded with notifications every time you put on your AirPods? Do you wish you could enjoy your music or podcasts without the constant distractions? You're not alone. Many AirPods users struggle with managing notifications, but the good news is that you have control over what you receive. In this article, we'll explore how to turn off notifications on AirPods, starting with understanding how AirPods notifications work. We'll then dive into the steps to disable notifications on AirPods and provide tips on customizing your notification settings to suit your needs. By the end of this article, you'll be able to enjoy your AirPods experience without the constant interruptions. So, let's start by understanding how AirPods notifications work.
Understanding AirPods Notifications
AirPods notifications are a convenient feature that allows users to stay informed about important events and updates without needing to constantly check their devices. But have you ever wondered how AirPods notifications work? To understand this feature, it's essential to explore what AirPods notifications are, why they are sent, and how they are received. By delving into these aspects, you'll gain a deeper understanding of how AirPods notifications can enhance your user experience. So, let's start by examining what AirPods notifications are.
What are AirPods notifications?
AirPods notifications are alerts that you receive on your AirPods when you have an incoming call, text message, or other notification from your connected device. These notifications are typically announced through audio cues, such as a ringing sound or a voice assistant reading out the notification. When you receive a notification, you can choose to answer the call, respond to the message, or dismiss the notification altogether. AirPods notifications are a convenient way to stay connected and informed without having to physically check your device. You can customize your AirPods notifications to suit your preferences, such as choosing which types of notifications you want to receive or setting up custom notification sounds. Additionally, you can also use Siri to read out your notifications, making it easier to stay on top of your messages and calls. Overall, AirPods notifications provide a seamless and hands-free way to stay connected and manage your notifications on the go.
Why do AirPods send notifications?
AirPods send notifications to keep you informed about important events, such as incoming calls, texts, emails, and app alerts, while you're listening to music or podcasts. When your AirPods are connected to your iPhone or iPad, they can receive notifications from your device, allowing you to stay up-to-date without needing to check your screen. This feature is especially useful when you're exercising, driving, or in a meeting, and can't easily access your device. Additionally, AirPods can also send notifications for other events, such as calendar reminders, social media updates, and news alerts, depending on your notification settings. By sending notifications to your AirPods, you can quickly and discreetly stay informed about what's happening on your device, without needing to interrupt your music or other activities.
How do AirPods receive notifications?
AirPods receive notifications through a combination of Bluetooth technology and the iPhone's operating system. When paired with an iPhone, AirPods can receive notifications, such as texts, emails, and social media alerts, directly to the earbuds. This is made possible by the iPhone's Bluetooth connection, which allows the device to transmit audio and data to the AirPods. When a notification is received on the iPhone, it is sent to the AirPods, which then play a notification sound or read out the notification using Siri. This feature is enabled by default, but users can customize their notification settings to control which types of notifications are received on their AirPods. Additionally, AirPods can also receive notifications from other Apple devices, such as the Apple Watch, when connected to the same iCloud account.
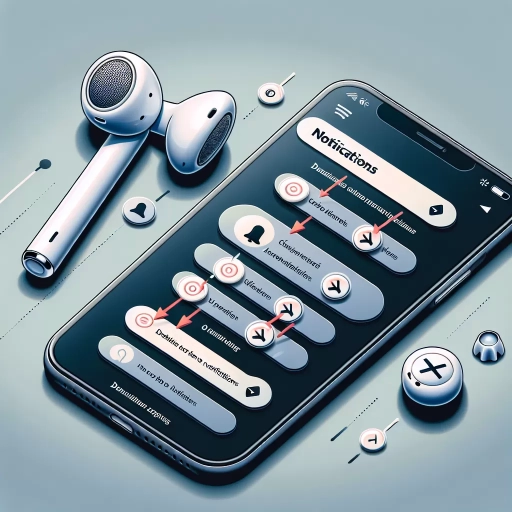
Disabling Notifications on AirPods
Here is the introduction paragraph: Disabling notifications on AirPods can be a game-changer for those who want to minimize distractions and focus on their music, podcasts, or phone calls. Fortunately, Apple provides several ways to turn off notifications on AirPods, ensuring that you can enjoy an uninterrupted listening experience. In this article, we will explore three methods to disable notifications on AirPods: using the iPhone Settings app, using the AirPods case, and using Siri or Voice Assistant. By the end of this article, you will be able to choose the method that works best for you and enjoy a notification-free listening experience. To start, let's dive into the first method: using the iPhone Settings app.
Using the iPhone Settings App
The iPhone Settings app is a treasure trove of customization options, allowing users to personalize their device to suit their preferences. To access the Settings app, simply tap the gear icon on your home screen. Once inside, you'll find a plethora of options organized into categories such as Wi-Fi, Bluetooth, and Notifications. To disable notifications on your AirPods, navigate to the Notifications section and select the "Notifications" option. From here, you can toggle off notifications for specific apps or disable them altogether. Additionally, you can customize notification settings for individual apps, choosing to receive notifications only when the app is open or not at all. The Settings app also allows you to manage your AirPods' connection, adjust audio settings, and even reset your AirPods to their factory settings. By exploring the iPhone Settings app, you can unlock a world of customization options and tailor your AirPods experience to your liking.
Using the AirPods Case
Using the AirPods case is a simple and effective way to manage notifications on your AirPods. When you place your AirPods in their case, they automatically disconnect from your device, and you will no longer receive notifications. This is a convenient way to take a break from notifications without having to disable them entirely. Additionally, the case also helps to preserve battery life, as the AirPods will not continue to receive notifications and drain the battery. To use the case to manage notifications, simply place your AirPods in the case when you're not using them, and they will automatically disconnect from your device. You can also use the case to charge your AirPods, which will help to keep them powered up and ready to use. By using the AirPods case, you can easily manage notifications and keep your AirPods charged and ready to use.
Using Siri or Voice Assistant
Using Siri or a voice assistant is a convenient way to manage your AirPods notifications. To turn off notifications using Siri, simply say "Hey Siri, turn off notifications" or "Hey Siri, do not disturb." This will put your AirPods in Do Not Disturb mode, silencing all notifications. Alternatively, you can use Siri to turn off notifications for a specific app by saying "Hey Siri, turn off notifications for [app name]." For example, "Hey Siri, turn off notifications for Facebook." If you prefer to use a voice assistant other than Siri, such as Google Assistant or Alexa, you can use similar voice commands to manage your AirPods notifications. For instance, you can say "Ok Google, turn off notifications" or "Alexa, turn off notifications." By using a voice assistant, you can quickly and easily turn off notifications on your AirPods without having to physically interact with your device. This feature is especially useful when you're in a meeting, driving, or engaging in an activity where you don't want to be distracted by notifications.
Customizing Notification Settings on AirPods
Here is the introduction paragraph: Customizing notification settings on your AirPods can greatly enhance your listening experience. By tailoring your notifications to your specific needs, you can minimize distractions and stay focused on what matters most. In this article, we'll explore three key aspects of customizing notification settings on your AirPods: choosing which notifications to receive, setting up custom notification alerts, and managing notification settings for specific apps. By understanding these features, you'll be able to create a personalized notification experience that suits your lifestyle. Let's start by exploring the first aspect: choosing which notifications to receive.
Choosing Which Notifications to Receive
When it comes to customizing notification settings on your AirPods, one of the most important decisions you'll make is choosing which notifications to receive. This is because notifications can be both helpful and distracting, and receiving too many can be overwhelming. To start, consider the types of notifications that are most important to you. For example, you may want to receive notifications from your phone, such as texts, emails, and social media updates. On the other hand, you may not want to receive notifications from other apps, such as games or news apps. You can also choose to receive notifications from specific contacts, such as family members or close friends. Additionally, you can set your AirPods to only receive notifications when you're in a specific location, such as at work or at home. By carefully selecting which notifications to receive, you can ensure that you stay informed and connected without being overwhelmed by unnecessary distractions.
Setting Up Custom Notification Alerts
Setting up custom notification alerts on your AirPods allows you to personalize the way you receive notifications, making it easier to stay informed without being overwhelmed. To start, open the Settings app on your iPhone and navigate to the Notifications section. From there, select the app for which you want to customize notifications, such as Messages or Email. Tap on the "Sounds" option and choose from a variety of alert tones or opt for a custom sound. You can also adjust the notification volume to your liking. Additionally, you can enable or disable notification previews, which allow you to see a brief summary of the notification on your AirPods. If you want to receive notifications only when your AirPods are connected to your iPhone, toggle on the "Only when connected to iPhone" option. Furthermore, you can also set up custom notification alerts for specific contacts, allowing you to receive notifications only from important people. To do this, go to the Contacts app, select the contact, and tap on "Edit." Then, tap on "Ringtone" and choose a custom sound or alert tone. By setting up custom notification alerts, you can tailor your AirPods to your specific needs and preferences, ensuring that you stay informed without being distracted.
Managing Notification Settings for Specific Apps
Managing notification settings for specific apps is a crucial aspect of customizing your AirPods experience. To do this, you'll need to access the Settings app on your connected device, whether it's an iPhone, iPad, or iPod touch. Once you're in the Settings app, tap on "Notifications" and then select the specific app for which you want to manage notifications. From there, you can toggle on or off the "Allow Notifications" switch to enable or disable notifications for that app. You can also customize the notification settings further by selecting the types of notifications you want to receive, such as alerts, banners, or badges. Additionally, you can choose to have notifications delivered quietly or with a sound, and even set a specific notification schedule. By managing notification settings for specific apps, you can ensure that you only receive notifications that are important to you, and avoid distractions from unnecessary alerts. This level of customization allows you to tailor your AirPods experience to your individual needs and preferences, making it easier to stay focused and productive throughout the day.