How To Clean A Night Guard
A night guard is a crucial oral appliance that protects your teeth from grinding and clenching while you sleep. However, it can harbor bacteria, plaque, and other microorganisms that can lead to bad breath, gum disease, and other oral health issues if not properly cleaned and maintained. To keep your night guard clean and hygienic, it's essential to follow a regular cleaning routine. This involves preparing your night guard for cleaning, using the right cleaning methods and materials, and properly drying and storing it. In this article, we will guide you through the step-by-step process of cleaning your night guard, starting with the pre-cleaning preparation. By following these simple steps, you can ensure your night guard remains clean, hygienic, and effective in protecting your teeth. So, let's begin with the first step: pre-cleaning preparation.
Pre-Cleaning Preparation
Before you start cleaning your kitchen utensils, appliances, or surfaces, it's essential to prepare them properly to ensure a thorough and effective cleaning process. Pre-cleaning preparation is a crucial step that can make a significant difference in the outcome of your cleaning efforts. To begin with, you need to remove any debris or food particles that may be stuck to the surface. This will prevent the spread of bacteria and make the cleaning process more efficient. Next, rinsing with warm water can help loosen any tough stains or grime, making it easier to clean. Finally, pat drying with a soft cloth can help remove any excess moisture and prevent water spots. By following these simple steps, you can ensure that your kitchen is clean, hygienic, and ready for use. So, let's start with the first step: removing any debris or food particles.
Remove Any Debris or Food Particles
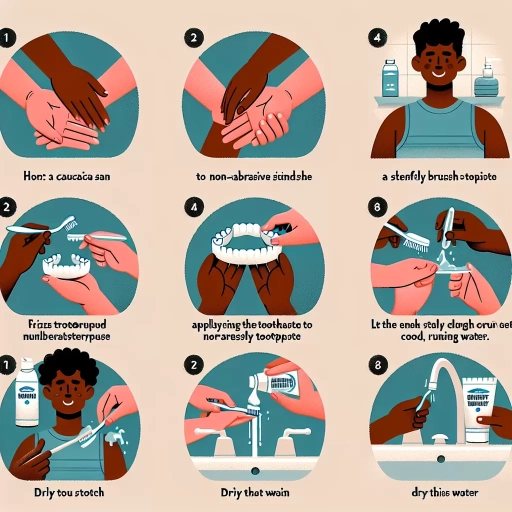
When it comes to pre-cleaning preparation for your night guard, one of the most crucial steps is to remove any debris or food particles that may have accumulated on the surface. This is essential because any remaining particles can interfere with the cleaning process, making it less effective and potentially damaging your night guard. To remove debris or food particles, start by rinsing your night guard under warm running water. This will help loosen any stuck particles, making it easier to remove them. Next, use a soft-bristled toothbrush to gently scrub away any remaining debris. Be sure to brush all surfaces of the night guard, paying particular attention to any areas with visible buildup. If there are any stubborn particles, you can also try soaking your night guard in a mixture of equal parts water and white vinegar for about 30 minutes. The acid in the vinegar will help break down any tough particles, making them easier to remove. Once you've removed any debris or food particles, your night guard is ready for the next step in the cleaning process.
Rinse with Warm Water
Rinsing with warm water is a crucial step in the pre-cleaning preparation of your night guard. This initial rinse helps to loosen any debris, saliva, or bacteria that may have accumulated on the surface of the guard during the night. By rinsing with warm water, you can effectively dislodge any large particles or food residue, making it easier to clean the guard thoroughly. Additionally, warm water helps to relax the plastic material, making it more pliable and receptive to cleaning. This step is especially important if you have a soft or flexible night guard, as it can help prevent scratches or damage during the cleaning process. Furthermore, rinsing with warm water also helps to remove any lingering mouthwash or toothpaste residue, which can leave behind a bitter taste or affect the guard's texture. By starting with a warm water rinse, you can ensure a clean slate for the rest of the cleaning process, allowing you to effectively remove any stubborn stains or bacteria and keep your night guard in optimal condition.
Pat Dry with a Soft Cloth
When it comes to pre-cleaning preparation for your night guard, one crucial step is to pat dry with a soft cloth. This simple yet effective technique helps remove any loose debris, saliva, or bacteria that may have accumulated on the surface of your night guard. By gently patting the night guard dry with a soft cloth, you prevent any water spots from forming, which can lead to mineral deposits and discoloration. Moreover, pat drying with a soft cloth helps to reduce the risk of bacterial growth, as it removes excess moisture that can create an ideal breeding ground for bacteria. This step is especially important if you plan to store your night guard in a case or container, as it will help prevent the growth of bacteria and odor-causing microorganisms. To pat dry your night guard effectively, use a soft, lint-free cloth and gently blot the surface, paying extra attention to any areas with visible debris or stains. By incorporating this step into your pre-cleaning routine, you'll be able to keep your night guard clean, hygienic, and in good condition, ensuring a comfortable and healthy fit.
Cleaning Methods and Materials
When it comes to cleaning methods and materials, there are various approaches that can be employed to achieve a sparkling clean surface. For instance, using a mild soap and soft-bristled toothbrush can be an effective way to gently remove dirt and grime from delicate surfaces. Alternatively, soaking items in a denture cleaner or white vinegar solution can help to loosen and remove tough stains. In some cases, applying a hydrogen peroxide solution can be necessary to tackle particularly stubborn stains. By understanding the different cleaning methods and materials available, individuals can choose the best approach for their specific cleaning needs. For example, when it comes to cleaning delicate surfaces, using a mild soap and soft-bristled toothbrush is often the best place to start.
Use a Mild Soap and Soft-Bristled Toothbrush
When it comes to cleaning your night guard, it's essential to use a mild soap and a soft-bristled toothbrush to avoid damaging the appliance. A mild soap is recommended because it is gentle and won't leave any harsh chemical residues on the night guard. Avoid using abrasive cleaners, bleach, or strong detergents, as they can damage the material and compromise the fit of the night guard. A soft-bristled toothbrush is also crucial, as it will help remove any debris and bacteria without scratching the surface of the night guard. Look for a toothbrush with soft bristles that are specifically designed for cleaning delicate surfaces. When cleaning your night guard, gently scrub all surfaces with the soft-bristled toothbrush and mild soap, paying special attention to any areas with visible debris or stains. Rinse the night guard thoroughly with warm water to remove any soap residue, and then dry it with a soft cloth to prevent water spots. By using a mild soap and a soft-bristled toothbrush, you can keep your night guard clean and hygienic, ensuring a comfortable and healthy fit.
Soak in a Denture Cleaner or White Vinegar Solution
Soaking your night guard in a denture cleaner or white vinegar solution is an effective way to deep clean and sanitize it. To do this, mix a denture cleaning tablet with water according to the manufacturer's instructions, or combine equal parts water and white vinegar in a bowl. Submerge your night guard in the solution and let it soak for 15-30 minutes. The acid in the vinegar or the active ingredients in the denture cleaner will help break down and dissolve any tough stains, bacteria, and plaque that may have accumulated on the surface of your night guard. After soaking, remove your night guard from the solution and rinse it thoroughly with warm water to remove any remaining solution. This method is especially useful for removing stubborn stains and odors, and can be done weekly or as needed to keep your night guard clean and hygienic.
Apply a Hydrogen Peroxide Solution for Tough Stains
When dealing with tough stains on your night guard, applying a hydrogen peroxide solution can be an effective cleaning method. To start, mix equal parts hydrogen peroxide and water in a bowl. Soak your night guard in the solution for about 30 minutes to an hour. The hydrogen peroxide will help break down and lift the tough stains, making it easier to remove them. After soaking, use a soft-bristled toothbrush to gently scrub away the stains. Be sure to rinse your night guard thoroughly with warm water to remove any remaining solution. For more stubborn stains, you can let the night guard soak for a few hours or even overnight. However, be sure to check the manufacturer's instructions before using hydrogen peroxide, as some materials may be damaged by the solution. Additionally, if you have sensitive teeth or gums, you may want to dilute the hydrogen peroxide solution further to avoid any irritation. By applying a hydrogen peroxide solution, you can effectively remove tough stains from your night guard and keep it clean and hygienic.
Drying and Storage
When it comes to drying and storage, it's essential to take the right steps to ensure the longevity and quality of your belongings. Whether you're dealing with delicate fabrics, sensitive electronics, or precious items, proper drying and storage techniques can make all the difference. To achieve this, it's crucial to allow items to air dry or use a clean towel to pat dry, store them in a protective case or container, and keep them away from direct sunlight and extreme temperatures. By following these simple yet effective methods, you can prevent damage, reduce the risk of deterioration, and maintain the condition of your belongings. In this article, we'll delve into the importance of each of these techniques, starting with the first step: allowing items to air dry or using a clean towel to pat dry.
Allow to Air Dry or Use a Clean Towel to Pat Dry
When it comes to drying your night guard, it's essential to do it correctly to prevent bacterial growth and maintain its quality. After rinsing your night guard with cold water, gently shake off any excess water. You can then allow it to air dry or use a clean towel to pat it dry. Allowing it to air dry is a great option, as it helps prevent bacterial growth and keeps your night guard fresh. On the other hand, using a clean towel to pat it dry can help remove excess moisture and speed up the drying process. However, be sure to use a clean towel to prevent transferring bacteria to your night guard. Avoid using a hot towel or rubbing your night guard vigorously, as this can cause damage or create scratches. By following these simple steps, you can ensure your night guard remains clean, dry, and ready for its next use.
Store in a Protective Case or Container
When not in use, it's essential to store your night guard in a protective case or container to maintain its cleanliness and longevity. This will prevent it from coming into contact with bacteria, dust, and other contaminants that can accumulate on surfaces. A protective case or container will also shield your night guard from accidental damage, such as being crushed or bent, which can render it ineffective. Furthermore, storing your night guard in a protective case or container will help to prevent the buildup of plaque and tartar, which can lead to bad breath and gum disease. By keeping your night guard clean and dry, you can ensure that it continues to provide you with the protection and comfort you need to get a good night's sleep. It's recommended to store your night guard in a case or container that is specifically designed for dental appliances, as these are typically made with antimicrobial materials that can help to prevent the growth of bacteria and other microorganisms. Additionally, make sure to clean and dry the case or container regularly to prevent the buildup of bacteria and other contaminants. By taking these simple steps, you can help to extend the life of your night guard and keep your mouth healthy and clean.
Keep Away from Direct Sunlight and Extreme Temperatures
When it comes to drying and storing your night guard, it's essential to keep it away from direct sunlight and extreme temperatures. Direct sunlight can cause the plastic or acrylic material to warp, become brittle, or even crack, rendering your night guard useless. Similarly, extreme temperatures, whether hot or cold, can also cause damage to the material, leading to a loss of shape or flexibility. To avoid these issues, it's recommended to store your night guard in a cool, dry place, away from direct sunlight and heat sources. A protective case or container can also help to shield your night guard from environmental stressors and keep it clean and dust-free. By taking these precautions, you can help extend the lifespan of your night guard and ensure it continues to provide you with comfortable and effective protection for your teeth and mouth.