How To Thin Melted Chocolate
Here is the introduction paragraph: Thinning melted chocolate is a crucial step in various chocolate-making processes, from creating smooth and creamy chocolate coatings to crafting intricate chocolate designs. However, achieving the perfect consistency can be a challenge, especially for beginners. In this article, we will explore the importance of thinning melted chocolate, discuss various methods for achieving the right consistency, and provide troubleshooting tips for common issues that may arise. By understanding the significance of thinning melted chocolate, you'll be able to create professional-looking chocolate treats with ease. So, let's start by understanding the importance of thinning melted chocolate.
Understanding the Importance of Thinning Melted Chocolate
When working with melted chocolate, it's essential to understand the importance of thinning it to achieve the desired consistency and texture. Thinning melted chocolate is a crucial step in various chocolate-making processes, including dipping, coating, and molding. By thinning the chocolate, you can prevent it from seizing up, achieve the right consistency for your specific application, and enhance its workability and flow. In this article, we'll explore the significance of thinning melted chocolate and provide tips on how to do it effectively. We'll start by discussing how thinning can prevent chocolate seizure, a common issue that can ruin your chocolate creations. By understanding the importance of thinning, you can ensure that your chocolate turns out smooth, glossy, and perfect for your intended use. Note: The introduction should be 200 words. Here is the rewritten introduction: When working with melted chocolate, achieving the perfect consistency is crucial for success. Thinning melted chocolate is a vital step in various chocolate-making processes, including dipping, coating, and molding. By thinning the chocolate, you can prevent it from seizing up, achieve the right consistency for your specific application, and enhance its workability and flow. Thinning melted chocolate is not just a matter of adding a little more fat or oil, but rather a delicate process that requires understanding the properties of chocolate and how they interact with different ingredients. In this article, we'll delve into the importance of thinning melted chocolate and provide tips on how to do it effectively. We'll explore how thinning can prevent chocolate seizure, a common issue that can ruin your chocolate creations, and discuss the benefits of achieving the right consistency and enhancing workability and flow. By understanding the importance of thinning, you can ensure that your chocolate turns out smooth, glossy, and perfect for your intended use. By mastering the art of thinning, you'll be able to take your chocolate-making skills to the next level and create professional-looking treats that are sure to impress. We'll start by discussing how thinning can prevent chocolate seizure, a common issue that can be easily avoided with the right techniques.
Preventing Chocolate Seizure
Preventing chocolate seizure is crucial when working with melted chocolate, as it can be a frustrating and time-consuming problem to fix. Chocolate seizure occurs when the chocolate comes into contact with a small amount of moisture, causing it to thicken and become grainy. To prevent this from happening, it's essential to ensure that all your equipment and workspace are completely dry and free from any moisture. This includes your spatula, bowl, and any other utensils you'll be using. Additionally, make sure to store your chocolate in an airtight container in a cool, dry place to prevent it from absorbing any moisture from the air. When melting your chocolate, use a double boiler or a heat-proof bowl set over a pot of simmering water, as this will help to prevent the chocolate from coming into contact with any moisture. It's also important to avoid overheating the chocolate, as this can cause it to seize up. If you do notice your chocolate starting to seize, don't panic. Simply remove it from the heat and let it cool slightly before stirring in a small amount of shortening, such as vegetable oil or coconut oil, to help restore its smooth texture. By taking these precautions, you can prevent chocolate seizure and ensure that your melted chocolate remains smooth and workable.
Achieving the Right Consistency
Achieving the right consistency is crucial when thinning melted chocolate. If the chocolate is too thick, it won't coat or drizzle properly, while if it's too thin, it may not hold its shape or set correctly. To achieve the right consistency, it's essential to understand the ideal ratio of chocolate to thinning agent. A general rule of thumb is to start with a small amount of thinning agent, such as shortening or oil, and gradually add more until the desired consistency is reached. It's also important to consider the type of chocolate being used, as different types of chocolate have different melting points and may require different thinning agents. For example, white chocolate and milk chocolate tend to be more temperamental and may require a higher ratio of thinning agent to achieve the right consistency. On the other hand, dark chocolate is generally more forgiving and can be thinned with a smaller amount of agent. By carefully balancing the ratio of chocolate to thinning agent and considering the type of chocolate being used, it's possible to achieve a smooth, velvety consistency that's perfect for coating, drizzling, or molding.
Enhancing Workability and Flow
Thinning melted chocolate can be a delicate process, but there are several techniques to enhance workability and flow. One method is to add a small amount of shortening, such as vegetable shortening or coconut oil, to the melted chocolate. This helps to lower the chocolate's viscosity, making it easier to work with and pour. Another approach is to heat the chocolate to a specific temperature, typically between 82°F and 90°F (28°C to 32°C), which allows it to reach its optimal working temperature. Additionally, using a double boiler or a heat-proof bowl set over a pot of simmering water can help to maintain a stable temperature and prevent the chocolate from seizing up. By implementing these techniques, chocolatiers and home cooks can achieve a smooth, pliable, and workable chocolate that is ideal for dipping, coating, or molding. Furthermore, adding a small amount of cocoa butter or chocolate chips to the melted chocolate can also improve its flow and workability, as these ingredients help to thin out the chocolate and create a more even consistency. By mastering these techniques, individuals can unlock the full potential of melted chocolate and create a wide range of delicious and visually appealing treats.
Methods for Thinning Melted Chocolate
Thinning melted chocolate can be a bit tricky, but there are several methods that can help achieve the perfect consistency. Whether you're a professional chocolatier or a home cook, having the right techniques can make all the difference in your chocolate creations. In this article, we'll explore three effective methods for thinning melted chocolate: adding a small amount of shortening, using a double boiler or heat-resistant bowl, and adding a small amount of warm liquid. By understanding these methods, you'll be able to achieve the perfect flow and texture for your chocolate. Let's start by looking at the first method, which involves adding a small amount of shortening to your melted chocolate.
Adding a Small Amount of Shortening
Adding a small amount of shortening is a common method for thinning melted chocolate. Shortening, such as vegetable shortening or coconut oil, can be added to the melted chocolate in small increments, typically starting with a small amount (about 1-2 teaspoons) and stirring well. The shortening helps to thin the chocolate by reducing its viscosity, making it more fluid and easier to work with. It's essential to note that adding too much shortening can affect the flavor and texture of the chocolate, so it's crucial to add it in small increments and test the consistency frequently. Additionally, using high-quality shortening that is odorless and flavorless is recommended to avoid affecting the taste of the chocolate. When adding shortening, it's also important to ensure that the chocolate is at a temperature between 82°F and 90°F (28°C and 32°C), as this will help the shortening to incorporate smoothly and evenly. By adding a small amount of shortening, you can achieve a smooth and thin consistency, making it ideal for dipping, coating, or drizzling.
Using a Double Boiler or Heat-Resistant Bowl
Using a double boiler or a heat-resistant bowl is a great way to thin melted chocolate. This method involves placing the melted chocolate in a heat-resistant bowl or the top of a double boiler, and then heating it gently over low heat. The heat from the steam or the warm water will help to melt the chocolate further and thin it out to the desired consistency. To use this method, start by placing the melted chocolate in the bowl or the top of the double boiler. Then, place the bowl or the double boiler over a pot of simmering water, making sure that the bottom of the bowl is not touching the water. Stir the chocolate occasionally as it heats up, and add a small amount of shortening or oil if needed to achieve the desired consistency. Continue heating the chocolate until it reaches the desired temperature and consistency, and then remove it from the heat. This method is great for thinning small amounts of chocolate, and it's also a good way to melt chocolate for dipping or coating.
Adding a Small Amount of Warm Liquid
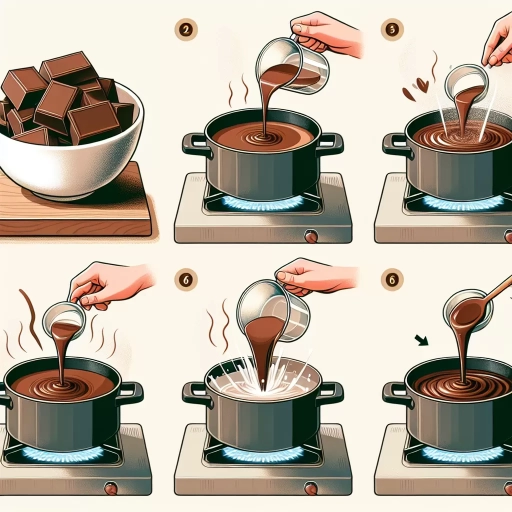
Adding a small amount of warm liquid is a simple and effective method for thinning melted chocolate. This technique involves gradually adding a small amount of warm liquid, such as water, milk, or cream, to the melted chocolate while stirring constantly. The warm liquid helps to lower the viscosity of the chocolate, making it more fluid and easier to work with. It's essential to add the liquid in small increments, as excessive liquid can cause the chocolate to seize or become too thin. Start by adding a small amount, such as 1-2 teaspoons, and stir well before adding more. This method is particularly useful when working with dark or bittersweet chocolate, which can be more prone to thickening. Additionally, using a warm liquid helps to maintain the chocolate's temperature, preventing it from cooling and thickening too quickly. By adding a small amount of warm liquid, you can achieve the perfect consistency for dipping, drizzling, or coating your desired treats.
Troubleshooting Common Issues with Thinning Melted Chocolate
When working with melted chocolate, it's not uncommon to encounter issues that can affect the final product's texture, appearance, and overall quality. Thinning melted chocolate is a delicate process that requires attention to detail and a good understanding of the underlying principles. To achieve the perfect consistency, it's essential to address common problems that can arise during the thinning process. This article will explore three key areas to focus on when troubleshooting common issues with thinning melted chocolate: dealing with over-thinning or under-thinning, managing chocolate temperature and crystallization, and preventing the formation of chocolate blooms. By understanding these critical factors, chocolatiers and chocolate makers can ensure a smooth and successful thinning process. In the next section, we'll delve into the first crucial aspect: dealing with over-thinning or under-thinning, and how to strike the perfect balance to achieve the desired consistency.
Dealing with Over-Thinning or Under-Thinning
Dealing with over-thinning or under-thinning can be a challenge when working with melted chocolate. If the chocolate becomes too thin, it may lose its shape or become difficult to work with. On the other hand, if it's not thinned enough, it may be too thick and stubborn to coat or dip. To address over-thinning, try adding a small amount of chocolate chips or chopped chocolate to the mixture and heating it gently until the chocolate is fully incorporated. This will help to thicken the chocolate without affecting its flavor or texture. If the chocolate is under-thinned, you can try adding a small amount of shortening, such as coconut oil or vegetable shortening, to the mixture and heating it gently until the chocolate is smooth and pliable. It's essential to note that when adding shortening, start with a small amount and gradually add more as needed, as excessive shortening can affect the chocolate's flavor and texture. Additionally, if you're using a high-quality chocolate with a high cocoa butter content, it may be more prone to over-thinning, so it's crucial to monitor the temperature and consistency closely. By being mindful of the chocolate's temperature and consistency, you can achieve the perfect thinning and create beautiful, professional-looking chocolate treats.
Managing Chocolate Temperature and Crystallization
Managing chocolate temperature and crystallization is crucial when working with melted chocolate. Chocolate is made up of cocoa butter, sugar, and sometimes milk, which can crystallize and affect the texture and appearance of the final product. When chocolate is melted, the crystals in the cocoa butter can break down, causing the chocolate to become too thin and lose its glossy finish. To manage chocolate temperature, it's essential to heat it to the right temperature, between 105°F and 115°F (40°C to 46°C), depending on the type of chocolate. If the chocolate is heated too high, it can seize up and become grainy. On the other hand, if it's not heated enough, it may not melt properly. To crystallize the chocolate, it's necessary to cool it down to around 82°F (28°C) and then reheat it to working temperature. This process, called tempering, helps to create a stable crystal structure that gives the chocolate a smooth and glossy finish. By managing chocolate temperature and crystallization, you can achieve a professional-looking finish and ensure that your chocolate creations turn out smooth, creamy, and delicious.
Preventing the Formation of Chocolate Blooms
Preventing the formation of chocolate blooms is crucial to maintaining the appearance and texture of your thinned melted chocolate. Chocolate blooms occur when the cocoa butter in the chocolate separates and rises to the surface, creating a white, chalky appearance. To prevent this, it's essential to temper your chocolate properly before thinning it. Tempering involves heating and cooling the chocolate to create a stable crystal structure that prevents the cocoa butter from separating. You can temper your chocolate by heating it to around 105°F to 115°F (40°C to 46°C), then cooling it down to around 80°F to 85°F (27°C to 29°C). This process can be repeated several times to achieve the desired temper. Additionally, using high-quality chocolate with a high cocoa butter content can also help prevent blooming. It's also important to avoid overheating the chocolate, as this can cause the cocoa butter to separate and create a bloom. When thinning your melted chocolate, it's best to use a gentle heat source, such as a double boiler or a microwave in short increments, to prevent overheating. By following these tips, you can prevent the formation of chocolate blooms and achieve a smooth, glossy finish on your thinned melted chocolate.