How To Remove 3m Adhesive
 Harnessing the power of 3M adhesive can be incredible for a variety of projects. However, without the right knowledge, trying to remove it can result in undesired marks or even surface damage. On the brighter side, this comprehensive guide sheds light on how to seamlessly conquer the challenge of 3M adhesive removal, saving you undesired stress, time, and maybe a few dollars. To effectively bring that to fruition, we need to understand the strength of this adhesive, the science that makes it ultra-stick, and the essential elements that keep it undefeated—that's where our journey begins in 'Understanding 3M Adhesive.' From there, we graciously walk you through the 'Methods for 3M Adhesive Removal'—step by step, ensuring you can handle this task like a pro. Finally, it doesn't end with adhesive eradication. We take you through 'Post-Removal Care and Surface Restoration' for that final missing piece. Now, let's delve deeper into 'Understanding 3M Adhesive', the first step toward achieving a clean, adhesive-free surface.
Understanding 3M Adhesive
Understanding the mechanics behind 3M adhesive is not only intriguing, but it also opens doors to its optimal application across various mediums. This article delves into the world of 3M adhesive - offering keen insights into its composition, its diverse areas of application, and most importantly, the adhesive's renowned staying power. The core component of this adhesive technology's allure begins with its unique composition. Crafted with an intricate balance of ingredients, 3M adhesive excels where others fall short. Your comprehension of its make-up helps demystify its astounding performance, giving you an edge in its use. Furthermore, familiarising yourself with the expansive arenas where 3M adhesive comes into play will amaze you, reiterating its supreme versatility. Yet, there's still more. This adhesive's unrivaled endurance, the so-called 'staying power,' sets it apart in the adhesive industry and makes it a front-runner for numerous applications. Now, let's peel back the layers and get a closer look at the first aspect: the composition of 3M adhesive.
The Composition of 3M Adhesive
An understanding of the composition of 3M Adhesive is crucial when exploring the ways to remove it safely. As a fundamental part of everyday life, adhesives like 3M's products have a complex formulation that expertly incorporates various components, based largely on polymers, to create a solution with desirable adhesive properties. The backbone of 3M adhesives is typically made from acrylic polymer, which offers excellent environmental resistance and faster setting times, further enhanced by an array of additives to tweak performance and lifespan aspects. One of the notable ingredients is known as tackifiers, which increase the 'tack' or stickiness of the adhesive. These are used in varying proportions to create the right level of adhesive power for different surfaces and functionalities. Solvents are another crucial ingredient, which aim to alter viscosity and drying times. Depending on the adhesive's intended use, more durable, or resilient solvents may be included so the adhesive can withstand harsher conditions such as exposure to UV light and extreme temperatures. Fillers like glass beads, as well as antioxidants and UV stabilizers, often find their way into these adhesive recipes. They serve to enhance properties such as gap-filling capability, longevity, and physical strength. Moreover, they counteract potential harm effects from environmental stresses or repeated use. Lastly, curatives or hardeners complete the balance, allowing the adhesive to set properly and hold its bond over time. This sophisticated chemical composition dictates the adhesive's behavior, making it an omnipresent helper in a multitude of applications - from sticking notes to more heavy-duty applications like mounting or industrial assembly. Understanding this sheds light on the adhesive's tenacity and informs the approach to its removal, particularly on the varying degrees of difficulty that one might encounter when trying to eliminate it from different surfaces. Therefore, a comprehensive insight into 3M Adhesive's makeup is vital in the subsequent steps of formulating effective removal methods.
Areas of Application for 3M Adhesive
3M adhesives are incredibly versatile products, catering to the needs of numerous industries, from automotive and aerospace to healthcare and construction. Their myriad uses make them an indispensable tool, no matter the scale or sector of your application. For instance, in the automotive industry, 3M’s adhesives are up to the task of effectively bonding, sealing, and improving the durability of various parts — everything from headlights to body panels. This can significantly enhance a vehicle’s performance, safety, and longevity. In the aerospace sector, these adhesives ensure the reliable, lightweight attachment of panels and fixtures, contributing to the overall functionality and fuel-efficiency of aircraft. They withstand changes in temperature, pressure, and humidity, crucial features when at high altitudes or in turbulent weather conditions. Guaranteeing patient comfort and efficient wound healing, 3M's adhesives also find usage in the healthcare industry. They are pristine in their application and medical-grade, allowing the creation of secure wound dressings, bandages, or patches. Within the construction sector, this robust adhesive helps to attach, seal, or repair various materials, like concrete, wood, or glass, irrespective of environmental conditions. It provides a long-lasting and reliable solution for intricate architectural designs, or even simpler home renovations. Central to 3M adhesive's effectiveness across these diverse applications is their unique blend of adhesive properties. They boast high shear and peel strength, water resistance, and ability to withstand temperature shifts and harsh environments. Thus, whether you are in a bustling factory, an advanced medical facility, a soaring aircraft, or a cozy home, the role of 3M adhesives is pivotal. They are a prime example of how sophisticated industrial science can permeate daily life and facilitate creative solutions in various fields. With its multifaceted function, using 3M adhesive is a surefire way to increase functionality, efficiency, and durability, irrespective of context or industry.
The Staying Power of 3M Adhesive
The unique staying power of 3M adhesive has been instrumental in its wide acceptance across numerous industries, making it a consistent choice for all adhesive requirements. The 3M adhesive, painstakingly crafted through dedicated research and development, exhibits an outstanding level of persistence in its adhesion capabilities, unlike any of its competitors. It owes its resilience to a blend of innovative technology and superior-quality ingredients, leading to a product that is not only robust but also reliable and enduring. The unmatched sticking characteristics of the 3M adhesive have been developed through the years based on the evolving needs of its users. These adhesives are designed to withstand varying temperatures, humidity levels, and even time, minimizing the likelihood of deterioration or weakening over prolonged periods. Its reactive nature with many surfaces and materials fosters an unrivaled and lasting bond, reinforcing its universal acceptance in countless applications, from mounting heavy equipment to simple household tasks. With its distinctive properties, 3M adhesive goes beyond mere outer surface sticking. The adhesive creates a near-invincible bond by penetrating the microscopic crevices of both surfaces, ensuring a perfect, enduring adhesion that thrives under any condition. As a result, this creates the perception of an almost permanent bond, reflecting the power of its adhesion. The resilience of 3M adhesive's sticking prowess is a result of the company's commitment to constantly understand and innovate for the customer's needs, making it a highly dependable product for users around the globe. With unmatched tenacity and strength, the lasting power of 3M adhesive extends beyond surface deep, proving its worth as a leading industry choice. By understanding the staying power of 3M adhesive, its removal will often require an equally forceful course of action, thus necessitating a comprehensive and thoughtful approach.
Methods for 3M Adhesive Removal
Adhesive materials, particularly those crafted by 3M, are internationally recognized for their robustness and multifaceted applicability. However, there might be occasions when the need arises to eradicate them from surfaces effectively and safely. This article meticulously delineates the three principal methods for 3M adhesive removal, each tailored for varying circumstances and elaborated with regards to their refinement and methodology. Firstly, we have Mechanical Removal Methods, comprising techniques that rely on the principle of force application for adhesive withdrawal. Second, we explore the option of Chemical Removal Methods, that delves into the usage of solvents for adhesive disintegration. Finally, we will enlighten you about Heat-Induced Adhesive Removal Methods which involves the application of heat as a means to melt and scrub the adhesive away. Each section provides comprehensive insights into involved steps, precautions, and the best possible results. Beginning with Mechanical Removal Methods, this strategy is ideal for those who prefer the high-efficiency and low-cost approach to adhesive removal. Let us tear away the mysteries surrounding this method.
Mechanical Removal Methods
Mechanical Removal Methods
Among the diverse methods of 3M Adhesive removal, mechanical methods are popularly utilized due to their efficiency and immediacy. This approach involves the use of physical tools and force to remove the lingering adhesive, making it quite effective for stubborn adherent material. Some commonly applied mechanical tools include a scraper or blade that can methodically and carefully scrape off the adhesive, enabling the substratum to become adhesive-free. One of the primary mechanical techniques is by using a razor or a sharp-edged blade. This requires some precision as the blade needs to be carefully inserted under the adhesive without causing damage to the surface underneath. Some blades even come with a safety handle offering a firm grip, which diminishes the risk of any unintended slips. Another mechanical remedy is abrasion or sanding, often applied on wood surfaces. It's effective in not only removing the adhesive but also in restoring the surface to its original glory. However, respirators should be used while sanding to prevent inhalation of any deleterious residues. Heat is another popular method of mechanical removal. By using a hair dryer or a heat gun, the adhesive can be heated up, making it softer and easier to remove. Adhesive removers are also available in the market that facilitate mechanical removal. However, it's imperative to ensure they are compatible with the surface and would not cause any discoloration or damage. Lastly, you might want to consider a combination of mechanical methods to be more effective. All these mechanical methods require a great level of patience and diligence, as any rush can lead to surface damage. Also, after employing the mechanical removal method, it's recommended to clean the surface to get rid of any residual adhesive particles. Consequently, whether it's discarding the leftover adhesive from labels on glassware or dislodging a stuck tape from a wooden table, the mechanical removal method proves to be a comprehensive solution for adhesive issues.
Chemical Removal Methods
Chemical Removal Methods
The chemical removal method is a highly effective process used for removing 3M adhesives. It encompasses the use of potent solvents designed to break the bond of the adhesive, making it far easier to remove. These chemical-based solvents, such as acetone, isopropyl alcohol, or adhesion removers specifically designed for 3M adhesives, interact with the adhesive on a molecular level, weakening its structure and removing its sticking properties. Let's begin with acetone. Known for its utility in several domestic and industrial applications, acetone's potent nature can effectively strip 3M adhesive off surfaces. When applying acetone, it's important to do so in a well-ventilated area as the chemical can be rather robust. Make sure to put on gloves and dab it onto the adhesive, setting it aside for a few minutes to allow the reaction process. Next, there's isopropyl alcohol, an equally effective solvent for many adhesives, including 3M varieties. It offers a slightly gentler approach compared to harsher chemicals, though still very effective. Similar to the acetone method, apply a generous amount of isopropyl alcohol to the adhesive and allow it to sit for some time. Adhesive removers, specifically designed for removing 3M, are also an excellent choice. These proprietary solvents are made with unique formulas that are specialized and optimized for 3M adhesive removal. They are effective and easy to use, usually sprayed directly onto the adhesive, requiring a few moments to penetrate the adhesive and break it down, making it easier to peel or scrape away. While these methods are highly effective, each one requires diligence and care during use. The chemicals used can harm certain surfaces or cause discoloration, so it's important always to test a small, inconspicuous area first. Also, remember that safety should be paramount: always utilize appropriate protective measures, such as gloves and goggles, to limit direct contact with these potent solvents. Finally, ensure proper ventilation to minimize inhalation risk. These precautions alongside the right chemical solution will certainly aid in successful 3M adhesive removal.Heat-Induced Adhesive Removal Methods
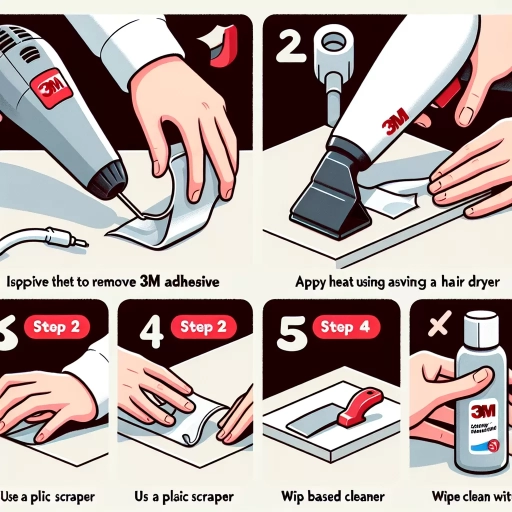
Heat-Induced Adhesive Removal Methods play a crucial role in eliminating stubborn 3M adhesives, leaving your surfaces clean and damage-free. This method leverages the principle of thermal dynamics, making it a highly trusted and efficient way of removing sticky adhesive substances. Temperatures out of adhesive's temperature resistance range tend to destabilize the chemical structure of the adhesive, altering its sticky properties, a circumstance that aids in easy removal. Heat application, a non-toxic and safe method, has found widespread use due to its effectiveness and the availability of common tools used, such as heat guns or a hairdryer. With a tool like a heat gun, practitioners can direct a concentrated amount of heat at the adhesive, causing it to be softened or liquified for easy removal. Speed control on the heat gun allows the user to control the output and protect the surface from heat damage, making this method safe for both the user and the material involved. On the other hand, the use of a hair dryer in this process represents an option when handling sensitive items unable to withstand extreme temperatures. Hair dryers emit less heat compared to heat guns, preventing cases of unintentional damage due to overheating. Regardless of the device used, it's essential to keep the heat source moving, not focusing on one area for prolonged periods to prevent surface damage. Partnering heat with a plastic scraper or a similar tool allows for the gentle prying of the adhesive once it's sufficiently softened. This combination helps preserve the original material, preventing abrasions from metal tools or the sticky residue left behind by the adhesive. Despite being effective, the heat-induced method requires patience to allow unhurried, thorough heating without causing degradation to the adhesive or the substance it's adhered to. This procedure may not be applicable in some instances where the material involved is heat sensitive, requiring the use of other methods like chemical-induced removal. Understanding the right time to stop heating and start scraping is vital to successful adhesive removal. It requires a keen eye to ensure the heat has penetrated sufficiently and the adhesive is ready to scrape off. Therefore, knowledge and caution play an indispensable role when using heat-induced adhesive removal methods, ensuring a clean, residue-free surface post the removal process.
Post-Removal Care and Surface Restoration
Post-Removal Care and Surface Restoration are essential elements in maintaining the long-term integrity and appearance of surfaces subjected to adhesives. This includes not only the primary task of cleaning the surface post-removal, but also addressing potential damages caused by adhesive removal. To further ensure the longevity of these surfaces, proactive steps, including the application of preventive measures to minimize future adhesive damage, need to be in place. This comprehensive guide will deep dive into the crucial area of post-removal surface care, shining a light on effective cleaning methods after removal, reparative techniques for adhesive-induced damage, and preventive strategies that can help you safeguard your surfaces from unnecessary wear and tear. As a starting point, let's unveil the secrets of thoroughly cleaning the surface after adhesive removal to restore its original sheen and texture.
Cleaning The Surface Post-Removal
Cleaning the surface post-removal is a crucial step in post-removal care and surface restoration. Upon successfully dislocating the 3M adhesive, you'll often find a layer of residual adhesive or a sticky film clinging tenaciously to the surface. This seemingly irreparable circumstance is none other than a minor leverage setback. It’s essential to ensure a pristine and immaculate finish that reinstates the surface back to its original grace. The primary intent behind cleaning the surface post-removal is not only to eliminate traces of the adhesive but also to reinstate the area to its original texture. The residual matter can tarnish the appearance of the surface and potentially disrupt any further application of new adhesives or restorative products. The cleaning process requires a meticulous approach, and it’s crucial to follow a strategic cleaning plan. Moreover, the cleaning process is not as straightforward as it may sound. It involves using appropriate cleaning materials and products that are suitable for the affected surface, not causing any inadvertent damage or discoloration in the act of cleaning. Begin with the application of a soft, clean cloth lightly dampened with a mild detergent or adhesive remover. Gently work it in a circular motion over the affected area, exerting ample pressure to lift the sticky remnants. In times when the adhesive is stubborn, the use of a plastic scraper can be incorporated cautiously into the process. Remember, the key is to restore, not to damage further. Any scrape or scratch can impair the overall aesthetics of the surface. It's imperative to note that different surfaces may require different cleaning agents. For instance, glass surfaces might demand a different approach compared to wooden surfaces. It’s always wise to test the cleaning method on a hidden area first to ensure no discoloration or damage will occur. Once the surface is cleaned thoroughly, it needs to be dried properly. Negligence in this step may leave behind unwanted smudges or watermarks. Use a clean, soft, and dry cloth for this purpose and observe the area for any more remaining adhesive. The whole process may require several repeats until the surface is wholly clean and restored. In conclusion, cleaning the surface post-removal is a meticulous yet critical process within post-removal care and surface restoration. By following the right procedures and utilizing the appropriate products, you can ensure a high-quality, aesthetically pleasing finish that breathes new life into the surface, mitigating any signs that an adhesive was ever present. The role this supporting step plays is undeniable as it helps in maintaining the surface’s appeal and integrity in the long run.
Repairing Damage Caused by Adhesive Removal
Post-Removal Care and Surface Restoration is a crucial step after getting rid of the persistently clingy 3M adhesive. This bold turnaround from the removal process addresses all the damage caused and aims for restoration. Repairing the damage caused by adhesive removal involves a meticulous and thoughtful approach. It is essential to restore the surface to its natural state, ensuring it is as good as new. The remnants of 3M adhesive, known for its high-bonding strength, often tarnish the aesthetics of a surface, leaving behind a mark of discoloration or roughness that ruins its natural sleekness. However, with the right care, we can easily restore the surface to its former shine and texture. The first step to undertake when repairing damage is a comprehensive surface cleaning. Use a damp, soft cloth to remove any final traces of adhesive and to prepare the surface for the restoration process. Remember to avoid using any abrasive cloth or scrubbing hard, as it may lead to increased surface damage. Subsequently, assess the nature and extent of the damage. Is the surface discolored or has it lost its shine? Are there scratches or small patches of leftover adhesive? If the surface is discolored, you may need to consider a specialist surface or furniture polish. In contrast, the presence of scratches or adhesive patches may necessitate the use of fine sandpaper. In case of scratches, use a fine grain sandpaper, and gently sand down the area until the surface is smooth, taking caution not to remove too much of the surface material in the process. For surfaces that have lost shine or color, different polishes or restoration compounds are available to revive them. Simply apply these products according to manufacturer instructions and allow them to work their magic. The restoration process may also warrant the use of sealants or protectants, particularly for materials like wood or metal, which can help resist future damage and enhance the surface's appeal. It reinstates the preserved aesthetics of the materials used, delivering an enhanced, pristine finish. In conclusion, repairing the damage caused by adhesive removal is a diligent process that necessitates a keen eye and careful attention. By employing these tactics, one can manage to restore surfaces back to their original condition, ensuring that the vestiges of the persistent 3M adhesive are thoroughly eradicated. Post-removal care and surface restoration should not be skipped to maintain the longevity and beauty of your belongings from any adhesive-related damages.
Preventive Measures to Minimize Future Adhesive Damage
Consistent post-removal care and immediate restoration can significantly reduce future adhesive damage, ensuring the longevity of your surfaces. Understanding the preventive measures to minimize future adhesion issues involves knowledge about the nature of adhesives, the surfaces they adhere to, and the proper care techniques. Firstly, make sure you thoroughly clean the surface after adhesive removal. Residual adhesive elements, may it be dust, particles, or tiny bits of the same adhesive, can serve as the root cause for future potential damage. Utilize a gentle cleansing solution and a soft cloth to sweep off any infinitesimal adhesive remnants. Next, regularly inspect your surfaces. By taking the time to go over surfaces with precision, you can detect minor problems before they evolve into significant concerns. Slightly peeling edges, bubbling or any discoloration should not be neglected. These could be signals of an impending adhesive damage. Restoration of the damaged surface is another crucial preventive measure. The key to successful restoration revolves around swift and substantial repair to any damages, however minor they might seem. Minor scratches, for example, can expose the surface to moisture, leading to adhesive failure. A fast repair process will prevent the development of these issues. Care should be taken while choosing the adhesive for the restoration process. The adhesive should be compatible with the surfaces on which it is being used. For instance, strong adhesives like epoxy resins might not be suitable for surfaces that require flexible or temporary adhesion. On the contrary, use of 3M adhesive makes it a preferred choice as these adhesives are designed to minimize possible damage while providing maximum adherence. Another preventive measure is maintaining appropriate environmental conditions. Avoid exposing the surfaces to extreme temperatures, high humidity, or extreme dryness, as these can weaken the adhesive bond. Maintain a balanced temperature and humidity to keep the adhesive in good condition. Lastly, using a high-quality protective coating can provide extra defense against future adhesive damage. Employ a coating that offers UV protection, waterproofing capabilities, and resistance to environmental pollutants. By consolidating a proficient cleaning routine, regular inspection, swift and timely restoration, balanced environmental conditions and implementing protective coatings, you can significantly minimize the risk of future adhesive damage. The mantra to remember is - preventive care is integral to long-lasting adhesion.