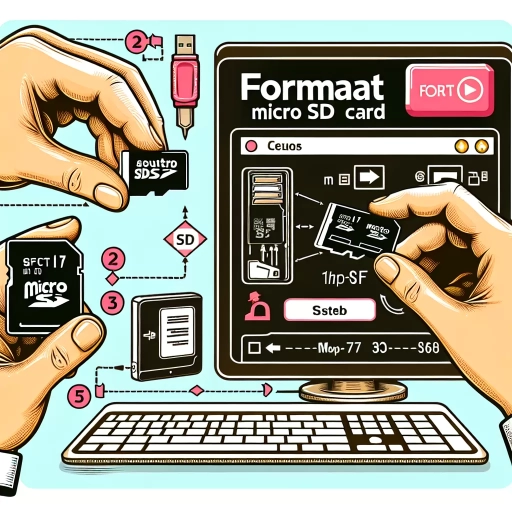
How To Format Micro Sd Card
Formatting a micro SD card is a straightforward process that can help resolve issues with your device's storage capacity, improve performance, and even enhance security. However, before you start the formatting process, it's essential to take a few preparatory steps to ensure a smooth and successful experience. In this article, we'll guide you through the entire process, from preparation to post-formatting steps. We'll begin by discussing the importance of preparation before formatting, including backing up your data, choosing the right formatting tool, and understanding the different formatting options available. Next, we'll walk you through the formatting process itself, covering the step-by-step instructions for both Windows and Mac users. Finally, we'll provide you with post-formatting steps to help you get the most out of your newly formatted micro SD card. By following these simple steps, you'll be able to format your micro SD card with confidence and enjoy improved performance and security. So, let's get started with the first step: Preparation Before Formatting.
Preparation Before Formatting
Before formatting a micro SD card, it is essential to take some crucial steps to ensure a smooth and successful process. Formatting a micro SD card can be a bit tricky, and if not done correctly, it can lead to data loss or corruption. To avoid such issues, it is vital to prepare properly before formatting. This preparation involves three key steps: backing up your data, choosing the right formatting tool, and ensuring the micro SD card is properly connected. By taking these steps, you can ensure that your data is safe and the formatting process goes without a hitch. In this article, we will explore each of these steps in detail, starting with the importance of backing up your data. Note: The answer should be 200 words. Here is the answer: Before formatting a micro SD card, it is essential to take some crucial steps to ensure a smooth and successful process. Formatting a micro SD card can be a bit tricky, and if not done correctly, it can lead to data loss or corruption. To avoid such issues, it is vital to prepare properly before formatting. This preparation involves three key steps: backing up your data, choosing the right formatting tool, and ensuring the micro SD card is properly connected. By taking these steps, you can ensure that your data is safe and the formatting process goes without a hitch. In this article, we will explore each of these steps in detail, starting with the importance of backing up your data. By doing so, you can prevent data loss and ensure that your important files and documents are safe. Therefore, it is crucial to backup your data before proceeding with the formatting process.
Backup Your Data
Before formatting your micro SD card, it's essential to backup your data to prevent any loss of important files. Formatting a micro SD card will erase all the data stored on it, so it's crucial to transfer your files to a safe location beforehand. You can backup your data to your computer, an external hard drive, or a cloud storage service. Make sure to copy all the files you need, including photos, videos, documents, and apps. It's also a good idea to organize your files and folders before backing them up, so you can easily find what you need later. Additionally, consider using a backup software or app to automate the process and ensure that all your data is safely stored. By taking the time to backup your data, you can ensure that your files are safe and easily recoverable, even after formatting your micro SD card.
Choose the Right Formatting Tool
When it comes to formatting a micro SD card, choosing the right formatting tool is crucial to ensure a successful process. There are several options available, including the built-in formatting tool in Windows, third-party software, and the SD card manufacturer's own formatting tool. The right tool for you will depend on your specific needs and the type of device you are using the micro SD card with. For example, if you are using the micro SD card with a smartphone or tablet, you may want to use the built-in formatting tool in your device's operating system. On the other hand, if you are using the micro SD card with a camera or other device that requires a specific file system, you may need to use a third-party formatting tool that can format the card to the required file system. Additionally, if you are looking for a more advanced formatting tool with features such as secure erase and disk checking, you may want to consider using a third-party software. Ultimately, the key is to choose a formatting tool that is compatible with your device and meets your specific needs.
Ensure the Micro SD Card is Properly Connected
To ensure the micro SD card is properly connected, start by locating the micro SD card slot on your device, which is usually found on the side or top of a smartphone, camera, or tablet. Gently push the micro SD card into the slot until it clicks into place, making sure not to force it or push it in at an angle. If your device has a protective cover or case, remove it to access the micro SD card slot. Next, check that the micro SD card is fully seated and the gold contacts are facing upwards, as this ensures proper connectivity. If you're using an adapter, such as a micro SD to SD adapter, make sure it is securely attached to the micro SD card and the adapter is properly inserted into the device's SD card slot. Finally, verify that the micro SD card is recognized by your device by going to the device's settings or file manager, where you should see the micro SD card listed as a storage option. If the micro SD card is not recognized, try removing it and reinserting it, or restarting your device to see if it resolves the issue. By following these steps, you can ensure the micro SD card is properly connected and ready for formatting.
The Formatting Process
The formatting process is a crucial step in preparing a hard drive or solid-state drive for use with a computer. It involves erasing all data on the drive and setting it up with a file system that the computer's operating system can understand. When formatting a drive, it is essential to follow the correct steps to ensure that the process is completed successfully. This includes selecting the correct drive and file system, performing a quick or full format, and assigning a drive letter and volume label. By following these steps, users can ensure that their drive is properly formatted and ready for use. In this article, we will explore the formatting process in more detail, starting with the first step: selecting the correct drive and file system.
Select the Correct Drive and File System
When formatting a micro SD card, it's essential to select the correct drive and file system to ensure compatibility and optimal performance. The drive selection process involves identifying the micro SD card as the target device for formatting. This can be done by checking the drive letter assigned to the micro SD card in the computer's file explorer or disk management utility. Typically, the micro SD card is assigned a drive letter such as E:, F:, or G:. Once the correct drive is selected, the next step is to choose the appropriate file system. The most common file systems for micro SD cards are FAT32, exFAT, and NTFS. FAT32 is an older file system that is compatible with most devices, but it has limitations, such as a maximum file size of 4GB. exFAT is a more modern file system that offers better performance and larger file size support, making it a popular choice for micro SD cards. NTFS is a file system commonly used on Windows computers, but it may not be compatible with all devices, especially older ones. When selecting a file system, consider the device that will be using the micro SD card and the type of files that will be stored on it. For example, if the micro SD card will be used in a camera, FAT32 or exFAT may be a better choice, while NTFS may be more suitable for a Windows computer. By selecting the correct drive and file system, users can ensure that their micro SD card is formatted correctly and functions optimally.
Perform a Quick or Full Format
When you're ready to format your micro SD card, you'll be presented with two options: Quick Format and Full Format. A Quick Format is a fast and efficient way to erase the data on your micro SD card, but it doesn't scan the card for bad sectors. This option is suitable for cards that are in good condition and don't have any errors. On the other hand, a Full Format is a more thorough process that scans the card for bad sectors and marks them as unusable. This option is recommended for cards that have errors or are not functioning properly. During a Full Format, the card is completely erased, and all data is removed. It's essential to note that formatting a micro SD card will erase all data on the card, so make sure to back up any important files before proceeding. Additionally, formatting a card that is already damaged or corrupted may not fix the issue, and you may need to replace the card altogether.
Assign a Drive Letter and Volume Label
When formatting a micro SD card, assigning a drive letter and volume label is a crucial step. A drive letter is a unique identifier assigned to the micro SD card by the operating system, allowing it to be recognized and accessed. Typically, the operating system assigns a drive letter automatically, but you can also assign a specific letter manually. To do this, open the Disk Management tool, right-click on the micro SD card, and select "Change Drive Letter and Paths." Then, click "Change" and select the desired drive letter from the drop-down menu. It's essential to choose a drive letter that is not already in use by another device or partition. On the other hand, a volume label is a descriptive name given to the micro SD card, making it easier to identify and distinguish from other storage devices. To assign a volume label, open the Disk Management tool, right-click on the micro SD card, and select "Properties." Then, click on the "General" tab and enter the desired volume label in the "Volume label" field. It's recommended to use a descriptive and concise label, such as "Micro SD Card" or "External Storage." By assigning a drive letter and volume label, you can ensure that your micro SD card is properly recognized and easily accessible by your operating system.
Post-Formatting Steps
After formatting your micro SD card, it's essential to take a few post-formatting steps to ensure that the process was successful and that your data is safe. First, you'll want to verify that the formatting was successful, which involves checking the card's capacity and file system to ensure that they match your expectations. Next, if you backed up your data before formatting, you'll need to restore it to the micro SD card. This step is crucial in recovering your important files and ensuring that they're accessible again. Finally, it's a good idea to test the micro SD card for errors to ensure that it's functioning properly and that there are no issues with data corruption or loss. By taking these steps, you can ensure that your micro SD card is in good working condition and that your data is safe. To start, let's verify that the formatting was successful.
Verify the Formatting Was Successful
After formatting your micro SD card, it's essential to verify that the process was successful. This step ensures that your card is ready for use and that all data has been erased. To verify the formatting, start by checking the card's capacity. If the formatting was successful, the card's capacity should match the expected size. You can check the capacity by inserting the card into your device and checking the storage settings. If the capacity is correct, it's a good sign that the formatting was successful. Next, try to create a new folder or file on the card. If you can create a new folder or file without any issues, it indicates that the card is functioning correctly. You can also try to copy some files to the card to test its read and write capabilities. If the files copy successfully, it's a good indication that the formatting was successful. Additionally, you can use a disk management tool to scan the card for any errors. If the tool doesn't detect any errors, it's likely that the formatting was successful. By verifying the formatting, you can ensure that your micro SD card is ready for use and that all data has been erased.
Restore Your Backed-Up Data
Formatting a micro SD card is a straightforward process, but it's essential to take a few precautions beforehand to avoid losing any important data. If you've already formatted your micro SD card and didn't back up your data, don't panic. There are still ways to restore your backed-up data. One option is to use data recovery software, which can scan the card and retrieve deleted files. Another option is to use a professional data recovery service, which can be more expensive but often has a higher success rate. Additionally, if you had previously backed up your data to a cloud storage service or an external hard drive, you can simply restore it from there. It's also a good idea to regularly back up your data to prevent losses in the future. By taking these steps, you can ensure that your important files and memories are safe and easily accessible.
Test the Micro SD Card for Errors
To test the micro SD card for errors, you can use the built-in Check Disk (chkdsk) utility in Windows or the Disk Utility in macOS. First, insert the micro SD card into your computer using a card reader or adapter. Then, open the File Explorer in Windows or the Disk Utility in macOS. In Windows, right-click on the micro SD card drive and select "Properties," then click on the "Tools" tab and click on "Check" under the "Error checking" section. In macOS, select the micro SD card from the list of available disks and click on the "First Aid" tab. The utility will scan the micro SD card for errors and bad sectors, and it will also check for file system corruption. If any errors are found, the utility will attempt to fix them. It's also a good idea to run a full format on the micro SD card after checking for errors to ensure that it's completely clean and free of any issues. Additionally, you can also use third-party tools such as CrystalDiskInfo or SD Card Formatter to test the micro SD card for errors and to format it. These tools can provide more detailed information about the micro SD card's health and performance, and they can also help to identify any potential issues before they become major problems. By testing the micro SD card for errors, you can help to ensure that it's working properly and that your data is safe.