How To Connect Logitech Mouse
Here is the introduction paragraph: Connecting a Logitech mouse to your computer is a straightforward process that can be completed in a few simple steps. Whether you're using a wireless mouse that relies on Bluetooth technology or a wired mouse that connects via a USB receiver, the process is relatively painless. In this article, we'll explore the different methods for connecting a Logitech mouse, including connecting via Bluetooth, using a USB receiver, and troubleshooting common connection issues. First, we'll start with the most common method for connecting a wireless Logitech mouse: connecting via Bluetooth.
Connecting Logitech Mouse via Bluetooth
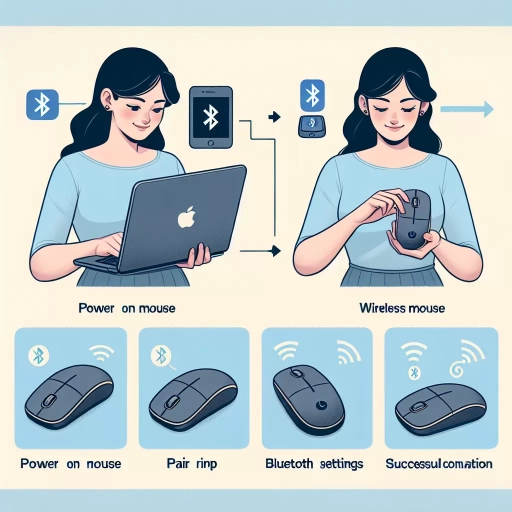
Connecting a Logitech mouse via Bluetooth is a straightforward process that can be completed in a few simple steps. To start, you'll need to put the mouse in pairing mode, which allows it to be discovered by your computer. This is typically done by pressing and holding a button on the mouse until a light begins to flash. Once the mouse is in pairing mode, you'll need to search for it on your computer, which can usually be done through the Bluetooth settings menu. Finally, you'll need to complete the pairing process, which may involve entering a code or confirming the connection on both the mouse and the computer. By following these steps, you can easily connect your Logitech mouse via Bluetooth and start using it with your computer. To begin, let's take a closer look at the first step: putting the mouse in pairing mode.
Putting the Mouse in Pairing Mode
To put your Logitech mouse in pairing mode, start by ensuring it's turned off. Then, locate the pairing button, which is usually found on the underside of the mouse. Press and hold this button until the LED light on the mouse starts to blink. This indicates that the mouse is in pairing mode and ready to be connected to your device. The exact steps may vary slightly depending on the specific model of your Logitech mouse, so it's a good idea to consult the user manual if you're unsure. Once the mouse is in pairing mode, you can proceed with the pairing process on your device.
Searching for the Mouse on the Computer
When searching for the mouse on the computer, it's essential to ensure that the device is properly connected and recognized by the system. First, check the Bluetooth settings on your computer to see if the mouse is listed as a connected device. If it's not, try restarting the computer and the mouse to refresh the connection. If the issue persists, go to the Device Manager on your computer, usually found in the Control Panel or System Settings, and look for the "Mice and other pointing devices" section. Check if the Logitech mouse is listed and if there are any error messages or warnings. If the mouse is not listed, try reinstalling the drivers or updating the firmware. Additionally, ensure that the mouse is properly paired with the computer by following the pairing instructions provided with the device. If you're still having trouble finding the mouse, try using the Logitech software or app to detect and connect the device. By following these steps, you should be able to locate and connect your Logitech mouse to your computer via Bluetooth.
Completing the Pairing Process
When you've successfully put your Logitech mouse into pairing mode, the next step is to complete the pairing process. This involves connecting your mouse to your computer or mobile device via Bluetooth. To do this, go to your device's Bluetooth settings and search for available devices. Your Logitech mouse should appear in the list of available devices, usually identified by its name or a generic label such as "Logitech Mouse." Select your mouse from the list to initiate the pairing process. Your device will then send a pairing request to your mouse, and once the request is accepted, the two devices will be connected. You may be prompted to enter a passcode or confirm the pairing on your device, but this is usually not required. Once the pairing process is complete, your Logitech mouse should be fully connected and ready to use. You can test the connection by moving the mouse and checking that the cursor on your screen responds accordingly. If you encounter any issues during the pairing process, you can try restarting your mouse and device, or consulting the user manual for troubleshooting tips.
Connecting Logitech Mouse via USB Receiver
Connecting a Logitech mouse via a USB receiver is a straightforward process that requires a few simple steps. To get started, you'll need to insert the USB receiver into your computer, which will allow your mouse to communicate with your device. Before that, it's essential to understand the overall process, which involves installing the Logitech software to ensure seamless connectivity and pairing the mouse with the USB receiver to establish a secure connection. By following these steps, you'll be able to enjoy a reliable and efficient computing experience with your Logitech mouse. In this article, we'll guide you through the process, starting with the first step: inserting the USB receiver into your computer.
Inserting the USB Receiver into the Computer
Inserting the USB receiver into the computer is a straightforward process that requires minimal technical expertise. To begin, locate a free USB port on your computer, which is usually found on the back or side of the device. Ensure that the port is not obstructed by any other devices or cables. Next, take the USB receiver that came with your Logitech mouse and align it with the USB port. Gently push the receiver into the port until it clicks into place, indicating that it is securely connected. Make sure not to force the receiver into the port, as this can cause damage to the device or the port itself. Once the receiver is inserted, your computer should automatically detect it and install the necessary drivers. If prompted, follow the on-screen instructions to complete the installation process. It's essential to note that the USB receiver should be inserted directly into the computer and not into a USB hub or extension cable, as this can cause connectivity issues. By following these simple steps, you can successfully insert the USB receiver into your computer and establish a reliable connection with your Logitech mouse.
Installing the Logitech Software
To install the Logitech software, start by downloading the correct software for your device from the Logitech website. Make sure to select the software that corresponds to your specific mouse model and operating system. Once the download is complete, run the installation file and follow the on-screen instructions. You will be prompted to agree to the terms and conditions, choose the installation location, and select any additional features you want to install. The installation process should only take a few minutes to complete. After the installation is finished, you will be prompted to restart your computer. Once your computer has restarted, you can launch the Logitech software and start customizing your mouse settings. The software will allow you to adjust the mouse sensitivity, button mapping, and other features to your liking. Additionally, the software may also offer features such as battery life monitoring, gesture recognition, and customizable lighting effects. By installing the Logitech software, you can unlock the full potential of your mouse and enhance your overall computing experience.
Pairing the Mouse with the USB Receiver
When pairing the mouse with the USB receiver, ensure that the receiver is properly plugged into a working USB port on your computer. Next, turn on the mouse by switching it to the "On" position, usually found on the bottom of the device. The mouse should now be in pairing mode, indicated by a flashing LED light. On the receiver, press and hold the Connect button until the LED light on the receiver starts flashing. This indicates that the receiver is in pairing mode as well. Now, bring the mouse close to the receiver and wait for a few seconds. The LED lights on both the mouse and receiver should stop flashing, indicating a successful pairing. If the pairing process fails, try restarting the mouse and receiver, and then repeat the pairing process. Once paired, the mouse should be recognized by your computer, and you can start using it. It's also a good idea to check the Logitech software for any available updates to ensure optimal performance and functionality.
Troubleshooting Common Connection Issues
Troubleshooting common connection issues with your Logitech mouse can be a frustrating experience, but there are several steps you can take to resolve the problem. If your mouse is not connecting properly, it may be due to a low battery level, outdated software or drivers, or a simple glitch that can be resolved with a restart. In this article, we will explore three common solutions to troubleshoot connection issues with your Logitech mouse. First, we will discuss the importance of checking the battery level of the mouse, as a low battery can often be the culprit behind connection issues. We will also cover the benefits of restarting the computer and mouse, as this can often resolve any software or hardware glitches that may be causing the problem. Finally, we will examine the importance of updating the Logitech software and drivers, as outdated software can often lead to connection issues. By following these simple steps, you can quickly and easily troubleshoot common connection issues with your Logitech mouse. So, let's start by checking the battery level of the mouse.
Checking the Battery Level of the Mouse
If your Logitech mouse is not connecting, one of the first things to check is the battery level. A dead or low battery can prevent the mouse from functioning properly, so it's essential to ensure it has enough power. To check the battery level, you can follow these steps: For wireless mice, look for the battery indicator light, usually located on the top or bottom of the mouse. If the light is red or flashing, it indicates low battery. For mice with removable batteries, take them out and check the charge level using a battery tester. If you don't have a tester, try replacing the batteries with new ones. For mice with rechargeable batteries, plug the mouse into a USB port or charging dock and let it charge for a few hours. You can also check the battery level using the Logitech software, such as Logitech Options or Logitech Gaming Software, if you have it installed on your computer. Once you've checked the battery level, if it's low, replace or recharge the batteries as needed. If the battery level is not the issue, you can move on to other troubleshooting steps to resolve the connection problem.
Restarting the Computer and Mouse
Restarting the computer and mouse can often resolve connectivity issues. To restart the computer, simply shut it down, wait for 10 seconds, and then turn it back on. This will refresh the system and potentially resolve any software glitches that may be causing the connection problem. Additionally, restarting the mouse can also be beneficial. For Logitech mice, you can restart the device by removing the batteries, waiting for 10 seconds, and then reinserting them. Alternatively, if your mouse has a reset button, press and hold it for 5 seconds to reset the device. Restarting the mouse will reset its connection and may resolve any issues with the receiver or transmitter. It's also a good idea to restart the receiver as well, especially if it's a wireless mouse. Simply unplug the receiver from the computer, wait for 10 seconds, and then plug it back in. This will refresh the connection between the mouse and the receiver, and may resolve any connectivity issues. By restarting the computer and mouse, you can often resolve connectivity issues and get your Logitech mouse working properly again.
Updating the Logitech Software and Drivers
Updating the Logitech software and drivers is a crucial step in ensuring that your Logitech mouse functions properly and efficiently. To update the software and drivers, start by visiting the Logitech website and navigating to the support section. From there, select your product and click on the "Downloads" tab. You will be prompted to select your operating system and language, after which you can download the latest software and drivers. Once the download is complete, run the installer and follow the on-screen instructions to install the updates. It is essential to note that you should only download software and drivers from the official Logitech website to avoid any potential malware or viruses. Additionally, make sure to restart your computer after installing the updates to ensure that they take effect. By keeping your Logitech software and drivers up to date, you can resolve common connection issues, improve the performance of your mouse, and enjoy a seamless user experience. Regularly updating your software and drivers can also help to fix bugs, add new features, and enhance the overall functionality of your Logitech mouse. Therefore, it is recommended to check for updates regularly to ensure that your mouse is always running at its best.