How To Change Skin In Minecraft Java
Minecraft Java is a popular sandbox video game that allows players to customize their in-game experience. One of the most exciting features of Minecraft Java is the ability to change your skin, which can be a fun way to express yourself and stand out from other players. But have you ever wondered how to change your skin in Minecraft Java? In this article, we will explore the world of Minecraft Java skins, from understanding the basics of skin files to changing your skin and even creating your own custom designs. We will start by delving into the world of Minecraft Java skin files, exploring what they are, how they work, and how to access them. By the end of this article, you will be equipped with the knowledge and skills to change your Minecraft Java skin and take your gaming experience to the next level. So, let's get started by Understanding Minecraft Java Skin Files.
Understanding Minecraft Java Skin Files
Minecraft Java skin files are a crucial part of the game's customization options, allowing players to personalize their characters and stand out in the vast Minecraft community. For those who are new to Minecraft or looking to enhance their gaming experience, understanding Minecraft Java skin files is essential. In this article, we will delve into the world of Minecraft Java skin files, exploring what they are, the different types available, and how to download and install them. By the end of this article, you will have a comprehensive understanding of Minecraft Java skin files and be able to take your Minecraft experience to the next level. So, let's start by answering the most basic question: what is a Minecraft Java skin file?
What is a Minecraft Java Skin File?
A Minecraft Java skin file is a 2D image file that represents a player's character skin in the game. It is a crucial component of the game's customization feature, allowing players to personalize their in-game appearance. The skin file is a 64x64 pixel image, typically in PNG format, that contains the character's texture, including the head, body, arms, and legs. The file is used by the game to render the player's character model, and it can be customized to display a wide range of designs, from simple color changes to intricate artwork. Minecraft Java skin files can be created using image editing software, such as Adobe Photoshop or GIMP, and can be uploaded to the game using the Minecraft launcher or by manually replacing the default skin file. The skin file is a key part of the Minecraft experience, allowing players to express their creativity and showcase their unique personality in the game.
Types of Minecraft Java Skin Files
There are two types of Minecraft Java skin files: Steve and Alex. The main difference between the two is the model and texture of the character. Steve is the default male character, while Alex is the default female character. Both skin types have the same dimensions, 64x64 pixels, and are used to customize the appearance of the player's character in the game. The choice of skin type depends on the player's preference and the desired appearance of their character. It's worth noting that custom skins can be created and applied to both Steve and Alex models, allowing for a wide range of customization options.
How to Download and Install Minecraft Java Skin Files
To download and install Minecraft Java skin files, start by finding a reputable website that offers free Minecraft skins, such as Minecraft Skins or NameMC. Browse through the available skins and select the one you want to download. Click on the skin to open its page, then click on the "Download" button to save the skin file to your computer. The file will be in PNG format and should be named after the skin. Once the download is complete, navigate to the Minecraft directory on your computer, which is usually located in the ".minecraft" folder. Inside the ".minecraft" folder, find the "skins" folder and open it. If the "skins" folder does not exist, create a new folder and name it "skins". Now, move the downloaded skin file into the "skins" folder. Make sure the skin file is in the correct format and is named correctly, as Minecraft will only recognize files with the correct naming convention. Finally, launch Minecraft and navigate to the "Skins" section in the game's settings. Your new skin should be available for selection. If you're having trouble finding the "skins" folder or installing the skin, you can try resetting the Minecraft launcher or seeking help from the Minecraft community.
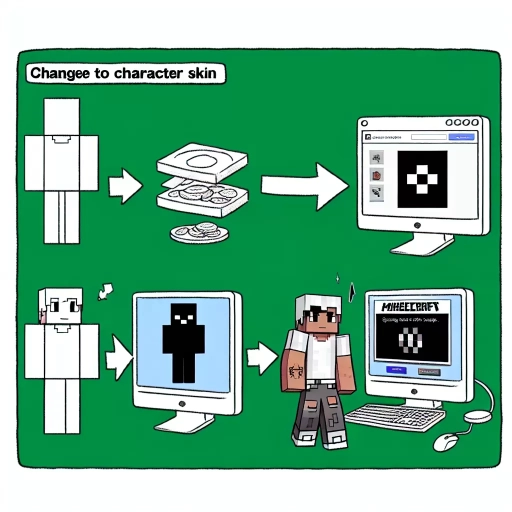
Changing Your Minecraft Java Skin
Changing your Minecraft Java skin can be a fun and creative way to personalize your gaming experience. If you're looking to give your character a fresh new look, there are several ways to do so. You can use the Minecraft Launcher to change your skin, which is a straightforward and convenient method. Alternatively, you can change your skin through the Minecraft website, which offers a wide range of customization options. Additionally, you can also use third-party tools to change your Minecraft Java skin, which can provide even more advanced features and customization options. In this article, we'll explore each of these methods in more detail, starting with the simplest and most convenient option: using the Minecraft Launcher to change your skin.
Using the Minecraft Launcher to Change Your Skin
To change your Minecraft Java skin using the Minecraft Launcher, start by opening the launcher and logging in to your Minecraft account. Once you're logged in, click on the "Skins" tab located on the top navigation bar. This will take you to the Skins page, where you can browse and upload your own custom skins. To upload a new skin, click on the "Browse" button and select the skin file from your computer. Make sure the skin file is in the correct format, which is a PNG file with a resolution of 64x64 pixels. Once you've selected the skin file, click on the "Upload" button to upload it to your Minecraft account. After the skin has been uploaded, you can preview it on the Skins page to make sure it looks correct. If everything looks good, click on the "Save" button to save the new skin as your default skin. You can also choose to upload multiple skins and switch between them at any time. To do this, simply click on the "Skins" tab and select the skin you want to use from the list of available skins. You can also delete skins you no longer want to use by clicking on the "Delete" button next to the skin. Overall, using the Minecraft Launcher to change your skin is a quick and easy process that allows you to customize your Minecraft experience with a wide range of custom skins.
Changing Your Skin through the Minecraft Website
Changing your skin through the Minecraft website is a straightforward process that allows you to customize your in-game appearance. To start, navigate to the Minecraft website and log in to your account. Once you're logged in, click on the "Profile" tab, which can be found at the top of the page. From there, click on the "Change" button next to the "Skin" option. This will take you to the skin upload page, where you can browse for a skin file on your computer or enter the URL of a skin you've found online. Make sure the skin file is in the correct format, which is a PNG file with a resolution of 64x64 pixels. Once you've selected your skin, click the "Upload" button to apply it to your account. The changes will be reflected in-game immediately, allowing you to show off your new look to friends and fellow players. It's worth noting that you can also use the Minecraft website to reset your skin to the default Steve or Alex skin, or to download a skin that you've previously uploaded. Overall, changing your skin through the Minecraft website is a quick and easy way to personalize your Minecraft experience.
Using Third-Party Tools to Change Your Minecraft Java Skin
Using third-party tools is another way to change your Minecraft Java skin. One popular tool is the Minecraft Skin Editor, which allows you to create and edit your own custom skins. You can also use online skin editors like Nova Skin or Minecraft Skin Viewer to browse and download skins created by other players. Another tool is the Minecraft Skin Changer, which enables you to change your skin in-game without having to restart the game. These tools can be downloaded from the internet and installed on your computer, providing you with a wide range of customization options for your Minecraft Java skin. Additionally, some third-party tools also offer features like skin animation, which can add an extra layer of customization to your Minecraft experience. However, be cautious when using third-party tools, as some may contain malware or viruses, so make sure to download from reputable sources only.
Customizing and Creating Your Own Minecraft Java Skins
Minecraft Java skins are a great way to personalize your gaming experience and showcase your creativity. With millions of possible combinations, the possibilities are endless. If you're looking to take your Minecraft game to the next level, customizing and creating your own Minecraft Java skins is the way to go. In this article, we'll explore the different ways to customize and create your own Minecraft Java skins, from designing your own skin from scratch to using online tools and uploading and sharing your creations with the community. We'll start by looking at the basics of designing your own Minecraft Java skin from scratch, including the different design elements and techniques you can use to create a unique and personalized skin. (Note: The supporting paragraph should be 200 words and the introduction should be 100 words)
Designing Your Own Minecraft Java Skin from Scratch
Designing your own Minecraft Java skin from scratch can be a fun and creative process. To start, you'll need a graphics editor like Adobe Photoshop or GIMP. Create a new document with a resolution of 64x64 pixels, as this is the standard size for Minecraft skins. You can choose a template or start from a blank canvas. Begin by sketching out a rough idea of your character's design, considering the game's blocky aesthetic. You can use reference images or draw inspiration from your favorite Minecraft characters. Once you have a solid concept, start adding colors and details, keeping in mind the 64x64 pixel limit. You can use a variety of tools and techniques, such as layers, brushes, and textures, to achieve the desired look. As you work, remember to save your progress regularly, as Minecraft skins can be finicky. When you're happy with your design, save it as a PNG file and upload it to your Minecraft account. With a little patience and practice, you can create a unique and personalized skin that reflects your personality and style.
Using Online Tools to Create and Customize Minecraft Java Skins
Using online tools is a fantastic way to create and customize Minecraft Java skins without requiring extensive graphic design experience. Websites like Minecraft Skin Editor, Nova Skin, and Skindex offer a user-friendly interface that allows you to design and edit skins with ease. These tools provide a vast library of pre-made templates, textures, and accessories, making it simple to create a unique and personalized skin. You can choose from a wide range of colors, patterns, and designs, and even upload your own images to incorporate into your skin. Additionally, many online tools offer features like layering, resizing, and rotating, giving you complete control over your skin's design. Once you've created your skin, you can easily download it and upload it to your Minecraft account, making it a seamless process to showcase your new look in-game. With online tools, the possibilities are endless, and you can experiment with different designs and styles until you find the perfect skin that represents your Minecraft persona.
Uploading and Sharing Your Custom Minecraft Java Skins
To upload and share your custom Minecraft Java skins, you'll need to follow a few simple steps. First, ensure that your skin is in the correct format, which is a 64x64 pixel PNG file. You can use any image editing software to create and edit your skin, such as Adobe Photoshop or GIMP. Once you're happy with your design, save it as a PNG file and make sure it's named "char.png" (without the quotes). Next, go to the Minecraft website and log in to your account. Click on the "Profile" tab and then select "Skins" from the drop-down menu. Click on the "Browse" button and select your custom skin file from your computer. Click "Upload" to upload your skin to the Minecraft servers. Once your skin is uploaded, you can share it with others by copying the link provided on the Minecraft website. You can also share your skin on social media platforms or Minecraft forums. Additionally, you can use third-party websites that allow you to upload and share your custom skins, such as Minecraft Forum or Planet Minecraft. These websites often have a large community of Minecraft players who share and download custom skins. By uploading and sharing your custom Minecraft Java skins, you can show off your creativity and personal style to the Minecraft community.