How To Test Ignition Coil With Multimeter
Here is the introduction paragraph: Testing an ignition coil with a multimeter is a straightforward process that can help you diagnose issues with your vehicle's engine. To get started, it's essential to understand the basics of ignition coil testing, including the different types of ignition coils and how they function. Once you have a solid grasp of the fundamentals, you can prepare your multimeter for testing by setting it to the correct voltage and resistance settings. With your multimeter ready, you can follow a step-by-step guide to test the ignition coil and determine if it's functioning properly. In this article, we'll take a closer look at the basics of ignition coil testing, so let's dive in and explore the fundamentals of ignition coil testing.
Understanding the Basics of Ignition Coil Testing
Understanding the basics of ignition coil testing is crucial for any car owner or mechanic. The ignition coil is a vital component of a vehicle's ignition system, and testing it can help identify issues that may be affecting the engine's performance. In this article, we will explore the basics of ignition coil testing, including what an ignition coil is and its function, why testing the ignition coil is important, and precautions to take before testing the ignition coil. By understanding these concepts, you will be able to diagnose and repair ignition coil-related problems with confidence. So, let's start by understanding what an ignition coil is and its function.
What is an Ignition Coil and Its Function
An ignition coil is a crucial component of a vehicle's ignition system, responsible for generating the high voltage needed to create a spark in the engine's cylinders. Its primary function is to convert the low voltage from the battery into a high voltage, typically between 5,000 to 30,000 volts, which is then sent to the spark plugs. The ignition coil achieves this through electromagnetic induction, where an electrical current flows through a primary coil, generating a magnetic field that induces a voltage in a secondary coil. This process allows the ignition coil to step up the voltage, making it possible to create a spark that ignites the fuel-air mixture in the engine's cylinders. In essence, the ignition coil acts as a transformer, increasing the voltage to a level that can jump the gap between the spark plug electrodes, ensuring proper engine combustion and performance.
Why Testing the Ignition Coil is Important
Testing the ignition coil is a crucial step in diagnosing and troubleshooting engine problems. A faulty ignition coil can cause a range of issues, including misfires, poor engine performance, and decreased fuel efficiency. By testing the ignition coil, you can determine if it's functioning properly and identify any potential problems before they become major issues. Ignition coils are responsible for generating the high voltage needed to create a spark in the engine's cylinders, and a malfunctioning coil can disrupt this process. Testing the ignition coil can help you identify issues such as worn-out spark plug wires, faulty spark plugs, or a malfunctioning ignition module. Additionally, testing the ignition coil can also help you determine if the problem lies with the coil itself or with another component in the ignition system. By testing the ignition coil, you can save time and money by avoiding unnecessary repairs and replacements. Furthermore, testing the ignition coil can also help you ensure the overall health and performance of your engine, which can lead to improved fuel efficiency, reduced emissions, and a longer engine lifespan. Overall, testing the ignition coil is an essential step in maintaining your vehicle's engine and ensuring it runs smoothly and efficiently.
Precautions to Take Before Testing the Ignition Coil
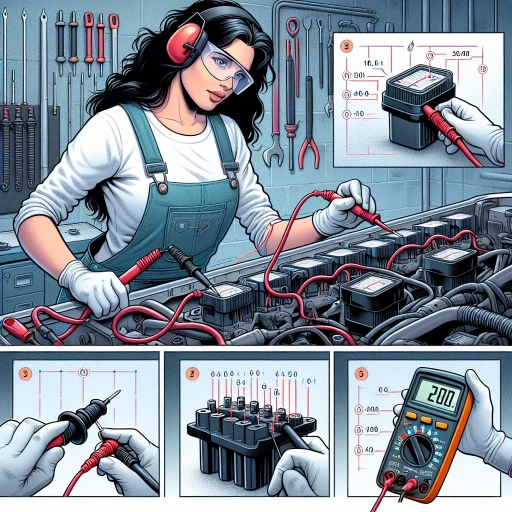
When testing an ignition coil, it's essential to take necessary precautions to ensure your safety and the accuracy of the test results. Before starting the test, make sure the ignition coil is cool to the touch, as high temperatures can affect the readings. Additionally, ensure the vehicle is in a well-ventilated area, away from any open flames or sparks, as the ignition coil can produce a spark when tested. Wear protective gear, including safety glasses and gloves, to prevent injury from electrical shock or flying debris. It's also crucial to disconnect the battery negative cable to prevent any accidental engine starts or electrical shocks. Furthermore, consult the vehicle's repair manual or manufacturer's instructions for specific testing procedures and precautions, as different vehicles may have unique requirements. By taking these precautions, you can ensure a safe and accurate ignition coil test.
Preparing the Multimeter for Ignition Coil Testing
When preparing a multimeter for ignition coil testing, it's essential to ensure that the device is set up correctly to obtain accurate readings. This involves selecting the correct multimeter settings, understanding the device's resistance and voltage functions, and calibrating the multimeter for precise measurements. By doing so, technicians can confidently diagnose ignition coil issues and perform repairs. To begin, selecting the correct multimeter settings is crucial, as it directly affects the accuracy of the readings. In the next section, we will discuss the importance of choosing the right settings and how to do so effectively.
Selecting the Correct Multimeter Settings for Ignition Coil Testing
When testing an ignition coil with a multimeter, selecting the correct settings is crucial to obtain accurate readings. The primary objective is to measure the resistance and voltage of the ignition coil, which requires the multimeter to be set to the correct function and range. For resistance measurements, set the multimeter to the ohms (Ω) function, typically denoted by the symbol "Ω" or "ohms." Ensure the multimeter is set to the correct range, usually 20kΩ or 200kΩ, depending on the ignition coil's specifications. For voltage measurements, set the multimeter to the DC voltage (V) function, denoted by the symbol "V" or "DCV." Choose a range that is higher than the expected voltage reading, typically 20V or 200V. It is essential to consult the ignition coil's specifications or the vehicle's repair manual to determine the correct settings and ranges for accurate measurements. Additionally, ensure the multimeter is set to the correct polarity, as incorrect polarity can result in inaccurate readings or damage to the multimeter. By selecting the correct multimeter settings, you can ensure accurate and reliable measurements when testing the ignition coil.
Understanding the Multimeter's Resistance and Voltage Functions
When testing an ignition coil with a multimeter, it's essential to understand the device's resistance and voltage functions. The multimeter's resistance function, denoted by the ohms symbol (Ω), measures the opposition to the flow of electric current in a circuit. In the context of ignition coil testing, this function helps determine if the coil's primary and secondary windings are within the manufacturer's specified resistance range. A reading that's significantly higher or lower than the recommended value may indicate a faulty coil. On the other hand, the multimeter's voltage function, denoted by the volts symbol (V), measures the potential difference between two points in a circuit. When testing an ignition coil, this function is used to verify the presence and level of voltage at the coil's terminals, which is crucial for proper ignition system operation. By understanding and utilizing these two functions, you can accurately diagnose issues with your ignition coil and ensure your vehicle's engine is running smoothly.
Calibrating the Multimeter for Accurate Readings
Calibrating the multimeter for accurate readings is a crucial step in ensuring the reliability of the test results when testing an ignition coil with a multimeter. To begin, set the multimeter to the DC voltage function, usually denoted by a "V" symbol with a straight line above or below it, and select the 20-volt range. Next, touch the multimeter leads together to create a short circuit, allowing the multimeter to auto-zero and adjust for any internal resistance. This step is essential in eliminating any potential errors that may arise from the multimeter's internal resistance. Once the multimeter has been calibrated, it is ready to take accurate readings of the ignition coil's primary and secondary circuits. It is also important to note that some multimeters may have a specific calibration procedure outlined in the user manual, so it is recommended to consult the manual if you are unsure. By calibrating the multimeter, you can ensure that the readings obtained are accurate and reliable, allowing you to diagnose any issues with the ignition coil effectively.
Step-by-Step Guide to Testing the Ignition Coil with a Multimeter
Here is the introduction paragraph: Testing the ignition coil with a multimeter is a crucial step in diagnosing engine problems. A faulty ignition coil can cause a range of issues, from misfires and poor engine performance to complete engine failure. To accurately diagnose and repair ignition coil problems, it's essential to follow a step-by-step guide. This article will walk you through the process of testing the ignition coil with a multimeter, covering three key areas: measuring the primary resistance of the ignition coil, testing the secondary resistance and voltage of the ignition coil, and interpreting the multimeter readings for accurate diagnosis. By following these steps, you'll be able to identify and fix ignition coil problems quickly and efficiently. So, let's start by measuring the primary resistance of the ignition coil.
Measuring the Primary Resistance of the Ignition Coil
Measuring the primary resistance of the ignition coil is a crucial step in determining its overall health and functionality. To do this, you'll need to set your multimeter to the ohms function (usually denoted by the omega symbol) and ensure it's set to the lowest range possible. Next, locate the primary terminals on the ignition coil, which are usually marked as the positive (+) and negative (-) terminals. Connect the multimeter leads to these terminals, making sure not to touch any other metal parts or wires. Take note of the reading on the multimeter display, which should be in ohms. A typical primary resistance reading for most ignition coils ranges from 0.5 to 2.5 ohms. If the reading is significantly higher or lower than this range, it may indicate a problem with the ignition coil. It's essential to consult your vehicle's repair manual or the manufacturer's specifications for the correct primary resistance value for your specific ignition coil. By measuring the primary resistance, you can determine if the ignition coil is functioning correctly and identify any potential issues that may be affecting your vehicle's performance.
Testing the Secondary Resistance and Voltage of the Ignition Coil
When testing the secondary resistance and voltage of the ignition coil, it's essential to follow a systematic approach to ensure accurate results. Begin by setting your multimeter to the ohms function (Ω) and measuring the secondary resistance between the spark plug wire terminal and the ignition coil's secondary terminal. The reading should be within the manufacturer's specified range, typically between 5,000 to 10,000 ohms. If the reading is significantly higher or lower, it may indicate a faulty ignition coil. Next, switch your multimeter to the DC voltage function (V) and measure the voltage at the spark plug wire terminal while the engine is cranking. A healthy ignition coil should produce a voltage reading between 5,000 to 30,000 volts, depending on the vehicle's ignition system. If the voltage reading is lower than expected, it may indicate a weak ignition coil or a problem with the ignition system. Additionally, you can use a spark tester to visually inspect the spark and determine if it's weak or intermittent. By testing the secondary resistance and voltage of the ignition coil, you can gain valuable insights into the coil's performance and identify potential issues that may be affecting your vehicle's engine performance.
Interpreting the Multimeter Readings for Accurate Diagnosis
When interpreting the multimeter readings for accurate diagnosis, it's essential to understand the expected values and the implications of the readings. For a standard ignition coil, the primary resistance should be between 0.5 and 2.5 ohms, while the secondary resistance should be between 5,000 and 15,000 ohms. If the primary resistance is higher than expected, it may indicate a faulty ignition coil or a problem with the wiring. On the other hand, if the primary resistance is lower than expected, it could indicate a short circuit. The secondary resistance reading can help identify issues with the spark plug wire or the ignition coil itself. If the reading is higher than expected, it may indicate a faulty spark plug wire or a problem with the ignition coil's secondary winding. Conversely, a lower-than-expected reading could indicate a short circuit in the secondary winding. Additionally, the multimeter readings can also help identify issues with the ignition coil's voltage output. A reading of 10-15 volts on the primary side and 5,000-15,000 volts on the secondary side indicates a healthy ignition coil. However, if the voltage output is lower than expected, it may indicate a faulty ignition coil or a problem with the ignition system. By carefully interpreting the multimeter readings, you can accurately diagnose issues with the ignition coil and make the necessary repairs to get your vehicle running smoothly.