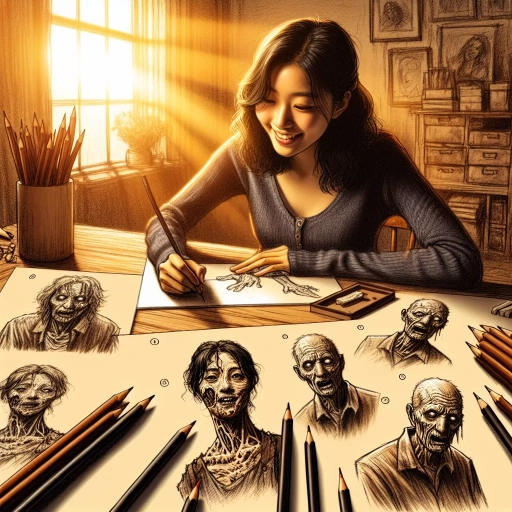
How To Draw A Zombie
Drawing a zombie can be a fun and creative activity, but it requires some skill and attention to detail. To create a realistic and terrifying zombie, you'll need to understand the basics of drawing a zombie, including its facial features and body proportions. You'll also need to add details and texture to your zombie drawing, such as wounds, scars, and decaying flesh. Additionally, you'll want to create realistic clothing and accessories for your zombie, and add shading and texture to bring it to life. In this article, we'll take you through the process of drawing a zombie, starting with the basics. We'll cover the key elements of a zombie's facial features and body, and provide tips on how to add details and texture to create a realistic and terrifying zombie. So, let's get started by understanding the basics of drawing a zombie.
Understanding the Basics of Drawing a Zombie
Drawing a zombie can be a fun and creative activity, but it requires some understanding of the basics. To create a believable and terrifying zombie, you need to familiarize yourself with its anatomy, choose the right drawing tools and materials, and set the mood and atmosphere for your drawing. In this article, we will explore these three essential aspects of drawing a zombie. We will start by examining the anatomy of a zombie, including its skeletal structure, muscles, and skin. This will help you understand how to draw a zombie's body and facial features in a realistic and detailed way. By the end of this article, you will have a solid foundation in drawing a zombie and be able to create your own terrifying creations. So, let's start by familiarizing ourselves with zombie anatomy.
Familiarizing Yourself with Zombie Anatomy
Familiarizing yourself with zombie anatomy is crucial in creating a believable and terrifying undead creature. Start by studying the human body, focusing on the skeletal and muscular systems. Understand how the bones and muscles work together to create movement and structure. Then, imagine how these systems would be affected by decay and decomposition. Consider how the skin would sag, the muscles would atrophy, and the bones would become exposed. Think about how the zombie's body would change as it decomposes, such as the eyes sinking into the skull, the skin turning gray and decaying, and the limbs becoming stiff and rigid. Additionally, consider the zombie's posture and movement, taking into account the loss of coordination and balance. By understanding the underlying anatomy of a zombie, you can create a more realistic and frightening creature. You can also experiment with different levels of decay and decomposition to create a unique and terrifying zombie. For example, you could draw a freshly turned zombie with minimal decay, or a zombie that has been dead for weeks with advanced decomposition. By familiarizing yourself with zombie anatomy, you can create a wide range of terrifying and believable undead creatures.
Choosing the Right Drawing Tools and Materials
Choosing the right drawing tools and materials is crucial for creating a realistic and terrifying zombie drawing. To start, you'll need a pencil with a range of hardness levels, such as a 2B, 4B, and 6B, to achieve varying shades and textures. A sharpener is also essential to keep your pencils sharp and ready to use. For added depth and dimension, consider using a range of markers or colored pencils, such as Copic or Prismacolor, which offer a wide range of colors and blending capabilities. A sketchbook or drawing paper with a smooth finish is also necessary to prevent your pencils and markers from scratching or bleeding. Additionally, a blending stump or tortillon can be used to smooth out rough edges and create subtle transitions between shades. An eraser, such as a kneaded eraser or white vinegar eraser, is also necessary to correct mistakes and remove unwanted lines. Finally, a reference image or still life setup can be helpful in achieving accurate proportions and details in your zombie drawing. By investing in the right tools and materials, you'll be well on your way to creating a zombie drawing that's sure to send chills down the spines of your friends and family.
Setting the Mood and Atmosphere for Your Zombie Drawing
Setting the mood and atmosphere for your zombie drawing is crucial in creating a believable and captivating piece of art. To achieve this, consider the environment and setting in which your zombie will be placed. A dark and ominous background can instantly convey a sense of foreboding and dread, while a desolate and barren landscape can evoke a feeling of isolation and desperation. Think about the lighting in your scene, as it can greatly impact the overall mood. Harsh shadows and dim lighting can create a sense of tension and fear, while a full moon or flickering candles can add an eerie and supernatural ambiance. Additionally, consider the colors you use, as they can greatly influence the mood and atmosphere of your drawing. Cool colors such as blues and purples can create a sense of coldness and detachment, while warm colors like oranges and reds can evoke a sense of chaos and panic. By carefully selecting the environment, lighting, and colors, you can effectively set the mood and atmosphere for your zombie drawing, drawing the viewer into a world of horror and suspense.
Sketching the Zombie's Facial Features and Body
Sketching a zombie's facial features and body requires attention to detail and a clear understanding of the characteristics that define these undead creatures. To create a believable and terrifying zombie, it's essential to focus on the eyes, eyebrows, and eyelids, which are often the most expressive and haunting features of a zombie's face. Additionally, the nose, mouth, and jawline play a crucial role in conveying the zombie's emotions and overall appearance. Furthermore, the body proportions and posture of a zombie can greatly impact its overall aesthetic and movement. By mastering these key elements, artists can bring their zombie creations to life and create a truly unsettling and engaging piece of art. In this article, we will explore the techniques and tips for sketching a zombie's facial features and body, starting with the eyes, eyebrows, and eyelids, which are the foundation of a zombie's haunting gaze.
Drawing the Eyes, Eyebrows, and Eyelids of a Zombie
Drawing the eyes, eyebrows, and eyelids of a zombie is a crucial step in creating a believable and terrifying undead creature. To start, draw the eyes as sunken and empty sockets, with the eyeballs themselves appearing to be shriveled and dry. The irises should be a dull, milky white, with the pupils barely visible. The eyelids should be thin and papery, with a subtle sag to them, giving the impression that they're barely holding on to the eyeballs. The eyebrows should be sparse and unkempt, with a few stray hairs sticking out in every direction. To add some extra depth and dimension to the eyes, you can draw a few wrinkles and creases around the sockets, as well as some dark shading to give the impression of deep-set eyes. When drawing the eyelids, be sure to capture the subtle sag and droop of the skin, which will help to create a sense of decay and rot. By paying close attention to these details, you can create a zombie with eyes that are truly unsettling and terrifying. Additionally, you can also add some bloodshot veins, dark circles, and a few scratches or wounds around the eyes to make it look more realistic and gruesome.
Sketching the Nose, Mouth, and Jawline of a Zombie
When sketching the nose, mouth, and jawline of a zombie, it's essential to consider the level of decay and damage you want to depict. A zombie's nose can be drawn as a slightly sunken or collapsed feature, with the nostrils flared and the bridge of the nose broken or cracked. The mouth can be a key feature in conveying the zombie's gruesome state, with lips that are torn, stretched, or hanging loose. You can also add some gruesome details like exposed teeth, gums, or a tongue that's hanging out. The jawline can be drawn as a prominent feature, with the jawbone exposed or the skin hanging loose from the bone. To add some texture and depth to your zombie's face, you can also include some wrinkles, scars, or lesions around the nose, mouth, and jawline. When drawing these features, remember to keep your lines loose and expressive, and don't be afraid to experiment with different shapes and textures to create a truly terrifying zombie visage.
Creating the Zombie's Body Proportions and Posture
When creating the zombie's body proportions and posture, it's essential to consider the character's overall appearance and the story you want to tell. A zombie's body is often depicted as decaying, with a mix of human and monstrous features. To achieve this, you can start by sketching the overall shape of the body, using simple shapes such as cylinders and rectangles to help you get the proportions right. The zombie's body should be slightly hunched over, with a curved spine and a prominent ribcage. The arms and legs should be long and spindly, with a mix of human and skeletal features. The hands and feet should be claw-like, with long fingers and toes that are perfect for grasping and tearing flesh. When it comes to the posture, consider the zombie's movement and behavior. A zombie that is shambling or lurching forward should have a more hunched and uneven posture, while a zombie that is standing upright should have a more rigid and menacing stance. You can also add some subtle details such as a twisted neck or a crooked shoulder to give your zombie a more unsettling appearance. By paying attention to the body proportions and posture, you can create a zombie that is both terrifying and believable, and that will add depth and realism to your artwork.
Adding Details and Texture to Your Zombie Drawing
Adding Wounds, Scars, and Decaying Flesh to Your Zombie
Creating Realistic Clothing and Accessories for Your Zombie
Adding Shading and Texture to Bring Your Zombie to Life
Adding details and texture to your zombie drawing can make it go from a simple sketch to a terrifying and realistic piece of art. To take your zombie drawing to the next level, consider adding wounds, scars, and decaying flesh to give it a gruesome and eerie appearance. You can also focus on creating realistic clothing and accessories, such as tattered and worn-out clothes, to add depth and character to your zombie. Finally, adding shading and texture can bring your zombie to life, making it look like it's about to jump off the page. By incorporating these details, you can create a zombie drawing that's sure to send chills down the spines of anyone who sees it. In this article, we'll explore how to add wounds, scars, and decaying flesh to your zombie, create realistic clothing and accessories, and add shading and texture to bring your zombie to life. Adding Wounds, Scars, and Decaying Flesh to Your Zombie Creating Realistic Clothing and Accessories for Your Zombie Adding Shading and Texture to Bring Your Zombie to Life.
Adding Wounds, Scars, and Decaying Flesh to Your Zombie
Creating Realistic Clothing and Accessories for Your Zombie
Adding Shading and Texture to Bring Your Zombie to Life
Adding Wounds, Scars, and Decaying Flesh to Your Zombie To create a truly terrifying zombie, you'll want to add some gruesome details such as wounds, scars, and decaying flesh. Start by adding some torn and tattered skin, exposing the underlying muscle and bone. You can use a combination of hatching and cross-hatching techniques to create a sense of depth and texture. Next, add some wounds and scars, using a range of lines and shapes to create a sense of irregularity and chaos. Consider adding some exposed organs or bones to really drive home the zombie's undead state. Finally, use a range of shading techniques to create a sense of decay and rot, adding some dark shadows and highlights to give your zombie a truly gruesome appearance. Creating Realistic Clothing and Accessories for Your Zombie When it comes to dressing your zombie, you'll want to create a sense of tattered and worn clothing that's been ravaged by the undead state. Start by adding some torn and frayed edges to your zombie's clothing, using a range of lines and shapes to create a sense of irregularity. Consider adding some bloodstains or other signs of decay to really drive home the zombie's undead state. Next, add some accessories such as a tattered hat or a broken necklace, using a range of textures and shading techniques to create a sense of depth and realism. Finally, use a range of shading techniques to create a sense of wear and tear, adding some dark shadows and highlights to give your zombie's clothing a truly worn and tattered appearance. Adding Shading and Texture to Bring Your Zombie to Life To really bring your zombie to life, you'll want to add some shading and texture to create a sense of depth and realism. Start by adding some basic shading, using a range of lines and shapes to create a sense of volume and form. Next, add some texture, using a range of techniques such as hatching and cross-hatching to create a sense of roughness and irregularity. Consider adding some highlights and shadows to really drive home the zombie's undead state, using a range of shading techniques to create a sense of depth and dimension. Finally, use a range of texture and shading techniques to create a sense of decay and rot, adding some dark shadows and highlights to give your zombie a truly gruesome appearance.
Adding Wounds, Scars, and Decaying Flesh to Your Zombie
Adding wounds, scars, and decaying flesh to your zombie can elevate its terrifying appearance and make it more believable. To create realistic wounds, start by adding deep gashes and lacerations to your zombie's skin, using a combination of curved and straight lines to convey a sense of violence and trauma. You can also add scars, which can be depicted as raised, bumpy, or smooth, depending on the type of wound and the zombie's age. Decaying flesh can be added by drawing sagging skin, exposed bones, and oozing sores, which can be achieved by using soft, rounded lines and subtle shading. To take your zombie's appearance to the next level, consider adding maggots, flies, or other insects that are attracted to decaying flesh, which can be drawn using small, delicate lines and subtle texture. By incorporating these details, you can create a zombie that looks like it's been ravaged by time and the elements, making it a truly terrifying creature.
Creating Realistic Clothing and Accessories for Your Zombie
Creating realistic clothing and accessories for your zombie can add an extra layer of depth and authenticity to your drawing. To start, consider the type of clothing your zombie would wear based on its backstory and environment. For example, a zombie that was once a office worker might wear a suit and tie, while a zombie that was once a construction worker might wear a hard hat and overalls. Next, think about how the clothing would be affected by the zombie's decay and the environment it's in. For instance, the clothing might be tattered, stained, and covered in dirt and debris. You can also add accessories such as jewelry, glasses, or a watch to give your zombie a more personalized look. To draw the clothing and accessories, use a range of lines and textures to create a sense of depth and dimension. For example, you can use hatching and cross-hatching to create a sense of fabric texture, and use thicker lines to define the edges of the clothing. Don't forget to add some tears, rips, and frays to the clothing to give it a more realistic and worn look. By adding these details, you can create a more believable and engaging zombie character that will draw the viewer in.