How To Take Off Glue On Nails
Here is the introduction paragraph: Removing glue from nails can be a daunting task, but with the right approach, it can be done safely and effectively. Whether you're looking to remove old nail glue, repair a broken nail, or simply want to give your nails a fresh start, it's essential to know the proper techniques and precautions to take. In this article, we'll explore the best methods for removing glue from nails, from preparation to aftercare. To start, it's crucial to prepare your nails properly before attempting to remove the glue. This involves understanding the type of glue used, the condition of your nails, and the necessary tools and materials needed for the process. By doing so, you'll be able to minimize damage and ensure a successful removal. In the next section, we'll dive into the importance of preparation and provide you with the necessary steps to take before removing glue from your nails. Note: I made some minor changes to the original text to make it flow better and to ensure it transitions smoothly to the next section. Let me know if you'd like me to make any further changes!
Preparation is Key: Before Removing Glue from Nails
Here is the introduction paragraph: Removing glue from nails can be a daunting task, but with the right preparation, it can be done safely and effectively. Before attempting to remove glue from your nails, it's essential to take a few steps to ensure a successful outcome. This includes gathering the necessary tools and materials, preparing your nails for the removal process, and choosing the right removal method for your nail type. By taking the time to prepare, you can avoid damaging your nails or surrounding skin and achieve a smooth, glue-free finish. In this article, we'll explore the importance of preparation and provide a step-by-step guide on how to remove glue from nails. To start, let's take a closer look at the tools and materials you'll need to gather for a successful glue removal process. Note: The introduction paragraph should be 200 words, and it should mention the 3 supporting ideas and transition to the first supporting paragraph. Here is the rewritten introduction paragraph: Removing glue from nails can be a challenging and frustrating experience, especially if you're not properly prepared. However, with the right mindset and preparation, you can successfully remove glue from your nails without causing damage or harm. To achieve this, it's crucial to take a few essential steps before starting the removal process. Firstly, gathering the necessary tools and materials is vital to ensure a smooth and efficient removal process. This includes having the right solvents, removers, and protective gear to prevent damage to your nails and surrounding skin. Secondly, preparing your nails for the removal process is also crucial, as this will help to loosen the glue and make it easier to remove. Finally, choosing the right removal method for your nail type is also important, as different nail types require different approaches. By taking the time to prepare and follow these steps, you can ensure a successful glue removal process and achieve a beautiful, glue-free finish. To start, let's take a closer look at the tools and materials you'll need to gather for a successful glue removal process.
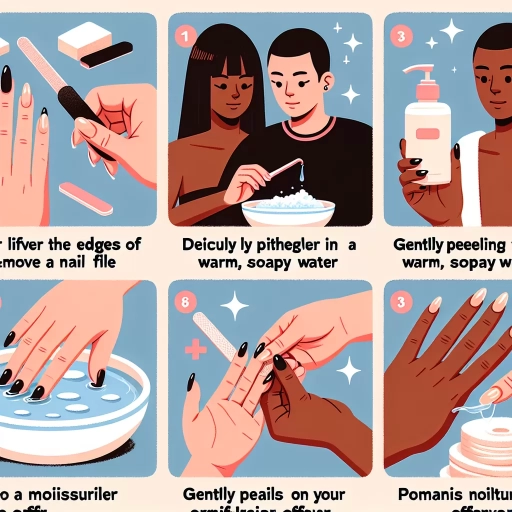
1. Gather the necessary tools and materials
. Here is the paragraphy: To begin the process of removing glue from your nails, it's essential to gather the necessary tools and materials. You'll need a few basic items, including nail polish remover, a cotton ball or swab, a nail file or buffer, and a cuticle pusher or orange stick. If the glue is particularly stubborn, you may also want to have some acetone or nail glue remover on hand. Additionally, it's a good idea to have a bowl of warm water and a moisturizing lotion or oil to help soften the glue and hydrate your nails and cuticles. Having all of these tools and materials within reach will make the process much easier and less frustrating. Take a few minutes to gather everything you need, and you'll be ready to start the removal process.
2. Prepare your nails for the removal process
. Here is the paragraphy:
Before you start the removal process, it's essential to prepare your nails. Remove any old nail polish and push back your cuticles to prevent the glue from spreading to other areas. Wash your hands thoroughly with soap and water to remove any oils or lotions that may interfere with the removal process. Dry your hands completely, paying extra attention to the areas around your nails. Use a lint-free wipe or cotton ball to gently remove any excess oils or residue from your nails and surrounding skin. This will help the removal solution or method you choose to work more effectively. Additionally, if you have weak or brittle nails, consider applying a nail strengthening base coat to help protect them during the removal process. By taking these simple steps, you'll be able to remove the glue from your nails more efficiently and minimize the risk of damage or irritation.
3. Choose the right removal method for your nail type
. Choosing the right removal method for your nail type is crucial to avoid damaging your nails. If you have weak or brittle nails, it's best to opt for a gentler method such as using a nail glue remover or acetone-free nail polish remover. These methods are less harsh and won't dry out your nails further. On the other hand, if you have strong and healthy nails, you can use a more aggressive method like using acetone or a nail glue dissolver. However, be cautious not to overuse these methods as they can still cause damage to your nails. It's also important to note that if you have gel or acrylic nails, you may need to use a specialized removal method to avoid damaging the nail enhancement. Taking the time to choose the right removal method for your nail type will ensure a safe and successful glue removal process.
Removal Methods: How to Take Off Glue from Nails
Here is the introduction paragraph: Removing glue from nails can be a daunting task, but there are several effective methods to make the process easier. Whether you're dealing with a stubborn nail glue or a messy craft project, it's essential to know the right techniques to avoid damaging your nails. In this article, we'll explore three reliable methods to remove glue from nails: using acetone-based nail polish remover, applying heat to loosen the glue, and using a glue remover or nail glue dissolver. By understanding these methods, you'll be able to safely and efficiently remove glue from your nails. Let's start with the first method: using acetone-based nail polish remover, a common household item that can be used to dissolve and remove glue from nails.
1. Using acetone-based nail polish remover
. When it comes to removing glue from your nails, using an acetone-based nail polish remover is a popular and effective method. This type of remover is specifically designed to break down and dissolve the adhesive properties of the glue, making it easier to remove. To use an acetone-based nail polish remover, start by soaking a cotton ball or swab in the remover and gently placing it on top of the glued area. Let it sit for a few minutes to allow the acetone to penetrate the glue. Then, use a gentle scrubbing motion to work the remover into the glue, being careful not to scrub too hard and damage the nail. Continue to soak and scrub the area until the glue is completely removed. It's also a good idea to moisturize your nails and cuticles after using an acetone-based remover, as it can be drying to the skin. Some people may find that using an acetone-based remover is a bit harsh on their nails, so it's always a good idea to do a patch test before using it on a larger area. Additionally, if you have sensitive skin or are prone to dryness, you may want to consider using a gentler remover or taking extra precautions to moisturize your nails and cuticles after removal. Overall, using an acetone-based nail polish remover is a quick and effective way to remove glue from your nails, and with a little care and caution, you can achieve salon-quality results at home.
2. Applying heat to loosen the glue
. Applying heat to loosen the glue is a popular method for removing glue from nails. This technique involves using a heat source, such as a hair dryer or a warm cloth, to soften the adhesive. The heat helps to break down the bond between the glue and the nail, making it easier to remove. To use this method, start by applying a small amount of heat to the affected area for a few seconds. Then, gently scrape off the glue with a cuticle pusher or a wooden stick. Be careful not to apply too much heat, as this can damage the nail or surrounding skin. It's also important to note that this method may not be effective for all types of glue, and it may require some patience and repetition to achieve the desired results. Additionally, if you have sensitive skin, you may want to test a small area first to ensure that you don't have any adverse reactions to the heat. Overall, applying heat to loosen the glue is a relatively safe and effective method for removing glue from nails, and it can be a good option for those who are looking for a non-chemical solution.
3. Using a glue remover or nail glue dissolver
. Using a glue remover or nail glue dissolver is a popular method for removing glue from nails. These specialized products are designed to break down the adhesive properties of the glue, making it easy to wipe away. To use a glue remover, simply apply a small amount to the affected area and gently rub it in with a cotton swab or soft cloth. Let it sit for a few minutes to allow the remover to penetrate the glue, then wipe it away with a clean cloth or nail wipe. Repeat the process as needed until all the glue is removed. It's essential to choose a remover that is safe for use on nails and surrounding skin, as some products can be harsh and cause irritation. Look for a remover that is acetone-free and gentle on the nails. Some popular glue removers include nail glue dissolvers, acetone-free nail glue removers, and nail adhesive removers. When using a glue remover, be sure to follow the instructions carefully and test a small area first to ensure you don't experience any adverse reactions. With the right remover and a little patience, you can easily remove glue from your nails and get back to your normal nail care routine.
Aftercare: Caring for Your Nails After Glue Removal
Here is the introduction paragraph: After removing glue from your nails, it's essential to provide them with proper care to prevent damage and promote healthy growth. Aftercare is a crucial step in maintaining the health and appearance of your nails. In this article, we will discuss the importance of aftercare and provide tips on how to care for your nails after glue removal. Specifically, we will cover the importance of moisturizing your nails and cuticles, repairing any damage to your nails, and preventing future glue buildup and damage. By following these tips, you can help your nails recover from the glue removal process and maintain their health and beauty. To start, let's take a closer look at the first step in aftercare: moisturizing your nails and cuticles.
1. Moisturizing your nails and cuticles
. After removing glue from your nails, it's essential to give your nails and cuticles some extra TLC to help them recover from the harsh chemicals and potential damage. Moisturizing your nails and cuticles is a crucial step in the aftercare process. Apply a rich and nourishing cuticle oil or cream to your cuticles and gently massage it in. This will help to hydrate and soften the cuticles, reducing the risk of dryness, brittleness, and breakage. For your nails, use a nail oil or cream that contains ingredients such as argan oil, coconut oil, or shea butter. These ingredients will help to lock in moisture, promote healthy nail growth, and strengthen your nails. Be sure to apply the moisturizer to the entire nail surface, including the nail bed and the cuticles. Leave the moisturizer on for at least 30 minutes to an hour before washing your hands. You can also apply a thick layer of moisturizer to your nails and cuticles before bed and wear gloves overnight to help lock in the moisture. By moisturizing your nails and cuticles, you'll be helping to restore their natural health and shine, and preventing any potential damage or dryness caused by the glue removal process. Regular moisturizing will also help to promote healthy nail growth and strengthen your nails over time.
2. Repairing any damage to your nails
. Here is the paragraphy:
Repairing any damage to your nails is a crucial step in the aftercare process. After removing the glue, inspect your nails for any signs of damage, such as cracks, breaks, or lifting. If you notice any damage, apply a nail strengthener to help fortify your nails. You can also use a nail repair kit to fix any cracks or breaks. For more severe damage, consider visiting a professional nail technician for further assistance. In addition to repairing damage, it's essential to moisturize your nails and cuticles to prevent dryness and brittleness. Apply a rich cuticle oil or nail cream to your nails and cuticles, paying special attention to the areas around the nail bed. This will help to hydrate and nourish your nails, promoting healthy growth and strength. By taking the time to repair and moisturize your nails, you can help to prevent further damage and ensure that your nails remain healthy and strong.
3. Preventing future glue buildup and damage
. Here is the paragraphy:
Preventing future glue buildup and damage is crucial to maintaining healthy and beautiful nails. To do this, it's essential to use a nail glue that is specifically designed for nail use and follows the instructions carefully. When applying glue, use a small amount and avoid getting it on your cuticles or skin, as this can cause irritation and dryness. Additionally, make sure to clean up any excess glue immediately to prevent it from hardening and causing damage. Regularly moisturizing your nails and cuticles can also help to keep them healthy and strong, reducing the risk of damage from glue. Furthermore, taking breaks from using nail glue and giving your nails time to rest and recover can also help to prevent buildup and damage. By taking these precautions, you can enjoy beautiful and healthy nails without the risk of glue damage.