How To Left Click On Macbook
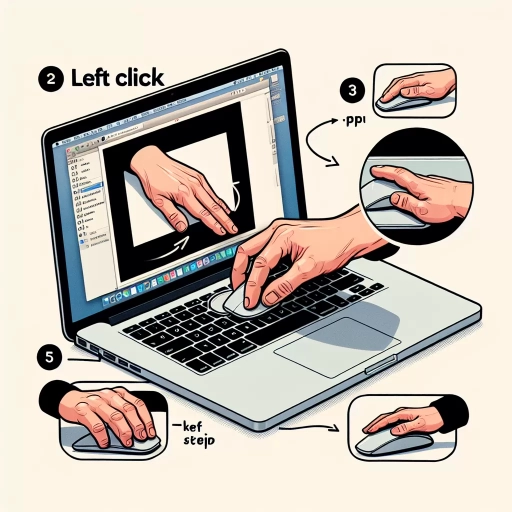
Here is the introduction paragraph: If you're new to using a MacBook, you might be wondering how to left click on the device. Unlike Windows laptops, MacBooks don't have a traditional left click button. Instead, Apple has designed the MacBook to use a variety of methods to perform a left click. In this article, we'll explore three ways to left click on a MacBook: using the trackpad, using a mouse, and using keyboard shortcuts. We'll start by looking at the most common method, which is using the trackpad. By default, the trackpad on a MacBook is set up to recognize a left click when you press down on the trackpad with one finger. This method is convenient and easy to use, but it can take some getting used to, especially if you're accustomed to using a traditional mouse. Let's take a closer look at how to use the trackpad to left click on a MacBook.
Using the Trackpad
Using the trackpad on your laptop can be a convenient and efficient way to navigate and interact with your computer. However, it can take some time to get used to, especially if you're accustomed to using a mouse. To get the most out of your trackpad, it's essential to understand how to enable and customize its features. This includes enabling tap to click, which allows you to register a click by simply tapping on the trackpad. Additionally, customizing trackpad settings can help you tailor the experience to your preferences, such as adjusting the sensitivity and gesture recognition. Finally, practicing trackpad gestures can help you master the various movements and actions that can enhance your productivity. By exploring these features and techniques, you can unlock the full potential of your trackpad and improve your overall computing experience. To start, let's take a closer look at enabling tap to click.
Enabling Tap to Click
Enabling Tap to Click is a convenient feature on MacBooks that allows users to tap the trackpad instead of physically clicking it to register a left-click. To enable this feature, go to System Preferences, then click on Trackpad. In the Point & Click tab, check the box next to "Tap to click." This will allow you to tap the trackpad with one finger to register a left-click. You can also adjust the tracking speed and scrolling direction to your liking in this menu. Additionally, you can enable "Force Click and haptic feedback" to get tactile feedback when you force click on an item. Enabling Tap to Click can take some getting used to, but it can be a huge time-saver and make navigating your MacBook much more efficient.
Customizing Trackpad Settings
Customizing Trackpad Settings. The trackpad on your MacBook is a powerful tool that can be tailored to fit your specific needs and preferences. To access the trackpad settings, go to System Preferences and click on Trackpad. Here, you can adjust the tracking speed, which controls how fast the cursor moves across the screen. You can also adjust the scrolling direction, which can be set to either natural or non-natural. Natural scrolling mimics the motion of scrolling on a touchscreen device, while non-natural scrolling is the traditional scrolling direction. Additionally, you can adjust the zoom and smart zoom settings, which allow you to zoom in and out of windows and web pages with a simple pinch gesture. You can also adjust the notification settings, which allow you to customize how notifications are displayed on your MacBook. Furthermore, you can adjust the gesture settings, which allow you to customize the gestures used to navigate and interact with your MacBook. For example, you can adjust the three-finger tap gesture to look up words in the dictionary or to show the definition of a selected word. You can also adjust the four-finger swipe gesture to switch between open apps or to show the desktop. By customizing the trackpad settings, you can make your MacBook more efficient and easier to use.
Practicing Trackpad Gestures
Practicing trackpad gestures is essential to master the navigation and interaction with your MacBook. To start, place your fingers on the trackpad and get familiar with the different gestures. Begin with the basic gestures such as tapping, pinching, and swiping. Tap with one finger to click, tap with two fingers to right-click, and tap with three fingers to look up a word or phrase. Pinch with two fingers to zoom in and out, and swipe with two fingers to scroll up and down. Practice these gestures until they become second nature. Next, move on to more advanced gestures such as three-finger swipes to switch between apps, four-finger swipes to open the Notification Center, and a three-finger tap to open the dictionary. You can also customize the trackpad gestures to your liking by going to System Preferences > Trackpad. With practice, you'll be able to navigate your MacBook with ease and efficiency, making the most out of your trackpad experience.
Using the Mouse
Using a computer mouse is an essential part of interacting with a computer. A mouse allows users to navigate through various applications, select items, and perform various actions with precision and ease. To get the most out of a mouse, it's crucial to understand how to properly use it. This includes connecting the mouse to the computer, configuring the mouse settings to suit individual preferences, and understanding the differences between using a wired and wireless mouse. In this article, we will explore the basics of using a mouse, starting with the process of connecting a USB mouse, which is a common type of mouse used by many computer users. By understanding how to connect a USB mouse, users can ensure a seamless and efficient computing experience.
Connecting a USB Mouse
Connecting a USB mouse to your MacBook is a straightforward process that requires minimal effort. To start, locate an available USB port on your MacBook. If you're using a newer MacBook model with only USB-C ports, you'll need a USB-C to USB adapter to connect your mouse. Once you've identified a suitable port, insert the USB connector of your mouse into the port. Make sure it's securely plugged in to ensure a stable connection. If your mouse requires batteries, insert them according to the manufacturer's instructions. Some mice may also require you to install drivers or software, but most modern mice are plug-and-play, meaning they'll work immediately without any additional setup. If you're using a wireless mouse, you'll need to insert the receiver into the USB port and pair the mouse with the receiver according to the manufacturer's instructions. Once connected, your MacBook should recognize the mouse and allow you to use it to navigate and interact with your computer.
Configuring Mouse Settings
Configuring mouse settings on a MacBook is a straightforward process that allows you to customize your mouse experience to suit your preferences. To access the mouse settings, click on the Apple menu and select "System Preferences," then click on "Mouse." From here, you can adjust the tracking speed, which controls how fast the cursor moves across the screen. You can also adjust the double-click speed, which determines how quickly you need to click the mouse button to register a double click. Additionally, you can configure the scroll direction, which can be set to either "natural" or "un-natural" scrolling. If you're using a Magic Mouse or Magic Trackpad, you can also configure the gestures, such as tapping, pinching, and swiping, to perform different actions. Furthermore, you can also set up the mouse to ignore accidental trackpad input, which can be useful if you're prone to accidentally tapping the trackpad while typing. By configuring these settings, you can optimize your mouse experience and improve your productivity on your MacBook.
Using a Bluetooth Mouse
Using a Bluetooth mouse is a convenient and efficient way to navigate your MacBook. To start, make sure your Bluetooth mouse is turned on and in pairing mode. Then, go to your MacBook's System Preferences, click on Bluetooth, and select the mouse from the list of available devices. Once paired, you can use your Bluetooth mouse to left-click on your MacBook. Simply move the mouse cursor to the desired location and press the left button to select or activate an item. You can also use the Bluetooth mouse to right-click by pressing the right button, or to scroll through documents and web pages by using the scroll wheel. Additionally, many Bluetooth mice offer customizable buttons and gestures, allowing you to personalize your navigation experience. For example, you can set up a button to open a frequently used application or to switch between open windows. Overall, using a Bluetooth mouse can enhance your productivity and provide a more comfortable computing experience.
Using Keyboard Shortcuts
Using keyboard shortcuts can significantly improve your productivity and efficiency when working on a computer. By learning and utilizing these shortcuts, you can perform tasks quickly and easily, saving you time and effort. In this article, we will explore three ways to use keyboard shortcuts to enhance your computing experience. Firstly, we will discuss how to use the space bar to click, which can be a game-changer for those who struggle with mouse navigation. Additionally, we will cover how to enable mouse keys, which allows you to control the mouse cursor using the keyboard. Finally, we will delve into customizing keyboard shortcuts, which enables you to personalize your shortcuts to suit your needs. By mastering these techniques, you can take your computing skills to the next level. Let's start by exploring how to use the space bar to click, a simple yet powerful shortcut that can revolutionize the way you interact with your computer.
Using the Space Bar to Click
Using the Space Bar to Click is a useful technique for Mac users who want to left-click on their MacBook without using the trackpad or mouse. To use this method, simply place the cursor over the item you want to click, and then press the Space Bar on your keyboard. This will simulate a left-click, allowing you to select or activate the item. This technique is especially useful for users who prefer to use keyboard shortcuts or have difficulty using the trackpad or mouse. Additionally, using the Space Bar to Click can be a more efficient way to navigate and interact with your MacBook, as it eliminates the need to move your hand away from the keyboard. By incorporating this technique into your workflow, you can streamline your productivity and get more done in less time.
Enabling Mouse Keys
Enabling Mouse Keys on a MacBook allows users to control the cursor using the keyboard, which can be particularly helpful for those who have difficulty using a traditional mouse or trackpad. To enable Mouse Keys, navigate to System Preferences, then select Accessibility, and click on Mouse & Trackpad. From there, check the box next to "Enable Mouse Keys" and choose a modifier key to use as the Mouse Key switch. This will allow you to use the numeric keypad to move the cursor and perform mouse actions, such as clicking and dragging. For example, pressing the "5" key will simulate a left click, while pressing the "0" key will simulate a right click. Additionally, you can use the "+" and "-" keys to zoom in and out, and the "/" key to simulate a mouse scroll. By enabling Mouse Keys, users can experience greater flexibility and control when interacting with their MacBook, making it easier to navigate and complete tasks.
Customizing Keyboard Shortcuts
Customizing keyboard shortcuts can significantly enhance your productivity and efficiency when using your MacBook. By tailoring shortcuts to your specific needs and preferences, you can streamline your workflow and reduce the time spent on repetitive tasks. To customize keyboard shortcuts on a MacBook, go to System Preferences and select the Keyboard option. From there, click on the Shortcuts tab, where you can view and modify existing shortcuts or create new ones. You can also import and export custom shortcut sets, making it easy to share your configurations with others or transfer them to a new device. Additionally, some applications, such as Adobe Creative Cloud, allow you to customize keyboard shortcuts within the app itself, providing even more flexibility and control. By taking the time to customize your keyboard shortcuts, you can work more efficiently, reduce eye strain from constantly switching between your keyboard and mouse, and focus on the tasks that matter most.