How To Screen Record On Chromebook With Audio
Screen recording on a Chromebook can be a valuable tool for creating tutorials, presentations, and other multimedia content. However, many users are unsure about how to record their screen with audio on their Chromebook. Fortunately, there are several methods to achieve this, including using the built-in screen recording tool, utilizing third-party screen recording extensions, and exploring alternative methods. In this article, we will delve into these three approaches, starting with the most straightforward method: using the built-in screen recording tool. This feature, introduced in Chrome OS 89, allows users to record their screen with audio without the need for any additional software or extensions. By the end of this article, you will be equipped with the knowledge to screen record on your Chromebook with audio, regardless of your preferred method. So, let's begin by exploring the built-in screen recording tool and how to use it to capture high-quality screen recordings with audio.
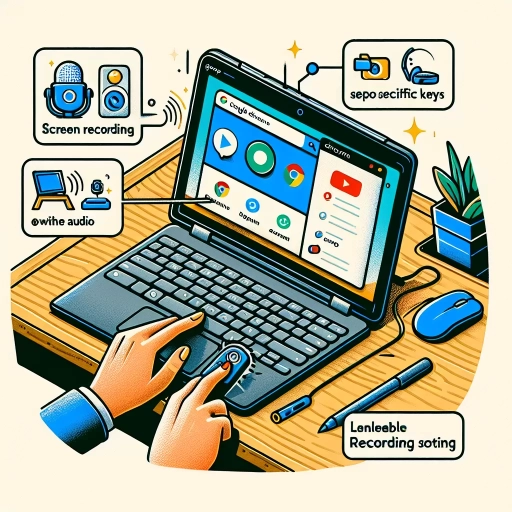
Using Built-in Screen Recording Tool
Chrome OS offers a built-in screen recording tool that allows users to capture their screen activity with ease. This feature is particularly useful for creating tutorials, recording gameplay, or capturing errors for troubleshooting purposes. To access this feature, users can enable screen recording in the Chrome OS settings, access the screen recording tool through the quick settings panel, or configure the screen recording settings for audio capture. By following these simple steps, users can start recording their screen activity in no time. In this article, we will explore how to enable screen recording in Chrome OS settings, providing users with a comprehensive guide on how to get started with this useful feature.
Enabling Screen Recording in Chrome OS Settings
To enable screen recording in Chrome OS settings, navigate to the Settings app on your Chromebook. You can do this by clicking on the time in the bottom right corner of the screen and selecting the gear icon. Once in the Settings app, scroll down to the "Advanced" section and click on "Accessibility." From there, select "Manage accessibility features" and toggle the switch next to "Screen reader" to the "On" position. This will enable the screen recording feature. Alternatively, you can also enable screen recording by pressing the keyboard shortcut Ctrl + Shift + Overview button (or Ctrl + Shift + F5). This will open the screen recording tool, allowing you to start recording your screen with audio. Note that you may need to grant permission for the screen recording tool to access your microphone in order to record audio. By enabling screen recording in Chrome OS settings, you can easily capture your screen and audio, making it a useful feature for creating tutorials, presentations, and more.
Accessing the Screen Recording Tool through the Quick Settings Panel
To access the screen recording tool through the Quick Settings panel on your Chromebook, start by clicking on the time in the bottom right corner of the screen. This will open the Quick Settings panel, which provides easy access to various settings and features. From here, click on the "Screen record" option, which is represented by a small video camera icon. If you don't see this option, you may need to click on the "More" or "Advanced" option to expand the panel. Once you've selected the screen record option, you'll be prompted to choose whether you want to record the entire screen, a partial screen, or a window. You can also choose to record audio from your microphone or not. After making your selections, click on the "Start" button to begin recording. The screen recording tool will then start capturing your screen activity, and you can stop the recording at any time by clicking on the "Stop" button. The recorded video will be saved to your Chromebook's Files app, where you can view, edit, and share it as needed.
Configuring Screen Recording Settings for Audio Capture
When it comes to configuring screen recording settings for audio capture on a Chromebook, there are a few key options to consider. First, you'll want to ensure that the audio source is set to "Internal Audio" or "System Audio" to capture the audio from your Chromebook's speakers or internal microphone. This will allow you to record audio from videos, podcasts, or other multimedia content playing on your device. Additionally, you can also choose to record audio from an external microphone, such as a USB microphone, by selecting it as the audio source. If you're looking to record audio from a specific application or window, you can also select the "Application Audio" or "Window Audio" option, which will allow you to capture audio from a specific app or window. Furthermore, you can also adjust the audio quality settings, such as the bitrate and sample rate, to balance between audio quality and file size. It's also worth noting that some screen recording tools may have additional audio settings, such as noise reduction or echo cancellation, which can help improve the overall audio quality of your recording. By configuring these audio settings, you can ensure that your screen recordings capture high-quality audio that complements your video footage.
Utilizing Third-Party Screen Recording Extensions
When it comes to creating high-quality video content, screen recording is an essential tool for many professionals and individuals alike. Utilizing third-party screen recording extensions can significantly enhance the quality and functionality of your recordings. To get started, you'll need to install a reliable screen recording extension from a trusted source, such as the Chrome Web Store. Once installed, you'll need to configure the extension's settings to ensure optimal audio recording and video quality. Finally, with the extension properly set up, you can begin using it to record your screen with high-quality audio. In this article, we'll explore each of these steps in detail, starting with the process of installing a screen recording extension from the Chrome Web Store.
Installing a Screen Recording Extension from the Chrome Web Store
To install a screen recording extension from the Chrome Web Store, start by opening the Chrome browser on your Chromebook. In the address bar, type "chrome://extensions/" and press Enter to access the Extensions page. Alternatively, you can click on the three vertical dots in the upper right corner of the browser window and select "More tools" followed by "Extensions." Once you're on the Extensions page, click on the "Chrome Web Store" button at the top left corner. In the search bar, type "screen recording" or "screen capture" and press Enter to find relevant extensions. Browse through the search results and select an extension that suits your needs, such as Loom, Screencastify, or Nimbus Screenshot. Click on the "Add to Chrome" button to install the extension. A pop-up window will appear asking for permission to access your Chromebook's microphone and camera. Click "Add extension" to grant the necessary permissions. The extension will be installed and added to your Chrome browser. You can now access the extension by clicking on its icon in the upper right corner of the browser window. Follow the extension's instructions to start recording your screen with audio.
Configuring Extension Settings for Audio Recording and Quality
When it comes to configuring extension settings for audio recording and quality, there are several options to consider. First, you'll want to select the audio input source, which can be either the internal microphone, an external microphone, or a system audio source. Some extensions, such as Screencastify, also offer the option to record audio from a specific tab or window, which can be useful for recording online meetings or tutorials. Additionally, you can adjust the audio quality settings, such as the bitrate and sample rate, to balance file size and audio fidelity. For example, a higher bitrate will result in a larger file size, but will also provide better audio quality. You can also choose to record audio in stereo or mono, depending on your needs. Furthermore, some extensions, such as Loom, offer advanced audio settings, such as noise reduction and echo cancellation, which can help to improve the overall audio quality. It's also worth noting that some extensions may have specific requirements or recommendations for audio settings, so be sure to check the extension's documentation for more information. By configuring your extension settings for audio recording and quality, you can ensure that your screen recordings sound professional and clear.
Using the Extension to Record the Screen with Audio
To record the screen with audio using the extension, follow these steps: First, open the Chrome browser and navigate to the Chrome Web Store. Search for a screen recording extension that supports audio recording, such as Loom, Screencastify, or Nimbus Screenshot. Click on the "Add to Chrome" button to install the extension. Once installed, click on the extension's icon in the top right corner of the browser and select "Record screen" or a similar option. Choose the type of recording you want to make, such as a full screen, window, or tab recording. Select the audio input, such as your computer's microphone or an external microphone. You can also choose to record system audio, which will capture any sounds coming from your computer. Click on the "Start recording" button to begin the recording process. The extension will start recording your screen and audio, and you can stop the recording at any time by clicking on the "Stop recording" button. Once you've finished recording, you can edit the video, add annotations, and share it with others. Some extensions also offer additional features, such as the ability to record webcam video, add captions, or trim the video. By using a screen recording extension with audio, you can create high-quality video tutorials, presentations, and demonstrations that include both visual and audio elements.
Alternative Methods for Screen Recording with Audio
When it comes to screen recording with audio, many users rely on built-in software or default recording tools. However, these methods may not always provide the desired quality or flexibility. Fortunately, there are alternative methods that can help you achieve high-quality screen recordings with audio. One approach is to use an external screen recording software with a USB connection, which can provide more advanced features and better sound quality. Another option is to record the screen with audio using a mobile app, which can be convenient for on-the-go recording. Additionally, utilizing a cloud-based screen recording service with audio support can also be a viable solution. In this article, we will explore these alternative methods in more detail, starting with the use of an external screen recording software with a USB connection.
Using an External Screen Recording Software with a USB Connection
Using an external screen recording software with a USB connection is a viable alternative for Chromebook users who want to record their screen with audio. This method involves connecting an external device, such as a USB capture card or a dedicated screen recording device, to the Chromebook via a USB port. The external device then captures the screen and audio signals, allowing users to record high-quality video and audio. One popular option is the Elgato HD60, a USB capture card that can record up to 1080p at 60fps. Another option is the AVerMedia Extremecap U3, a USB 3.0 capture card that can record up to 4K at 30fps. These devices are plug-and-play, meaning they don't require any additional software installation on the Chromebook. Instead, users can install the software on their computer or mobile device, and then connect the external device to the Chromebook via USB. This method offers several advantages, including high-quality video and audio, low latency, and the ability to record for extended periods of time. Additionally, external screen recording software often provides advanced features such as video editing, annotation, and sharing options, making it a great option for users who want to create professional-looking screen recordings. Overall, using an external screen recording software with a USB connection is a reliable and high-quality solution for Chromebook users who want to record their screen with audio.
Recording the Screen with Audio using a Mobile App
Screen recording with audio using a mobile app is a convenient and accessible way to capture your screen activity, especially when you're on-the-go. There are numerous mobile apps available for both Android and iOS devices that allow you to record your screen with audio, making it easy to create tutorials, demos, and presentations. One of the most popular mobile screen recording apps is AZ Screen Recorder, which offers a range of features such as video editing, screen drawing, and audio recording. Another popular option is DU Recorder, which allows you to record your screen in high definition and add audio commentary. To record your screen with audio using a mobile app, simply download and install the app, grant the necessary permissions, and start recording. You can then edit and share your recording as needed. Mobile screen recording apps are a great alternative to traditional screen recording software, offering a more portable and flexible solution for capturing your screen activity with audio.
Utilizing a Cloud-Based Screen Recording Service with Audio Support
Utilizing a cloud-based screen recording service with audio support is a convenient and efficient way to capture and share screen recordings with audio on a Chromebook. These services allow users to record their screen and audio simultaneously, without the need for additional software or equipment. One popular cloud-based screen recording service is Loom, which offers a user-friendly interface and high-quality video and audio recording capabilities. To use Loom, simply sign up for an account, install the Chrome extension, and click the record button to start capturing your screen and audio. The recording will be automatically uploaded to your Loom account, where you can edit, share, and download it as needed. Another benefit of using a cloud-based screen recording service is that it eliminates the need for local storage, making it ideal for Chromebooks with limited storage capacity. Additionally, many cloud-based screen recording services offer collaboration features, such as real-time commenting and @mentions, making it easy to work with others on projects. Overall, utilizing a cloud-based screen recording service with audio support is a great alternative to traditional screen recording methods, offering a convenient, efficient, and collaborative way to capture and share screen recordings with audio on a Chromebook.