How To Install Vapor Barrier
Installing a vapor barrier is a crucial step in maintaining a healthy and energy-efficient home. A vapor barrier is a material that prevents moisture from entering a building, reducing the risk of mold, mildew, and structural damage. To ensure a successful installation, it's essential to understand the process involved. In this article, we'll guide you through the preparation, step-by-step installation, and post-installation checks to ensure a successful vapor barrier installation. First, we'll cover the preparation phase, where we'll discuss the necessary materials, tools, and site conditions required for a smooth installation. By understanding these critical factors, you'll be well-equipped to tackle the installation process with confidence. Preparation for Vapor Barrier Installation is the first step towards a successful installation, and we'll dive into the details in the next section.
Preparation for Vapor Barrier Installation
Proper preparation is key to a successful vapor barrier installation. A vapor barrier is a critical component in preventing moisture damage and ensuring a healthy indoor environment. To ensure a successful installation, it is essential to assess the site and climate, choose the right vapor barrier material, and prepare the subfloor and walls. Assessing the site and climate involves evaluating the local weather patterns, soil conditions, and building design to determine the most effective vapor barrier solution. Choosing the right vapor barrier material requires considering factors such as durability, permeability, and compatibility with other building materials. Preparing the subfloor and walls involves cleaning, leveling, and repairing any damage to ensure a smooth and even surface for the vapor barrier. By carefully considering these factors, homeowners and builders can ensure a successful vapor barrier installation that provides long-term protection against moisture damage. Assessing the site and climate is the first step in this process, and it is crucial to get it right to ensure a successful installation.
Assessing the Site and Climate
Assessing the site and climate is a crucial step in preparing for vapor barrier installation. The site assessment involves evaluating the terrain, soil conditions, and existing structures to determine the best approach for installing the vapor barrier. This includes identifying any potential obstacles, such as rocks, trees, or slopes, that could affect the installation process. Additionally, the climate of the area must be taken into account, as it can impact the performance and durability of the vapor barrier. In areas with high humidity or extreme temperatures, a more robust vapor barrier may be required to ensure effective moisture control. The site assessment also involves evaluating the drainage patterns and water table levels to ensure that the vapor barrier is installed in a way that prevents water accumulation and damage. Furthermore, the assessment should include an evaluation of the soil's pH levels and nutrient content, as these factors can affect the vapor barrier's performance and longevity. By conducting a thorough site assessment, installers can identify potential challenges and develop a tailored installation plan that ensures the vapor barrier is installed correctly and functions effectively. This, in turn, helps to prevent moisture-related issues, such as mold growth, structural damage, and indoor air quality problems. Overall, assessing the site and climate is a critical step in the vapor barrier installation process, and it plays a significant role in ensuring the long-term performance and effectiveness of the barrier.
Choosing the Right Vapor Barrier Material
When it comes to choosing the right vapor barrier material, there are several factors to consider. The first consideration is the climate and region in which the building is located. In areas with high humidity, a more robust vapor barrier material may be necessary to prevent moisture buildup. Another important factor is the type of insulation being used, as some materials may require a specific type of vapor barrier to function effectively. Additionally, the building's intended use and occupancy level should also be taken into account, as some materials may be more suitable for high-traffic areas or areas with sensitive equipment. In terms of specific materials, polyethylene plastic sheeting is a popular choice due to its affordability and effectiveness, while nylon and polyester materials offer added durability and resistance to punctures. It's also worth considering the thickness of the material, with thicker options providing greater protection against moisture and air leaks. Ultimately, selecting the right vapor barrier material requires careful consideration of the building's specific needs and conditions.
Preparing the Subfloor and Walls
Preparing the subfloor and walls is a crucial step in ensuring a successful vapor barrier installation. The subfloor should be clean, dry, and level, with any cracks or unevenness filled with a self-leveling compound. The walls should be free of any old adhesives, paint, or other substances that could interfere with the vapor barrier's adhesion. Any holes or gaps in the walls should be sealed with a patching compound, and the surface should be smooth and even. Additionally, the subfloor and walls should be checked for any signs of moisture or water damage, and any necessary repairs should be made before proceeding with the vapor barrier installation. It's also important to ensure that the subfloor and walls are compatible with the vapor barrier material being used, and that the surface is prepared according to the manufacturer's instructions. By taking the time to properly prepare the subfloor and walls, you can ensure a strong bond between the vapor barrier and the surface, and prevent any potential issues with moisture or air leaks.
Step-by-Step Installation Process
Installing a vapor barrier is a crucial step in ensuring the longevity and durability of your flooring. A well-installed vapor barrier can prevent moisture from seeping into the flooring, reducing the risk of damage and costly repairs. To achieve a successful installation, it's essential to follow a step-by-step process. This process involves laying out the vapor barrier, securing it to the subfloor, and sealing it to the walls and around obstructions. By following these steps, you can ensure a tight and effective seal that will protect your flooring for years to come. In this article, we will guide you through the step-by-step installation process, starting with the first crucial step: laying out the vapor barrier.
Laying Out the Vapor Barrier
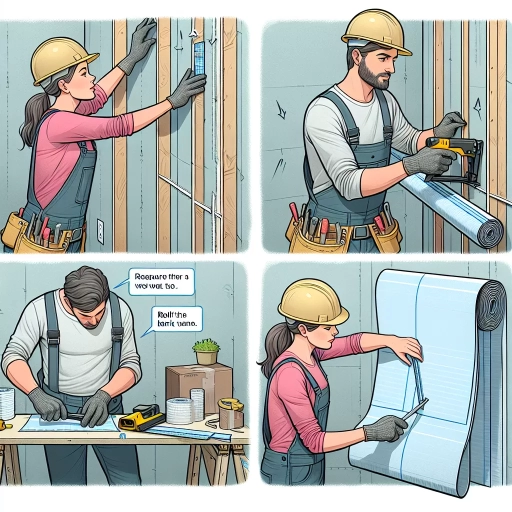
Laying out the vapor barrier is a crucial step in the installation process, as it ensures that the barrier is properly positioned and secured to prevent moisture from entering the crawl space. To begin, unroll the vapor barrier material and cut it to the desired length using a utility knife or a specialized cutting tool. Next, lay out the vapor barrier along the crawl space floor, ensuring that it is centered and evenly spaced. Use a tape measure to verify that the barrier is the correct size and that it covers the entire floor area. Once the barrier is in place, use a staple gun or a specialized fastening system to secure it to the floor joists, making sure to space the fasteners at regular intervals to prevent the barrier from sagging or becoming dislodged. It's also essential to ensure that the vapor barrier is tightly sealed around any obstructions, such as pipes or ductwork, to prevent moisture from entering the crawl space. Finally, use a specialized sealant or tape to seal any seams or edges, ensuring a tight and secure fit. By following these steps, you can ensure that your vapor barrier is properly laid out and secured, providing a effective barrier against moisture and humidity in your crawl space.
Securing the Vapor Barrier to the Subfloor
Securing the vapor barrier to the subfloor is a crucial step in the installation process. To ensure a tight seal, start by applying a continuous bead of compatible adhesive, such as a polyurethane-based caulk, along the perimeter of the subfloor. Next, carefully unroll the vapor barrier, ensuring it is centered and evenly spaced. Use a staple gun or a specialized vapor barrier fastening system to secure the barrier to the subfloor, working from the center outwards. Apply staples or fasteners at a maximum spacing of 12 inches, making sure to maintain a consistent pattern. It's essential to avoid over-tightening, which can cause the barrier to pucker or distort. Additionally, ensure that the vapor barrier is properly sealed around any obstructions, such as pipes or ductwork, using a compatible sealant. Finally, inspect the vapor barrier for any wrinkles, creases, or gaps, and make any necessary adjustments to ensure a smooth, even surface. By following these steps, you can ensure a secure and effective vapor barrier installation that will help protect your building from moisture-related damage.
Sealing the Vapor Barrier to the Walls and Around Obstructions
Sealing the vapor barrier to the walls and around obstructions is a critical step in ensuring the effectiveness of the vapor barrier system. To begin, apply a continuous bead of vapor barrier sealant, such as spray foam or caulk, along the perimeter of the vapor barrier where it meets the wall. Make sure to press the vapor barrier firmly onto the sealant to create a tight seal. Next, use a utility knife or scissors to cut the vapor barrier around any obstructions, such as pipes, ducts, or electrical outlets. Apply additional sealant around these obstructions, ensuring that the vapor barrier is tightly sealed to the surrounding surface. For larger obstructions, such as windows or doors, use a specialized vapor barrier flashing product to create a watertight seal. Finally, inspect the vapor barrier for any gaps or tears, and apply additional sealant as needed to ensure a complete seal. By following these steps, you can ensure that your vapor barrier is properly sealed to the walls and around obstructions, preventing moisture from entering the building envelope and reducing the risk of mold, mildew, and structural damage.
Ensuring a Successful Vapor Barrier Installation
A successful vapor barrier installation is crucial in preventing moisture-related issues in buildings, such as mold growth, structural damage, and indoor air quality problems. To ensure a successful installation, it is essential to follow a comprehensive approach that includes inspecting the vapor barrier for damage or defects, testing the vapor barrier for moisture and air leaks, and maintaining the vapor barrier over time. By doing so, building owners and managers can prevent costly repairs, reduce energy consumption, and create a healthier indoor environment. In this article, we will explore these critical steps in detail, starting with the importance of inspecting the vapor barrier for damage or defects, which is a crucial first step in ensuring a successful installation.
Inspecting the Vapor Barrier for Damage or Defects
Inspecting the vapor barrier for damage or defects is a crucial step in ensuring a successful installation. Before proceeding with the installation, it is essential to thoroughly inspect the vapor barrier for any signs of damage, defects, or irregularities. This includes checking for tears, punctures, cuts, or holes in the material, as well as any signs of wear and tear, such as creases, folds, or wrinkles. Additionally, inspect the vapor barrier for any signs of contamination, such as dirt, dust, or debris, which can compromise its effectiveness. It is also important to check the vapor barrier's seams and joints for any signs of weakness or separation, as these can provide a pathway for moisture to enter the building envelope. Furthermore, verify that the vapor barrier is the correct size and type for the specific application, and that it meets the relevant building codes and standards. By conducting a thorough inspection of the vapor barrier, installers can identify and address any issues before they become major problems, ensuring a successful and effective installation.
Testing the Vapor Barrier for Moisture and Air Leaks
Testing the vapor barrier for moisture and air leaks is a crucial step in ensuring a successful installation. This process involves inspecting the vapor barrier for any signs of damage, tears, or gaps that could compromise its integrity. One common method of testing is the "smoke test," where a smoke machine is used to fill the space between the vapor barrier and the building envelope with smoke. If the smoke escapes through any gaps or holes, it indicates a leak in the vapor barrier. Another method is the "pressure test," where the space is pressurized and then depressurized to detect any air leaks. This can be done using a blower door test or a duct blaster test. Additionally, a "moisture test" can be conducted using a moisture meter to detect any areas of high moisture levels, which could indicate a leak in the vapor barrier. It's essential to perform these tests before finishing the interior of the building to ensure that the vapor barrier is functioning correctly and to prevent any potential issues with mold, mildew, or structural damage. By testing the vapor barrier, builders and homeowners can have confidence that their building is well-sealed and protected from moisture and air leaks.
Maintaining the Vapor Barrier Over Time
Maintaining the vapor barrier over time is crucial to ensure its effectiveness and longevity. Regular inspections should be conducted to check for any signs of damage, wear, and tear, or degradation. This includes checking for punctures, tears, or holes in the barrier, as well as ensuring that the seams and joints are still intact. Additionally, it's essential to verify that the vapor barrier is still properly attached to the wall or floor, and that there are no gaps or openings that could compromise its performance. If any issues are found, they should be addressed promptly to prevent moisture from entering the building envelope. Furthermore, it's recommended to perform routine cleaning and maintenance tasks, such as removing any debris or dust that may have accumulated on the surface of the vapor barrier. This will help to ensure that the barrier remains effective and continues to provide the necessary protection against moisture and air leaks. By following these maintenance tips, building owners and managers can help to extend the lifespan of their vapor barrier and ensure that it continues to perform optimally over time.