How To Remove Vileda Mop Head
Here is the introduction paragraph: Removing a Vileda mop head can seem like a daunting task, but with the right approach, it can be done efficiently and effectively. To ensure a smooth process, it's essential to understand the steps involved and the importance of preparation. In this article, we will guide you through the process of removing a Vileda mop head, from preparation to post-removal steps. We will start by highlighting the key aspects of preparation, including the tools and materials needed, to ensure a successful removal. By following these steps, you'll be able to remove your Vileda mop head with ease and have it ready for replacement or cleaning. Preparation is Key, and in the next section, we will dive into the details of what you need to do to get started.
Preparation is Key
When it comes to cleaning with a Vileda mop, preparation is key to achieving the best results. Before you start mopping, it's essential to take a few minutes to prepare yourself and your cleaning tools. This involves checking the type of Vileda mop head you have, as different types may require different cleaning solutions or techniques. Additionally, gathering the necessary tools, such as a bucket and cleaning solution, will ensure that you have everything you need to get the job done efficiently. Finally, reading the manufacturer's instructions will provide you with valuable information on how to use your Vileda mop effectively. By taking these simple steps, you'll be well-prepared to tackle even the toughest cleaning tasks. So, let's start by checking the type of Vileda mop head you have.
Check the Type of Vileda Mop Head
When it comes to removing the Vileda mop head, it's essential to check the type of mop head you have. Vileda offers various types of mop heads, including the popular Microfiber Mop Head, the SuperMocio Mop Head, and the EasyWring Mop Head. Each type of mop head has a unique attachment mechanism, so it's crucial to identify the type of mop head you have before attempting to remove it. The Microfiber Mop Head, for instance, has a simple snap-on design, while the SuperMocio Mop Head has a more complex attachment system that requires a bit more effort to remove. The EasyWring Mop Head, on the other hand, has a convenient twist-and-lock mechanism that makes it easy to remove and replace. By checking the type of Vileda mop head you have, you can ensure that you use the correct removal method and avoid damaging the mop head or the handle.
Gather the Necessary Tools
To effectively remove a Vileda mop head, it's essential to gather the necessary tools beforehand. You'll need a screwdriver, preferably a flathead or Phillips head, depending on the type of screw that holds the mop head in place. Additionally, a pair of needle-nose pliers can come in handy for gripping small parts or screws. If the mop head is stuck due to dried-on dirt or grime, a gentle cleaning solution and a soft-bristled brush can help loosen it. You may also want to have a replacement mop head ready, especially if the old one is damaged or worn out. Having all these tools within reach will save you time and frustration during the removal process.
Read the Manufacturer's Instructions
When it comes to removing the Vileda mop head, it's essential to read the manufacturer's instructions first. The instructions provided by Vileda will give you specific guidance on how to detach the mop head safely and correctly. By following the manufacturer's instructions, you can avoid damaging the mop handle or the head itself, which could render the product unusable. Additionally, the instructions may provide valuable information on how to clean and maintain the mop head, which can help extend its lifespan. It's also possible that the instructions will include recommendations for replacement parts or accessories, which can be useful if you need to replace the mop head in the future. By taking the time to read the manufacturer's instructions, you can ensure that you're using your Vileda mop correctly and safely, and that you're getting the most out of your cleaning experience. Furthermore, reading the instructions can also help you to identify any specific features or mechanisms that are unique to your particular Vileda mop model, which can make the removal process easier and more efficient. Overall, reading the manufacturer's instructions is a crucial step in the process of removing the Vileda mop head, and it's an important part of ensuring that you're using your cleaning products effectively and safely.
Removing the Mop Head
Removing the mop head is a crucial step in maintaining the cleanliness and hygiene of your mop. Over time, the mop head can accumulate dirt, grime, and bacteria, making it essential to replace it regularly. However, removing the mop head can be a bit tricky, especially if you're not familiar with the process. In this article, we'll explore three effective methods to remove the mop head: twisting and pulling the mop head, using a screwdriver to release the locking mechanism, and soaking the mop head in warm water. By following these simple steps, you'll be able to remove the mop head with ease and keep your mop in top condition. To start, let's take a look at the first method: twisting and pulling the mop head.
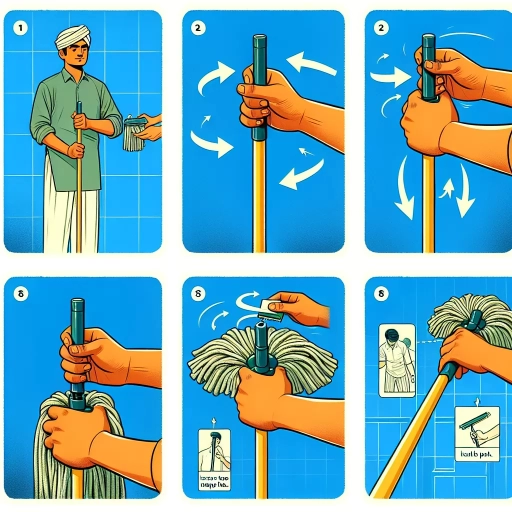
Twist and Pull the Mop Head
To remove the Vileda mop head, you'll need to twist and pull the mop head. This is a simple process that requires some force, but be careful not to damage the handle or the mop head itself. Start by holding the mop handle firmly with one hand, and with the other hand, grasp the mop head and twist it counterclockwise. You may need to apply some pressure to loosen the head from the handle. Once you feel the head start to come loose, pull it straight off the handle. Be prepared for the head to come off quickly, so make sure you have a good grip on it to avoid it flying off and causing a mess. If the head is particularly stubborn, you can try soaking it in warm water for a few minutes to loosen the adhesive that holds it in place. However, be careful not to soak the handle, as this can damage the materials it's made of. With a bit of force and patience, you should be able to twist and pull the mop head off the handle, making it easy to replace or clean.
Use a Screwdriver to Release the Locking Mechanism
To release the locking mechanism on your Vileda mop head, you will need to use a screwdriver. Begin by locating the small screw or clip that holds the mop head in place. This is usually found at the base of the handle, where the mop head meets the handle. Take your screwdriver and insert it into the screw head or clip, making sure it is securely seated. Gently turn the screwdriver counterclockwise to loosen the screw or release the clip. You may need to apply a bit of force, but be careful not to strip the screw or damage the surrounding material. As you turn the screwdriver, you should start to feel the locking mechanism release, allowing you to remove the mop head from the handle. Continue to turn the screwdriver until the mop head is completely free, then set it aside to clean or replace.
Soak the Mop Head in Warm Water
Soak the Mop Head in Warm Water. To begin the process of removing the Vileda mop head, start by soaking the mop head in warm water. This step is crucial as it helps to loosen the dirt and grime that may be holding the mop head in place. Fill a bucket or sink with warm water, making sure it's not too hot or too cold. Submerge the mop head in the water, allowing it to soak for about 10-15 minutes. This will help to soften the adhesive or Velcro that holds the mop head to the handle, making it easier to remove. As the mop head soaks, you can also add a small amount of mild detergent or soap to the water to help break down any tough stains or dirt. After soaking, use a soft-bristled brush or cloth to gently scrub away any remaining dirt or debris from the mop head. This will help to ensure a clean and smooth removal process. By soaking the mop head in warm water, you'll be able to remove it more easily and effectively, making the entire process less frustrating and time-consuming.
Post-Removal Steps
After removing the old mop head, it's essential to take the necessary steps to ensure a smooth transition to a new one. This process involves more than just attaching a new mop head, as it requires attention to detail and a few simple steps to maintain the quality and longevity of your mop. To begin with, you'll need to dispose of the old mop head, which is often the most straightforward part of the process. However, it's crucial to do so in an environmentally friendly manner. Next, you'll need to clean and dry the mop handle to prevent any dirt or bacteria from accumulating and affecting the new mop head. Finally, you'll be able to attach a new mop head, which will have your mop looking and performing like new. By following these simple steps, you'll be able to keep your mop in great condition and ensure it continues to effectively clean your floors. First, let's start with disposing of the old mop head.
Dispose of the Old Mop Head
Dispose of the old mop head responsibly by wrapping it in a plastic bag or tying it in a knot to prevent any remaining dirt or debris from spilling out. You can then throw it away in your regular trash. If you're looking for a more eco-friendly option, consider recycling the mop head if it's made of a recyclable material. Some communities have special collection programs for textiles or household items, so be sure to check with your local waste management agency to see if they accept mop heads. Additionally, you can also repurpose the old mop head as a cleaning rag for dusting or wiping down surfaces, reducing waste and giving it a new life. By properly disposing of the old mop head, you'll not only keep your home clean but also contribute to a more sustainable environment.
Clean and Dry the Mop Handle
After removing the Vileda mop head, it's essential to clean and dry the mop handle to prevent the buildup of bacteria and mildew. Start by rinsing the handle with warm water to remove any remaining dirt or debris. Use a soft-bristled brush or a non-abrasive scrubber to gently scrub away any stubborn stains or grime. For tougher stains, you can mix a solution of equal parts water and white vinegar in a spray bottle and spray it onto the handle. Let it sit for a few minutes before wiping it clean with a soft cloth. Once the handle is clean, use a dry towel to thoroughly dry it, paying extra attention to any crevices or grooves where moisture may collect. This will help prevent the growth of bacteria and mildew, ensuring your mop handle remains clean and hygienic for its next use. Regular cleaning and drying of the mop handle will also help extend its lifespan and maintain its effectiveness in cleaning your floors.
Attach a New Mop Head
Here is the paragraphy: To attach a new mop head, start by taking the new mop head and aligning it with the handle. Make sure the holes on the mop head match up with the pins on the handle. Once aligned, push the mop head onto the handle until it clicks into place. You may need to apply a bit of force, but be careful not to push too hard, as this can damage the handle or the mop head. Once the mop head is securely attached, give it a gentle tug to make sure it's in place. If it feels loose, you may need to adjust the alignment and try again. It's also a good idea to check the manufacturer's instructions for any specific attachment instructions, as different models may have slightly different attachment mechanisms. With the new mop head securely attached, your Vileda mop is ready for use.