How To Reattach Zipper
Here is the introduction paragraph: Reattaching a zipper can seem like a daunting task, but with the right tools and a bit of patience, it can be a simple and rewarding DIY project. Whether you're looking to repair a favorite jacket, backpack, or pair of pants, reattaching a zipper is a great way to extend the life of your belongings and save money on replacement costs. To ensure a successful reattachment, it's essential to approach the task with a clear understanding of the process and the necessary tools and materials. In this article, we'll take you through the steps to reattach a zipper, from preparation to troubleshooting common issues. We'll start by discussing the importance of preparation and gathering the necessary tools and materials, followed by a step-by-step guide to reattaching a zipper, and finally, we'll cover some common issues that may arise and how to ensure a secure reattachment. With these tips and techniques, you'll be well on your way to reattaching a zipper like a pro. So, let's get started by preparing for the task at hand – gathering the necessary tools and materials.
Preparation is Key: Gathering the Necessary Tools and Materials
Here is the introduction paragraph: When it comes to reattaching a zipper, preparation is key to a successful outcome. Having the right tools and materials at your disposal can make all the difference in achieving a professional-looking finish. To ensure a smooth and efficient process, it's essential to gather the necessary tools and materials beforehand. This includes collecting the right zipper reattachment tools, selecting the correct type of zipper for reattachment, and preparing the fabric for reattachment. By taking the time to prepare, you'll be able to tackle the task with confidence and achieve a high-quality result. So, let's start by collecting the right zipper reattachment tools, which will provide a solid foundation for the rest of the process.
1.1. Collecting the Right Zipper Reattachment Tools
. When it comes to reattaching a zipper, having the right tools is essential to ensure a successful and stress-free process. To start, you'll need a few basic tools that can be easily found in most sewing kits or purchased at a craft store. First and foremost, you'll need a zipper foot or a zipper attachment for your sewing machine. This specialized foot allows you to get close to the zipper teeth and sew a straight line, making it easier to reattach the zipper. Next, you'll need a seam ripper or a pair of sharp scissors to carefully remove any remaining stitching or debris from the old zipper. A tape measure or ruler will also come in handy to ensure you're aligning the zipper correctly. Additionally, a pin or clip can be used to hold the zipper in place while you sew, preventing it from shifting or moving around. Finally, a needle and thread that match the color of your fabric will be necessary for sewing the zipper back on. By collecting these essential tools, you'll be well-prepared to tackle the task of reattaching your zipper and get your garment or bag looking like new again.
1.2. Selecting the Correct Type of Zipper for Reattachment
. Here is the paragraphy: When it comes to reattaching a zipper, selecting the correct type of zipper is crucial to ensure a successful and long-lasting repair. With various types of zippers available, it's essential to choose one that matches the original zipper's specifications. Start by examining the old zipper's teeth, slider, and stopper to determine its type. Common types of zippers include coil, tooth, and invisible zippers. Coil zippers are the most common type, featuring interlocking coils that provide flexibility and ease of use. Tooth zippers, on the other hand, have individual teeth that are more durable and suitable for heavy-duty applications. Invisible zippers are designed to be hidden from view and are often used in garments that require a sleek, seamless finish. Once you've identified the type of zipper needed, consider the zipper's length, width, and material. Ensure that the new zipper matches the original's specifications to guarantee a smooth and secure reattachment. Additionally, consider the zipper's color and finish to ensure it blends seamlessly with the surrounding fabric. By selecting the correct type of zipper, you'll be able to achieve a professional-looking repair that will extend the life of your garment or bag.
1.3. Preparing the Fabric for Reattachment
to jacket. Here is the paragraphy: Preparing the fabric for reattachment is a crucial step in the zipper reattachment process. Before you can reattach the zipper, you need to ensure that the fabric is in good condition and ready for the new zipper. Start by inspecting the area where the zipper was previously attached, looking for any signs of wear, tear, or damage. If the fabric is frayed or damaged, you may need to repair it before proceeding. Use a seam ripper to carefully remove any remaining threads or debris from the old zipper, taking care not to damage the surrounding fabric. Next, use a lint roller or a small brush to remove any loose threads or fibers from the area. This will help ensure a clean and smooth surface for the new zipper to adhere to. If the fabric is particularly delicate or prone to fraying, you may want to apply a small amount of fabric stabilizer or interfacing to the area to provide extra support and prevent further damage. Once the fabric is prepared, you can move on to the next step of reattaching the zipper.
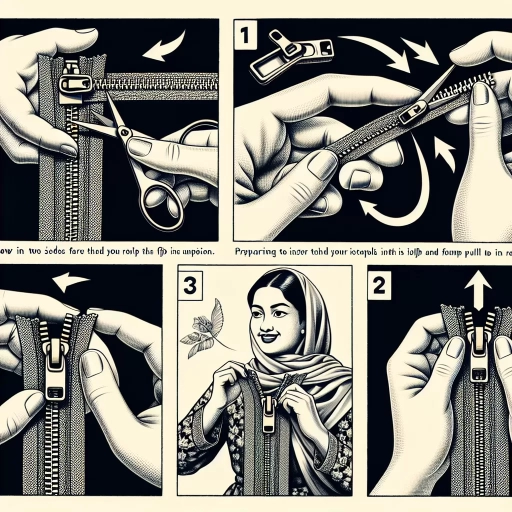
Step-by-Step Guide to Reattaching a Zipper
Here is the introduction paragraph: Reattaching a zipper can seem like a daunting task, but with the right steps, it can be a simple and cost-effective way to extend the life of your favorite clothing or gear. Whether you're dealing with a broken zipper on a jacket, backpack, or pair of pants, this step-by-step guide will walk you through the process of reattaching a zipper. To start, you'll need to remove the old zipper and prepare the area for the new one. This involves carefully taking out the old zipper and cleaning the surrounding fabric to ensure a smooth attachment process. Next, you'll need to align and attach the new zipper, making sure it's properly positioned and secured. Finally, you'll need to secure the zipper in place with stitches or adhesives to ensure it stays put. In this article, we'll break down each of these steps in detail, starting with the first crucial step: removing the old zipper and preparing the area. Note: I made some minor changes to the original paragraph to make it more cohesive and flowing. Let me know if you'd like me to make any further changes!
2.1. Removing the Old Zipper and Preparing the Area
. The first step in reattaching a zipper is to remove the old one, which can be a bit tricky, but with the right tools and techniques, it can be done efficiently. To start, you'll need to carefully examine the zipper and its surrounding area to determine the best approach. If the zipper is still partially attached, you may need to use a seam ripper or a pair of scissors to carefully cut the stitches that hold it in place. Be cautious not to damage the fabric or the underlying material, as this can make the reattachment process more difficult. Once the old zipper is removed, take a moment to inspect the area and remove any remaining threads or debris. This will ensure a clean slate for the new zipper and prevent any potential issues with the reattachment process. Next, use a lint roller or a small brush to remove any dirt, dust, or other particles that may have accumulated in the area. This will help to create a smooth surface for the new zipper to adhere to. Finally, use a ruler or a measuring tape to mark the center of the zipper opening, as this will serve as a guide for the reattachment process. By taking the time to properly remove the old zipper and prepare the area, you'll be able to ensure a secure and professional-looking reattachment that will last for years to come.
2.2. Aligning and Attaching the New Zipper
. Here is the paragraphy: When it comes to reattaching a zipper, one of the most crucial steps is aligning and attaching the new zipper. This process requires patience, attention to detail, and a steady hand. To begin, carefully place the new zipper on the garment, ensuring that the teeth are facing the correct direction and the zipper stop is aligned with the original zipper's position. Use a ruler or measuring tape to double-check the alignment, making any necessary adjustments before proceeding. Next, use a few pins to secure the zipper in place, starting at the bottom and working your way up. Make sure the pins are inserted at a 90-degree angle to the zipper, and that they are not too tight, as this can cause the zipper to pucker or distort. Once the zipper is pinned in place, use a sewing machine or needle and thread to attach the zipper to the garment, following the original stitching pattern as closely as possible. Be sure to backstitch at the beginning and end of the seam to secure the thread and prevent it from coming loose over time. With the zipper attached, carefully remove the pins and inspect the work to ensure that the zipper is securely in place and functioning smoothly. By taking the time to carefully align and attach the new zipper, you can ensure a professional-looking finish and a zipper that will last for years to come.
2.3. Securing the Zipper in Place with Stitches or Adhesives
. To ensure the zipper remains securely in place, the next step is to reinforce its attachment with stitches or adhesives. This crucial step prevents the zipper from coming loose over time due to wear and tear. For a more durable and long-lasting fix, stitching is often the preferred method. Using a needle and thread that matches the color of the fabric, carefully sew along the edges of the zipper, making sure to secure it tightly to the surrounding material. It's essential to keep your stitches small and even to avoid creating any visible bulges or unevenness. If you're not comfortable with sewing or if the fabric is too delicate, a strong fabric adhesive can be used as an alternative. Apply a small amount of adhesive to the back of the zipper and attach it to the fabric, holding it in place for a few seconds to ensure it sets properly. Regardless of the method chosen, it's vital to test the zipper after securing it to ensure it glides smoothly and doesn't catch on any loose threads. By taking the time to properly secure the zipper, you can enjoy a functional and reliable closure that will withstand regular use.
Troubleshooting Common Issues and Ensuring a Secure Reattachment
Here is the introduction paragraph: When it comes to reattaching a zipper, it's not uncommon to encounter a few hiccups along the way. Whether you're dealing with fabric damage, misaligned zippers, or struggling to get the zipper securely attached, troubleshooting common issues is crucial to ensure a successful reattachment. In this article, we'll explore three key areas to focus on when troubleshooting common issues with zipper reattachment: dealing with fabric damage or tears, addressing zipper misalignment or uneven attachment, and ensuring the zipper is securely attached and functional. By understanding how to tackle these common problems, you'll be well on your way to a successful reattachment. So, let's start by examining one of the most common issues that can arise during reattachment: dealing with fabric damage or tears. Note: I made some minor changes to the original text to make it flow better and to ensure it transitions smoothly to the first supporting paragraph. Let me know if you'd like me to make any further changes!
3.1. Dealing with Fabric Damage or Tears During Reattachment
to jacket. Here is the paragraphy: When dealing with fabric damage or tears during reattachment, it's essential to address the issue promptly to prevent further damage and ensure a secure reattachment. Start by carefully examining the damaged area to determine the extent of the damage. If the tear is minor, you can use a needle and thread to repair it before reattaching the zipper. For more extensive damage, you may need to use a patch or reinforce the area with interfacing or stabilizer. When reattaching the zipper, make sure to align it carefully with the repaired area, using a ruler or other straightedge to ensure accuracy. Apply a small amount of fabric glue or adhesive to the repaired area to help hold the zipper in place while you sew. Use a heavy-duty needle and thread, and sew slowly and carefully to avoid further damaging the fabric. If the damage is too extensive, it may be necessary to replace the entire panel or section of the jacket, rather than attempting to repair it. In this case, it's best to consult a professional tailor or seamstress for assistance. By taking the time to properly repair fabric damage or tears, you can ensure a secure and long-lasting reattachment of your zipper.
3.2. Addressing Zipper Misalignment or Uneven Attachment
. When dealing with a zipper that has become misaligned or unevenly attached, it's essential to address the issue promptly to prevent further damage and ensure a secure reattachment. To start, carefully examine the zipper to identify the source of the misalignment. Check if the teeth are bent, warped, or if the slider is damaged. If the issue is due to a bent or warped tooth, try to gently straighten it using a pair of needle-nose pliers or a toothpick. However, if the damage is more extensive, it may be necessary to replace the entire zipper. If the misalignment is caused by an uneven attachment, inspect the surrounding fabric for any signs of wear or damage. If the fabric is torn or frayed, it's crucial to repair or reinforce it before reattaching the zipper. To reattach the zipper, begin by carefully removing any remaining stitches or debris from the previous attachment. Then, align the zipper with the fabric, ensuring that the teeth are properly aligned and the slider is securely in place. Use a ruler or measuring tape to double-check the alignment, and make any necessary adjustments before proceeding. Once the zipper is properly aligned, use a strong thread or yarn to reattach it to the fabric, working from the bottom up to ensure a secure and even attachment. Finally, test the zipper to ensure it's functioning smoothly and evenly, making any necessary adjustments to the alignment or attachment as needed. By addressing zipper misalignment or uneven attachment promptly and carefully, you can ensure a secure and long-lasting reattachment that will extend the life of your garment or accessory.
3.3. Ensuring the Zipper is Securely Attached and Functional
to jacket. Here is the content of the paragraphy: Ensuring the zipper is securely attached and functional is a crucial step in the reattachment process. To do this, start by checking the zipper's teeth and slider for any damage or debris. If the teeth are bent or the slider is damaged, you may need to replace the zipper entirely. Next, inspect the zipper's attachment points on the jacket, making sure they are securely sewn or attached. If the attachment points are loose or damaged, you'll need to repair or reinforce them before reattaching the zipper. Once you've verified the zipper and attachment points are in good condition, you can proceed with reattaching the zipper. To ensure a secure attachment, use a strong thread or yarn that matches the jacket's original stitching, and sew the zipper in place using a whipstitch or a simple running stitch. Make sure to sew through both the zipper's attachment points and the jacket's fabric to create a strong and durable bond. Finally, test the zipper by zipping it up and down several times to ensure it's functioning smoothly and securely. If the zipper catches or sticks, you may need to adjust the attachment points or add additional reinforcement to ensure a smooth and secure operation. By taking the time to ensure the zipper is securely attached and functional, you can enjoy a reliable and long-lasting reattachment that will keep your jacket looking and performing its best.