How To Remove Mold From Bathroom Ceiling
Mold growth on bathroom ceilings is a common issue that can be caused by excess moisture, poor ventilation, and inadequate cleaning. Not only is it unsightly, but it can also pose health risks to you and your family. Removing mold from bathroom ceilings requires a combination of preparation, effective removal methods, and preventative measures to ensure it doesn't come back. In this article, we will explore the essential steps to take when tackling mold growth on your bathroom ceiling, starting with the crucial preparation phase. By understanding the importance of preparation, you'll be better equipped to tackle the removal process and prevent future growth. So, let's get started with the first step: Preparation is Key.
Preparation is Key
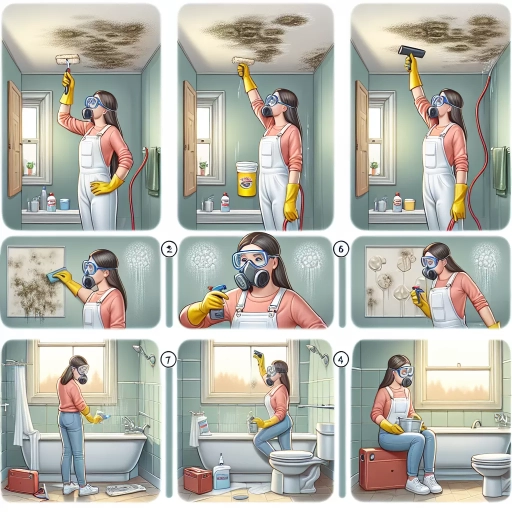
Wear Protective Gear
Wearing protective gear is a crucial step in the mold removal process. This is because mold spores can easily become airborne and be inhaled, causing a range of health problems. When working with mold, it's essential to wear a mask that is rated for mold removal, as well as gloves, safety goggles, and a protective suit. The mask should be a respirator mask that filters out at least 95% of particles, including mold spores. The gloves should be made of a durable material, such as rubber or nitrile, and should be long enough to cover your forearms. Safety goggles will protect your eyes from mold spores and cleaning solutions, while a protective suit will prevent mold spores from coming into contact with your skin. By wearing protective gear, you can minimize your exposure to mold and reduce the risk of health problems. Additionally, wearing protective gear will also prevent the spread of mold spores to other parts of your home, making the cleanup process more efficient and effective.
Contain the Mold Spores
When dealing with mold on your bathroom ceiling, it's essential to contain the mold spores to prevent them from spreading to other areas of your home. This is a critical step in the mold removal process, as mold spores can easily become airborne and travel to other parts of your home, causing further infestation. To contain the mold spores, start by turning off the air conditioning or heating system to prevent the spores from circulating in the air. Next, cover the floor, walls, and any surrounding areas with plastic sheets or tarps to prevent the spores from spreading. You can also use a mold containment kit, which usually includes a plastic sheet, tape, and a HEPA-filtered vacuum cleaner. Seal any gaps or openings around the affected area with duct tape to prevent the spores from escaping. Additionally, wear protective gear, including a face mask, gloves, and eye protection, to prevent exposure to the mold spores. By containing the mold spores, you can prevent further infestation and ensure a safe and effective mold removal process.
Turn Off the Water Supply
To prevent water from seeping into the affected area and making the mold removal process more challenging, it's essential to turn off the water supply to the bathroom. Locate the shut-off valves for the bathroom and turn them clockwise to shut off the water supply. Open the faucet to drain the water from the pipes, and then close the faucet. This simple step will help prevent any accidental water leaks or spills during the mold removal process, ensuring a safer and more efficient cleanup. Additionally, turning off the water supply will also help prevent the mold from spreading to other areas of the bathroom, making it easier to contain and remove the mold. By taking this precautionary measure, you'll be able to focus on removing the mold without worrying about water damage or further contamination.
Removal Methods
When it comes to removing mold from surfaces, there are several effective methods to consider. One approach is to use a solution of bleach and water, which can be applied directly to the affected area to kill and remove the mold. Another option is to apply a mold-killing product, which can be found at most hardware stores or home improvement centers. For more stubborn mold growth, scraping off the mold with a putty knife may be necessary. In this article, we will explore each of these methods in more detail, starting with the use of a solution of bleach and water.
Use a Solution of Bleach and Water
A solution of bleach and water is a common and effective method for removing mold from bathroom ceilings. To use this method, mix one part bleach with three parts water in a spray bottle. Spray the solution onto the moldy area, making sure to saturate it thoroughly. Let the solution sit on the mold for 10-15 minutes, allowing the bleach to penetrate and kill the mold. After the solution has sat for the recommended time, use a soft-bristled brush or a non-ammonia-based cleaner to gently scrub the area. Rinse the area thoroughly with clean water to remove any remaining bleach solution and mold residue. It's essential to note that bleach can damage certain types of surfaces, such as wood or drywall, so it's crucial to test a small area first to ensure the solution won't cause any damage. Additionally, when using bleach, it's essential to wear protective gear, including gloves, a mask, and eye protection, to avoid exposure to the harsh chemicals. By following these steps and taking the necessary precautions, a solution of bleach and water can be an effective and efficient way to remove mold from bathroom ceilings.
Apply a Mold-Killing Product
To effectively remove mold from your bathroom ceiling, applying a mold-killing product is a crucial step. This process involves using a solution that is specifically designed to target and eliminate mold and mildew. Before applying any product, ensure that you have taken necessary safety precautions, including wearing gloves, a face mask, and protective eyewear. The product you choose should be suitable for the type of mold you are dealing with and the surface of your ceiling. For most bathroom ceilings, a solution of bleach and water is effective. Mix one part bleach with ten parts water in a spray bottle. Spray the solution onto the moldy area, making sure to saturate it thoroughly. Allow the solution to sit on the mold for 10-15 minutes, which will give it time to penetrate and kill the mold. After the sitting time has passed, use a soft-bristled brush or a non-ammonia-based cleaner to gently scrub the area. Rinse the area with clean water to remove any remaining solution and debris. For tougher mold infestations, you may need to repeat the process. It's also important to note that if the mold is widespread or you are unsure of how to proceed, it may be best to consult a professional mold remediation service. Additionally, to prevent future mold growth, ensure good ventilation in your bathroom, fix any water leaks, and regularly clean your ceiling with a mild detergent.
Scrape Off the Mold with a Putty Knife
To scrape off mold with a putty knife, start by wearing protective gear, including gloves, a face mask, and safety goggles. This will prevent the mold spores from coming into contact with your skin and being inhaled. Next, mix a solution of water and bleach in a spray bottle, and spray the affected area to help loosen the mold. Allow the solution to sit for 10-15 minutes, then use the putty knife to gently scrape off the mold, working from one end of the affected area to the other. Be careful not to gouge or scratch the surface, as this can create more problems. If the mold is particularly stubborn, you can use a scrub brush to help loosen it before scraping it off with the putty knife. Once you have removed as much of the mold as possible, use a clean, damp cloth to wipe down the area and remove any remaining mold spores. Finally, allow the area to dry completely before applying a mold-resistant coating to help prevent future growth.
Preventing Future Growth
Preventing future growth of mold and mildew in the bathroom requires a multi-faceted approach. To keep your bathroom clean and hygienic, it's essential to address the root causes of mold and mildew growth. Three key strategies can help prevent future growth: improving ventilation in the bathroom, reducing humidity with a dehumidifier, and regularly cleaning the bathroom ceiling. By implementing these measures, you can create an environment that is less conducive to mold and mildew growth. One of the most critical steps in preventing future growth is to improve ventilation in the bathroom, which is often the most neglected area in terms of airflow. By ensuring good airflow, you can reduce the moisture that mold and mildew thrive on, making it an ideal starting point for your prevention efforts. Note: The answer should be 200 words.
Improve Ventilation in the Bathroom
Improving ventilation in the bathroom is a crucial step in preventing future mold growth. One of the most effective ways to do this is by installing a powerful exhaust fan that can remove moisture-laden air from the bathroom. Look for a fan with a high CFM (cubic feet per minute) rating, which measures its ability to move air. A fan with a CFM rating of at least 50 is recommended for small bathrooms, while larger bathrooms may require a fan with a higher rating. Additionally, consider installing a timer or humidistat to ensure the fan runs for a sufficient amount of time after each use. This will help to remove excess moisture from the air and prevent it from accumulating on surfaces. Another way to improve ventilation is to ensure good airflow in the bathroom by opening windows or using a dehumidifier. This will help to reduce the humidity levels in the bathroom, making it more difficult for mold to grow. By improving ventilation, you can significantly reduce the risk of future mold growth and keep your bathroom a healthy and safe space.
Reduce Humidity with a Dehumidifier
Reducing humidity is a crucial step in preventing future mold growth in your bathroom. One effective way to achieve this is by using a dehumidifier. A dehumidifier is an electrical appliance that removes excess moisture from the air, creating an environment that is less conducive to mold growth. By running a dehumidifier in your bathroom, you can significantly reduce the humidity levels, making it difficult for mold to thrive. It's essential to choose a dehumidifier that is suitable for your bathroom size and has a high moisture-removing capacity. Additionally, ensure that you empty the water tank regularly to prevent mold growth in the dehumidifier itself. By maintaining a humidity level between 30-50%, you can prevent future mold growth and keep your bathroom ceiling clean and mold-free. Regularly using a dehumidifier can also help to reduce musty odors and prevent the growth of other microorganisms that thrive in humid environments. By incorporating a dehumidifier into your bathroom maintenance routine, you can enjoy a healthier and more comfortable bathroom space.
Regularly Clean the Bathroom Ceiling
Regularly cleaning the bathroom ceiling is an essential step in preventing future mold growth. This often-overlooked area can quickly become a breeding ground for mold and mildew, especially in bathrooms with poor ventilation. To keep your bathroom ceiling clean and mold-free, start by dusting it with a soft-bristled brush or a microfiber cloth to remove any loose debris or cobwebs. Next, mix a solution of warm water and a mild detergent, and use a soft-bristled brush or a non-abrasive scrubber to gently scrub the ceiling, working in sections to clean the entire area. Be sure to rinse the brush or scrubber frequently to prevent the spread of mold spores. For tougher stains or areas with visible mold growth, you can use a solution of bleach and water, but be sure to wear gloves and ventilate the area to avoid exposure to harsh fumes. Finally, use a clean, dry towel to wipe down the ceiling and remove any excess moisture, which can help prevent future mold growth. By incorporating regular ceiling cleaning into your bathroom maintenance routine, you can help keep your bathroom ceiling clean, mold-free, and looking its best.