How To Screen Record On Macbook Air
 In today's digital age, capturing your screen's activity is a highly sought-after capability; whether for tutorials, presentations, or troubleshooting, screen recording can be a nifty skill. For MacBook Air users, this feature is conveniently built-in, enabling effortless screen capture. This comprehensive article aims to aid you in understanding the necessity for screen recording on MacBook Air, walking you through a detailed step-by-step guide on how to screen record effectively on your MacBook Air, and finally, venturing into the field of third-party applications for screen recording that can multiply your capturing capabilities. Our first part, 'Understanding the Need for Screen Recording on MacBook Air,' offers diagnostic insight into why this feature has become indispensable for MacBook Air users.
Understanding the Need for Screen Recording on MacBook Air
In the evolving digital era, understanding the need for screen recording on MacBook Air is more crucial than ever before, driven by a variety of compelling reasons that we will explore in this comprehensive article. As we delve into these details, we will underscore the importance of screen recording - the muscle behind efficient digital communication and an indisputable asset for professionals and educators alike. Amidst the boatload of applications spread across different industries, the usage of screen recording indeed morphs according to the needs of the field. Be it for creating tutorial videos, recording webinars, saving content that can't be downloaded, making software demos, and more, the diversity of its applications is truly mind-boggling. Finally, we will shed light on why MacBook Air, Apple's ultra-slim laptop, has emerged as an exceptional tool for screen recording. Apple's investment in exceptional screen resolution, unparalleled software compatibility, powerful processors, and fast SSDs make MacBook Air an ideal platform for seamless screen recording experiences. We will now proceed to our first topic of discussion - unearthing the importance of screen recording in today’s digital environment.
The Importance of Screen Recording
Screen recording has steadily climbed the ladder of importance in the digital era due to its nearly unlimited applications, especially with the prominence of MacBook Air in the tech world. The functionality transcends bounds, becoming an indispensable tool within the fields of education, marketing, IT, and even social interactions. Screen recording, once considered a niche function, is now an essential aspect of our digital interactions. Screen recording is critical as it captures not only visual content but also audio elements, allowing for comprehensive data collection. On MacBook Air, the high resolution and stunning visuals paired with crisp audio add a level of clarity and impact that few other tools can match. For education, it plays a pivotal role, allowing educators to record lectures, tutorial sessions, webinars and share them effortlessly. It gives students the ability to revisit educational content, enhancing their learning process by controlling their own pace. In marketing and business, screen recording has revolutionised client interaction and product demonstration. With the ability to illustrate the user interface, features, or benefits succinctly, it enhances customer understanding and reinforces the value proposition. Consequently, this functionality increases the possibility of purchase and improves customer satisfaction levels. From a technical perspective, screen recording on MacBook Air is an essential troubleshooting tool. IT professionals often use it to replicate and solve software issues, track bugs, or guide users through a complicated set of actions. Moreover, professionals can document each step, creating a library of "how-to" videos that can be leveraged for training purposes, thus increasing efficiency and productivity. In addition, screen recording is integral to the rise of digital socialization. With the increasing popularity of social media influencers and vloggers, having high-quality videos of on-screen activities helps them share engaging content, narrate experiences, provide game walkthroughs, software reviews, and many more. It’s been a handy tool in engaging with today's digital native audience. In conclusion, the importance of screen recording on MacBook Air extends much beyond capturing on-screen data. It is a transformative tool that facilitates digital communication, education, social engagement, business interaction, and technical troubleshooting. Therefore, understanding and utilising this feature is crucial to optimize the full potential of the MacBook Air effectively. Its value isn’t just its ability to record — it’s in the capacity to communicate effectively, educate thoroughly, troubleshoot efficiently and engage deeply.
Specific Uses of Screen Recording in Different Fields
In different professional sectors, the utilization of screen recording has proven to be a valuable tool. For instance, in the field of Education, screen recording can be essential for creating online lectures and tutorials. This method allows educators the chance to record their lessons in an organized and systematic manner, ensuring no critical points are missed during delivery. This way, scholars are able to review their study materials at their own pace, thus enhancing comprehension and retention. In the business realm, corporations leverage screen recordings for training purposes. Companies can create standardized training content that adheres to their operational norms and standards. This results in uniformity in operations, reducing chances of mishaps and facilitating smooth running of day-to-day activities. Furthermore, through screen recording, corporations can develop effective feedback tools to aid in personnel assessment. For software developers, screen recording is an excellent method of understanding bugs and software glitches. Developers can use screen captures from users to identify and address areas of challenge, improving overall application functionality and user experience. In the field of digital marketing, screen recording proves instrumental in user experience research. Marketers can track user interactions with websites or applications to understand user preferences and behaviors. These insights can then be used to optimize websites and apps, boosting customer engagement and ultimately increasing conversions. In the context of MacBook Air, the built-in screen recording feature enhances these functions in these particular fields. The clarity and high resolution of MacBook Air’s screen recording create high-quality, professional-looking videos that can be shared and played back easily. As such, whether you’re an educator, business professional, developer, or digital marketer, screen recording can be a reliable supporting tool. Therefore, understanding the need for – and various specific uses of – screen recording in different industries can give you a competitive edge in achieving your professional aims. By consciously utilizing this feature on your MacBook Air, you can make your work more efficient and effective, thus enhancing productivity and reach in your respective field. It is, without a doubt, a capability that has now become a necessity in the digital age.
Why MacBook Air for Screen Recording
The MacBook Air is a potent solution for screen recording and for more reasons than one. For starters, it's built-in software, QuickTime Player, gives users an easy and convenient way to record both screen and voice seamlessly. It's a hassle-free method that doesn't require downloading any third-party applications. This inherent simplicity is a direct reflection of Apple’s commitment to providing a user-friendly experience. Furthermore, when it comes to performance, MacBook Air’s high-resolution Retina display creates incredibly crisp and clear recordings. Its high-quality sound system also ensures superior audio recording. Particularly significant for tutorial creators, online teachers, and business professionals, it makes the content more attractive and simpler to comprehend for viewers. Equally important is the MacBook Air’s superior processing capability. It utilizes the latest M1 chip, designed specifically by Apple, giving it unmatched speed and performance. This chip allows multifaceted tasks like screen recording while running other demanding applications in the backdrop to be executed without any lag. Moreover, with an upgraded memory and storage, you get fast access to large files and can store hefty screen recordings effortlessly. Screen recording on MacBook Air does not only end at the recording phase. The device supports smooth, post-recording editing with the iMovie application, an intuitive and broadly equipped editing software that is free for MacBook users. This allows you to craft and polish your content without the need for any additional paid editing software. Finally, the MacBook Air brings the advantage of macOS Big Sur, the latest operating system designed with privacy and security in mind. This is a critical aspect when it comes to screen recording, capturing sensitive data or proprietary information. In a nutshell, the MacBook Air's powerful technical specifications, combined with in-built, uncomplicated, high-quality screen recording software, make it an excellent choice for every kind of user, from amateurs to professionals, and a robust tool in a digital content creator's kit. Thus, Understanding the need for screen recording on MacBook Air we can say that is not just about the capacity to record the screen. It's about the broader ecosystem that MacBook Air offers – a combination of superior hardware empowered by equally competent software. It brings together ease-of-use, high-quality recordings, powerful performance, excellent audio-visual capability, and stringent security features – every element crucial to efficient and effective screen recording.
Step-by-Step Guide on How to Screen Record on MacBook Air
Screen recording on a MacBook Air can simplify processes and enhance the efficiency of how you share information or instructions. Whether you're an educator doing distant learning, a creative professional showing off your process, a tech specialist giving a tutorial, or simply someone who wants to capture and keep a record of a series of actions on your laptop, knowing how to screen record is crucial. This guide will provide a comprehensive and accessible approach on how you can screen record on your MacBook Air. We will navigate through this process in three main parts: Setting Up Your MacBook Air for Screen Recording, Using the Built-in Screen Recorder in macOS, and Troubleshooting Common Issues in Screen Recording. Each section is carefully tailored to fulfilling your needs and answering your questions, ensuring you are well-acquainted with the screen recording feature. Now, let's embark on this practical journey, and our first field of focus will be setting up your MacBook Air for screen recording.
Setting Up Your MacBook Air for Screen Recording
Setting up your MacBook Air for screen recording is a straightforward process that doesn't demand any technical expertise. Before beginning, it's essential to note that to achieve optimal results, configuration settings must be accurately adjusted. Start by accessing QuickTime Player - a tool pre-installed in all MacBook Airs. QuickTime Player is not only your go-to resource for playing videos but also offers remarkable capabilities for recording screen activity. To find QuickTime, launch Finder and click on Applications, where you will see the QuickTime Player icon, double-click to open it. After launching QuickTime Player, click on 'File' at the top menu bar. Right under 'New Movie Recording', you'll find 'New Screen Recording'. This is the golden ticket to your MacBook’s screen recording feature. When you click, a screen recording window will appear with controls similar to a regular camera. You’ll see a red button for starting and stopping the recording process, and an arrow that opens further settings. Before you hit record, let's fine-tune the settings. Click on the arrow next to the red button, a dropdown will appear showing you multiple options. You can choose to record audio along with the screen recording by selecting the 'Built-in Microphone'. Should you wish to record just the video, ensure the microphone is turned off. One crucial aspect to remember while setting up your MacBook Air for screen recording is capturing mouse click effects. This feature can be valuable if your screen recording is aimed at tutorials or step-by-step guides where users need to see exact areas where you click. To do this, tick the 'Show Mouse Clicks in Recording' option. The key to a seamless, professional-level screen recording experience on your MacBook Air lies in using a combination of functionality and precision while setting up. Additionally, to enhance the audience engagement and improve your content's SEO ranking, consider your video's context. If explained with effectiveness and ease, a well-structured, high-quality screen recording can act as a useful guide, understanding the users' needs, and fulfilling their search intent. Hence, leading to better user experience and higher engagement rates. To an outsider, screen recording might seem like a technical chore. Still, with the right guidance, setting up your MacBook Air for screen recording can turn into a convenient experience. Remember, screen recording is not just about capturing the visual display. It is also about narrating a digital story, keeping the audience intrigued, and meeting their informational needs. As in-depth, informative and engaging content becomes the cornerstone of digital storytelling, the importance of setting up your MacBook Air for a high-quality screen recording cannot be understated. With a meticulous step-by-step setup, you'll find it easy to deliver top-notch screen recordings using your MacBook Air.
Using the Built-in Screen Recorder in macOS
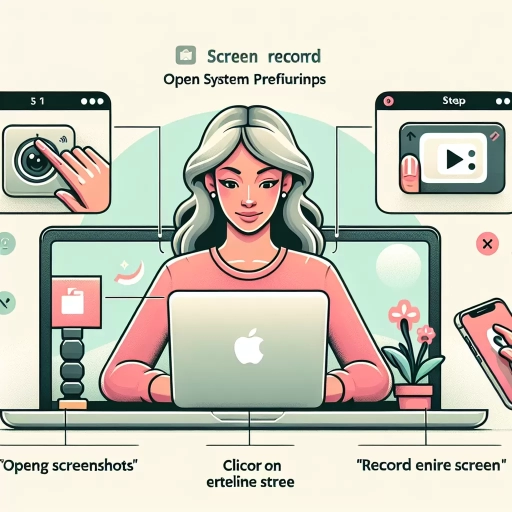
The built-in screen recorder in macOS is a versatile tool inputting enormous control at your fingertips, a standout feature of the advancements in MacBook Air. Understanding this in-app functionality will not only address temporary technical needs but also enrich your everyday workflow. Whether it's recording an important online meeting or documenting software issues, the built-in macOS screen recorder is an unsung hero. Unraveling the steps to utilize this state-of-the-art tool, you first need to press Command + Shift + 5 on your keyboard to open the screen recording toolbar, where three icons represent different recording modes: capture the entire screen, capture selected window, and capture selected portion. Depending on your requirement, you can select the area you need to record — a designated part of your screen, a specific window, or the entire canvas. The options panel offers you a wide berth to set a timer, choose where your file should be saved, select your microphone, or record your mouse clicks. The built-in screen recorder offers a seamless, user-friendly experience that makes screen recording on your MacBook Air an effortless task. However, what truly sets it apart is the macOS’s propensity for delivering optimal video output quality, ensuring you don't compromise on clarity and precision. Emergencies that necessitate screen recordings may come unannounced, hence having a basic understanding of how to screen record provides you with a backup when third-party applications fail. As the digital landscape evolves, features like the built-in macOS screen recorder have become essential, encouraging users to go beyond traditional usage, and explore new ways of digital expression and communication.
Troubleshooting Common Issues in Screen Recording
Troubleshooting Common Issues in Screen Recording Experience with screen recording on MacBook Air may sometimes be marred by emergent glitches and snags. Regardless, these hurdles should not dampen your spirit, as with every modern technology, some complications are an inescapable part. This segment will guide you through comprehensive troubleshooting steps to combat common headaches you may face during screen recording. Firstly, one of the most common problems users harp on is a noticeable lag during a screen record, which may result in a rough and disoriented video. This usually sprouts from the system being overburdened, possibly due to running heavy applications concurrently. To counteract this issue, try to close non-essential applications and clear up some memory before you start recording. Then, there are instances where the audio is either distorted or non-existent in the recording. This, in most cases, is traced to internal/external microphone settings. Before recording, confirm that you've selected the right microphone for audio input, ensure the volume is sufficiently high, and test your microphone for functionality. If the issue persists, restarting your MacBook could rectify any software glitches causing the problem. Thirdly, locating a recorded file might be strenuous for new users. After end of screen recording on MacBook Air, the thumbnail of the recording briefly appears at the corner of your screen. If you miss clicking it within the short period, it will automatically save in your default location, which typically is the “Movies” folder in the Finder, under the subfolder "Screen Recordings". Always remember to rename and save your file in the chosen location for easy recovery. Lastly, sometimes the recording function might not commence at all. Frequently, this happens due to privacy restrictions configured under your MacBook Air's system preferences. Best practice would be to head over to "System Preferences", then to "Security & Privacy", here, click on the "Privacy" tab and finally scroll down to "Screen Recording", making sure to check off the applications you want to accord permission for screen recording. Each technological novelty comes with its own set of challenges. The MacBook Air is no exception when it comes to screen recording. However, a fair grasp of troubleshooting techniques can brace you to tackle any issue that ventures your way, enabling you to make the most out of this remarkable tool at your disposal.
Exploring Third-Party Applications for Screen Recording on MacBook Air
Screen recording on a MacBook Air can be simplified by using third-party applications, providing superior features and functionality. This article will dive deeply into the world of screen recording on MacBook Air through the lens of third-party applications, examining their critical functions, features, and how they compare to one another. We'll be taking a closer look at the most popular screen recording apps currently available, comparing their various features, ease of use, and overall utility. Following our comparison, we'll guide you through the process of installing and utilizing one of these third-party applications. You'll be a pro at screen recording in no time! However, in our endeavor to use these apps, there are certain pitfalls every user should be mindful of. Hence, we will also discuss some cautions to bear in mind while navigating these third-party applications on your MacBook Air. As we delve into the world of screen recording, our first stop is the exploration of some of the most popular third-party screen recording apps. Let's dive in!
Comparison of Popular Third-Party Screen Recording Apps
As part of exploring third-party applications for screen recording on MacBook Air, it becomes crucial to compare popular screen recording apps. To effectively conduct meetings or create tutorials, individuals and organizations globally are perpetually seeking for the best screen recording software. Notably, popular contenders being ScreenFlow, OBS Studio and Snagit, stand out for their distinct features and functionalities. ScreenFlow by Telestream is a highly rated application that is exclusively designed for Mac users. It allows the recording of high-quality videos that can exceed the standard 1080p resolution. Offering an intuitive editing suite, it enables users to add elements such as callouts, annotations, and effects creating a more engaging and interactive recording. However, its premium features come with a relatively high price tag, which may be a deterrent for some users. Turning to OBS Studio, this robust, open-source screen recording software supports multiple platforms, including macOS. This app offers high levels of customization from its advanced scene switch options to its audio mixer with per-source filters. Being free, it's a great choice for users on a budget but can appear complex to the beginners due to its extensive settings and configurations. Lastly, Snagit by TechSmith, another industry-leading app geared not just towards screen recording but also screen capture. It offers a user-friendly interface and a myriad of tools for creating informative and engaging content like callouts, arrows, and blur effects. Unlike OBS Studio, Snagit has an easy-to-use interface suitable for beginners however, it demands a premium for its advanced features. In conclusion, choosing the right third-party screen recording app for your MacBook Air requires a balance between your budget, complexity of the features you need, and the quality you want to achieve. While ScreenFlow and Snagit offer extensive tools for a fee, OBS Studio presents an affordable yet complex alternative. Ultimately, the selection depends on the user’s specific needs and technical proficiency.
How to Install and Use a Third-Party Screen Recording App
Installing and using a third-party screen recording application on your MacBook Air can significantly enhance the quality and variety of your screen recordings. Once you've chosen the right software, give it a try - it's a simple process that any user can undertake. Begin by downloading the application from a reliable source, like the Mac App Store, to ensure safety and integrity. It then needs to be correctly installed onto your system. Normally, this will involve moving the downloaded file into your Applications folder. Upon successful installation, launch the program to understand its user interface. Different applications offer different features, so you may have to tailor your approach depending on the software you’ve chosen. However, most of them work on similar basics. Typically, you'll start by choosing what part of the screen you wish to capture - the entire screen, a window, or a designated area. Set this according to your project's requirements. Before you start recording, don't forget to check your audio settings. Depending on the nature of the screen recording, you might need to capture internal audio, external audio, or both. Configure these settings appropriately to assure optimal audio quality. When you're ready, hit the record button and carry out the activity you'd like to capture. Once done, stop the recording, and the file will be automatically saved in your designated folder. Most third-party applications also offer editing features. You can trim your video, add text overlays, include transition effects, incorporate annotations, and much more. That way, not only will you be able to record your screen but also create polished, professional-looking videos. Remember, a high-quality, informative, and engaging screen recording also depends on planning your content, rehearsing the steps beforehand, and an articulate narration, if necessary. By carefully choosing a third-party application that meets your specific needs and following this guide, you can effortlessly create screen recordings on your MacBook Air. This aids not only in communicating ideas effectively but can also contribute to developing a comprehensive digital story, depending on your project's scope and purpose.
Pitfalls to Watch Out for When Using Third-Party Apps
In exploring third-party applications for screen recording on a MacBook Air, one must be aware of potential pitfalls. While these third-party apps can offer a plethora of features and additional functionalities that might not be present in Apple's inbuilt screen recording tool, it's crucial to proceed with caution. Firstly, it's essential to consider the security and privacy associated with third-party applications. Not all apps are created equal, and some may pose risks such as data leakage, spyware, or malware. It's crucial when downloading any third-party application to do careful research about the developer, read user reviews, and check the privacy policy. A useful tip is to opt for applications that come from trusted platforms or those that are open source, as they are generally safer. Another pitfall is the impact on device performance. Third-party applications can sometimes consume a large amount of your MacBook's resources leading to slowed performance or, in extreme cases, crashes. They can also interfere with other running applications, causing unexpected issues. Hence, it is advisable to check the application's system requirements before installation and ensure it won't significantly hamper your device's performance. Furthermore, many third-party apps might lack proper customer support, making it difficult for users to get assistance when a problem arises. This can be frustrating, particularly if you're in the middle of an important task when an issue occurs. It would be beneficial to select applications with adequate support systems to ensure smooth operation. Lastly, always be mindful of the pricing and licensing agreements associated with third-party apps. Some applications might lure you in with enticing features only to charge hefty amounts for continued use. Often, developers offer a free trial period, then require a monthly or yearly subscription. Understand the cost structure, the billing frequency, and what features are included in the plan you're purchasing. In conclusion, while third-party applications for screen recording can offer more features and customization, it is vital to be well-informed of the associated pitfalls and how to avoid them. With the appropriate knowledge and precautions, they can be a powerful tool in your digital arsenal, providing an enhanced screen recording experience on your MacBook Air.