How To Block Email On Iphone
In today's digital age, email has become an essential tool for communication, but it can also be a source of frustration and distraction. With the constant influx of spam, junk, and unwanted emails, it's no wonder that many iPhone users are looking for ways to block email on their devices. But before you start blocking emails, it's essential to understand the basics of how email blocking works on iPhone. In this article, we'll explore the methods to block emails on iPhone, including the different techniques and features available. We'll also discuss how to manage blocked emails on iPhone, ensuring that you don't miss important messages from legitimate senders. By the end of this article, you'll be equipped with the knowledge to take control of your inbox and block unwanted emails with ease. So, let's start by understanding the basics of blocking email on iPhone.
Blocking Email on iPhone: Understanding the Basics
Email blocking on iPhone is a feature that allows users to block unwanted emails from specific senders. This feature is useful for individuals who receive a large volume of spam or unwanted emails. In this article, we will explore the basics of email blocking on iPhone, including what it is, why it's useful, and how to access the feature. We will start by defining what email blocking on iPhone is, and then delve into the reasons why blocking emails on iPhone is necessary. Finally, we will provide a step-by-step guide on how to access the email blocking features on iPhone. By the end of this article, you will have a clear understanding of how to block unwanted emails on your iPhone. So, let's start with the basics - what is email blocking on iPhone?
What is Email Blocking on iPhone?
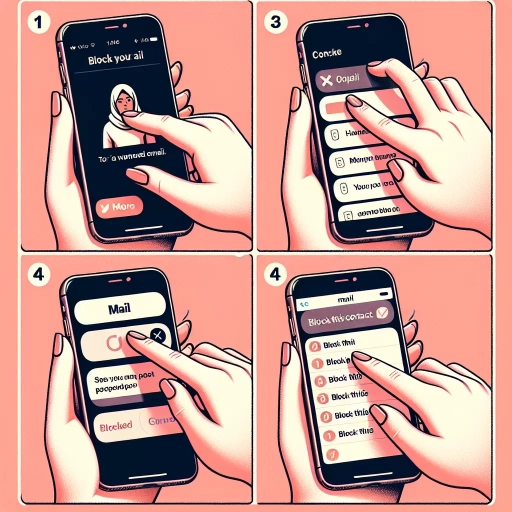
Email blocking on iPhone is a feature that allows users to block unwanted emails from specific senders or domains. When an email is blocked, it is automatically moved to the "Junk" folder, and the sender is prevented from sending further emails to the user's inbox. This feature is particularly useful for individuals who receive a high volume of spam or unwanted emails from specific senders. To block an email on iPhone, users can simply open the email, tap on the sender's name, and select "Block this Contact." Alternatively, users can also block emails from specific domains by going to the "Settings" app, selecting "Mail," and then tapping on "Blocked Sender Options." From there, users can add specific email addresses or domains to the block list. Blocked emails are not deleted, but rather moved to the "Junk" folder, where they can be reviewed and deleted manually. Email blocking on iPhone is a convenient and effective way to manage unwanted emails and reduce clutter in the inbox.
Why Block Emails on iPhone?
Blocking emails on an iPhone can be a highly effective way to manage your inbox and reduce stress. By blocking unwanted emails, you can prevent spam, phishing attempts, and other types of unwanted messages from cluttering your inbox. This feature is particularly useful for individuals who receive a high volume of emails, as it allows them to focus on important messages from known senders. Additionally, blocking emails can help protect your personal and financial information from potential scams and cyber threats. When you block an email address on your iPhone, the sender will not be notified, and their messages will be automatically moved to the trash folder. This means you can avoid engaging with unwanted emails and maintain a clean and organized inbox. Furthermore, blocking emails on an iPhone is a straightforward process that can be done in just a few steps, making it a convenient and efficient way to take control of your email management. By blocking unwanted emails, you can save time, reduce distractions, and improve your overall email experience.
How to Access Email Blocking Features on iPhone
To access email blocking features on your iPhone, start by opening the Settings app, which is typically found on the home screen. Scroll down and tap on "Mail," then select "Accounts" from the menu. Next, choose the email account you want to manage, such as iCloud, Gmail, or Yahoo. Tap on "Blocked Sender Options" or "Blocked" to view a list of blocked senders. To add a new blocked sender, tap on "Add New" and enter the email address you want to block. You can also block senders from the Mail app by opening a message from the sender, tapping on the sender's name, and selecting "Block this Contact." Additionally, you can use the "Report Junk" feature to block senders and report spam emails to your email provider. To do this, open a message, tap on "Report Junk," and then tap on "Block" to add the sender to your blocked list. By following these steps, you can easily access and manage your email blocking features on your iPhone.
Methods to Block Emails on iPhone
Here is the introduction paragraph: Managing your inbox on your iPhone can be a daunting task, especially when you're receiving unwanted emails from specific senders, unknown senders, or emails with specific keywords. Fortunately, there are several methods to block emails on your iPhone, helping you to declutter your inbox and reduce distractions. In this article, we will explore three effective methods to block emails on your iPhone: blocking emails from specific senders, blocking emails from unknown senders, and blocking emails with specific keywords. By the end of this article, you'll know how to take control of your inbox and block unwanted emails. Let's start by looking at how to block emails from specific senders, a feature that allows you to block emails from individuals or companies that you no longer want to hear from.
Blocking Emails from Specific Senders
Here is the paragraphy: Blocking emails from specific senders is a straightforward process on an iPhone. To do this, open the Mail app and navigate to the email from the sender you want to block. Tap on the sender's name or email address at the top of the screen, then tap "Block this Contact" or "Block this Sender." This will add the sender's email address to your blocked senders list, and any future emails from this address will be automatically moved to the Junk folder. Alternatively, you can also block a sender from the Settings app. Go to Settings > Mail > Blocked Senders, then tap "Add New" and enter the email address you want to block. You can also block a sender from the Contacts app by opening the contact's card, tapping "Edit," and then tapping "Block this Contact." Once a sender is blocked, you won't receive any notifications for emails from that address, and the emails will be automatically filtered out of your inbox. Note that blocking a sender only blocks emails from that specific email address, so if the sender uses a different email address, you may still receive emails from them.
Blocking Emails from Unknown Senders
Blocking emails from unknown senders is a simple yet effective way to reduce spam and unwanted messages in your iPhone's inbox. To do this, go to the Settings app, then tap on "Mail," and select "Accounts." From there, choose the email account you want to block unknown senders from, and toggle the switch next to "Filter Unknown Senders" to the right. This will move emails from unknown senders to a separate folder, making it easier to manage and delete them. Additionally, you can also report spam emails to help improve the filtering system. To do this, open the Mail app, select the spam email, and tap on "Report Junk" at the bottom of the screen. This will send the email to Apple's spam filtering system, which will help to improve the accuracy of the filter. By blocking emails from unknown senders and reporting spam, you can significantly reduce the amount of unwanted emails in your inbox and keep your email account more secure.
Blocking Emails with Specific Keywords
Blocking emails with specific keywords is a useful feature that allows you to filter out unwanted emails from your inbox. This feature is particularly helpful in reducing spam and junk emails that often contain specific keywords or phrases. To block emails with specific keywords on your iPhone, you can use the built-in Mail app or third-party email clients. Here's how: Open the Mail app, go to Settings, and select "Rules." Create a new rule by tapping the "+" icon and choose "From" or "Subject" as the condition. Enter the specific keyword or phrase you want to block, and select "Delete" or "Move to Junk" as the action. You can also use the "Contains" or "Does not contain" options to specify the keyword. Additionally, you can use third-party email clients like Spark or Airmail, which offer more advanced filtering options, including keyword blocking. These apps allow you to create custom filters based on specific keywords, sender addresses, or subject lines, giving you more control over your inbox. By blocking emails with specific keywords, you can significantly reduce the amount of spam and junk emails you receive, making it easier to manage your inbox and stay focused on important emails.
Managing Blocked Emails on iPhone
Managing blocked emails on your iPhone is a crucial task to ensure you don't miss important messages and to prevent spam emails from flooding your inbox. When you block an email address on your iPhone, all emails from that address are automatically moved to the "Blocked" folder. But have you ever wondered how to view these blocked emails, or how to unblock an email address if you've changed your mind? In this article, we'll explore how to manage blocked emails on your iPhone, including viewing blocked emails, unblocking emails, and reporting spam emails. By the end of this article, you'll know how to take control of your email inbox and ensure that you're only receiving emails from trusted senders. So, let's start by taking a look at how to view blocked emails on your iPhone.
Viewing Blocked Emails on iPhone
Viewing blocked emails on an iPhone is a straightforward process that allows you to keep track of emails from senders you've previously blocked. To start, open the Mail app on your iPhone and navigate to the "Mailboxes" section. From there, tap on "Blocked Senders" to access a list of all the email addresses you've blocked. This list will display the email addresses and names of the senders you've blocked, along with the date they were blocked. If you want to view the emails from a specific blocked sender, simply tap on their email address to open a folder containing all the emails they've sent you since being blocked. You can then read, delete, or report these emails as needed. Additionally, you can also use the "Blocked" folder to view all blocked emails in one place, making it easy to manage and keep track of unwanted emails. By regularly checking your blocked emails, you can ensure that you're not missing any important messages and that your inbox remains clutter-free.
Unblocking Emails on iPhone
If you're having trouble receiving emails from a specific sender on your iPhone, it's possible that their email address has been blocked. To unblock emails on your iPhone, follow these steps. First, go to the Settings app and tap on "Mail." Then, select "Blocked Sender Options" and look for the email address you want to unblock. Swipe left on the email address and tap "Unblock." Alternatively, you can also unblock an email address from the Mail app. Open the Mail app, go to the "Blocked" folder, and find the email from the sender you want to unblock. Tap "Edit" in the top right corner, then tap the "Unblock" button next to the sender's email address. Once you've unblocked the email address, you should start receiving emails from that sender again. It's also a good idea to check your junk mail folder to see if any emails from the sender were mistakenly marked as spam. By following these steps, you can easily unblock emails on your iPhone and stay connected with the people who matter.
Reporting Spam Emails on iPhone
Here is the paragraphy: Reporting spam emails on your iPhone is a crucial step in maintaining a clean and secure inbox. When you report spam emails, you're not only helping to protect yourself from potential scams and phishing attempts, but also contributing to the improvement of email filtering algorithms. To report spam emails on your iPhone, open the Mail app and navigate to the email you want to report. Tap the "Mark as Junk" button, which is usually located at the bottom of the screen. This will move the email to the Junk folder and also send a report to the email provider, indicating that the email is spam. Additionally, you can also report spam emails to the Federal Trade Commission (FTC) by forwarding the email to spam@uce.gov. This helps the FTC to track and take action against spammers. By reporting spam emails, you're playing an active role in keeping your inbox safe and helping to prevent others from falling victim to spam and phishing scams.