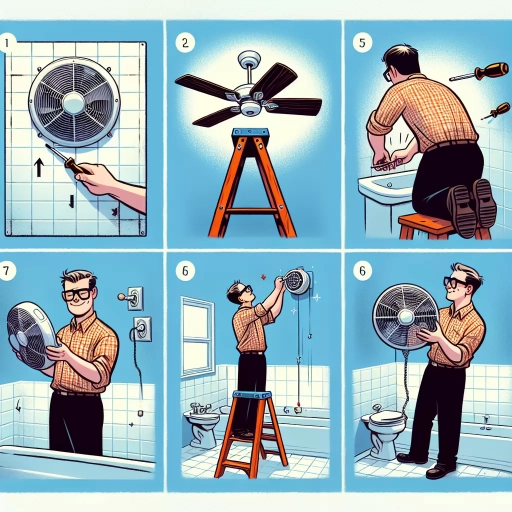
How To Replace Bathroom Fan
 Ventilation is crucial in every bathroom, but over time, bathroom fans can deteriorate or become obsolete, requiring replacement. The process can seem daunting, requiring tools, time, and patience; however, this article will provide a comprehensive, understandable guide for homeowners to confidently tackle this DIY project. We will break down the steps into three main supporting paragraphs. The first, 'Preparation is Key,' will outline pre-requisites, including necessary tools and safety precautions to ensure an efficient replacement process. The second segment, 'Removing the Old Fan,' will provide step-by-step instructions to dismantle and safely remove the existing fan. Lastly, 'Installing the New Fan' will guide you through affixing your new fan seamlessly into the bathroom setting. By hesitating no further, let's dive into the first critical phase of this endeavor - preparation is indeed key.
Preparation is Key
of any successful task lies on diligent preparation. The informative and engaging article you are about to read holds that true; it underscores the importance of adequate preparation when it comes to improving and ensuring proper ventilation in your bathroom. Thriving in a systematic process, this discussion pushes it focus into three key areas which form the cornerstone and provide direction. We will first delve into how to choose the right replacement fan, a crucial step that ensures your bathroom has an efficient, quiet, and durable ventilator. In following this, we will assess your bathroom's unique ventilation needs considering the room's size and the amount of moisture it produces. Finally, we will take a firm grip in understanding the local building codes and regulations revolving around bathroom ventilation. These guidelines can dramatically impact your choices and the overall success of your project. Now, let’s breeze into the first point - choosing the right replacement fan.
Choosing the Right Replacement Fan
Preparation indeed plays a major role in facilitating a seamless replacement of your bathroom fan. One key aspect of preparation is selecting the right replacement fan, a decision that should be guided by several critical factors. Firstly, consider the size of the fan. The new fan should match the dimensions of the existing one to ensure it fits into the designated space. The fan’s capacity should also be commensurate with the size of your bathroom; ideally, your fan should be able to change the bathroom’s air once every 8 minutes. Bathroom fans come with a performance rating known as CFM (Cubic Feet per Minute) and you should pick one with a higher CFM rating for larger bathrooms. Another factor to consider is the noise level of the fan. The noise produced by bathroom fans is measured in sones; the lower the sone rating, the quieter the fan. Many people prefer a quieter bathroom fan, but this depends on personal preference. Some homeowners might appreciate a bit of noise for added privacy. Next, consider the fan’s energy efficiency. It's advisable to choose a fan with an Energy Star rating as it ensures optimal performance with minimal energy consumption. Lastly, pay attention to features such as integrated lights, heaters, and motion or humidity sensors. These add to the functionality of your bathroom fan. A model with a built-in light can serve two purposes, especially if your bathroom could use some extra illumination. Fans with built-in heaters can bring some much-appreciated warmth during colder months. Motion sensors can automatically turn on the fan when someone enters the bathroom, and humidity sensors can trigger the fan when moisture levels rise above a certain point. Selecting the right replacement fan is a multi-step process that demands careful thought. Ensuring the fit, capacity, noise levels, energy efficiency, and additional features align with your personal preferences and bathroom conditions will ultimately ensure that your investment is worth it. A well-chosen bathroom fan can enhance the room's ambiance, reduce mold and mildew growth, and improve overall ventilation, thus contributing to a healthier living environment.
Assessing Your Bathroom's Ventilation Needs
Before embarking on the journey to replace your bathroom fan, an essential step is assessing your bathroom's ventilation needs. The bathroom fan's primary function is to expel the moisture and associated odors generated, yet not all bathrooms are created equally. Therefore, understanding the unique needs of your specific bathroom is paramount in guaranteeing an efficient ventilation system. The first factor to consider is the bathroom's size, as this fundamentally informs the fan's capacity needed to adequately circulate air and prevent humidity build-ups, which could lead to mold growth and paint deterioration. A useful rule of thumb is that the fan should have 1 CFM (Cubic Feet per Minute) capacity for every square foot of the bathroom, meaning for a 100-square-foot bathroom, a fan with at least 100 CFM rating is needed. Hand in hand with the size is the bathroom's usage. For instance, if your bathroom is frequently used for long, hot showers, the moisture level will be higher compared to a guest bathroom used infrequently, thus requiring a more powerful fan. Moreover, if the bathroom lacks a window or another source of natural ventilation, a robust fan will be necessary. Current building regulations also play a significant role in assessing ventilation needs. Many states require an extraction rate for new builds or remodeled bathrooms which must be upheld. It's crucial, therefore, to check the local rules to ensure compliance. Finally, current noise levels must be evaluated. If your existing fan is unbearably loud, you should look for a replacement fan with a lower sone rating. Sone is the unit of loudness, and the lower the sone number, the quieter the fan. Overall, preparing by assessing your bathroom's unique ventilation needs is crucial to successfully replacing your bathroom fan. By considering the bathroom's size, usage, local building regulations, and desired noise level, you can ensure a fan choice that guarantees improved air quality and lower humidity, contributing to a comfortable, safe, and odor-free bathroom.
Understanding Local Building Codes and Regulations
Preparation in terms of understanding local building codes and regulations is a pivotal aspect in the process of replacing a bathroom fan. Why is it so essential? Notably, building codes are set guidelines outlining safe construction standards that aim to safeguard the health and welfare of residents. They differ from place to place, oftentimes dictated by state, county, or city rules and regulations. Regulations may cover everything from the type of fan you can install, the minimum ventilation requirements, electrical wiring standards, up to where you can locate the fan. Initiating a self-actioned remodeling might seem like a small task, but it may require permits or inspections under your local law. How does one typically approach understanding local building codes? The first obvious step is to do meticulous research. Access your local government website or pay a visit to the city engineer's office to be acquainted with specific regulations regarding bathroom renovations. The building department of your municipality is a wealth of knowledge, and their guidance would be invaluable in ensuring your remodeling project complies with the local law, adheres to safety standards, and thereby, saves you from legal repercussions and possible reworking costs. Another aspect of compliance with building codes is periodic inspection after the renovation. This is essentially verification from a professional that your work is safe and sound. You therefore need to ensure the whole process, from the selection of the bathroom fan to its eventual installation, satisfies the required standards. In some cases, codes may require the fan to vent outdoors rather than into an attic to prevent moisture build-up that may subsequently lead to mold growth and other related issues. Non-compliance can carry severe penalties including heavy fines and the necessity to undo the improvements. Worse still, it could impact your insurance coverage in case of property damage. Moreover, the major risk is ultimately confined to the safety hazards like fire or structural failure that could arise from improper installations. Hence, preparing by understanding the local building codes is crucial. You might consider hiring professionals, such as licensed electricians and plumbers, to ensure work is compliant and effective. In conclusion, when preparing to replace a bathroom fan, understanding local building codes and regulations is key. There is no one-size-fits-all regulation as they vary across different jurisdictions. Therefore, conducting attentive research and seeking qualified professional guidance is indispensable to avoid any legal infringements and to ensure the safety and longevity of your renovation.
Removing the Old Fan
When it comes to home improvements, removing an old fan may not sound like the most exciting project, but if it is damaged or has fallen out of style, replacing it can drastically improve the aesthetic and environmental comfort of your home. The process is straightforward and consists of three distinct steps including; Disconnecting Power and Water Supplies, Removing Old Fan Housing and Mounting Brackets, and lastly, Disconnecting Electrical Connections. Each step carries its own set of challenges but by following them diligently, one can achieve a seamless fan removal. In the first step, safety is paramount. Disconnecting power and water supplies ensures we avoid any accidents related to electricity and water. After ensuring that your working environment is set, we'll transition into removing the old fan housing and mounting brackets, which involves a bit of physical work and may require a few handy tools. The final step is disconnecting electrical connections, which again underlines the importance of safety. Let’s commence with the first step - Disconnecting Power and Water Supplies. The following guidelines will lead you through the process, making it an easy at-home task to carry out.
Disconnecting Power and Water Supplies
Upon removal of the old bathroom fan, ensure safety by completely disconnecting the electrical power and water supplies. This is a crucial step in the process and should never be overlooked. Power and water tend to be a hazardous combination, hence the importance of making sure the relevant systems are properly shut off before beginning work. Disconnecting the power supply is required to mitigate the risk of electrocution while working with electrical connections or systems. This is generally accomplished by switching off the circuit breaker of the area you are performing work in. Remember, it's vital to use a volt meter or voltage tester to guarantee there's no current flowing in the wires before attempting any disconnections. Meanwhile, disconnecting the water supply seems to be less intuitive, especially considering bathrooms fans don't require water to function. However, there are situations where the water supply can interfere with your work. Imagine if you're working and accidentally puncture a water pipe, the resulting situation could be calamitous. Therefore, to ensure safety and eliminate these risks, it is advisable to shut off the main water supply valve as well. Moreover, if you are dealing with a fan incorporated with a light or heater, ensure they are switched off before disconnecting the power. This implies, turning off the switches and unplug them, if necessary. On the off chance that a wall switch controls the fan, flip it off then secure with a piece of tape to ensure nobody accidentally turns it on while you are working. Lastly, for those carrying out this task in apartment buildings, shared housing or townhouses, it may be beneficial to let your neighbors know when you plan to momentarily disconnect the shared water supply. This prevents any potential inconveniences to them and fosters harmonious living. In conclusion, while replacing a bathroom fan might seem like a simple DIY project, it does come with its significant safety considerations. Always remember, safety is a non-negotiable aspect of any electrical installation process. Hence, ensuring power and water supplies are responsibly disconnected before you start will safeguard against any unexpected incidents, making the task a smooth-sailing, hazard-free experience.
Removing Old Fan Housing and Mounting Brackets
When replacing your old bathroom fan, there's a key process you must undertake - the removal of the old fan's housing and mounting brackets. The initial step is to safely and correctly deactivate the power supply. This is an essential safety measure to prevent any potential electrical hazards during the process. You can achieve this by flipping off the circuit breaker connected to the fan. After ensuring the power is off, you can proceed to detach the old fan’s housing and mounting brackets. This step could potentially present some challenges as brackets and housings are often tightly secured and may have become rusty or corroded over time, making them resistant to removal. Firstly, you'll need to remove any visible screws using a screwdriver. Their locations will vary based on the specific model and make of the fan, but they are typically situated around the fan's perimeter. If the housing seems to be stuck, use a utility knife to carefully cut around the housing's edge, which may be glued or caulked to the ceiling. Be mindful not to damage the surrounding tiles or wiring in the process. Once the screws have been removed, it should be relatively easy to take out the old fan's housing. But in the case of older installations, you may come across elements that are stuck or difficult to pull free. You may need to use a pry bar or hammer to slowly and carefully break these connections. As for the mounting brackets, they are usually associated with secured bars that run across the top of the fan setup, typically attached to joists. They offer structural support and a hook-up spot for the fan. Stiffened by screws or nails, removal might necessitate a hammer, a wrench, or a pair of hardy pliers. Be very careful during this process as harsh jerking motions could lead to damages to the ceiling or joist. While detaching the mounting brackets, the fan motor might be heavy and unwieldy, which could cause the entire fan to drop down once the brackets are removed. Hence, it's essential to have firm support for the fan or a helper throughout the extraction process. It's crucial to have patience while tackling the removal of the old fan housing and mounting brackets. Due to the prolonged exposure to dampness, the hardware may have rusted, or there may be paint layers which may make it difficult to remove the housing and the brackets. Some resistance is expected, but with gentle persistence, the fan housing and brackets should ultimately loosen and come out. Lastly, ensure that all components are safely disposed of as promptly as possible to avoid any accidents or hazards. Remember, the key to successful removal of the old fan housing and mounting brackets lies in necessary precautions, the right tools, a dash of patience, and a steady hand. The outcome will be an open and ready space, prepared for the installation of your new bathroom fan.
Disconnecting Electrical Connections
When replacing a bathroom fan, one of the key steps involves disconnecting its electrical connections. This is a crucial process that necessitates extreme caution due to the inherent risks associated with handling electricity. It's worth mentioning that before you start this process, be certain to turn off the electricity at the main circuit breaker. This involves flipping off the appropriate switch that powers the bathroom fan. In many cases, this will be clearly labeled to prevent confusion. Once you have ensured that the power to the device is cut off, start by opening the fan housing. This is typically straightforward, involving the removal of a few screws or clips. Inside the housing, you will find a series of wires. These wires provide the fan and its associated lights with the power they need to operate. To disconnect them, locate the wire connectors that link them together, usually color-coded for easy identification. Usually, the black or red wire is the "hot" wire that delivers power, while the white wire is neutral, and the green or copper one is the ground wire. By unscrewing or twisting open these connectors, you can detach the wires. In so doing, the fan becomes completely depowered and ready for further disassembly or replacement procedures. It's important to handle these wires carefully. Even though you've cut the power at the main breaker, residual electricity can remain, creating a shock hazard. Moreover, improperly handling the wires can cause damage that complicates future installation processes. Additionally, keep track of which wires connect with each other, as this is crucial information for the proper wiring of your new fan. Finally, once the wires are disconnected, gently pull the wires apart and push them aside to avoid them getting in your way as you proceed with removing the old fan. Consider the use of electrical tape or wire nuts to cover the exposed end of the wires to prevent accidental contact. In conclusion, this critical step in replacing a bathroom fan must be performed carefully to ensure safety and ensure a smooth transition to the new device. Always remember to cut the power before handling any electrical wires and consider seeking professional help if you are ever unsure about how to proceed.
Installing the New Fan
The process of installing a new fan, although seemingly complex, can actually be broken down into manageable steps, ensuring a smooth and hassle-free installation. These steps are key to proper assembly and safe operation. The first important step involves securely mounting the new fan housing and brackets. This involves identifying the correct location and accurate alignment to secure the fan base. The second essential component of installation is appropriately connecting electrical connections. A meticulous approach here ensures a safe and reliable power supply to the fan while simultaneously reducing any electrical hazards. Finally, after successful assembly and connection, testing the new fan is crucial to guarantee its operation and performance is up to par. Each of these steps provides a foundation for safe, effective fan installation and usage. Let's dive into the first step - mounting the new fan housing and brackets - to understand its significance and comprehend the detailed process.
Mounting the New Fan Housing and Brackets
The successful installation of a new bathroom fan depends greatly on properly mounting the new fan housing and brackets. These components form an integral part of your bathroom fan set up, bearing the weight of the fan and securely keeping it in place. Therefore, any mistake or flaw in this step could result in fan malfunctions or safety threats. Once you have properly uninstalled the old fan, it's time to begin installing the new one. Fan housings can differ along with the fan model, so it's necessary to be familiar with the manufacturer's instructions included in your new fan's package. Before you begin mounting the new housing, you should thoroughly inspect it to ensure it's free from damages as any defects could compromise the installation or performance. Following that, you locate and mark the joist near the fan hole, which you were made aware of during the removal of the old fan. The new fan housing is positioned, parallel to the joist and marked, accounting for the size of the new fan. If the measurements align correctly, the fan housing should fit snugly into the hole. Next comes attaching the brackets. At this point, you turn your attention to the brackets that originally came with the fan. Accurately positioning the brackets at the marked points within the fan housing is crucial at this stage. These brackets provide additional support and ensure the fan housing is mounted properly. You screw the brackets to the joist using a strong drill and ensure it's correctly tightened. Make sure the screws penetrate deep enough into the joist to secure the brackets properly but not too deep that it damages the wood. Your objective should be to make it strong and secure but also respectful of the structure. When this is complete, the next step is to install the duct connector. This small component may seem insignificant, but without it, the newly installed fan won't function correctly. It's secured within the fan housing and this is followed by securely adhering the flexible duct to it. Once all these steps are completed, you should check everything again. Inspect the fan housing placement, the tightness of the brackets, and the condition of the duct connector. This step is crucial because it's far easier to fix any errors now than later when the fan has already been installed. With the correct installation of the fan housing and proper positioning of the brackets, you set a solid base for the subsequent steps. The success of the fan installation hinges greatly on getting this step right. It takes patience and precision but ultimately paves the way for a more comfortable and fresher bathroom experience.
Connecting Electrical Connections
Installing a new bathroom fan involves several key steps, and connecting electrical connections is a critical phase in the process. This part requires meticulous attention, as it ensures the fan's optimal operation and maximizes safety. In essence, wiring is the backbone of your bathroom fan's functioning - a network of electrical circuits that enables the fan to run effectively. Begin by making sure that the power supply is turned off at the circuit breaker before starting any electrical work. This reduces the risk of electric shock, a hazard that can lead to serious injuries. Once safety measures have been put in place, the task of connecting the wires can commence. You will find a handful of wires emanating from your bathroom fan - these are typically black, white, and green or bare copper. The black wire represents the hot wire, which delivers electricity to the fan. The white wire, on the other hand, functions as the neutral wire, creating a return path for the current. The green or bare copper wire stands as the ground wire and is designed to protect your fan, and more importantly, you from electrical faults. To connect these wires, you must pair them with their respective counterparts in your home's wiring system. Using wire nuts, twist together the similar color wires - black to black, white to white, and green or copper to green or copper. Ensure the connections are tight, as loose connections can generate heat leading to a potential fire risk. Also, remember to apply the wire nut in a clockwise direction to match the direction of the twisted wires, bonding them securely. Cap off the connected wires using electrical tape. This adds an extra layer of insulation, shielding you and your bathroom fan from electrical leakages. Capping not only secures the wires but also prevents moisture from entering the connections, which can impede the performance of your fan. It is a good practice to test the connections before proceeding further. Turn on the circuit breaker and check if your bathroom fan is running correctly. If it starts and operates without interrupting or humming, it means you have wired it accurately. But, if it fails to start or makes a strange noise, it's an indication that your wiring connections need revising. To sum up, connecting electrical connections when installing a new bathroom fan is a procedure that demands precision and widespread awareness about the wiring system. One must handle the wires carefully, ensuring they are securely connected and adequately capped off. Doing so will result in a smoothly functioning bathroom fan that runs efficiently and safely. Careful electrical work can seem daunting, but it is necessary for successful installations and a functional, safe home.
Testing the New Fan
Whether you're a DIY enthusiast or a professional contractor, testing the new fan after a successful installation is a crucial step in replacing a bathroom fan. This key process ensures that the new fan operates correctly and fulfills its purpose of removing excess humidity and preventing mold growth in your bathroom. It's equally important in confirming that the installation process was proficiently executed and the right device was selected. To perform this assessment, you'll need to apply a simple yet essential step-by-step procedure. Start by making sure that your new fan is correctly connected to a power source, preferably to a switch that can be controlled conveniently. Before activating the fan, it is always advised to inspect the area around the installation to ensure that there isn’t any debris or construction waste that could impede the performance of the newly installed fan. Upon activation, listen closely to check for abnormal noises like scraping, banging, or rattling. A smoothly running bathroom fan should only produce a soft whirring sound that's neither distracting nor disturbing. Listen for the efficiency of the air extraction as well. The new fan should noticeably reduce humidity levels within a short time after being switched on. In addition, it should be capable of dispersing smoke, steam, and bathroom odors, which you can test by letting hot water run from the shower and observing how fast the steam clears up. Carefully examine the vibration level of the fan as well. Excessive vibration may indicate a problem with the way the fan has been mounted, or it could reflect an issue with the fan's internal components themselves. The fan should be stable and secure, with only a slight vibration, often imperceptible. Checking for these parameters not only attests to the effectiveness of the fan but also confirms its operational longevity. Remember to verify the compatibility of the new bathroom fan with existing vent ducts and existing electrical connections. If correctly installed, a new fan should not affect the current building’s electrical load or compromise the existing ducting's effectiveness. Taking the time to thoroughly test the new fan after installation helps avert possible damage to the bathroom structure over time, such as peeling paint, wooden rot, or even mold formation - all consequences of inefficient air extraction. This simple yet vital step in the installation process of a new bathroom fan ultimately safeguards your bathroom's structural integrity and your comfort and health as a user. In conclusion, testing the new fan is not only essential to gauge its effectiveness but also to affirm its integral role in maintaining an ideal bathroom atmosphere. This satisfying end confirms the value of the meticulous journey of replacing your bathroom fan, which, upon its successful testing, is now ready to serve its vital role for years to come.