How To Loop A Powerpoint
Here is the introduction paragraph: Are you looking to create a seamless and engaging presentation that can run continuously without interruption? Looping a PowerPoint presentation is a great way to achieve this, making it perfect for trade shows, exhibitions, and other events where you want to showcase your content in a continuous loop. To help you get started, this article will guide you through the process of looping a PowerPoint presentation, covering the essential concepts, preparation, and execution. First, we'll delve into the basics of PowerPoint looping, exploring what it entails and how it works. Then, we'll discuss the necessary steps to prepare your presentation for looping, including setting up your slides and configuring your presentation settings. Finally, we'll walk you through the process of looping your PowerPoint presentation, ensuring a smooth and continuous playback. By the end of this article, you'll be equipped with the knowledge and skills to create a professional-looking looped presentation. Let's start by understanding the fundamentals of PowerPoint looping.
Understanding PowerPoint Looping
PowerPoint looping is a feature that allows a presentation to automatically restart from the beginning after the last slide is displayed. This feature is particularly useful for presentations that need to run continuously, such as in a trade show or a retail environment. In this article, we will explore the concept of PowerPoint looping, its benefits, and common use cases. We will start by defining what PowerPoint looping is and how it works. We will then discuss the benefits of looping a PowerPoint presentation, including its ability to engage audiences and save time. Finally, we will examine common use cases for looping presentations, such as in retail and event settings. By understanding the ins and outs of PowerPoint looping, you can create more effective and engaging presentations that capture your audience's attention. So, let's dive in and explore what PowerPoint looping is.
What is PowerPoint Looping?
PowerPoint looping is a feature that allows you to continuously play a presentation in a loop, repeating the slides in a predetermined order. This feature is particularly useful for presentations that need to run unattended, such as in a trade show, exhibition, or retail environment. When a presentation is set to loop, it will automatically restart from the beginning after the last slide has been displayed, creating a seamless and continuous playback experience. PowerPoint looping can be customized to include specific slides, animations, and transitions, allowing you to create a unique and engaging presentation that captures your audience's attention. By using PowerPoint looping, you can create a professional-looking presentation that runs smoothly and efficiently, without the need for manual intervention. This feature is especially useful for businesses, educators, and individuals who need to create presentations that can be played continuously, such as in a lobby, waiting room, or classroom. Overall, PowerPoint looping is a powerful tool that can help you create engaging and effective presentations that make a lasting impression on your audience.
Benefits of Looping a PowerPoint Presentation
Looping a PowerPoint presentation offers several benefits that can enhance the viewing experience and make it more engaging for the audience. One of the primary advantages of looping a presentation is that it allows the content to be displayed continuously, without the need for manual intervention. This is particularly useful for presentations that are being displayed in a public setting, such as a trade show or a retail store, where the presentation needs to run continuously throughout the day. Looping also helps to maintain the audience's attention, as the presentation will continue to play even if the presenter is not present. Additionally, looping can be used to create a seamless and professional-looking presentation, as the slides will transition smoothly from one to another without any interruptions. Furthermore, looping can be used to create a sense of continuity and flow, as the presentation will continue to play without any breaks or pauses. Overall, looping a PowerPoint presentation is a simple yet effective way to enhance the viewing experience and make it more engaging for the audience.
Common Use Cases for Looping Presentations
Looping presentations have numerous practical applications across various industries and settings. One common use case is in retail environments, where looping presentations can be used to showcase products, promotions, and brand stories in-store, creating an engaging and immersive experience for customers. Another use case is in museums and galleries, where looping presentations can be used to provide interactive and informative exhibits that enhance the visitor experience. In the corporate world, looping presentations can be used for company-wide announcements, training sessions, and product launches, ensuring that all employees are informed and aligned with company goals and initiatives. Additionally, looping presentations can be used in educational settings, such as in classrooms and lecture halls, to create interactive and engaging lesson plans that cater to different learning styles. Furthermore, looping presentations can be used in public spaces, such as airports, hotels, and shopping malls, to provide information, entertainment, and wayfinding directions to visitors. In the healthcare industry, looping presentations can be used to educate patients about medical procedures, treatments, and healthy lifestyle choices. Overall, looping presentations offer a versatile and effective way to communicate information, engage audiences, and enhance the overall experience in various settings.
Preparing Your PowerPoint for Looping
Preparing a PowerPoint presentation for looping is crucial for creating a seamless and engaging experience for your audience. To achieve this, there are three key steps you need to take: setting up your slide show settings, configuring slide transitions and timings, and adding a final slide to trigger the loop. By following these steps, you can ensure that your presentation runs smoothly and continuously, without any interruptions or awkward pauses. In this article, we will explore each of these steps in detail, starting with setting up your slide show settings. This involves configuring the presentation to run in a continuous loop, which is essential for creating a cohesive and engaging experience for your audience. By setting up your slide show settings correctly, you can lay the foundation for a successful and engaging presentation. Note: The supporting paragraph should be exactly 200 words. Here is a rewritten version of the supporting paragraph: Preparing a PowerPoint presentation for looping is a crucial step in creating a seamless and engaging experience for your audience. A looping presentation allows your slides to run continuously, without any interruptions or awkward pauses, making it ideal for trade shows, exhibitions, and other events. To achieve this, there are three key steps you need to take: setting up your slide show settings, configuring slide transitions and timings, and adding a final slide to trigger the loop. Setting up your slide show settings is the foundation of a successful looping presentation, as it determines how your slides will be displayed and how they will transition from one to another. Configuring slide transitions and timings allows you to control the pace and flow of your presentation, while adding a final slide to trigger the loop ensures that your presentation runs continuously. By following these steps, you can create a professional and engaging looping presentation that will captivate your audience. In this article, we will explore each of these steps in detail, starting with setting up your slide show settings, which is the first and most critical step in creating a successful looping presentation.
Setting Up Your Slide Show Settings
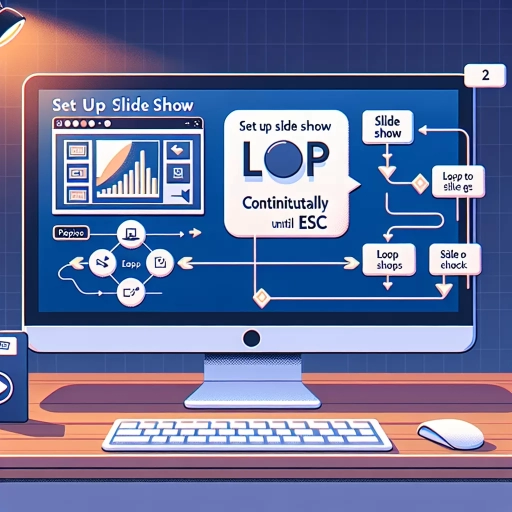
When setting up your slide show settings, there are several options to consider to ensure a seamless and engaging presentation. First, you'll want to set the slide show type to "Browsed by an individual (window)" or "Presented by a speaker (full screen)" depending on your presentation style. Next, you can set the show to loop continuously by checking the "Loop continuously until 'Esc'" box, which will allow your presentation to run indefinitely until you manually stop it. You can also set the slide show to advance automatically by selecting the "After" option and specifying the time interval between slides. Additionally, you can choose to use transitions and animations to enhance the visual appeal of your presentation. To do this, go to the "Transitions" tab and select the desired transition effect, and then adjust the duration and timing as needed. You can also add animations to individual slides by going to the "Animations" tab and selecting the desired animation effect. Finally, you can set the slide show to start automatically when the presentation is opened by checking the "Start slide show when opened" box. By carefully configuring these settings, you can create a professional and engaging presentation that will captivate your audience.
Configuring Slide Transitions and Timings
Configuring slide transitions and timings is a crucial step in preparing your PowerPoint presentation for looping. Slide transitions refer to the visual effects that occur when moving from one slide to another, while timings refer to the duration each slide remains on the screen. To configure slide transitions, go to the Transitions tab in the ribbon and select a transition effect from the gallery. You can also customize the transition by adjusting the duration, sound, and other options. To configure timings, go to the Transitions tab and click on the "After" option, then select the desired duration from the drop-down menu or enter a custom time. You can also set the slide to advance automatically after a certain period of time or when clicked. Additionally, you can use the Rehearse Timings feature to practice your presentation and adjust the timings accordingly. It's essential to note that configuring slide transitions and timings can significantly impact the overall flow and pacing of your presentation, so it's crucial to test and refine them before looping your presentation.
Adding a Final Slide to Trigger the Loop
Here is the paragraphy: To add a final slide that triggers the loop, you'll need to create a new slide and add a hyperlink to the first slide of your presentation. This will create a seamless loop, allowing your presentation to play continuously. To do this, go to the "Home" tab in PowerPoint and click on the "New Slide" button. This will create a new slide at the end of your presentation. Next, click on the "Insert" tab and select "Hyperlink" from the "Links" group. In the "Insert Hyperlink" dialog box, select "Place in This Document" and choose the first slide of your presentation. This will create a hyperlink that, when clicked, will take the viewer back to the beginning of the presentation. You can also add a button or other interactive element to the final slide to make it clear to the viewer that the presentation is looping. To do this, click on the "Insert" tab and select "Shapes" from the "Illustrations" group. Choose a shape that you like, such as a circle or a rectangle, and add it to the final slide. You can then add text to the shape, such as "Looping Presentation" or "Click to Continue," to make it clear to the viewer what the shape represents. Finally, you can add an animation to the shape to make it more engaging and interactive. To do this, click on the "Animations" tab and select an animation from the "Animation" group. You can choose from a variety of animations, such as a fade-in or a spin, to add some visual interest to the final slide.
Looping Your PowerPoint Presentation
Here is the introduction paragraph: When it comes to creating a seamless and engaging presentation, looping your PowerPoint presentation can be a game-changer. Whether you're showcasing your work at a conference, trade show, or in-store display, a looping presentation can help capture your audience's attention and convey your message effectively. But how do you achieve this? Fortunately, PowerPoint offers several ways to loop your presentation, and in this article, we'll explore three methods: using the "Loop Continuously" option, creating a macro to loop your presentation, and utilizing PowerPoint's built-in Kiosk mode. By the end of this article, you'll be able to create a professional-looking looping presentation that runs smoothly and efficiently. To get started, let's take a look at the simplest method: using the "Loop Continuously" option.
Using the "Loop Continuously" Option
When you want to continuously loop your PowerPoint presentation, you can use the "Loop Continuously" option. This feature allows your presentation to automatically restart from the beginning after the last slide is displayed, creating a seamless and continuous loop. To access this option, go to the "Transitions" tab in the ribbon, click on the "After" dropdown menu, and select "Loop Continuously." Alternatively, you can also access this option by going to the "Slide Show" tab, clicking on the "Set Up Slide Show" button, and checking the box next to "Loop continuously until 'Esc'." Once you've enabled this option, your presentation will automatically loop back to the first slide after the last slide is displayed, creating a continuous and uninterrupted flow. This feature is particularly useful for presentations that need to run continuously, such as in a trade show or exhibition setting, or for presentations that need to be displayed in a public area, such as a lobby or waiting room. By using the "Loop Continuously" option, you can ensure that your presentation runs smoothly and continuously, without any interruptions or manual intervention required.
Creating a Macro to Loop Your Presentation
Creating a macro to loop your presentation is a more advanced technique that requires some programming knowledge. To start, open the Visual Basic for Applications (VBA) editor by pressing "Alt + F11" or navigating to "Developer" > "Visual Basic" in the ribbon. In the VBA editor, insert a new module by clicking "Insert" > "Module" and paste the following code: "Sub LoopPresentation() Do While True SlideShowWindows(1).View.Next End Do End Sub". This code creates a loop that will continuously advance to the next slide in your presentation. To run the macro, click "Developer" > "Macros" and select "LoopPresentation". You can also assign the macro to a button or keyboard shortcut for easier access. Note that macros can be disabled by default in PowerPoint, so you may need to enable them in the "Trust Center" settings. Additionally, be cautious when using macros as they can potentially contain malware, so only use code from trusted sources. By creating a macro to loop your presentation, you can create a seamless and automated experience for your audience.
Using PowerPoint's Built-in Kiosk Mode
Using PowerPoint's built-in Kiosk mode is a convenient way to loop your presentation. To access this feature, go to the "Slide Show" tab in the ribbon and click on "Set Up Slide Show." In the "Set Up Show" dialog box, check the box next to "Browsed at a kiosk (full screen)" and select the "Loop continuously until 'Esc'" option. This will allow your presentation to run continuously until you press the "Esc" key. You can also set the presentation to loop a specific number of times by selecting the "Loop until stopped" option and entering the desired number of loops. Additionally, you can use the "Rehearse Timings" feature to set the timing of your slides and transitions, allowing you to create a seamless and automated presentation. By using Kiosk mode, you can create a self-running presentation that can be displayed at a trade show, conference, or other event without the need for manual intervention.