How To Flip A Photo On Iphone
Flipping a photo on an iPhone can be a simple yet effective way to enhance the composition and visual appeal of an image. Whether you're a photography enthusiast or a social media influencer, knowing how to flip a photo on your iPhone can be a valuable skill. Fortunately, there are several ways to do so, and in this article, we'll explore three methods to flip a photo on your iPhone. You can use the built-in Photos app, the Markup tool, or third-party apps to achieve this effect. Each method has its own advantages and disadvantages, and we'll delve into the details of each approach. First, let's start with the most straightforward method: using the Photos app.
Using the Photos App
The Photos app is a powerful tool for managing and editing your photos on your device. With its user-friendly interface and robust features, you can easily organize, enhance, and share your favorite memories. In this article, we will explore how to use the Photos app to flip a photo, a simple yet useful feature that can add a new perspective to your images. To do this, we will first need to access the Photos app, then select the photo we want to flip, and finally, use the app's built-in tools to flip the photo. By following these steps, you can easily flip a photo and give it a fresh new look. So, let's get started by accessing the Photos app.
Accessing the Photos App
Accessing the Photos app on your iPhone is a straightforward process. To start, locate the Photos app icon on your home screen, which is typically represented by a colorful flower-like image. Tap on the icon to open the app. Alternatively, you can also access the Photos app from the App Library, which can be found by swiping left on your home screen until you reach the App Library page. From there, tap on the "Media" category and then select the Photos app. Once the app is open, you will be taken to the "Photos" tab, which displays all your photos and videos in a grid view. You can then navigate through your photos by scrolling up or down, or by using the tabs at the bottom of the screen to switch between different views, such as "Albums" or "Shared". If you have a lot of photos, you can also use the search function to quickly find a specific photo by typing in keywords or names. Additionally, you can also access the Photos app from other apps, such as Messages or Mail, by tapping on a photo attachment and then selecting "Open in Photos".
Selecting the Photo to Flip
When selecting the photo to flip, it's essential to choose an image that will look good when reversed. Consider the composition of the photo and how it will be affected by flipping. If the image has a clear subject or focal point, flipping it may alter the viewer's attention or create an unusual perspective. On the other hand, symmetrical or abstract images may look great when flipped, adding a new layer of visual interest. Additionally, think about the colors and textures in the photo. If the image has a strong color palette or distinctive textures, flipping it may enhance or alter these elements in a visually appealing way. Ultimately, the key to selecting a great photo to flip is to experiment and have fun with the process. Try flipping different images and see how they look before deciding on the final result.
Flipping the Photo
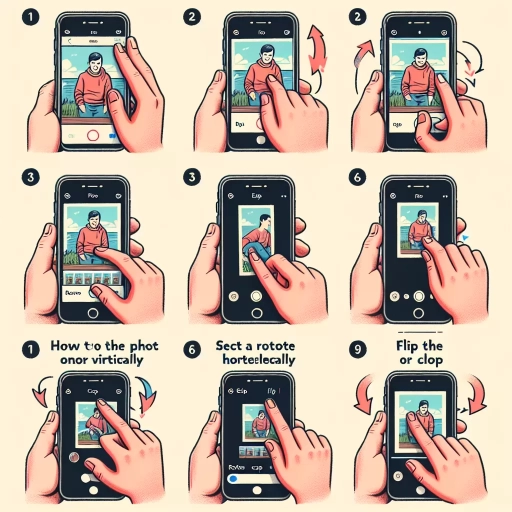
Flipping a photo on an iPhone is a simple process that can be done directly within the Photos app. To flip a photo, open the Photos app and select the photo you want to flip. Tap the "Edit" button in the top right corner of the screen, then tap the "Crop" tool. From there, tap the "Flip" button, which looks like a square with two arrows pointing in opposite directions. This will flip the photo horizontally. If you want to flip the photo vertically, you'll need to rotate it 90 degrees first, then flip it. To do this, tap the "Rotate" button, which looks like a curved arrow, until the photo is oriented vertically, then tap the "Flip" button again. Once you've flipped your photo, tap "Done" to save the changes. The flipped photo will be saved as a new version, and the original will remain unchanged.
Using the Markup Tool
The Markup Tool is a powerful feature in iOS devices that allows users to edit and annotate photos. With this tool, users can add text, draw shapes, and even flip photos. To get started with using the Markup Tool, users need to open the tool, select the photo they want to edit, and then use the various features to make changes. In this article, we will explore how to use the Markup Tool to edit photos, starting with opening the tool. We will also cover how to select the photo to edit and how to flip the photo using the Markup Tool. By the end of this article, users will have a good understanding of how to use the Markup Tool to enhance their photos. To begin, let's start with the first step: opening the Markup Tool.
Opening the Markup Tool
Opening the Markup tool is a straightforward process that allows you to access a variety of editing features to enhance your photos. To open the Markup tool, start by selecting the photo you want to edit from your Photos app. Once you've chosen the photo, tap the "Edit" button in the top right corner of the screen. This will open the editing menu, where you'll find a variety of tools and features to adjust your photo. To access the Markup tool, tap the "More" button, represented by three horizontal dots, and then select "Markup" from the list of options. Alternatively, you can also access the Markup tool by tapping the "Markup" button directly, if it's available on your iPhone model. Once you've opened the Markup tool, you'll be able to access a range of features, including drawing tools, text options, and a magnifier, which allow you to make precise edits to your photo. With the Markup tool, you can add text, draw shapes, and even add a signature to your photo, making it a powerful editing feature that can help you enhance your images.
Selecting the Photo to Edit
When selecting a photo to edit, it's essential to choose an image that will benefit from the editing process. Start by browsing through your iPhone's Photos app and selecting a picture that you think could use some improvement. Consider the composition, lighting, and overall aesthetic of the image. If the photo is poorly lit, has distracting elements, or is not well-composed, editing can help enhance its quality. Look for images with good contrast, interesting textures, and a clear subject. Avoid selecting photos with low resolution or those that are too dark or too bright, as they may not respond well to editing. Additionally, consider the purpose of the edited photo – will it be shared on social media, used in a presentation, or printed as a physical copy? This will help you determine the level of editing required and the desired outcome. By carefully selecting the right photo to edit, you'll be able to achieve the best possible results and make the most of the Markup tool's features.
Flipping the Photo with the Markup Tool
Flipping a photo with the Markup tool is a straightforward process that allows you to create a mirrored version of your image. To start, open the Photos app and select the image you want to flip. Tap the "Edit" button, then tap the "Markup" button, which looks like a pen tip. This will open the Markup tool, where you can access a variety of editing options. To flip your photo, tap the "Rotate" button, which looks like a curved arrow. Then, tap the "Flip Horizontal" option to create a mirrored version of your image. You can also flip your photo vertically by tapping the "Flip Vertical" option. Once you've flipped your photo, you can save it as a new image or share it directly from the Markup tool. The Markup tool also allows you to make other edits to your photo, such as adding text, drawing, or cropping. By flipping your photo with the Markup tool, you can create a unique and interesting effect that adds a new perspective to your image.
Using Third-Party Apps
With the rise of smartphone technology, photo editing has become an essential part of our daily lives. We often need to flip photos to create a mirror image or to correct the orientation of a picture. While some smartphones have built-in photo editing features, they may not offer the desired level of customization. This is where third-party apps come in handy. In this article, we will explore how to use third-party apps to flip a photo. To do this, we will first need to download a photo editing app that offers flipping features. Once the app is installed, we can select the photo we want to flip and use the app's editing features to create the desired effect. By following these simple steps, we can easily flip a photo using a third-party app. So, let's get started by downloading a photo editing app.
Downloading a Photo Editing App
When it comes to flipping a photo on an iPhone, using a third-party app can be a great option. One of the first steps in this process is downloading a photo editing app. With the vast array of apps available in the App Store, it can be overwhelming to choose the right one. However, by considering a few key factors, you can find an app that meets your needs. Look for an app that is user-friendly, has a wide range of editing tools, and is compatible with your iPhone model. Some popular photo editing apps include Adobe Lightroom, VSCO, and Snapseed. Once you've selected an app, simply click the "Get" button to begin the download process. The app will be downloaded and installed on your iPhone, and you'll be able to access it from your home screen. From there, you can open the app, select the photo you want to flip, and use the app's editing tools to make the necessary adjustments. With the right app, flipping a photo on your iPhone can be a quick and easy process.
Selecting the Photo to Flip in the App
When selecting a photo to flip in the app, it's essential to choose an image that will look good when reversed. Consider the composition of the photo and how it will be affected when flipped. If the image has text or logos, flipping it may make them appear backwards, which could be undesirable. On the other hand, photos with symmetrical compositions or abstract patterns may look great when flipped. Additionally, think about the mood and atmosphere you want to convey with the flipped photo. For example, a flipped photo of a serene landscape may create a sense of unease or disorientation, while a flipped photo of a playful moment may add to the humor. By carefully selecting the right photo, you can create a unique and eye-catching flipped image that adds a new layer of meaning or interest to your original photo.
Flipping the Photo with the App's Editing Features
Flipping a photo can be a great way to add some creativity to your images, and with the right app, you can do it with ease. One of the most popular photo editing apps for iPhone is Adobe Lightroom, which offers a range of features to help you flip and edit your photos. To flip a photo using Adobe Lightroom, simply open the app and select the image you want to edit. Then, tap on the "Edit" button and select the "Crop" tool. From there, you can use the "Flip" option to flip your photo horizontally or vertically. You can also use the "Rotate" tool to rotate your photo by 90 degrees or more. In addition to flipping and rotating, Adobe Lightroom also offers a range of other editing features, including exposure adjustments, color grading, and noise reduction. With these features, you can take your photos to the next level and make them look truly professional. Another popular photo editing app for iPhone is VSCO, which offers a range of presets and editing tools to help you achieve a unique look. To flip a photo using VSCO, simply open the app and select the image you want to edit. Then, tap on the "Edit" button and select the "Tools" option. From there, you can use the "Flip" tool to flip your photo horizontally or vertically. VSCO also offers a range of other editing features, including exposure adjustments, contrast, and saturation. With these features, you can add a touch of creativity to your photos and make them stand out. Overall, flipping a photo with a third-party app is a great way to add some creativity to your images, and with the right app, you can do it with ease. Whether you're using Adobe Lightroom or VSCO, you can achieve professional-looking results with just a few taps.