How To Remove Backsplash
Removing a backsplash can be a daunting task, but with the right approach, it can be done efficiently and effectively. Whether you're looking to update your kitchen or bathroom, or simply want to get rid of an outdated design, removing a backsplash is a crucial step. To ensure a successful removal process, it's essential to break it down into manageable stages. First, preparation is key to a smooth removal process. This involves assessing the type of backsplash, gathering necessary tools, and protecting the surrounding area. Once you're prepared, you can move on to the actual removal process, which requires careful technique and attention to detail. Finally, after the backsplash is removed, it's essential to clean up the area and make any necessary repairs to the wall or surrounding surfaces. In this article, we'll guide you through each stage, starting with the importance of preparation.
Preparation is Key
When it comes to installing a new backsplash, preparation is key to a successful and stress-free experience. A well-prepared workspace can make all the difference in ensuring a smooth installation process and achieving professional-looking results. To start, it's essential to clear the area around the backsplash, removing any furniture, appliances, or obstructions that could get in the way. Additionally, protecting the countertops and floors from damage is crucial, as the installation process can be messy and potentially hazardous. Finally, gathering the necessary tools and materials beforehand will save time and frustration in the long run. By taking these steps, homeowners can set themselves up for success and ensure a beautiful, long-lasting backsplash. Clearing the area around the backsplash is the first step in this process, and it's essential to get it right to avoid any complications down the line.
Clear the Area Around the Backsplash
Clear the area around the backsplash to ensure a safe and efficient removal process. Start by covering the countertops, floors, and any surrounding surfaces with drop cloths or plastic sheets to protect them from debris and dust. Remove any outlet covers, switch plates, and light fixtures to prevent damage and make it easier to access the backsplash. Take down any curtains, blinds, or other window treatments to prevent them from getting in the way or getting damaged. If you have any appliances or furniture near the backsplash, move them away or cover them with plastic sheets to prevent damage. Finally, turn off the power to any electrical outlets or switches in the area to prevent any accidents or electrical shocks. By clearing the area around the backsplash, you'll be able to work safely and efficiently, and avoid any potential damage to surrounding surfaces or objects.
Protect the Countertops and Floors
Protecting the countertops and floors is a crucial step in the backsplash removal process. Before you start, cover your countertops and floors with drop cloths or plastic sheets to prevent damage from debris and dust. Secure the coverings with tape to ensure they stay in place. Additionally, remove any furniture, appliances, or fixtures that may be in the way or could be damaged during the removal process. This will give you a clear workspace and prevent any accidents or damage to your belongings. By taking the time to protect your countertops and floors, you can ensure a safe and successful backsplash removal process.
Gather the Necessary Tools and Materials
To remove a backsplash, you'll need to gather the necessary tools and materials to ensure a safe and successful process. Start by collecting a putty knife or a scraper, which will be used to pry the backsplash away from the wall. A hammer or a mallet may also be necessary to gently tap the knife or scraper and loosen the adhesive. Additionally, a pry bar can be used to carefully remove the backsplash, especially if it's been glued or nailed to the wall. You'll also need a utility knife or a tile cutter to cut through any caulk or adhesive that may be holding the backsplash in place. A dust mask, safety goggles, and gloves will protect you from debris and dust, while a drop cloth or old sheets will cover your floors and countertops to prevent damage. If you're dealing with a tile backsplash, you may also need a tile scraper or a grout saw to remove the grout and caulk. Finally, a vacuum cleaner or a broom and dustpan will be necessary to clean up the area once the backsplash has been removed. By gathering all the necessary tools and materials, you'll be well-prepared to tackle the removal process and achieve a successful outcome.
Removing the Backsplash
Removing a backsplash can be a daunting task, but with the right techniques and tools, it can be done efficiently and effectively. To start, it's essential to understand that the process involves several steps, including scraping off the old adhesive and grout, using a pry bar to gently remove the backsplash, and applying heat to loosen the adhesive. By following these steps, homeowners can successfully remove their old backsplash and prepare their kitchen or bathroom for a fresh new look. The first step in this process is to scrape off the old adhesive and grout, which can be a time-consuming but crucial task. This step requires patience and attention to detail, as it sets the stage for the rest of the removal process. By carefully scraping away the old adhesive and grout, homeowners can ensure a smooth and successful removal of their backsplash.
Scrape Off the Old Adhesive and Grout
When removing a backsplash, one of the most challenging tasks is dealing with the old adhesive and grout that holds it in place. Scrape off the old adhesive and grout using a combination of manual and power tools. Start by applying a grout remover or adhesive dissolver to the affected area, allowing it to sit for the recommended amount of time to loosen the bond. Then, use a putty knife or scraper to gently pry the old adhesive and grout away from the wall. Be careful not to gouge the surface, as this can create more work in the long run. For tougher areas, switch to a power tool like a rotary hammer or oscillating multi-tool with a scraper attachment. These tools can help break up the old adhesive and grout, making it easier to remove. As you scrape, use a vacuum or damp cloth to clean up the debris and prevent it from spreading to other areas. Once the majority of the old adhesive and grout is removed, use a wire brush or scrubber to remove any remaining residue. Finally, clean the area with a mixture of soap and water to prepare it for the new backsplash installation.
Use a Pry Bar to Gently Remove the Backsplash
When it's time to remove the backsplash, a pry bar is a valuable tool to have in your arsenal. This long, flat tool is designed to gently pry the backsplash away from the wall without causing damage to the surrounding area. To use a pry bar effectively, start by inserting the flat end of the tool into the gap between the backsplash and the wall. Gently rock the pry bar back and forth, working your way along the edge of the backsplash. As you apply gentle pressure, the backsplash should begin to loosen and separate from the wall. Be careful not to apply too much pressure, as this can cause the backsplash to crack or break. Instead, work slowly and patiently, using a gentle prying motion to coax the backsplash away from the wall. If the backsplash is particularly stubborn, you can also use a hammer to tap the pry bar gently, helping to loosen the adhesive that holds it in place. With a pry bar and a little patience, you should be able to remove the backsplash without causing damage to the surrounding area.
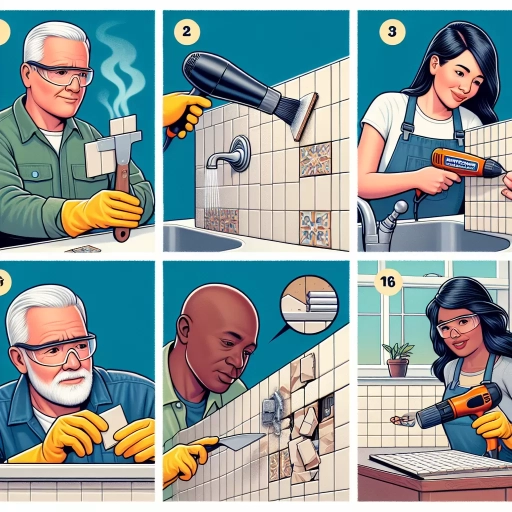
Apply Heat to Loosen the Adhesive
Applying heat to loosen the adhesive is a crucial step in removing a backsplash. This method is particularly effective for removing old, stubborn adhesive that has been holding the backsplash in place for years. To apply heat, you can use a hair dryer, heat gun, or a warm cloth soaked in hot water. Hold the heat source about six inches away from the adhesive and move it slowly back and forth, applying even heat to the entire area. Be careful not to apply too much heat, as this can damage the surrounding surfaces or cause the adhesive to melt and become even more difficult to remove. As the adhesive begins to loosen, you can use a putty knife or scraper to gently pry it away from the wall. Continue to apply heat and scrape away the adhesive until it is completely removed. It's essential to work slowly and patiently, as applying heat to loosen the adhesive can be a time-consuming process. However, with persistence and the right techniques, you can successfully remove the adhesive and take the first step towards removing the backsplash.
Post-Removal Cleanup and Repair
When it comes to post-removal cleanup and repair, it's essential to take a comprehensive approach to ensure a smooth and successful process. After removing old flooring, countertops, or other materials, you're often left with a mess that requires attention to detail and the right techniques. A thorough cleanup and repair process involves three critical steps: removing any remaining adhesive and debris, repairing any damaged walls or countertops, and cleaning and preparing the area for new installation. By tackling these tasks, you'll be able to restore your space to its original condition and create a solid foundation for new installations. In this article, we'll dive into the specifics of each step, starting with the crucial task of removing any remaining adhesive and debris.
Remove Any Remaining Adhesive and Debris
After removing the backsplash, it's essential to remove any remaining adhesive and debris to ensure a smooth surface for the new installation. Start by scraping off any large chunks of adhesive using a putty knife or a scraper, working from one end of the wall to the other. Be careful not to gouge the wall or apply too much pressure, which can damage the drywall. For more stubborn adhesive, apply a small amount of adhesive remover or a mixture of equal parts water and white vinegar to the area. Let it sit for a few minutes to allow the solution to penetrate the adhesive, then scrape it off with a putty knife or a scrub brush. If there are any remaining adhesive residue or debris, use a damp cloth to wipe down the wall, paying particular attention to the edges and corners. For tougher adhesive residue, you can use a gentle adhesive remover or a product specifically designed for removing adhesive residue. Always follow the manufacturer's instructions and test a small area first to ensure the product doesn't damage the wall. Once the adhesive and debris are removed, use a clean, dry cloth to wipe down the wall to remove any remaining dust or debris. This will ensure a clean and smooth surface for the new backsplash installation.
Repair Any Damaged Walls or Countertops
When it comes to post-removal cleanup and repair, one of the most critical tasks is to repair any damaged walls or countertops. This is especially true if the backsplash removal process involved scraping or prying, which can sometimes result in scratches, holes, or cracks on the surrounding surfaces. To repair damaged walls, start by cleaning the area thoroughly with a mixture of soap and water to remove any debris or dust. Next, apply a joint compound or spackling paste to the affected area, using a putty knife to smooth out the surface. Allow the compound to dry completely before sanding it down to a smooth finish. If the damage is more extensive, you may need to use a patching compound or even replace the drywall entirely. For damaged countertops, the repair process will depend on the type of material. For example, if you have a granite or stone countertop, you may need to use a specialized epoxy or resin to fill in any cracks or chips. For laminate or Formica countertops, you can use a laminate repair kit or a countertop repair compound. In either case, be sure to follow the manufacturer's instructions carefully to ensure a successful repair. By taking the time to repair any damaged walls or countertops, you can ensure a smooth and seamless transition to your new backsplash installation.
Clean and Prepare the Area for New Installation
When it comes to preparing the area for a new installation, cleanliness is key. After removing the old backsplash, it's essential to thoroughly clean the area to ensure a smooth and successful installation process. Start by removing any debris, dust, or old adhesive from the wall using a putty knife or a scraper. Be gentle to avoid damaging the wall or surrounding surfaces. Next, vacuum the area to remove any remaining dust or debris. If there are any stubborn stains or residue, use a mixture of soap and water to clean the area. Rinse the area thoroughly with clean water to remove any soap residue. Allow the area to dry completely before proceeding with the new installation. Additionally, inspect the wall for any damage or imperfections and make any necessary repairs before installing the new backsplash. This may include filling in holes or cracks with spackling compound or sanding down rough surfaces. By taking the time to properly clean and prepare the area, you'll ensure a strong bond between the new backsplash and the wall, and a successful installation that will last for years to come.