How To Connect Garmin To Strava
Here is the introduction paragraph: Connecting your Garmin device to Strava can be a game-changer for athletes and fitness enthusiasts. By linking your Garmin device to Strava, you can track your workouts, monitor your progress, and compete with friends. However, the process of connecting your Garmin device to Strava can be confusing, especially for those who are new to both platforms. In this article, we will guide you through the process of connecting your Garmin device to Strava, starting with setting up your Garmin device, then connecting it to Strava, and finally troubleshooting common connection issues. By the end of this article, you will be able to seamlessly connect your Garmin device to Strava and start tracking your workouts. So, let's get started by setting up your Garmin device.
Setting Up Your Garmin Device
Setting up your Garmin device is an essential step to unlock its full potential and start tracking your fitness journey. To get started, you'll need to enable Bluetooth and GPS on your device, which will allow you to connect it to your smartphone and access location-based features. Additionally, you'll need to download and install the Garmin Connect app, which will enable you to sync your device with your account and access a wealth of features and data. Finally, you'll need to create a Garmin Connect account, which will provide you with a centralized hub to manage your device, track your progress, and connect with other users. By following these simple steps, you'll be able to set up your Garmin device and start achieving your fitness goals in no time. So, let's get started by enabling Bluetooth and GPS on your Garmin device.
Enabling Bluetooth and GPS on Your Garmin Device
To enable Bluetooth and GPS on your Garmin device, start by going to the device's settings menu. This is usually represented by a gear icon or a wrench symbol. Once you're in the settings menu, look for the "Bluetooth" or "Wireless" option and select it. From there, toggle the switch to turn Bluetooth on. You may be prompted to confirm that you want to enable Bluetooth, so select "Yes" or "OK" to proceed. Next, go back to the settings menu and look for the "GPS" or "Location" option. Select this option and toggle the switch to turn GPS on. You may need to wait a few seconds for the device to acquire a GPS signal. Once you've enabled both Bluetooth and GPS, your Garmin device is ready to connect to Strava and track your activities. Make sure to also enable the "GLONASS" option, which is a satellite navigation system that can improve the accuracy of your GPS signal. Additionally, you may want to enable the "WAAS" option, which is a system that provides corrections to GPS signals and can improve accuracy. By enabling these options, you can ensure that your Garmin device is able to provide accurate location data and connect to Strava seamlessly.
Downloading and Installing the Garmin Connect App
To download and install the Garmin Connect app, start by visiting the App Store on your iOS device or the Google Play Store on your Android device. Search for "Garmin Connect" in the search bar, and select the app from the search results. Tap the "Get" or "Install" button to begin the download process. Once the download is complete, tap the "Open" button to launch the app. You will be prompted to create a Garmin account or sign in to an existing one. Follow the in-app instructions to complete the setup process, which may include agreeing to terms and conditions, selecting your device, and setting up your profile. After setting up your account, you will be able to connect your Garmin device to the app, track your activities, and access various features and settings. The Garmin Connect app is free to download and use, and it is compatible with a wide range of Garmin devices, including smartwatches, fitness trackers, and cycling computers. By installing the Garmin Connect app, you will be able to unlock the full potential of your Garmin device and take your fitness tracking to the next level.
Creating a Garmin Connect Account
To create a Garmin Connect account, start by navigating to the Garmin Connect website and clicking on the "Create Account" button. You will be prompted to enter your email address, choose a password, and provide some basic information such as your name and date of birth. Once you have filled out the required fields, click on the "Create Account" button to complete the registration process. You will then receive an email from Garmin to verify your email address, which you must click on to activate your account. After verifying your email address, you can log in to your Garmin Connect account and start setting up your profile. You can add a profile picture, cover photo, and bio to personalize your account. You can also connect your social media accounts to share your activities and achievements with friends and family. Additionally, you can set up your account to sync with your Garmin device, allowing you to track your activities, view your progress, and receive notifications. By creating a Garmin Connect account, you can unlock a range of features and benefits that enhance your Garmin device experience.
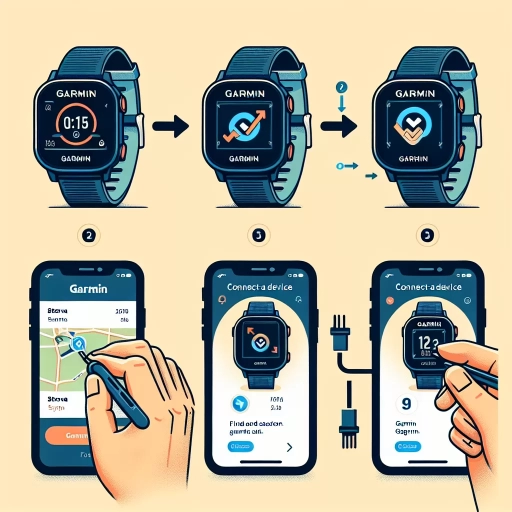
Connecting Your Garmin Device to Strava
Connecting your Garmin device to Strava can enhance your fitness tracking experience by providing a more comprehensive view of your activities and performance. To get started, you'll need to authorize Strava to access your Garmin Connect account, which will allow the two platforms to share data seamlessly. Once connected, you can configure Strava to sync with your Garmin device, ensuring that all your workouts and activities are accurately recorded and analyzed. Additionally, you can enable live segments and other Strava features to take your training to the next level. In this article, we'll guide you through the process of connecting your Garmin device to Strava, starting with the first step: authorizing Strava to access your Garmin Connect account.
Authorizing Strava to Access Your Garmin Connect Account
To authorize Strava to access your Garmin Connect account, start by logging into your Strava account and navigating to the "Settings" or "Preferences" section. From there, click on "Applications, Services, and Devices" or a similar option, depending on the Strava interface you're using. Next, search for Garmin Connect and click on it to initiate the authorization process. You will be redirected to the Garmin Connect website, where you'll be prompted to log in to your Garmin account. Once logged in, you'll be asked to grant Strava permission to access your Garmin Connect data. Review the permissions carefully, ensuring you're comfortable with the level of access Strava is requesting. If you agree, click "Authorize" to complete the process. After authorization, Strava will be able to sync your Garmin data, allowing you to track your activities, analyze your performance, and compete with friends. It's essential to note that you can revoke Strava's access to your Garmin Connect account at any time by returning to the "Applications, Services, and Devices" section in your Strava settings and clicking "Revoke Access" next to Garmin Connect.
Configuring Strava to Sync with Your Garmin Device
Configuring Strava to sync with your Garmin device is a straightforward process that allows you to seamlessly integrate your fitness tracking data. To start, ensure that you have a Strava account and a Garmin device that is compatible with Strava. Next, download and install the Strava app on your mobile device, and sign in to your Strava account. Then, navigate to the Strava app settings, select "Account" and then "Link Other Services." From here, choose "Garmin" as the service you want to connect. You will be redirected to the Garmin website, where you will need to sign in to your Garmin account and authorize Strava to access your data. Once authorized, your Garmin device will be connected to Strava, and your fitness tracking data will be synced automatically. You can also customize your sync settings to choose which data you want to share with Strava, such as activities, routes, and heart rate data. Additionally, you can set up automatic uploads from your Garmin device to Strava, so you don't have to manually upload your data every time. By configuring Strava to sync with your Garmin device, you can unlock a wealth of features and insights to help you optimize your training and reach your fitness goals.
Enabling Live Segments and Other Strava Features
Enabling Live Segments and other Strava features can elevate your running or cycling experience. To enable Live Segments, go to the Strava app, navigate to the "Settings" icon, and select "Live Segments." From there, toggle the switch to turn on Live Segments. This feature allows you to compete with others in real-time on popular segments, providing an added motivation to push your limits. Additionally, you can enable other features such as "Live Tracking," which allows friends and family to track your activities in real-time, and "Beacon," which sends your location to emergency contacts in case of an incident. To access these features, go to the "Settings" icon, select "Account," and then choose the feature you want to enable. By enabling these features, you can enhance your Strava experience, stay connected with others, and prioritize your safety while engaging in your favorite activities.
Troubleshooting Common Connection Issues
Troubleshooting common connection issues can be a frustrating experience, especially when it comes to syncing your Garmin device with Strava. However, with the right approach, you can quickly identify and resolve the problem. In this article, we will explore three common connection issues and provide step-by-step solutions to get you back on track. First, we will discuss resolving Bluetooth connectivity problems, which can often be the culprit behind syncing errors. We will also delve into fixing syncing errors between Garmin and Strava, which can be caused by a range of factors, including incorrect settings or outdated software. Finally, we will cover resetting your Garmin device and Strava connection, a simple yet effective solution that can resolve even the most stubborn issues. By the end of this article, you will be equipped with the knowledge and tools to troubleshoot common connection issues and get your Garmin device and Strava account syncing seamlessly. Let's start by resolving Bluetooth connectivity problems.
Resolving Bluetooth Connectivity Problems
Bluetooth connectivity problems can be frustrating, especially when you're trying to connect your Garmin device to Strava. To resolve these issues, start by ensuring your Garmin device and Strava app are updated to the latest versions. Next, check that Bluetooth is enabled on both devices and that they are in close proximity to each other. If you're still experiencing issues, try restarting both devices and then attempt to reconnect. Additionally, check for any conflicts with other Bluetooth devices in the area and disable them if necessary. If none of these steps resolve the issue, try resetting your Garmin device's Bluetooth connection by going to Settings > Bluetooth > Reset Bluetooth. You can also try deleting the Strava app and reinstalling it to start fresh. If you're still having trouble, consult Garmin's support resources or contact their customer support team for further assistance. By following these steps, you should be able to resolve any Bluetooth connectivity problems and successfully connect your Garmin device to Strava.
Fixing Syncing Errors Between Garmin and Strava
If you're experiencing syncing errors between Garmin and Strava, there are several steps you can take to resolve the issue. First, ensure that your Garmin device is properly connected to your Strava account by checking the connection status in your Strava settings. If the connection is not active, try disconnecting and reconnecting your Garmin account to Strava. Next, verify that your Garmin device is set to sync automatically with Strava by checking the device's settings. If automatic syncing is not enabled, turn it on to ensure that your activities are being transferred to Strava. Additionally, check that your Strava account is set to receive data from Garmin by checking the account's data sources. If Garmin is not listed as a data source, add it to ensure that your activities are being synced. If you're still experiencing issues, try resetting your Garmin device's sync settings or reinstalling the Garmin Connect app. You can also try syncing your activities manually by uploading them to Strava from your Garmin device. If none of these steps resolve the issue, try contacting Garmin or Strava support for further assistance. By following these steps, you should be able to resolve syncing errors between Garmin and Strava and ensure that your activities are being accurately tracked and synced.
Resetting Your Garmin Device and Strava Connection
If you're experiencing issues with your Garmin device and Strava connection, resetting your device and re-establishing the connection may resolve the problem. To reset your Garmin device, go to the settings menu and select "System" or "About." Look for the "Reset" or "Factory Reset" option and follow the prompts to complete the process. This will restore your device to its default settings, so be sure to re-pair it with your Strava account afterwards. To re-establish the connection, open the Strava app and navigate to the "Settings" or "Account" menu. Select "Connected Services" or "Third-Party Apps" and look for Garmin. If you don't see Garmin listed, select "Add a Service" or "Connect an App" and follow the prompts to link your accounts. You may need to enter your Garmin login credentials and authorize Strava to access your Garmin data. Once connected, your Garmin device should sync with Strava, and you should be able to view your activities and data on both platforms. If you're still experiencing issues, try restarting your Garmin device and Strava app, or contact Garmin or Strava support for further assistance.