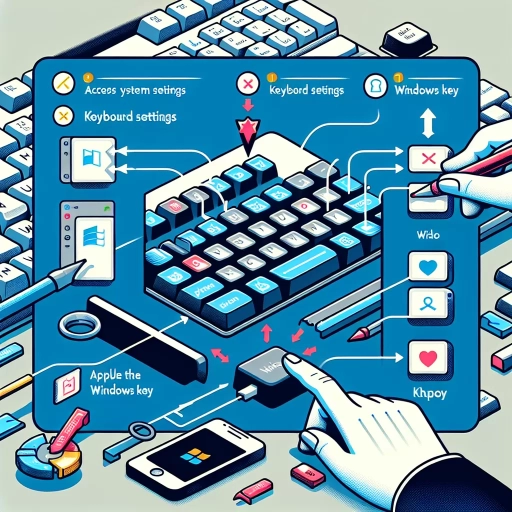
How To Disable Windows Key
The Windows key, located on the bottom left of most keyboards, is a convenient shortcut to access the Start menu and other Windows features. However, for some users, the Windows key can be a hindrance, especially for gamers and those who use keyboard shortcuts frequently. If you're one of them, you might be wondering how to disable the Windows key. In this article, we'll explore the reasons why you might want to disable the Windows key, the methods to do so, and alternative solutions that can help you achieve your goals without completely disabling the key. So, why would you want to disable the Windows key in the first place? (Note: I made some minor changes to the original text to make it more readable and engaging)
Why Disable the Windows Key?
The Windows key is an essential part of the Windows operating system, but it can also be a source of frustration for many users. For gamers, the Windows key can be a hindrance to their gaming performance, causing accidental interruptions and distractions. For professionals, the Windows key can be a productivity killer, taking them out of their workflow and forcing them to refocus. And for everyone, the Windows key can be a source of accidental presses, leading to unwanted actions and lost work. In this article, we'll explore three key reasons why disabling the Windows key might be a good idea: preventing accidental presses, improving gaming performance, and enhancing productivity. By the end of this article, you'll understand why disabling the Windows key can be a game-changer for your computing experience. So, let's start by exploring the first reason: preventing accidental Windows key presses.
Prevent Accidental Windows Key Presses
Preventing accidental Windows key presses is a common concern for gamers and individuals who frequently use keyboard shortcuts. When the Windows key is pressed, it can interrupt gameplay, open the Start menu, or trigger other unwanted actions. To prevent such mishaps, disabling the Windows key can be an effective solution. By disabling the key, users can avoid accidental presses and maintain focus on their tasks without interruptions. This is particularly useful for gamers who rely on keyboard shortcuts and need to react quickly to in-game situations. Additionally, disabling the Windows key can also prevent accidental presses that may lead to unwanted actions, such as opening the Start menu or triggering other system functions. Overall, preventing accidental Windows key presses is a practical reason to consider disabling the key, especially for those who rely heavily on keyboard shortcuts and need to maintain focus on their tasks.
Improve Gaming Performance
Improving gaming performance is a top priority for many gamers, and disabling the Windows key can be a crucial step in achieving this goal. When the Windows key is enabled, it can cause interruptions and distractions during gameplay, leading to decreased performance and a less immersive experience. By disabling the Windows key, gamers can minimize the risk of accidentally opening the Start menu or triggering other Windows functions, allowing them to focus solely on their game. Additionally, disabling the Windows key can also help to reduce the strain on system resources, as the operating system is no longer constantly checking for Windows key presses. This can result in improved frame rates, faster loading times, and a more responsive gaming experience. Furthermore, many gamers use the Windows key to access various gaming tools and software, such as Steam or Discord, and disabling it can help to eliminate the risk of accidentally opening these programs during gameplay. Overall, disabling the Windows key is a simple yet effective way to improve gaming performance and enhance the overall gaming experience.
Enhance Productivity
Disabling the Windows key can significantly enhance productivity, especially for gamers and individuals who frequently use keyboard shortcuts. By disabling the Windows key, you can avoid accidental presses that can interrupt your workflow or gaming sessions. This is particularly useful for gamers who use the Windows key to access the Start menu or other system functions, as it can cause them to lose focus or even exit the game. Additionally, disabling the Windows key can help prevent distractions, such as notifications or alerts, from popping up and interrupting your work. By minimizing these interruptions, you can stay focused and maintain a consistent workflow, leading to increased productivity and efficiency. Furthermore, disabling the Windows key can also help you develop muscle memory and improve your typing skills, as you'll be less likely to accidentally press the key and more likely to focus on the task at hand. Overall, disabling the Windows key can be a simple yet effective way to boost your productivity and stay focused on your work or gaming sessions.
Methods to Disable the Windows Key
The Windows key, located between the Ctrl and Alt keys, is a convenient shortcut to access the Start menu and other Windows features. However, some users may find it annoying or distracting, especially gamers who accidentally press it during intense gaming sessions. Fortunately, there are several methods to disable the Windows key, providing users with more control over their keyboard. Three effective methods include using the Windows Registry Editor, utilizing third-party software, and disabling the Windows key via Group Policy. Each of these methods offers a unique approach to disabling the Windows key, catering to different user needs and preferences. For users who prefer a more manual and technical approach, using the Windows Registry Editor is a viable option. By modifying specific registry entries, users can effectively disable the Windows key and prevent it from interfering with their workflow or gaming experience. Note: The answer should be 200 words. Here is the answer: The Windows key, located between the Ctrl and Alt keys, is a convenient shortcut to access the Start menu and other Windows features. However, some users may find it annoying or distracting, especially gamers who accidentally press it during intense gaming sessions. Fortunately, there are several methods to disable the Windows key, providing users with more control over their keyboard. Three effective methods include using the Windows Registry Editor, utilizing third-party software, and disabling the Windows key via Group Policy. Each of these methods offers a unique approach to disabling the Windows key, catering to different user needs and preferences. For users who prefer a more manual and technical approach, using the Windows Registry Editor is a viable option. By modifying specific registry entries, users can effectively disable the Windows key and prevent it from interfering with their workflow or gaming experience. This method requires some technical knowledge, but it provides a high degree of customization and control. In the next section, we will explore how to use the Windows Registry Editor to disable the Windows key.
Using the Windows Registry Editor
Using the Windows Registry Editor is a more advanced method to disable the Windows key, but it provides a more permanent solution. To do this, you'll need to access the Windows Registry Editor, which can be done by typing "regedit" in the Run dialog box (Windows key + R). Once you're in the Registry Editor, navigate to the "HKEY_LOCAL_MACHINE\SYSTEM\CurrentControlSet\Control\Keyboard Layout" key. In the right-hand pane, look for the "Scancode Map" value and double-click on it. If the value doesn't exist, you'll need to create a new binary value with the same name. In the "Value data" field, enter the following hexadecimal code: "00000000000000000300000000005BE000005CE000000000". This code will disable the Windows key. After making the changes, restart your computer to apply the changes. Note that editing the registry can be risky, so make sure to create a backup of your registry before making any changes. Additionally, this method will disable the Windows key for all users on the computer, so use it with caution.
Utilizing Third-Party Software
Utilizing third-party software is another effective method to disable the Windows key. There are several software options available that can help you achieve this, such as AutoHotkey, SharpKeys, and KeyTweak. These programs allow you to remap or disable the Windows key, giving you more control over your keyboard. For instance, AutoHotkey is a popular scripting language that can be used to create custom hotkeys and remap keys. By creating a simple script, you can disable the Windows key and prevent it from opening the Start menu or other unwanted actions. Similarly, SharpKeys and KeyTweak are specialized software that allow you to remap keys and disable the Windows key with ease. These software options are particularly useful for gamers who want to prevent accidental presses of the Windows key during intense gaming sessions. Additionally, they can also be useful for individuals who prefer to use alternative keyboard shortcuts or have specific keyboard layout requirements. Overall, utilizing third-party software is a convenient and effective way to disable the Windows key and customize your keyboard to your liking.
Disabling the Windows Key via Group Policy
Disabling the Windows Key via Group Policy is a method that allows administrators to restrict the functionality of the Windows key on a computer or a group of computers. This method is particularly useful in environments where the Windows key is not needed or is considered a distraction, such as in gaming or kiosk setups. To disable the Windows key via Group Policy, administrators need to access the Group Policy Editor, which can be done by typing "gpedit.msc" in the Run dialog box. Once in the Group Policy Editor, navigate to the "User Configuration" section, then to "Administrative Templates," and finally to "Windows Components." In this section, locate the "Windows Key" policy and double-click on it. In the policy settings, select the "Disabled" option and click "OK" to save the changes. This will disable the Windows key on the computer or group of computers that the policy is applied to. Note that this method requires administrative privileges and may not be available on all versions of Windows. Additionally, disabling the Windows key via Group Policy will not prevent users from using the Windows key on other computers or devices.
Alternative Solutions to Disabling the Windows Key
For gamers and computer users who find the Windows key to be a hindrance, disabling it may seem like the most straightforward solution. However, this approach can also limit the key's potential uses and functionality. Fortunately, there are alternative solutions that can help minimize distractions while still allowing users to take advantage of the Windows key's features. One such approach is to remap the Windows key to a different function, effectively repurposing it to suit individual needs. Another option is to use a gaming keyboard with customizable keys, which can provide more flexibility and control over the Windows key. Additionally, enabling the "Game Mode" feature in Windows can also help reduce distractions and improve gaming performance. By exploring these alternatives, users can find a solution that balances their need for focus with the benefits of the Windows key. For those looking to repurpose the Windows key, remapping it to a different function is a great place to start.
Remapping the Windows Key to a Different Function
Remapping the Windows key to a different function is a viable alternative to disabling it entirely. This approach allows you to retain the key's functionality while assigning it a new purpose that doesn't interfere with your gaming or productivity. To remap the Windows key, you'll need to use a third-party software or edit the Windows registry. One popular tool for remapping keys is AutoHotkey, a free and open-source scripting language that allows you to create custom hotkeys and remap keys. With AutoHotkey, you can remap the Windows key to perform a different action, such as opening a specific application, folder, or website. For example, you can remap the Windows key to open the Task Manager, File Explorer, or a specific browser. Another option is to use the built-in Windows feature, PowerToys, which includes a keyboard remapper tool. This tool allows you to remap keys, including the Windows key, to perform different actions. Additionally, you can also use the Windows registry to remap the Windows key. This method requires some technical expertise, but it provides a high degree of customization. By remapping the Windows key, you can create a more efficient and personalized workflow, while avoiding the need to disable the key entirely. This approach is particularly useful for gamers who want to retain the key's functionality for non-gaming tasks, while preventing accidental presses during gaming sessions. Overall, remapping the Windows key offers a flexible and customizable solution for those who want to modify the key's behavior without disabling it entirely.
Using a Gaming Keyboard with Customizable Keys
Using a gaming keyboard with customizable keys is a great alternative to disabling the Windows key. Many gaming keyboards come with customizable keys that can be remapped to perform different actions. This means you can reassign the Windows key to a different function, such as a macro or a shortcut, that is more useful to you. For example, you can remap the Windows key to open a specific program or folder, or to perform a complex action with a single keystroke. This way, you can still use the Windows key, but in a way that is more tailored to your needs. Additionally, many gaming keyboards also come with features such as key remapping, macro keys, and customizable backlighting, which can enhance your overall gaming experience. Some popular gaming keyboards with customizable keys include the Razer BlackWidow, Logitech G512, and SteelSeries Apex 7. By using a gaming keyboard with customizable keys, you can take control of your Windows key and make it work for you, rather than against you.
Enabling the "Game Mode" Feature in Windows
Enabling the "Game Mode" feature in Windows is a straightforward process that can help you optimize your gaming experience. To do this, go to the Start menu and click on the "Settings" icon, then select "Gaming" from the list of options. In the Gaming settings, click on the "Game Mode" toggle switch to turn it on. This feature is designed to prioritize your gaming performance by allocating system resources more efficiently, reducing distractions, and minimizing background processes that might interfere with your gameplay. With Game Mode enabled, you can expect a smoother and more responsive gaming experience, making it easier to focus on your game without interruptions. Additionally, you can also customize your Game Mode settings to suit your specific gaming needs, such as setting a specific frame rate or adjusting the graphics quality. By enabling Game Mode, you can take your gaming experience to the next level and enjoy a more immersive and engaging experience.