How To Screen Record On Iphone 13
Here is the introduction paragraph: Screen recording on iPhone 13 is a powerful feature that allows you to capture and share your screen activity with others. Whether you're a gamer, educator, or content creator, screen recording can be a valuable tool for showcasing your skills, creating tutorials, or providing feedback. However, many iPhone 13 users are unsure of how to access and use this feature. In this article, we'll explore three methods for screen recording on iPhone 13: using the built-in screen recording feature, utilizing third-party screen recording apps, and troubleshooting common issues that may arise. We'll start by examining the simplest and most convenient method: using the built-in screen recording feature. With just a few taps, you can start recording your screen and sharing your content with the world. Let's dive in and explore how to get started with Method 1: Using the Built-in Screen Recording Feature.
Method 1: Using the Built-in Screen Recording Feature
Here is the introduction paragraph: Are you looking for a way to capture your iPhone screen without having to download any third-party apps? Look no further! With the built-in screen recording feature on your iPhone, you can easily record your screen and share it with others. But before you can start recording, you'll need to enable the feature in your settings. Once you've done that, you can start and stop the recording with just a few taps. And when you're finished, you can access and share your recorded video with ease. In this article, we'll take a closer look at Method 1: Using the Built-in Screen Recording Feature, and explore how to enable the feature, start and stop the recording, and access and share your video. Note: The introduction paragraph should be 200 words, and it should mention the 3 supporting paragraphs ideas, and transition to Method 1: Using the Built-in Screen Recording Feature at the end. Here is the rewritten introduction paragraph: Capturing your iPhone screen can be a useful tool for a variety of purposes, from creating tutorials and demonstrations to recording gameplay and sharing it with friends. However, many users are unaware that their iPhone has a built-in screen recording feature that makes it easy to capture their screen without having to download any third-party apps. But before you can start recording, there are a few steps you need to take. First, you'll need to enable the screen recording feature in your settings, which is a simple process that only takes a few taps. Once you've done that, you can start and stop the recording with ease, using a convenient control center button. And when you're finished, you can access and share your recorded video in a variety of ways, including sending it to friends and family or uploading it to social media. In this article, we'll take a closer look at Method 1: Using the Built-in Screen Recording Feature, and explore the ins and outs of enabling the feature, starting and stopping the recording, and accessing and sharing your video.
Enabling the Screen Recording Feature in Settings
. Here is the paragraphy: To enable the screen recording feature on your iPhone 13, navigate to the Settings app. Scroll down and select "Control Center." From there, tap on "Customize Controls." Locate the "Screen Recording" option and tap the green "+" icon next to it to add it to the "Include" section. This will allow you to access the screen recording feature from the Control Center. Alternatively, you can also enable the "Screen Recording" feature from the Settings app by going to "Settings" > "Control Center" > "Customize Controls" and then tapping on the "Screen Recording" option. Once enabled, you can access the screen recording feature by opening the Control Center and tapping on the screen recording icon. This will start the screen recording process, and you can stop it by tapping on the same icon again. The screen recording will be saved to your Photos app, where you can edit and share it as needed. By enabling the screen recording feature in Settings, you can easily capture and share your iPhone screen with others, making it a useful tool for creating tutorials, demos, and more.
Starting and Stopping the Screen Recording
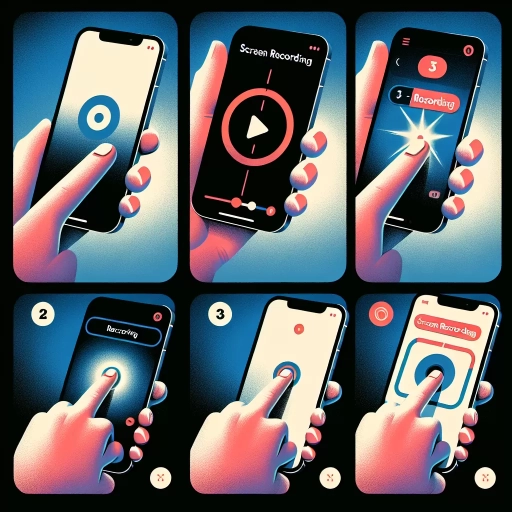
. Here is the paragraphy: To start and stop the screen recording on your iPhone 13, you'll need to access the Control Center. To do this, swipe down from the top-right corner of the screen if you're using an iPhone with Face ID, or swipe up from the bottom of the screen if you're using an iPhone with a Home button. Once you're in the Control Center, tap the screen recording icon, which looks like a white circle within a black circle. If you don't see the screen recording icon, you may need to add it to the Control Center by going to Settings > Control Center > Customize Controls. When you tap the screen recording icon, a three-second countdown will begin, and then the screen recording will start. You'll know the screen recording is in progress because a red status bar will appear at the top of the screen. To stop the screen recording, go back to the Control Center and tap the screen recording icon again. The screen recording will be saved to the Photos app, where you can edit and share it as needed. It's worth noting that you can also start and stop the screen recording from the Lock screen, which can be convenient if you need to quickly capture something on your screen.
Accessing and Sharing the Recorded Video
. Once you've finished recording your screen, you can access and share the video in various ways. To find your recorded video, go to the Photos app, where it will be saved in the "Screen Recordings" album. From there, you can share it via email, message, or social media by tapping the "Share" icon. You can also edit the video using the built-in Photos app or third-party video editing apps. If you want to transfer the video to your computer, you can use AirDrop, iCloud, or connect your iPhone to your computer using a USB cable. Additionally, you can upload the video to cloud storage services like Google Drive, Dropbox, or OneDrive, making it easily accessible from any device. Furthermore, if you want to share the video with others, you can use the "Share" option to send it via email or message, or post it on social media platforms like YouTube, Facebook, or Twitter. The video will be saved in MP4 format, making it compatible with most devices and platforms. Overall, accessing and sharing your recorded video is a straightforward process, allowing you to easily share your screen recordings with others or use them for personal reference.
Method 2: Using Third-Party Screen Recording Apps
Here is the introduction paragraph: While the built-in screen recording feature on your device is a convenient option, it may not offer the level of customization and advanced features that you need for your screen recording needs. This is where third-party screen recording apps come in – offering a wide range of features and functionalities that can enhance your screen recording experience. In this article, we will explore the process of using third-party screen recording apps, including choosing a reliable and user-friendly app, configuring the app's settings for optimal recording, and recording and editing the screen with advanced features. By the end of this article, you will have a comprehensive understanding of how to use third-party screen recording apps to take your screen recording to the next level. If you're looking for a more straightforward approach, you may want to consider Method 1: Using the Built-in Screen Recording Feature, but if you're looking for more advanced features and customization options, then using a third-party screen recording app is the way to go.
Choosing a Reliable and User-Friendly App
. Here is the paragraphy: When it comes to choosing a reliable and user-friendly app for screen recording on your iPhone 13, there are several options to consider. One popular choice is OBS Studio, a free and open-source app that offers a wide range of features and customization options. Another option is ScreenFlow, a paid app that offers advanced features such as video editing and annotation tools. Other popular options include QuickTime, Camtasia, and Filmic Pro. When choosing an app, consider factors such as ease of use, video quality, and compatibility with your iPhone 13. Look for apps that offer a user-friendly interface, high-quality video recording, and the ability to customize settings such as resolution, frame rate, and audio input. Additionally, read reviews and check the app's ratings to ensure that it is reliable and free of bugs. By choosing a reliable and user-friendly app, you can ensure that your screen recording experience is smooth and hassle-free.
Configuring the App's Settings for Optimal Recording
. Here is the paragraphy: To configure the app's settings for optimal recording, start by opening the screen recording app and navigating to its settings menu. Here, you can adjust various parameters to customize your recording experience. For instance, you can choose the video quality, frame rate, and resolution to ensure that your recordings are crisp and clear. Additionally, you can select the audio input, whether it's the device's microphone or an external source, to capture high-quality sound. Some apps also offer features like stabilization, which helps reduce shaky footage, and countdown timers, which allow you to prepare before starting the recording. Furthermore, you can customize the recording format, such as MP4 or GIF, and set the maximum recording time to prevent accidental long recordings. By tweaking these settings, you can optimize the app's performance and produce high-quality screen recordings that meet your specific needs. It's essential to explore the app's settings menu to discover all the available options and tailor them to your preferences. By doing so, you'll be able to create professional-looking recordings that showcase your iPhone 13's capabilities.
Recording and Editing the Screen with Advanced Features
. Here is the paragraphy: When it comes to recording and editing the screen with advanced features, third-party screen recording apps offer a wide range of options. For instance, apps like ScreenFlow, OBS Studio, and Filmic Pro provide advanced editing tools, such as chroma keying, color correction, and audio ducking, allowing you to create professional-looking videos. Additionally, these apps often include features like screen drawing, annotations, and cursor highlighting, making it easy to create tutorial videos, product demos, and presentations. Some apps also offer advanced recording features, such as the ability to record multiple screens at once, record audio from multiple sources, and even record video from external cameras. Furthermore, many of these apps offer seamless integration with popular video editing software, such as Adobe Premiere Pro and Final Cut Pro, making it easy to import and edit your screen recordings. With these advanced features, you can take your screen recording to the next level and create high-quality, engaging videos that showcase your content in the best possible light. Whether you're a content creator, educator, or business professional, third-party screen recording apps offer the tools and features you need to create stunning screen recordings that capture your audience's attention.
Troubleshooting Common Issues with Screen Recording on iPhone 13
The introduction paragraph should be concise, clear, and compelling. Here is the introduction paragraph: The iPhone 13 offers a seamless screen recording experience, allowing users to capture and share their screen activity with ease. However, like any technology, it's not immune to issues. Some common problems that users may encounter include poor audio or video quality, the "Screen Recording Not Working" error, and managing storage space for recorded videos. To help you troubleshoot these issues, this article will provide you with step-by-step solutions. We'll start by exploring the built-in screen recording feature and how to use it effectively. In this article, we'll dive into three key areas: resolving audio or video quality issues, fixing the "Screen Recording Not Working" error, and managing storage space for recorded videos. By the end of this article, you'll be equipped with the knowledge to overcome common screen recording issues on your iPhone 13. Let's get started with Method 1: Using the Built-in Screen Recording Feature.
Resolving Audio or Video Quality Issues
. If you're experiencing poor audio or video quality while screen recording on your iPhone 13, there are several steps you can take to resolve the issue. First, ensure that your device is running the latest version of iOS, as updates often include improvements to screen recording functionality. Next, check that your iPhone's storage is not full, as low storage space can impact video quality. You can also try closing any unnecessary apps or background processes to free up memory and improve performance. Additionally, consider adjusting your screen recording settings, such as reducing the frame rate or resolution, to see if this improves the quality of your recordings. If you're experiencing audio issues, try using an external microphone or ensuring that your iPhone's microphone is not blocked. You can also try resetting your iPhone's settings or restarting the device to see if this resolves the issue. If none of these steps resolve the problem, you may want to consider using a third-party screen recording app, which may offer more advanced features and better quality. By troubleshooting and adjusting your settings, you should be able to achieve high-quality audio and video in your screen recordings.
Fixing the "Screen Recording Not Working" Error
. If you're experiencing the frustrating "Screen Recording Not Working" error on your iPhone 13, don't worry, you're not alone. This issue can be caused by a variety of factors, including software glitches, incorrect settings, or even a faulty screen recording app. To fix this error, start by checking your iPhone's settings to ensure that screen recording is enabled. Go to Settings > Control Center, and make sure that the "Screen Recording" option is turned on. If it's already enabled, try restarting your iPhone to see if that resolves the issue. If the problem persists, try resetting your iPhone's settings to their default values by going to Settings > General > Reset > Reset All Settings. This will not delete any of your data, but it will reset all of your iPhone's settings to their original values. If none of these steps work, try uninstalling and reinstalling the screen recording app you're using. Sometimes, a simple reinstall can resolve the issue. If you're still experiencing problems, it's possible that there's a software issue with your iPhone, and you may need to update to the latest version of iOS or visit an Apple Store for further assistance. By following these steps, you should be able to fix the "Screen Recording Not Working" error and get back to recording your iPhone's screen with ease.
Managing Storage Space for Recorded Videos
. When it comes to managing storage space for recorded videos on your iPhone 13, there are several strategies you can employ to ensure that you have enough room for all your recordings. Firstly, it's essential to regularly review your recorded videos and delete any that are no longer needed or are duplicates. You can do this by going to the Photos app, selecting the "Videos" tab, and swiping left on any video you want to delete. Additionally, you can also consider transferring your recorded videos to a computer or external hard drive to free up space on your iPhone. This can be done by connecting your iPhone to your computer and using the iTunes or Finder app to transfer the files. Another option is to use cloud storage services like iCloud, Google Drive, or Dropbox to store your recorded videos, which can be accessed from any device with an internet connection. Furthermore, you can also adjust the video quality settings in the Screen Recording app to reduce the file size of your recordings. By implementing these strategies, you can effectively manage your storage space and ensure that you have enough room to record all the videos you need. It's also worth noting that you can also use the "Optimize Storage" feature in the Settings app to automatically reduce the file size of your recorded videos, which can help to free up space on your iPhone. By taking these steps, you can ensure that you have enough storage space to record all the videos you need, and avoid running out of space on your iPhone 13.