How To Reset A Roku Tv
Here is the introduction paragraph: Are you experiencing issues with your Roku TV, such as freezing, buffering, or poor picture quality? Or perhaps you're looking to sell or give away your device and want to ensure all personal data is erased. Whatever the reason, resetting your Roku TV can be a simple and effective solution. In this article, we'll guide you through the process of resetting your Roku TV, from preparation to completion. Before you start, it's essential to take a few precautions to ensure a smooth reset process. In the following sections, we'll cover the Pre-Reset Checklist, which will help you prepare your device for the reset, followed by the steps for Resetting Your Roku TV, and finally, the Post-Reset Setup to get your device up and running again. So, let's begin with the Pre-Reset Checklist to ensure you're ready to reset your Roku TV.
Pre-Reset Checklist
Before you reset your Roku device, it's essential to take a few precautions to ensure a smooth transition. A pre-reset checklist can help you avoid losing important information and settings. Here are three crucial steps to include in your pre-reset checklist: backing up your Roku account information, unlinking any devices connected to your Roku account, and removing any external devices connected to your Roku TV. By following these steps, you can ensure that your reset process is hassle-free and that you don't lose any critical data. First, let's start with the most important step: backing up your Roku account information.
Backup Your Roku Account Information
To ensure a seamless experience after resetting your Roku TV, it's essential to backup your Roku account information. This includes your account login credentials, payment information, and any linked devices or services. Start by logging into your Roku account on the official Roku website or through the Roku mobile app. Once logged in, navigate to the "Account" or "My Account" section, where you can view and manage your account details. Take note of your username and password, and consider writing them down or storing them in a secure password manager. Additionally, review your payment information, including your credit card number, expiration date, and billing address. If you have any linked devices or services, such as Amazon Alexa or Google Assistant, make sure to note down the relevant details, including device names and authorization codes. It's also a good idea to take a screenshot of your account dashboard, which will provide a visual record of your account settings and linked devices. By backing up your Roku account information, you'll be able to easily restore your account settings and access your favorite channels and content after resetting your Roku TV.
Unlink Any Devices Connected to Your Roku Account
To ensure a seamless reset process, it's essential to unlink any devices connected to your Roku account. This step is crucial in preventing any potential disruptions or unauthorized access to your account after the reset. To unlink devices, follow these simple steps: go to the Roku website and sign in to your account, click on the "My Account" tab, and select "Linked Devices" from the drop-down menu. Here, you'll see a list of all devices connected to your account, including smartphones, tablets, and other Roku devices. Click on the "Unlink" button next to each device to disconnect it from your account. Additionally, if you have any mobile devices connected to your Roku account through the Roku app, make sure to uninstall the app or sign out of your account on those devices. By unlinking all devices, you'll prevent any potential issues during the reset process and ensure that your account remains secure.
Remove Any External Devices Connected to Your Roku TV
When resetting your Roku TV, it's essential to remove any external devices connected to it to prevent any potential issues or conflicts during the reset process. This includes devices such as USB drives, HDMI cables, and streaming devices like Google Chromecast or Amazon Fire TV. Disconnecting these devices will ensure that your Roku TV can complete the reset process without any interruptions or errors. Additionally, removing external devices will also help to prevent any data loss or corruption that may occur during the reset process. Once you have removed all external devices, you can proceed with the reset process, and your Roku TV will be restored to its factory settings.
Resetting Your Roku TV
If you're experiencing issues with your Roku TV, such as freezing, buffering, or poor picture quality, resetting it may be the solution. There are three ways to reset your Roku TV, and we'll explore each method in this article. You can reset your Roku TV using the Roku remote control, the settings menu, or the reset button on the back of the TV. Each method has its own advantages and disadvantages, and we'll discuss them in detail. In this article, we'll start by discussing how to reset your Roku TV using the Roku remote control, a simple and straightforward method that can resolve many common issues. By the end of this article, you'll know how to reset your Roku TV and get it working smoothly again. So, let's get started with the first method: Using the Roku Remote Control to Reset Your TV.
Using the Roku Remote Control to Reset Your TV
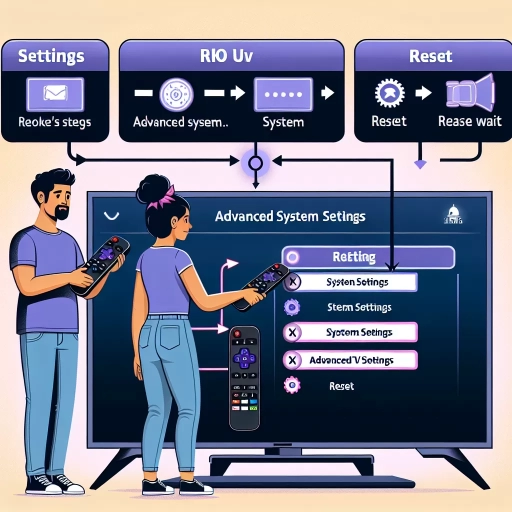
Using the Roku remote control to reset your TV is a straightforward process that can resolve various issues, such as freezing, buffering, or connectivity problems. To start, ensure your Roku remote is properly paired with your TV. If you're using a Roku Streaming Stick or Roku Streaming Stick+, make sure it's securely inserted into the HDMI port. Next, locate the "Settings" button on your remote, usually represented by a gear icon. Press the "Settings" button to access the menu, then navigate to "System" or "System Settings." From there, select "Advanced system settings" and choose "Factory reset." You will be prompted to enter a code, which is usually displayed on the screen. Enter the code using the number buttons on your remote, and confirm that you want to reset your TV. The reset process may take a few minutes to complete, during which your TV will restart and restore its default settings. Once the reset is finished, you'll need to set up your Roku TV again, including reconnecting to your Wi-Fi network and signing in to your Roku account. By using the Roku remote control to reset your TV, you can quickly and easily resolve common issues and get back to enjoying your favorite streaming content.
Resetting Your Roku TV Using the Settings Menu
To reset your Roku TV using the settings menu, navigate to the home screen and select the "Settings" option. From there, choose "System" and then "Advanced system settings." Next, select "Factory reset" and enter the code displayed on the screen to confirm. This will initiate the reset process, which may take a few minutes to complete. During this time, your Roku TV will restart and restore its original settings. Once the process is finished, you'll need to set up your Roku TV again, including reconnecting to your Wi-Fi network and signing in to your Roku account. It's also a good idea to update your Roku TV's software to ensure you have the latest features and security patches. After resetting your Roku TV, you may need to reinstall any channels or apps you had previously installed, as they will be removed during the reset process. By following these steps, you can easily reset your Roku TV using the settings menu and start fresh with a clean slate.
Performing a Factory Reset Using the Roku TV's Reset Button
Performing a factory reset using the Roku TV's reset button is a straightforward process that can be completed in a few simple steps. To begin, locate the reset button on your Roku TV, which is usually found on the back or bottom of the device. The reset button is typically a small pinhole button that requires a paper clip or small pin to press. Once you've located the reset button, press and hold it for about 10-15 seconds until the Roku TV's lights start to flash. This indicates that the reset process has begun. Next, release the reset button and wait for the Roku TV to complete the factory reset process, which may take a few minutes. During this time, the TV will restart several times and display a progress bar on the screen. Once the reset is complete, the Roku TV will display the initial setup screen, indicating that the device has been restored to its factory settings. It's essential to note that performing a factory reset will erase all of your personalized settings, including your Wi-Fi network, streaming services, and installed channels. Therefore, it's recommended to only perform a factory reset if you're experiencing severe issues with your Roku TV or if you're planning to sell or give away the device.
Post-Reset Setup
After resetting your Roku TV, you'll need to set it up again to get back to streaming your favorite shows and movies. This process involves several steps, including re-linking your Roku account to your TV, re-connecting external devices, and re-configuring your TV's settings and preferences. In this article, we'll guide you through the post-reset setup process, starting with the first crucial step: re-linking your Roku account to your TV. By the end of this process, you'll be able to access all your favorite streaming channels and enjoy a seamless viewing experience. So, let's dive in and explore how to re-link your Roku account to your TV.
Re-Linking Your Roku Account to Your TV
To re-link your Roku account to your TV, start by going to the Roku website and signing in to your account. Once you're logged in, click on the "My Account" tab and select "Link a Device" from the drop-down menu. You will then be prompted to enter the link code displayed on your TV screen. This code is usually a combination of letters and numbers and is used to verify your device. Enter the code correctly and click "Submit" to complete the linking process. If you encounter any issues during this process, you can try restarting your Roku device or checking your internet connection to ensure it's stable. Additionally, make sure you're using the correct Roku account credentials to avoid any linking errors. Once your account is successfully linked, you'll be able to access all your favorite channels and streaming services on your TV. It's also a good idea to check for any software updates to ensure your Roku device is running with the latest features and security patches. By re-linking your Roku account to your TV, you'll be able to enjoy a seamless streaming experience and get the most out of your device.
Re-Connecting External Devices to Your Roku TV
Re-connecting external devices to your Roku TV is a straightforward process that can be completed in a few simple steps. First, ensure that all cables are securely connected to the correct ports on both the device and the Roku TV. For example, if you're connecting a Blu-ray player, make sure the HDMI cable is plugged into the correct HDMI port on the TV and the player. Next, turn on the external device and the Roku TV, and then navigate to the Home screen on the TV. From there, select the "Settings" icon, followed by "System," and then "Control other devices (CEC)." This will allow you to enable the Consumer Electronics Control (CEC) feature, which enables communication between the Roku TV and external devices. Once CEC is enabled, you can use the Roku remote to control the external device, such as turning it on or off, or changing the input. If you're having trouble getting the external device to work, try restarting both the device and the Roku TV, and then repeat the connection process. Additionally, ensure that the external device is set to the correct input on the Roku TV, which can usually be found in the "Settings" menu under "System" and then "Inputs." By following these steps, you should be able to successfully re-connect your external devices to your Roku TV and enjoy a seamless viewing experience.
Re-Configuring Your Roku TV's Settings and Preferences
To re-configure your Roku TV's settings and preferences, start by accessing the Settings menu from the home screen. Navigate to the "Settings" option and select it using your remote control. From there, you can customize various aspects of your viewing experience. Begin by adjusting the display settings, such as the picture mode, brightness, and color temperature, to optimize the image quality for your specific TV model. Next, configure the audio settings, including the sound mode, volume, and audio output, to ensure an immersive audio experience. You can also personalize your Roku TV's appearance by changing the theme, screensaver, and wallpaper. Additionally, set up your preferred language, time zone, and date format to ensure that your TV is tailored to your needs. Furthermore, configure your network settings, including Wi-Fi and Ethernet connections, to establish a stable internet connection. You can also set up parental controls, such as content restrictions and time limits, to ensure a safe viewing environment for all users. Finally, explore the "System" menu to update your Roku TV's software, check for firmware updates, and reset the TV to its factory settings if needed. By re-configuring your Roku TV's settings and preferences, you can unlock a more personalized and enjoyable viewing experience.