How To Remove Glue
Here is the introduction paragraph: Removing glue can be a daunting task, especially when it dries and becomes stubborn. However, with the right techniques and preparation, it can be done effectively and safely. To successfully remove glue, it's essential to understand the different methods and approaches involved. In this article, we will explore the key steps to take when removing glue, including preparation, removal methods, and post-removal care. By following these steps, you can ensure a smooth and successful glue removal process. Preparation is key to a successful removal, and in the next section, we will discuss the importance of preparing the area and the glue itself before attempting to remove it.
Preparation is Key
When it comes to achieving a successful outcome in various tasks and projects, preparation is key. This is especially true when working with chemicals, paints, or other substances that require careful handling and application. To ensure a smooth and safe process, it's essential to take the necessary steps before diving in. This includes choosing the right solvent for the job, protecting your skin and surfaces from potential damage, and testing a small area first to avoid any unexpected consequences. By taking these precautions, you can minimize risks and achieve the desired results. In this article, we'll explore the importance of preparation in more detail, starting with the crucial step of choosing the right solvent.
Choose the Right Solvent
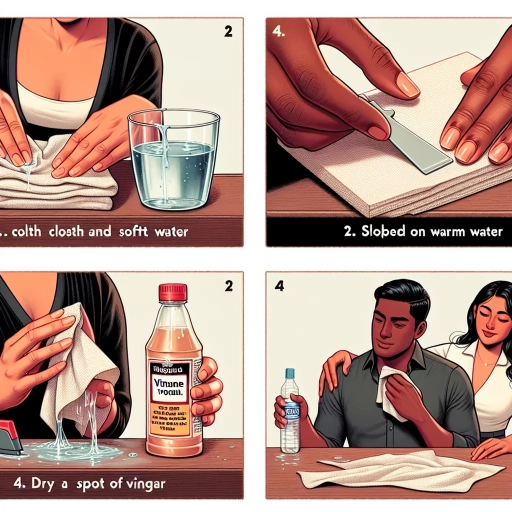
When it comes to removing glue, choosing the right solvent is crucial. The type of solvent you use will depend on the type of glue you're trying to remove. For example, if you're dealing with a water-based adhesive, such as white glue or school glue, a solvent like water or a mild detergent solution will likely be effective. On the other hand, if you're dealing with a solvent-based adhesive, such as super glue or epoxy, you'll need a more aggressive solvent like acetone or nail polish remover. It's also important to consider the surface you're working on, as some solvents can damage certain materials. For instance, acetone can damage plastics and some types of paint, so be sure to test a small area first. Additionally, some solvents may require special handling or ventilation, so be sure to read the label carefully and follow any safety precautions. By choosing the right solvent for the job, you'll be able to effectively remove the glue without damaging the surrounding surface.
Protect Your Skin and Surfaces
Protecting your skin and surfaces is a crucial step in the glue removal process. Before you start applying any removal methods, make sure to cover your skin and surfaces with protective gear. Wear gloves to prevent the glue from sticking to your skin, and apply a barrier cream to any exposed skin areas. For surfaces, cover them with a drop cloth or old sheets to prevent any damage from the removal process. If you're working with a particularly stubborn glue, consider applying a layer of petroleum jelly or cooking spray to the surface to make the removal process easier. Additionally, make sure to work in a well-ventilated area to prevent inhaling any harsh fumes from the glue or removal products. By taking these precautions, you can ensure a safe and successful glue removal process.
Test a Small Area First
When it comes to removing glue, it's essential to test a small area first to ensure the removal method you choose won't damage the surface. This is especially crucial when dealing with delicate or sensitive materials, such as wood, fabric, or paint. Testing a small area allows you to gauge the effectiveness of the removal method and assess any potential risks. Start by applying a small amount of the removal solution or product to a discreet area, such as a corner or a spot that won't be visible. Wait for the recommended amount of time, then gently scrape or wipe away the glue. Observe the results and check for any damage or discoloration. If the test area looks good, you can proceed with confidence, knowing that the removal method is safe and effective. However, if the test area shows signs of damage, it's best to try a different approach or seek professional help to avoid causing further harm. By testing a small area first, you can avoid costly mistakes and ensure a successful glue removal process.
Removal Methods
When it comes to removing unwanted adhesives, there are several methods that can be employed to achieve the desired results. The approach used often depends on the type of adhesive, the surface it is applied to, and the level of residue left behind. Three common removal methods include scraping off excess glue, applying heat or cold, and using a glue remover or solvent. Each of these techniques has its own set of advantages and can be effective in different situations. For instance, scraping off excess glue is a straightforward approach that can be used for thick, dried adhesives, while applying heat or cold can help loosen stubborn residues. On the other hand, using a glue remover or solvent is often the best option for delicate surfaces or when dealing with particularly strong adhesives. By understanding the different removal methods available, individuals can choose the most suitable approach for their specific needs. To start, one of the most basic and effective methods is to scrape off excess glue.
Scrape Off Excess Glue
When dealing with excess glue, it's essential to act quickly to prevent it from drying and becoming more challenging to remove. Scrape off excess glue using a blunt tool, such as a credit card, a similar tool, or a scraper, to gently pry the glue away from the surface. Be cautious not to scratch the surface, especially if it's a delicate material like wood or fabric. For more stubborn glue, you can use a hair dryer or a heat gun to soften the adhesive, making it easier to scrape off. However, be careful not to apply too much heat, as this can damage the surface or cause the glue to spread. If the glue is still wet, you can also use a paper towel or a cloth to blot it and remove as much of the excess as possible. In some cases, you may need to repeat the scraping and blotting process several times to remove all the excess glue. It's also important to note that some types of glue, such as epoxy or super glue, may require specialized removal methods, so be sure to check the manufacturer's instructions before attempting to remove excess glue.
Apply Heat or Cold
Applying heat or cold is a common method for removing glue, as it can help loosen the adhesive bond. Heat can be applied using a hair dryer, heat gun, or warm cloth, while cold can be applied using an ice pack or cold compress. The choice between heat and cold depends on the type of glue and the surface it is adhered to. For example, heat is often effective for removing glue from plastics, metals, and glass, while cold is better suited for removing glue from fabrics, wood, and paper. When applying heat, it's essential to be cautious not to apply too much heat, as this can damage the surface or cause the glue to melt and spread. Similarly, when applying cold, it's crucial to avoid applying too much pressure, as this can cause the glue to become brittle and crack. In general, it's recommended to start with a low temperature and gradually increase or decrease as needed. It's also important to test a small area first to ensure the heat or cold does not damage the surface. Additionally, applying heat or cold can be combined with other removal methods, such as scraping or using a solvent, to enhance the removal process. Overall, applying heat or cold is a simple and effective method for removing glue, and with the right technique and precautions, it can be a successful and safe removal method.
Use a Glue Remover or Solvent
When dealing with stubborn glue residue, using a glue remover or solvent can be an effective solution. These products are specifically designed to break down and dissolve the adhesive, making it easier to remove. There are various types of glue removers available, including acetone, nail polish remover, and specialized adhesive removers. When choosing a glue remover, it's essential to select one that is suitable for the type of glue you're dealing with and the surface it's on. For example, acetone is effective for removing cyanoacrylate-based adhesives, while nail polish remover is better suited for removing adhesive residue from surfaces that are sensitive to acetone. Always read the instructions and follow the recommended application and safety precautions when using a glue remover or solvent. Apply the remover to the affected area, let it sit for the recommended time, and then gently scrape off the glue residue with a soft cloth or brush. Be cautious not to apply too much pressure, which can damage the surface. If the glue residue is particularly stubborn, you may need to repeat the process several times before it's completely removed. It's also important to note that some glue removers can leave a residue or affect the surface's finish, so be sure to test a small area first and follow up with a cleaning solution to remove any remaining residue.
Post-Removal Care
After removing a sticker, decal, or adhesive residue, it's essential to take the right steps to ensure the surface is clean and protected. Post-removal care is crucial to prevent damage, maintain the surface's integrity, and make future cleaning easier. To achieve this, it's recommended to wipe down the surface, remove any residue with soap and water, and apply a protective coating if necessary. By following these steps, you can restore your surface to its original condition and prevent any potential damage. First, start by wiping down the surface to remove any loose debris or residue.
Wipe Down the Surface
Wipe down the surface with a damp cloth to remove any remaining adhesive residue. This step is crucial in ensuring the surface is clean and free of any sticky substances that could attract dirt and dust. Use a soft, lint-free cloth and mild soap solution to gently wipe down the surface, paying particular attention to any areas where the adhesive was most concentrated. Avoid using harsh chemicals or abrasive materials that could damage the surface. For delicate surfaces, such as wood or fabric, use a gentle cleaning product specifically designed for that material. Once you've wiped down the surface, use a dry cloth to remove any excess moisture and prevent water spots from forming. This will help restore the surface to its original condition and prevent any further damage. By wiping down the surface, you'll be able to remove any remaining adhesive residue and ensure a clean finish.
Remove Residue with Soap and Water
When it comes to removing residue, soap and water are often the most effective and gentle methods. This approach is particularly useful for removing adhesive residue from surfaces that are sensitive or prone to damage. To remove residue with soap and water, start by wetting the affected area with warm water. Then, apply a small amount of mild soap or dish soap directly to the residue. Gently massage the soap into the residue using a soft cloth or sponge, working in a circular motion. Be careful not to scrub too hard, as this can damage the surface. Rinse the area thoroughly with warm water to remove the soap and residue. If some residue remains, repeat the process as needed. For tougher residue, you can let the soap sit for a few minutes before rinsing. This will give the soap time to penetrate and break down the adhesive. Once the residue is removed, dry the area with a clean towel to prevent water spots. Soap and water are a safe and effective method for removing residue from a variety of surfaces, including skin, clothing, and household items.
Apply a Protective Coating (Optional)
Applying a protective coating to the affected area after removing glue is an optional but highly recommended step. This additional layer of protection can help shield the surface from further damage, stains, or spills, and make future cleaning easier. A protective coating can be especially beneficial for surfaces that are prone to scratches or wear and tear, such as wood, metal, or plastic. There are various types of protective coatings available, including clear wax, silicone sprays, and polyurethane varnishes. When choosing a protective coating, consider the type of surface you are working with and select a product that is specifically designed for that material. Always read and follow the manufacturer's instructions for application and drying times to ensure a strong and even bond. By applying a protective coating, you can add an extra layer of protection and peace of mind, knowing that your surface is safeguarded against future damage.