How To Remove Polygel Nails
 Navigating the world of nail care can be as complex as it is colorful, with a myriad of options available to boost style and confidence. One such trendy option is Polygel nails, a hybrid of gel and acrylic that promises durability, adaptability, and a flawless finish. For those who adore this innovation but are puzzled about its removal, this article unveils the mystery behind Polygel nails and guides you through a step-by-step process on their safe extraction at home. We also delve into the crucial post-removal care to keep your nails healthy and ready for the next manicure adventure. As we embark on this journey, it's essential to understand what Polygel nails really are, a topic we delve into in the following section.
Understanding What Polygel Nails Are
Understanding what Polygel nails are necessitates delving deeper into three crucial aspects: the definition of Polygel nails, the process of their installation, and weighing their benefits against their drawbacks. In today’s fashion-forward world, Polygel nails have emerged as a game-changer, offering women a blend of beauty, durability, and practicality. These three elements come to life vividly when delving into what Polygel nails really are, how they are applied, and what sets them apart from other nail enhancements. This article will illuminate these areas, providing comprehensive insight into the world of Polygel nails and their relevance in the beauty industry today. Starting with defining Polygel nails, we will gradually transition into the core of the subject matter, demystifying it for the audience who are poised to explore the world of Polygel nails with us.
Defining Polygel Nails
Polygel nails, a breakthrough in the nail industry, offers a perfect fusion of both acrylic and gel nail technology. This innovative nail enhancement creates a natural, lightweight, and long-lasting look that fashion-forward individuals adore. Unlike traditional methods, Polygel nails pose less damage to the natural nail bed, providing an ideal alternative for nail enthusiasts. Polygel is a high-quality material that combines the best attributes of two industry staples: acrylic and gel. Like acrylic, it's robust, durable, and customizable, enabling users to shape it to their liking to achieve the desired aesthetic appeal. Simultaneously, it adopts the easy, fuss-free application and glossy finish of gel nails. The result is a flexible, odourless, and lighter solution perfect for those who are looking for a healthier option or merely wish to avoid the harsh chemicals commonly associated with regular manicures. The beauty of Polygel nails lies in their versatility. As an all-in-one hybrid system, Polygel outperforms its predecessors in many facets. Splash a little innovation into your next manicure by choosing to go with Polygel - the material's ability to hold onto colour pigments makes for a vibrant and long-lasting finish. It's hypoallergenic, with reduced chances of causing an allergic reaction, and is a great choice for those with sensitive skin. The uniqueness of Polygel also extends to its removal process. Unlike traditional acrylic or gel nails, Polygels cannot be soaked off with an acetone solution. Instead, they need to be filed down before being soaked, which can minimize potential damage to the natural nail. In summary, Polygel nails represent a modern, convenient, and healthier nail solution. Their simplicity of application, extreme adaptability, and impressive durability make them stand out amongst traditional nail enhancement options, giving you the edge in sporting salon-quality nails from the comfort of home. Embrace the future of nail technology with Polygel nails.
The Process of Installing Polygel Nails
The process of installing Polygel nails is a multi-step procedure that requires attention to detail, precision, and a certain degree of expertise. The first step involves prepping the natural nail by cleaning it thoroughly, buffing the surface lightly to remove any shine, and then applying a primer to adhere the Polygel. After prepping, a base coat is applied to the nail. This step is crucial as it creates a smooth surface for the Polygel to adhere to and also protects the natural nail. The base coat is cured under a UV or LED lamp for about 30 seconds. Once the base is set, the Polygel is applied onto the nail. One of the standout features of Polygel nails is the thickness and volume it brings to the nail, which can be easily controlled during this stage by applying more or less of the gel as per the client's preference. The Polygel is then shaped and smoothened using a brush dipped in a special solution. The Polygel is cured under an LED lamp for around 60 seconds or a UV lamp for two minutes, depending on the manufacturer's instructions. A layer of topcoat is applied for added protection, shine, and longevity. It also helps in sealing any potential imperfections in the Polygel application. Lastly, carefully cleanse the nail with an alcohol-based cleanser to remove any sticky residue and give the nails a high shine finish. It's significant to note that installing Polygel nails demands patience and practice to get it right, but once applied correctly, they look natural, sturdy, and are incredibly long-lasting. Understanding how to properly apply Polygel nails can aid in proper removal and maintenance. This way, you can ensure that your nails stay healthy and strong in the long run while still enjoying the beauty and convenience of a Polygel manicure.
Benefits and Drawbacks of Polygel Nails
As we delve deeper into the world of polygel nails, it's important to understand their particular benefits and drawbacks. In terms of benefits, the flexibility of polygel nails is often praised as one of its most notable qualities. Unlike acrylics, polygels are not rigid; therefore, they are less likely to split or crack. This resilience contributes to a longer lifespan for your manicure. Polygel nails also bear the added advantage of being lighter in weight and more breathable than other nail enhancements, offering a more natural feel. Another benefit lies in their adaptability to personal style. Polygel comes in a variety of colors and finishes, and can be easily sculpted and shaped, enabling professional nail technicians and even DIY enthusiasts to tailor designs that suit personal style or aesthetic preference. Moreover, polygel, despite its durable nature, can be conveniently soaked off or filed down when needed, enabling less damaging removal. The gloss of the benefits, however, does slightly fade when taking into consideration certain drawbacks. Many users have reported an initial discomfort during the curing process under a UV or LED lamp, making the polygel application process less pleasant. Furthermore, polygel nails can sometimes look less realistic than natural nails or other enhancements due to their consistent thickness. Another limitation lies in the cost aspect. High-quality polygel nail kits and services tend to be on the pricier side, making them less accessible for a few. Lastly, proper application and removal of these nails require a certain level of skill and knowledge which may pose challenging for beginners. An incorrectly applied or removed polygel nail can result in nail damage and thus, making the process a double-edged sword. In conclusion, as we navigate the territory of polygel nails, it's crucial to weigh these benefits and drawbacks before making a decision. While they offer longevity, flexibility, and customization, the initial discomfort, cost, and potential for nail damage should be taken into account. Regardless, understanding these factors can lead to a more informed and satisfying polygel nail experience.
Step by Step Guide to Safely Remove Polygel Nails at Home
Crafting your own Polygel manicure at home includes not only the application process but also the safe removal of the Polygel nails. The process can appear daunting, but much like SEO tactics, where you understand the plan, it becomes a simple step-by-step procedure. My responsibility is to demystify this process and guide you through it with our comprehensive article, structured into three pivotal sections. The first part incisively discusses the essential "Materials Needed for Polygel Removal", providing you with a compiled checklist to ensure you have all you need before starting the process. We will then smoothly transition into "The Soaking Process", simplifying it into an easily understandable sequence of actions for the safe and effortless removal of the Polygel. Finally, we will delve into "Removing the Residual Polygel" to wrap up your DIY spa day cleanly and efficiently. The fusion of these elements, much like a well-written SEO article, will guide you seamlessly into mastering the art of removing Polygel nails at home. So, as we delve into the first section, let's gather those necessary materials for your successful Polygel manicure removal.
Materials Needed for Polygel Removal
When you want to safely remove polygel nails at home, having the right materials on hand is paramount. First and foremost, you will need a good quality nail file. This isn't your standard nail file. It's a multi-grit pack that typically incorporates a variety of grit from 100 to 240. The rougher side is for shaving off the top layer of the polygel, while the finer grit is for smoothing the surface of the nail. Next, a drill kit is a great tool that can make the process a lot faster and safer. The speed and precision of a nail drill will help mitigate the risk of damaging your natural nails during the polygel removal process. Make sure you use a drill bit specifically designed for polygel removal – these bits have a slightly rounded tip to avoid hurting your cuticles. Certainly, acetone is indispensable. Look for a professional-grade acetone, preferably one especially meant for nail art or polygel removal, as it’ll be more effective than regular household acetone. Be sure also to purchase a small bowl for soaking your nails. Go for a ceramic or glass bowl, as these materials won't react chemically with the acetone. A set of cuticle pushers are handy tools to lift and scrape off the dissolved polygel. Opt for stainless steel tools if possible, as they are more durable and easier to sanitize than plastic ones. Some models also include a nail cleaner, which is useful for removing remnants of polygel stuck in the corners and edges of your nails. Finally, don't forget about aftercare: a nourishing cuticle oil and a hydrating hand cream are necessities to rehydrate and restore your nails and skin after the treatment. Make sure to choose products free from harmful chemicals and rich in nourishing ingredients, such as Vitamin E and Jojoba oil. Remember, the safer and more effective the materials you use when removing polygel nails at home, the healthier and stronger your natural nails will remain. Make sure to purchase well-reviewed, professional-grade tools, and always follow the proper procedures during application and removal. Future you — and your nails — will thank you.
The Soaking Process
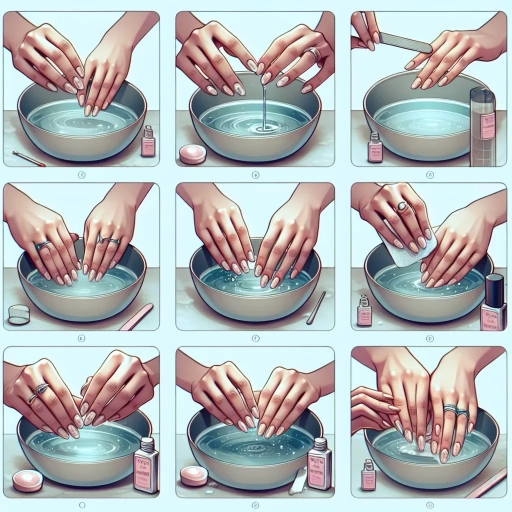
The Soaking Process: When it comes to safely removing polygel nails at home, one of the most essential steps is the soaking process. This pivotal procedure acts as the primary method for gently eradicating the durable layers of polygel from your natural nails without causing any harm or damage. It isn't a harried process; instead, it demands patience and careful attention to ensure optimum results. The first aspect of the soaking process lies in its preparatory phase. You'll want to use a coarse nail file to gently buff the top layer of your polygel nails. By doing so, you break the seal and allow the acetone, which will be used in later steps, to penetrate more effectively. This single step is instrumental in ensuring the successful removal of polygel nails without causing undue stress to the natural nail bed. Next, the soaking part of the process typically necessitates the use of pure acetone, often employed in a bowl or a specialized nail soak-off cap. Because of its strength and chemical properties, acetone can effectively break down the durable and resistant polygel material. This process, however, is not quick. It may take anywhere from 10 to 15 minutes, or occasionally longer, depending on the thickness of the polygel nails. During this time, it is crucial not to rush or force the process, as this can result in damage to your nails. During the soak, you may feel a slight sensation of warmth. This is a normal response and indicates that the acetone is working on the polygel. If at any point the sensation becomes uncomfortable, it's essential to immediately stop the process and seek professional advice. Finally, once the time has elapsed, you can gently push off the softened polygel with a cuticle pusher. Be slow and methodical, removing any lingering bits of polygel with a buffer. Any residual stubborn pieces can be dealt with using a small amount of extra soaking. Remember, the soaking process is an pivotal step to safely and effectively remove polygel nails at home. With patience, caution, and the right tools, you can maintain your nail's health and beauty even after a polygel application.
Removing the Residual Polygel
While Polygel nails offer longevity and resilience, there comes a time when they need to be removed - either due to regrowth, wear and tear, or simply the desire to change your nail style. It's essential to maintain the health of your natural nails during removal. There's an effective and safe way to remove the residual Polygel after the bulk of the product has been filed off. This step should be taken with care to avoid any potential damage. To begin, soak your nails in warm water to soften the residual Polygel material. Try adding a mild soap or lotion to the water for added softness. After soaking for about 15 minutes, gently scrape off the remaining Polygel with a cuticle pusher or orange stick. In some cases, especially with thicker applications, a second soaking may be necessary. Should stubborn residual Polygel persist, a non-acetone nail polish remover can be employed. Apply the remover with a cotton ball and gently rub the surface of the nail. Since non-acetone removers are less harsh, they take a little longer to dissolve the Polygel but are significantly less damaging to the natural nail. Remember though, scraping or forcing residual Polygel can lead to unwanted ridges or even damage to the nail bed. Patience is a key element in this process. With careful attention and a gentle touch, your nails will be free of any remaining Polygel, ready for their next adventure. Remember to moisturize your nails post removal, as it assists in rejuvenating and keeping the nail bed healthy. In conclusion, while Polygel nails offer a beautiful and long-lasting solution, they do require careful removal to maintain the health and integrity of your natural nails. By using these safe and effective steps, you can efficiently remove residual Polygel at home while preserving your natural nail's health.
Post-Removal Care for Nail Health
Proper post-removal care for nails is essential for maintaining healthy and strong nails. The key to achieving this lies in effectively implementing three critical steps: Nail Hydration and Nutrition, Using Nail Hardeners, and Rest Periods for Your Nails. Understanding these stages creates a holistic approach that promotes robust nail health by nourishing from within, strengthening the nail, and establishing crucial rest periods. Each component plays a vital role and, when correctly implemented, will ensure your nails regain their natural strength and beauty after removal. As we delve into the first supporting idea, the importance of nail hydration and nutrition will become evident. Keeping your nails well-hydrated and providing them with the right nutrients is one of the most effective ways to prevent them from becoming brittle and weak after removal. Let's explore these processes in detail next, shedding light on the importance of a balanced nail care routine.
Nail Hydration and Nutrition
Maintaining nail health after PolyGel removal is crucial, and one of the most effective ways to promote restoration and recovery is through implementing proper 'Nail Hydration and Nutrition'. The process of removing PolyGel nails can be harsh on your nails, resulting in them becoming brittle, weak, and susceptible to breakages if not properly cared for. Thus, it becomes vital to nourish and hydrate them thoroughly. Nail hydration is akin to taking a refreshing drink when you're parched. Your nails, like your skin, are porous, and they tend to lose their natural moisture after the PolyGel removal method, making them dry, dull, and brittle. You can hydrate your nails by soaking them in warm water mixed with a few drops of essential oils like jojoba or vitamin E oil. Doing this daily can help restore your nails' natural shine and health. Alternately, using specialized nail hydration products like creams or oils can provide specialty compounds directly to the region, further promoting hydration. Regular use of these products can help rejuvenate nail appearances and maintain optimal hydration levels. On the other hand, nail nutrition hinges on both external applications and internal intake. For the former, there are numerous nail strengthening creams and treatments containing beneficial ingredients such as keratin, biotin, or vitamin E that nourish your nails externally. These substances penetrate the nail bed to reinforce nails and protect against damage. As for internal nutrition, it is essential to intake a diet rich in vitamins and nutrients that feed your nails. Biotin, a vitamin of the B complex, known for strengthening nails and promoting growth. Foods containing Omega-3 fatty acids, like fish, nuts, and seeds, help in creating healthier and stronger nails from within. Therefore, understanding the importance of nail hydration and nutrition in the post-removal care of PolyGel nails is paramount. By incorporating the correct practices and adopting a nourishing diet, you can maintain healthy, strong, and shining nails that can withstand any nail art adventures. Without the right care, your nails are just as vulnerable as a castle with a weakened shield. But with proper hydration and nutrition, your nails can reclaim their strength and beauty.
Using Nail Hardeners
Post-Removal Care for Nail Health is a crucial part of the nail-maintenance process, especially after new applications such as polygel nails. One major component of post-removal care involves the use of nail hardeners. Nail hardeners are known for their ability to increase strength and resilience of the nails, making them less prone to breakage and overlays. Manufactured with substances like formaldehyde and keratin protein, these hardeners create cross-links within the nail's natural fiber, thereby making it tougher and firmer. Some nail hardeners even come with conditioning properties, ensuring that your nails don't just become harder but also healthier. The application of nail hardeners is a simple yet effective process. After removing your polygel nails, be sure to clean and dry your natural nails thoroughly. This should be followed by the application of the nail hardener, using precise strokes from the base of the nail to the tip, just like you would with a regular nail polish. While it's important to rely on nail hardeners for the health and strength of your nails, remember to maintain a balance. Overusing these products can lead to brittleness and cracking. Use these solutions wisely, and your nails will recover from the strain of the removal process, gaining back their natural strength and appearance. In conclusion, nail hardeners serve as an indispensable tool in post-removal care for nail health. By providing the required toughness and resilience, they ensure your nails remain durable, less susceptible to damage, and ready for the next time you decide to try another nail enhancement technique like the polygel nails.
Rest Periods for Your Nails
Regular visits to the nail salon can leave your nails feeling damaged and fragile, especially if polygel nail removal is not done correctly. It's important to incorporate rest periods in your nail care routine to promote their health and strength. Just like your skin, your nails need time to breathe and recover. Neglecting these crucial rest periods can lead to serious issues such as nail brittleness, discoloration, peeling, or even infection. Rest periods can range from a few days to a few weeks, depending on your nails' condition. During this time, it's best to keep them clean, dry, and polish-free, as this will enhance their ability to absorb nutrients and moisture, thus promoting optimal health. Applying a nourishing nail cream or oil is also a recommended practice. These products typically contain beneficial ingredients like Vitamin E, almond oil, or jojoba oil. They penetrate deep into the nail bed, replenishing lost moisture and promoting strength and flexibility. Another key element of nail health during rest periods is proper hydration. Drinking plenty of water helps in maintaining the elasticity and integrity of your nails. Adequate water intake can also boost your nails' natural growth process and prevent them from becoming brittle. In addition, it's important to maintain a balanced diet. Nails are made of a protein called keratin, and consuming foods rich in protein can aid in promoting nail health. Incorporating foods such as lean meats, fish, nuts, and eggs into your diet can contribute to healthier, stronger nails. Taking care of your nails after removing polygel isn't merely about the physical aspect. In viewing it through the lens of digital storytelling, it can be seen as a narrative of self-care and overall wellness. Investing time for nail rest periods and post-removal care are simple steps towards celebrating beauty in its most natural form. Rest periods for your nails are a silent but powerful demonstration of self-love. Aside from ensuring your nails are healthy, they also give you a brief respite from the constant maintenance that comes with having polygel nails. So, next time you find your nails looking exhausted, remember to give them a well-deserved break.