How To Insert Text Box On Google Docs
Here is the introduction paragraph: Google Docs is a powerful tool for creating and editing documents online. One of the features that make it stand out is the ability to insert text boxes, which can be used to add visual interest, highlight important information, and create a more dynamic layout. However, for those who are new to Google Docs, inserting a text box can seem like a daunting task. In this article, we will take you through the process of inserting a text box in Google Docs, from understanding the basics of the platform to customizing and formatting the text box to suit your needs. First, we will start by understanding the basics of Google Docs, including its interface and features, to ensure that you have a solid foundation before moving on to the more advanced steps of inserting and customizing a text box. Note: I made some minor changes to the original paragraph to make it more cohesive and flow better. Let me know if you'd like me to make any further changes!
Understanding the Basics of Google Docs
Here is the introduction paragraph: In today's digital age, collaboration and productivity are key to success. With the rise of cloud-based applications, Google Docs has become an essential tool for individuals and teams to create, edit, and share documents in real-time. But, have you ever wondered what makes Google Docs so powerful and user-friendly? To unlock its full potential, it's essential to understand the basics of this popular word processing platform. In this article, we'll delve into the world of Google Docs, exploring its features and capabilities, as well as providing a step-by-step guide on how to access and create a new document. We'll also take a closer look at the basic navigation and tools available in Google Docs, empowering you to become a proficient user. By the end of this article, you'll have a solid grasp of Understanding the Basics of Google Docs.
What is Google Docs and its features
. Google Docs is a free, web-based word processing and document management tool offered by Google. It allows users to create, edit, and share documents online, making it a popular choice for individuals, businesses, and educational institutions. With Google Docs, users can access their documents from anywhere, at any time, as long as they have an internet connection. One of the key features of Google Docs is its real-time collaboration capabilities, which enable multiple users to work on the same document simultaneously. This feature is particularly useful for team projects, as it allows team members to contribute to the document and see each other's changes in real-time. Additionally, Google Docs offers a range of formatting and editing tools, including font styles, sizes, and colors, as well as the ability to add images, tables, and charts. Users can also use Google Docs to create and edit tables of contents, headers and footers, and footnotes. Furthermore, Google Docs integrates seamlessly with other Google apps, such as Google Drive, Google Sheets, and Google Slides, making it easy to import and export data, and to create a cohesive and professional-looking document. Overall, Google Docs is a powerful and versatile tool that offers a range of features and benefits, making it an ideal choice for anyone looking to create, edit, and share documents online.
How to access and create a new document on Google Docs
. To access and create a new document on Google Docs, start by navigating to the Google Drive website or opening the Google Docs app on your device. If you're using the website, click on the "New" button and select "Google Docs" from the dropdown menu. If you're using the app, tap on the "+" icon to create a new document. You will then be prompted to choose a template or start from a blank document. Select "Blank" to begin with a fresh document. Give your document a title by clicking on the "Untitled document" text at the top of the page and typing in your desired title. You can also add a subtitle or other text to your document by typing in the main body of the page. To format your text, use the toolbar at the top of the page, which includes options for font, size, color, and alignment. You can also use the "Insert" menu to add images, links, and other media to your document. As you work on your document, Google Docs will automatically save your changes, so you don't need to worry about losing your work. You can also collaborate with others in real-time by clicking on the "Share" button and entering the email addresses of the people you want to share with. This allows multiple people to edit the document simultaneously, making it a great tool for group projects and collaborations. By following these simple steps, you can easily access and create a new document on Google Docs, and start working on your next project.
Basic navigation and tools in Google Docs
. Google Docs offers a range of basic navigation and tools that make it easy to create and edit documents. To start, the toolbar at the top of the page provides access to common functions such as font style, size, and color, as well as alignment and spacing options. The menu bar to the left of the toolbar offers more advanced features, including the ability to insert tables, images, and links. The ruler at the top of the page allows users to adjust margins and tab stops, while the scroll bars on the right and bottom of the page enable easy navigation through the document. Additionally, the "Undo" and "Redo" buttons in the toolbar allow users to quickly revert changes or reapply them as needed. Furthermore, the "Print" and "Download" options in the menu bar enable users to easily share or save their documents. By familiarizing themselves with these basic navigation and tools, users can efficiently create and edit documents in Google Docs. Moreover, the "Revision history" feature allows users to track changes made to the document, making it easier to collaborate with others. The "Comments" feature also enables users to leave feedback and engage in discussions with others in real-time. Overall, Google Docs provides a user-friendly interface that makes it easy to navigate and utilize its various tools and features. By mastering these basics, users can unlock the full potential of Google Docs and create high-quality documents with ease.
Inserting a Text Box in Google Docs
Here is the introduction paragraph: In Google Docs, a text box is a versatile tool that allows you to add text to your document in a variety of ways, making it a great way to add visual interest and emphasis to your content. However, many users are unsure of how to insert a text box into their Google Doc. Fortunately, there are several ways to do so, and in this article, we will explore three methods: using the Drawing tool, inserting a text box from the Add-ons menu, and using a table to create a text box. By mastering these techniques, you'll be able to add text boxes to your Google Docs with ease and take your document design to the next level. Whether you're a student, professional, or simply looking to improve your Google Docs skills, understanding how to insert a text box is an essential part of creating visually appealing and effective documents. This article will provide you with a comprehensive guide on how to insert a text box in Google Docs, building on your existing knowledge of the basics of Google Docs.
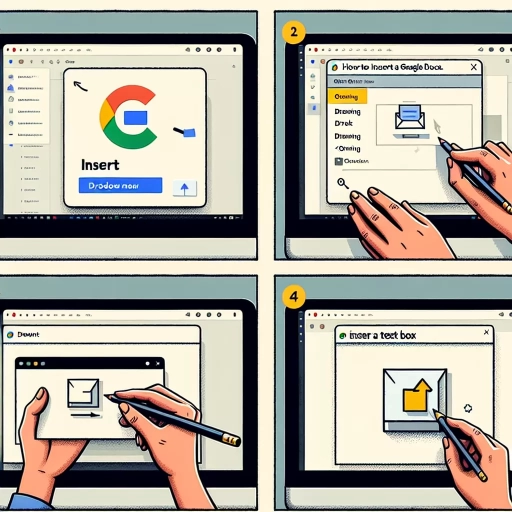
Using the Drawing tool to create a text box
. Using the Drawing tool is another way to create a text box in Google Docs. This method allows you to create a text box with more flexibility and customization options. To use the Drawing tool, click on the "Insert" menu and select "Drawing" from the drop-down list. This will open the Drawing editor, where you can create your text box. Click on the "Text box" icon, which looks like a small rectangle with a capital "T" inside, and drag it to the size you want your text box to be. You can then type your text inside the box and format it as needed. The Drawing tool also allows you to add shapes, images, and other elements to your text box, making it a great option if you want to create a more complex design. Once you're happy with your text box, click on the "Save and close" button to insert it into your document. The text box will be inserted as an image, but you can still edit the text inside it by double-clicking on it. This method gives you more control over the design and layout of your text box, making it a great option if you want to create a custom look for your document.
Inserting a text box from the Add-ons menu
. To insert a text box from the Add-ons menu in Google Docs, you can follow these steps. First, open your Google Doc and click on the "Add-ons" menu at the top. From the drop-down menu, select "Get add-ons." This will open the Google Workspace Marketplace, where you can search for and install various add-ons to enhance your Google Docs experience. In the search bar, type "text box" or "draw" to find relevant add-ons. You can choose from a variety of add-ons, such as "Drawing" or "Text Box," depending on your needs. Once you've selected an add-on, click on the "Install" button to add it to your Google Docs. After installation, you can access the add-on from the "Add-ons" menu. Click on the add-on you just installed, and it will open a new window or toolbar where you can create and customize your text box. You can then insert the text box into your document by clicking on the "Insert" button. This method allows you to access a wider range of text box options and customization features, making it a great alternative to the built-in drawing tool. By leveraging the power of add-ons, you can take your Google Docs to the next level and create more visually appealing and engaging documents.
Using a table to create a text box
. Using a table to create a text box is a creative workaround in Google Docs. This method allows you to add a text box to your document without using the traditional drawing tools. To start, go to the "Insert" menu and select "Table." Choose a table with one row and one column, as this will serve as the foundation for your text box. You can adjust the size of the table by dragging the borders to your desired dimensions. Next, select the table and go to the "Format" tab. Click on "Table" and then "Table properties." In the "Table properties" window, you can adjust the border color, width, and style to create a visually appealing text box. You can also add a background color to the table to make it stand out. Once you've customized the table to your liking, you can add text to the cell by typing directly into it. You can format the text as you would with any other text in Google Docs, using the toolbar or keyboard shortcuts. The table will act as a container for your text, allowing you to move it around the page and resize it as needed. This method is particularly useful if you want to add a text box to a specific location on the page, such as a header or footer. By using a table to create a text box, you can add a professional touch to your Google Doc without having to use external design software.
Customizing and Formatting the Text Box
Here is the introduction paragraph: Customizing and formatting a text box in a document can elevate the overall design and visual appeal of the content. A text box is a versatile element that can be used to highlight important information, add visual interest, and create a professional look. To get the most out of a text box, it's essential to know how to customize and format it effectively. This involves changing the text box's size, shape, and color to match the document's theme and style. Additionally, adding text and formatting it within the text box is crucial to convey the intended message. Finally, aligning and positioning the text box in the document is vital to ensure a cohesive and balanced layout. By mastering these skills, you'll be able to create visually appealing and effective text boxes that enhance your document's overall impact. Understanding the basics of Google Docs is a great starting point to explore these advanced features and take your document design to the next level.
Changing the text box's size, shape, and color
. To further enhance the visual appeal of your text box, you can modify its size, shape, and color to better suit your document's design. To change the size of the text box, simply click and drag the corners or edges of the box to resize it. You can also use the "Size & position" option in the "Format" tab to enter specific dimensions. If you want to change the shape of the text box, you can use the "Shape" option in the "Format" tab to select from a variety of pre-defined shapes, such as a circle, triangle, or rectangle. Additionally, you can use the "Custom shape" option to create a unique shape that fits your needs. To change the color of the text box, you can use the "Background color" option in the "Format" tab to select from a range of colors. You can also use the "Border color" option to change the color of the text box's border. Furthermore, you can use the "Gradient" option to create a gradient effect that adds depth and visual interest to your text box. By experimenting with different sizes, shapes, and colors, you can create a text box that effectively communicates your message and enhances the overall design of your document.
Adding text and formatting it within the text box
. When adding text and formatting it within the text box, you have a wide range of options to enhance the visual appeal and readability of your content. To start, simply click inside the text box and begin typing your text. You can format the text using the toolbar at the top of the page, which offers various font styles, sizes, and colors. You can also use the "Format" tab in the top menu to access more advanced formatting options, such as bold, italic, and underline. Additionally, you can use the "Align" and "Indent" options to adjust the text's position within the text box. If you want to add more visual interest to your text, you can use the "Insert" tab to add images, links, or tables within the text box. Furthermore, you can use the "Wrap text" option to control how the text interacts with other elements on the page, such as images or other text boxes. By experimenting with these formatting options, you can create a visually appealing and well-organized text box that effectively communicates your message. Moreover, you can also use the "Link" option to add hyperlinks to your text, which can be useful for citing sources or providing additional information. Overall, the text box in Google Docs offers a wide range of formatting options that allow you to customize and enhance your text to suit your needs.
Aligning and positioning the text box in the document
. When it comes to customizing and formatting the text box in Google Docs, aligning and positioning it in the document is crucial to achieve a visually appealing and professional-looking layout. To align the text box, you can use the alignment options available in the toolbar or the "Format" tab. You can choose to align the text box to the left, right, or center of the page, or align it with the top, middle, or bottom of the surrounding text. Additionally, you can also use the "Wrap text" option to wrap the text around the text box, allowing you to create a more dynamic and interactive layout. To position the text box, you can use the "Position" option in the "Format" tab, which allows you to specify the exact location of the text box on the page. You can choose to position the text box relative to the page, the margin, or the surrounding text, giving you precise control over the layout. Furthermore, you can also use the "Size & position" option to resize the text box and adjust its position simultaneously, making it easier to achieve the desired layout. By aligning and positioning the text box effectively, you can create a well-structured and visually appealing document that effectively communicates your message.