How To Take Screenshot On Lenovo Laptop
Taking a screenshot on a Lenovo laptop is a straightforward process that can be accomplished in several ways. Whether you need to capture a specific error message, share a funny meme with friends, or document a step-by-step process, knowing how to take a screenshot is an essential skill. In this article, we will explore three methods to take a screenshot on a Lenovo laptop: using the keyboard shortcut, utilizing the Snipping Tool, and leveraging the Game Bar. Each method has its own advantages and use cases, and by the end of this article, you will be able to choose the one that best suits your needs. To get started, let's dive into the most common and convenient method: using the keyboard shortcut.
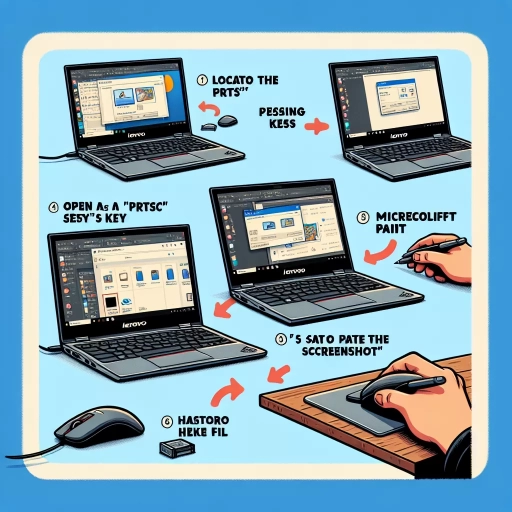
Using the Keyboard Shortcut
Using the keyboard shortcut to take a screenshot is a quick and efficient way to capture what's on your screen. To do this, you'll need to locate the PrtScn button, which is usually found on the top row of your keyboard. Once you've found it, you can press the PrtScn button alone or in combination with other keys to capture a screenshot of your entire screen or a selected area. After taking the screenshot, you can open it in an image editor to edit and enhance it. In this article, we'll explore these steps in more detail, starting with locating the PrtScn button.
Locate the PrtScn Button
To locate the PrtScn button on your Lenovo laptop, you'll typically find it in the top row of keys, often in combination with other functions such as the "Fn" key. The exact placement may vary depending on the specific Lenovo model you're using, but it's usually labeled as "PrtScn" or "Print Screen." On some Lenovo laptops, you might need to press the "Fn" key simultaneously with the PrtScn button to activate the screenshot function. If you're having trouble finding the PrtScn button, consult your laptop's user manual or search online for specific instructions tailored to your Lenovo model. Once you've located the PrtScn button, you can proceed to use the keyboard shortcut to capture a screenshot.
Press the PrtScn Button Alone or with Other Keys
Pressing the PrtScn button alone or with other keys is a common method for taking screenshots on Lenovo laptops. When you press the PrtScn button alone, it captures the entire screen and saves it to the clipboard. You can then open an image editing software like Paint and paste the screenshot to edit and save it. If you want to capture a specific window, you can press the Alt key + PrtScn. This will capture the currently active window and save it to the clipboard. Alternatively, you can press the Windows key + PrtScn to capture the entire screen and automatically save it to the Screenshots folder in your Pictures folder. This method is convenient as it eliminates the need to open an image editing software to save the screenshot. Additionally, you can also press the Fn key + PrtScn to capture the entire screen, but this method may vary depending on the Lenovo laptop model you are using. It's essential to note that some Lenovo laptops may have different keyboard shortcuts for taking screenshots, so it's always a good idea to check your laptop's user manual or online documentation for specific instructions.
Open the Screenshot in an Image Editor
To further enhance or modify your screenshot, you can open it in an image editor. Most Lenovo laptops come with a built-in image editor, such as Microsoft Paint or Lenovo's own photo editing software. To open the screenshot in an image editor, follow these steps. First, locate the screenshot you just captured, which is usually saved in the "Screenshots" folder in your "Pictures" folder. You can also search for it in the File Explorer by typing "Screenshots" in the search bar. Once you've found the screenshot, right-click on it and select "Open with" from the context menu. Then, choose your preferred image editor from the list of available options. If you don't have a preferred image editor, you can choose Microsoft Paint, which is a simple and user-friendly option. Once the screenshot is open in the image editor, you can crop, resize, or annotate it as needed. You can also use the image editor to add text, shapes, or other graphics to the screenshot. Additionally, you can use the image editor to adjust the brightness, contrast, or color balance of the screenshot. When you're finished editing the screenshot, you can save it in a variety of formats, including JPEG, PNG, or GIF. You can also share the edited screenshot directly from the image editor, either by emailing it or uploading it to a cloud storage service. By opening the screenshot in an image editor, you can take your screenshot to the next level and make it more informative, engaging, or visually appealing.
Using the Snipping Tool
The Snipping Tool is a powerful utility in Windows that allows users to capture and edit screenshots with ease. With this tool, you can select the screenshot mode that suits your needs, capture the screen, and then save and edit the screenshot as desired. To get started with using the Snipping Tool, you first need to access it from the Start Menu. From there, you can select the screenshot mode and capture the screen, whether it's a full screen, a window, or a rectangular region. Once you've captured the screenshot, you can save and edit it to add annotations, highlight important information, or crop out unnecessary parts. In this article, we'll take a closer look at how to use the Snipping Tool, starting with accessing it from the Start Menu.
Access the Snipping Tool from the Start Menu
To access the Snipping Tool from the Start Menu, follow these simple steps. First, click on the Start button located at the bottom left corner of your Lenovo laptop's screen. This will open the Start Menu, which displays a list of frequently used apps, settings, and other options. Next, type "Snipping Tool" in the search bar at the top of the Start Menu. As you type, the search results will start to appear below the search bar. Click on the "Snipping Tool" result to open the app. Alternatively, you can also find the Snipping Tool by clicking on the "All Apps" button in the Start Menu, then scrolling down to the "S" section, where you'll find the Snipping Tool listed. Once you've opened the Snipping Tool, you can use it to capture screenshots of your Lenovo laptop's screen. The Snipping Tool offers several capture modes, including full screen, window, and rectangular snip, allowing you to customize your screenshot to suit your needs. With the Snipping Tool, you can easily capture and annotate screenshots, making it a useful tool for a variety of tasks, from creating tutorials to troubleshooting technical issues.
Select the Screenshot Mode and Capture the Screen
To capture a screenshot on your Lenovo laptop using the Snipping Tool, you first need to select the screenshot mode. The Snipping Tool offers four different modes to capture screenshots: Full Screen, Window, Rectangular Snip, and Free-form Snip. To select a mode, open the Snipping Tool, click on the "Mode" button, and choose the desired mode from the drop-down menu. If you want to capture the entire screen, select "Full Screen." If you want to capture a specific window, select "Window" and click on the window you want to capture. If you want to capture a specific rectangular area, select "Rectangular Snip" and drag the crosshair to select the area. If you want to capture a specific area with a free-form shape, select "Free-form Snip" and draw the shape around the area you want to capture. Once you have selected the mode, click on the "New" button to capture the screen. The Snipping Tool will then capture the screenshot according to the selected mode, and you can save it as an image file or copy it to the clipboard.
Save and Edit the Screenshot
When you've captured your screenshot using the Snipping Tool, you have the option to save and edit it. To do this, click on the "File" menu and select "Save As" to choose a location to save your screenshot. You can also choose the file format, such as PNG, JPEG, or GIF, depending on your needs. Once you've saved your screenshot, you can edit it using the Snipping Tool's built-in editing features. These features allow you to add annotations, such as arrows, text, and highlights, to draw attention to specific parts of the screenshot. You can also crop, resize, and rotate the screenshot to focus on the most important information. Additionally, you can use the "Tools" menu to adjust the brightness, contrast, and saturation of the screenshot, or to apply a filter to give it a unique look. By saving and editing your screenshot, you can enhance its clarity and effectiveness, making it easier to communicate your ideas and share information with others.
Using the Game Bar
The Game Bar is a powerful tool in Windows 10 that allows users to capture and share their gaming experiences. With the Game Bar, users can take screenshots, record gameplay, and even broadcast their games to the world. In this article, we will explore the various features of the Game Bar and how to use them. We will discuss how to activate the Game Bar with the Windows key + G, take a screenshot with the camera icon, and view and share the screenshot. By the end of this article, you will be able to use the Game Bar like a pro and enhance your gaming experience. So, let's get started by learning how to activate the Game Bar with the Windows key + G.
Activate the Game Bar with the Windows Key + G
To activate the Game Bar on your Lenovo laptop, you can use the Windows key + G shortcut. This will open the Game Bar, which provides a range of features and tools to enhance your gaming experience. The Game Bar allows you to take screenshots, record gameplay, and access other gaming-related settings. To use this shortcut, simply press the Windows key and the letter G at the same time. The Game Bar will appear on your screen, and you can use its various features to capture screenshots, record gameplay, and more. This shortcut is a convenient way to access the Game Bar without having to navigate through the Start menu or Settings app. By using the Windows key + G shortcut, you can quickly and easily activate the Game Bar and start using its features to enhance your gaming experience on your Lenovo laptop.
Take a Screenshot with the Camera Icon
To take a screenshot with the camera icon on a Lenovo laptop, you can use the Snipping Tool or the Snip & Sketch app. First, locate the camera icon in the notification area of your taskbar, usually found at the bottom right corner of your screen. Click on the camera icon to open the Snipping Tool or Snip & Sketch app. Once the app is open, you can choose from various screenshot options, such as full screen, window, or rectangular snip. Select the desired option and click on the "New" button to capture the screenshot. The screenshot will be saved to your clipboard, and you can paste it into any image editing software or document. Alternatively, you can also use the keyboard shortcut Windows key + Print Screen to capture a screenshot and save it directly to your Pictures folder. This method is quicker and more convenient, but it doesn't offer the same level of customization as using the camera icon.
View and Share the Screenshot
To view and share the screenshot, navigate to the "Captures" folder in the "Videos" section of your Lenovo laptop's File Explorer. Here, you'll find all the screenshots you've taken using the Game Bar. You can view the screenshots as thumbnails or in a list, depending on your preference. To share a screenshot, simply right-click on the image and select "Share" from the context menu. You can then choose to share the screenshot via email, social media, or other installed apps on your laptop. Alternatively, you can also copy the screenshot to the clipboard and paste it into a document or message. If you want to edit the screenshot before sharing, you can open it in the Photos app or any other image editing software installed on your laptop. The Game Bar also allows you to upload your screenshots to Xbox Live, if you have an Xbox account linked to your Microsoft account. This way, you can share your gaming achievements and screenshots with your friends and community. Overall, the Game Bar provides a convenient and easy way to view, share, and manage your screenshots on your Lenovo laptop.