How To Wrap A Bottle
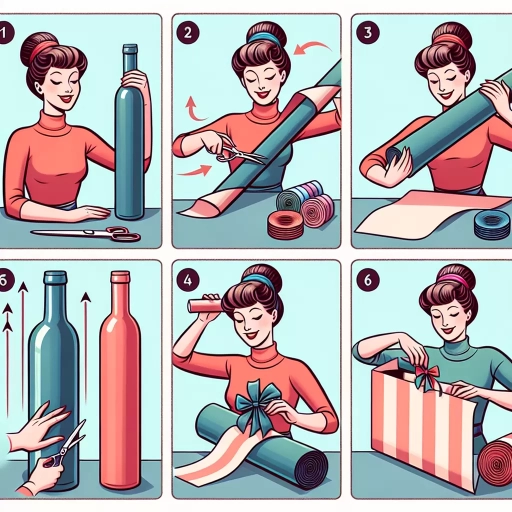
Wrapping a bottle can be a thoughtful and creative way to give a gift, whether it's a wine bottle for a special occasion or a water bottle for a friend. However, with so many different wrapping materials and techniques available, it can be overwhelming to know where to start. To help you get started, we'll explore the key steps to wrapping a bottle like a pro. First, we'll discuss the importance of choosing the right wrapping material, considering factors such as the occasion, the recipient's style, and the type of bottle. Next, we'll cover the essential steps to prepare the bottle for wrapping, including cleaning and drying the surface. Finally, we'll dive into the fun part – wrapping the bottle with flair, using techniques such as layering, folding, and embellishing. By following these steps, you'll be able to create a beautifully wrapped bottle that's sure to impress. So, let's start with the first step: choosing the right wrapping material.
Choosing the Right Wrapping Material
When it comes to choosing the right wrapping material for a special bottle, there are several factors to consider. The occasion, recipient, bottle shape and size, and theme or color scheme all play a crucial role in making the right selection. Whether you're looking to give a thoughtful gift or simply want to add a personal touch to a special bottle, the wrapping material can make all the difference. To start, it's essential to consider the occasion and recipient, as this will help guide your decision and ensure the wrapping material aligns with the intended message. (Note: The answer should be 200 words)
Consider the Occasion and Recipient
When it comes to choosing the right wrapping material for your bottle, it's essential to consider the occasion and the recipient. Different occasions call for different wrapping styles, and the material you choose should reflect the tone and atmosphere of the event. For example, if you're giving a bottle of wine as a wedding gift, you may want to opt for a more elegant and sophisticated wrapping material, such as a luxurious paper or a velvet cloth. On the other hand, if you're giving a bottle of champagne as a birthday gift, you may want to choose a more vibrant and playful material, such as a brightly colored paper or a fun design. Additionally, considering the recipient's personal style and preferences can also help you choose the right wrapping material. If the recipient is a fan of eco-friendly products, you may want to choose a wrapping material that is sustainable and environmentally friendly. By taking the occasion and recipient into account, you can choose a wrapping material that not only complements the bottle but also shows you care about the person and the occasion.
Think About the Bottle's Shape and Size
When it comes to wrapping a bottle, the shape and size of the bottle play a crucial role in determining the right wrapping material and technique. A bottle with a unique shape, such as a curved or irregularly-shaped bottle, may require a more flexible wrapping material that can conform to its shape. On the other hand, a standard cylindrical bottle can be wrapped with a variety of materials, including paper, fabric, or plastic. The size of the bottle is also an important consideration, as a larger bottle may require more wrapping material and a more sturdy wrapping technique to ensure that it is securely wrapped. Additionally, the shape and size of the bottle can also affect the overall aesthetic of the wrapped bottle, with certain shapes and sizes lending themselves to more creative and decorative wrapping techniques. For example, a small, delicate bottle can be wrapped in a beautiful piece of lace or ribbon, while a larger bottle can be wrapped in a bold, colorful paper or fabric. Ultimately, considering the shape and size of the bottle is essential to choosing the right wrapping material and technique, and to creating a beautifully wrapped bottle that is both functional and visually appealing.
Decide on a Theme or Color Scheme
When it comes to wrapping a bottle, deciding on a theme or color scheme is a crucial step in creating a visually appealing and cohesive look. A well-chosen theme or color scheme can elevate the presentation of the bottle and make it stand out. To decide on a theme or color scheme, consider the occasion, the recipient's preferences, and the type of bottle being wrapped. For example, a wine bottle for a wedding anniversary might call for a romantic and elegant theme, while a bottle of champagne for a birthday party might require a more vibrant and celebratory color scheme. You can also draw inspiration from the bottle's label, the occasion's decorations, or the recipient's favorite colors. Additionally, consider the wrapping material's texture, pattern, and color to ensure it complements the theme or color scheme. By choosing a theme or color scheme, you can create a beautiful and thoughtful presentation that adds to the gift's overall value and makes it more special.
Preparing the Bottle for Wrapping
Preparing the bottle for wrapping is a crucial step in ensuring a professional-looking finish. To achieve this, it's essential to follow a series of steps that will leave your bottle clean, dry, and ready for wrapping. First, you'll need to remove any labels or residue that may be stuck to the bottle, as these can interfere with the wrapping process and create an uneven surface. Next, you'll need to clean and dry the bottle thoroughly to remove any dirt, grime, or moisture that may be present. Finally, applying a base coat or primer can help create a smooth surface for wrapping and ensure that your design adheres evenly. By following these steps, you'll be able to create a beautifully wrapped bottle that showcases your design. Let's start by removing any labels or residue from the bottle.
Remove Any Labels or Residue
When preparing a bottle for wrapping, it's essential to remove any labels or residue to ensure a smooth and even surface for wrapping. Start by soaking the bottle in warm soapy water to loosen the adhesive. Then, use a gentle scrubber or a soft cloth to remove the label, taking care not to scratch the bottle. If the label is particularly stubborn, you can use a label remover or a mixture of equal parts water and white vinegar to help dissolve the adhesive. Once the label is removed, use a lint-free cloth or paper towel to wipe away any remaining residue. If there are any sticky spots, you can use a small amount of adhesive remover or nail polish remover to dissolve the residue. Finally, dry the bottle thoroughly with a clean towel to prevent any water spots from forming. By removing any labels or residue, you'll be able to achieve a professional-looking wrap that adheres evenly to the bottle.
Clean and Dry the Bottle
Cleaning and drying the bottle is a crucial step in preparing it for wrapping. Start by washing the bottle with soap and warm water to remove any dirt, grime, or residue. Use a soft-bristled brush to scrub away any stubborn stains or labels. Rinse the bottle thoroughly with clean water to remove any soap residue. Next, dry the bottle completely with a lint-free cloth or paper towel. This is an important step, as any moisture left on the bottle can cause the wrapping paper to become soggy or wrinkled. If you're using a particularly delicate or fragile bottle, you may want to use a hair dryer on a low setting to dry it more thoroughly. Once the bottle is dry, inspect it for any remaining streaks or residue. If necessary, use a gentle glass cleaner and a lint-free cloth to remove any remaining imperfections. A clean and dry bottle is essential for a smooth and even wrapping process, and will help ensure that your finished project looks its best.
Apply a Base Coat or Primer (Optional)
Applying a base coat or primer is an optional step in preparing your bottle for wrapping, but it can make a significant difference in the overall appearance and durability of the final product. A base coat or primer serves as a foundation for your wrapping paper or paint, creating a smooth and even surface for adhesion. This is especially important if your bottle has a glossy or uneven finish, as it can help the wrapping paper or paint adhere more securely. Additionally, a base coat or primer can help to cover up any imperfections or stains on the bottle, creating a clean and uniform surface for wrapping. There are many different types of base coats and primers available, including spray-on primers, brush-on primers, and even specialized primers designed specifically for glass surfaces. When choosing a base coat or primer, be sure to select one that is compatible with your wrapping paper or paint and follows the manufacturer's instructions for application. By applying a base coat or primer, you can ensure a strong bond between the wrapping paper or paint and the bottle, resulting in a beautifully wrapped bottle that will last for years to come.
Wrapping the Bottle with Flair
When it comes to wrapping a bottle with flair, there are several key elements to consider in order to create a truly show-stopping presentation. To start, it's essential to begin with a strong foundation, which can be achieved by starting with a centerpiece or focal point. This could be a beautiful piece of fabric, a decorative bow, or even a small gift or charm that complements the bottle's contents. From there, you can build upon this foundation by incorporating a variety of textures and patterns, such as ribbons, lace, or paper, to add depth and visual interest. Finally, adding a finishing touch with ribbons or embellishments can help to tie the entire look together and create a polished, professional finish. By incorporating these elements, you can create a beautifully wrapped bottle that is sure to impress. So, let's start with the first step: starting with a centerpiece or focal point.
Start with a Centerpiece or Focal Point
When it comes to wrapping a bottle, starting with a centerpiece or focal point is a great way to add visual interest and create a beautiful presentation. A centerpiece can be anything from a decorative bow to a small gift or charm that complements the occasion or the recipient's style. For example, if you're wrapping a bottle of wine for a wedding, you could use a small, delicate flower or a tiny wedding bell as a centerpiece. If you're wrapping a bottle of champagne for a birthday, you could use a small, shiny party hat or a colorful balloon. The key is to choose a centerpiece that reflects the occasion and adds a touch of personality to the gift. Once you have your centerpiece, you can begin wrapping the bottle, using the centerpiece as a guide to create a beautiful, balanced design. You can wrap the bottle in a way that showcases the centerpiece, or use it as a starting point to create a more intricate design. Either way, starting with a centerpiece or focal point is a great way to add some extra flair to your bottle wrapping and make it a truly special gift.
Use a Variety of Textures and Patterns
When it comes to wrapping a bottle, incorporating a variety of textures and patterns can add an extra layer of visual interest and make the gift even more special. Consider combining smooth, glossy paper with rough, natural fibers like burlap or twine. You could also pair delicate, lace-like patterns with bold, geometric shapes. The key is to balance contrasting elements in a way that creates a cohesive look. For example, you might wrap the bottle in a simple, monochromatic paper, then add a pop of texture with a ribbon or garland made from a natural material like wood or rattan. Alternatively, you could use a paper with a bold, graphic pattern, then tone it down with a smooth, satin ribbon. By mixing and matching different textures and patterns, you can create a unique and eye-catching look that reflects your personal style and adds to the overall presentation of the gift.
Add a Finishing Touch with Ribbons or Embellishments
Adding a finishing touch to your beautifully wrapped bottle with ribbons or embellishments can elevate its presentation and make it a truly special gift. A simple yet elegant ribbon tied around the neck of the bottle can add a touch of sophistication, while a decorative bow can add a playful and festive feel. You can choose a ribbon that complements the color and texture of the wrapping paper or go for a contrasting look to create a visually appealing combination. Embellishments such as gift tags, charms, or brooches can also be used to add a personal touch and make the gift even more meaningful. For a more rustic or vintage look, you can use twine or burlap ribbons, while a satin or velvet ribbon can add a luxurious feel. Whatever you choose, make sure it's securely attached to the bottle to prevent it from coming loose during handling. With a little creativity, you can turn a simple bottle into a stunning gift that's sure to impress.