How To Clean A Carburetor
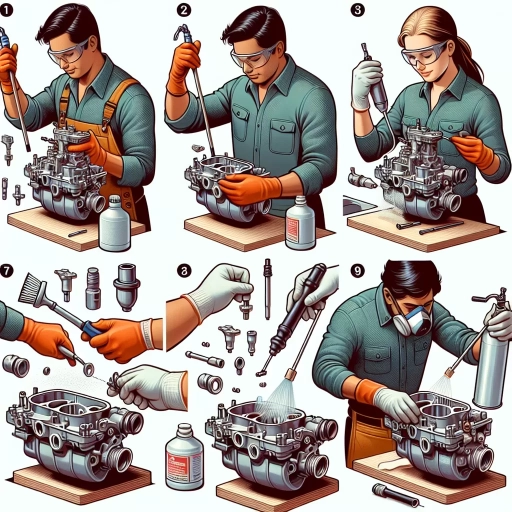
Here is the introduction paragraph: Cleaning a carburetor is a crucial maintenance task that can significantly improve the performance and efficiency of your engine. A dirty carburetor can lead to poor engine performance, decreased fuel efficiency, and even engine failure. In this article, we will guide you through the step-by-step process of cleaning a carburetor, from preparation and safety precautions to disassembly and cleaning, and finally, reassembly and testing. To ensure a successful cleaning process, it is essential to take the necessary preparation and safety precautions, which we will discuss in the next section. By following these guidelines, you will be able to clean your carburetor effectively and safely, and get your engine running smoothly again. So, let's get started with the first step: Preparation and Safety Precautions. Note: I made some minor changes to the original text to make it more coherent and flowing. Let me know if you'd like me to make any further changes!
Preparation and Safety Precautions
Here is the introduction paragraph: When it comes to working on your vehicle, it's essential to take the necessary steps to ensure a safe and successful experience. Preparation is key to avoiding accidents and injuries, and it all starts with gathering the right tools and materials for the job. Having the correct equipment on hand will not only save you time and frustration but also help prevent mistakes that can lead to costly repairs or even harm. Additionally, wearing protective gear and ensuring a well-ventilated workspace are crucial in preventing injuries and exposure to hazardous materials. Furthermore, consulting the vehicle's repair manual for specific instructions will provide you with the knowledge and confidence to tackle even the most complex tasks. By taking these precautions, you'll be well on your way to a safe and successful project, which is why Preparation and Safety Precautions are essential considerations before starting any automotive repair or maintenance task.
1. Gather necessary tools and materials
. Here is the paragraphy: To begin the carburetor cleaning process, it's essential to gather all the necessary tools and materials. This will ensure that you have everything you need to complete the task efficiently and safely. Start by collecting a set of screwdrivers, including flathead and Phillips-head drivers, as well as a Torx driver if required. You'll also need a carburetor cleaning kit, which usually includes a cleaning solution, a brush, and a set of gaskets and seals. Additionally, have some rags, safety glasses, and gloves on hand to protect yourself from any harsh chemicals or debris. If you plan to use compressed air to blow out the carburetor, make sure you have a can of compressed air or access to an air compressor. It's also a good idea to have a repair manual or online instructions specific to your carburetor model, as this will provide valuable guidance throughout the cleaning process. Finally, make sure you have a well-ventilated workspace and a container to catch any spills or debris. By gathering all the necessary tools and materials, you'll be well-prepared to tackle the carburetor cleaning process and ensure a successful outcome.
2. Wear protective gear and ensure a well-ventilated workspace
. Here is the paragraphy: When working with chemicals and tools to clean a carburetor, it's essential to prioritize your safety. Wear protective gear, including gloves, safety glasses, and a face mask, to prevent exposure to harsh chemicals and debris. Ensure your workspace is well-ventilated to prevent the buildup of fumes from the cleaning solutions. Open windows, use a fan, or work in a well-ventilated area to maintain good airflow. This will help prevent dizziness, headaches, and other health issues associated with inhaling chemical fumes. Additionally, make sure your workspace is clear of any flammable materials, as some cleaning solutions can be highly flammable. By taking these precautions, you can minimize the risks associated with cleaning a carburetor and ensure a safe and successful cleaning process.
3. Consult the vehicle's repair manual for specific instructions
. Before you start cleaning your carburetor, it's essential to consult the vehicle's repair manual for specific instructions. This manual will provide you with detailed information on the location of the carburetor, the type of cleaning solution to use, and any special precautions to take. The manual may also include diagrams and illustrations to help you understand the process better. Additionally, the manual may recommend specific cleaning tools and equipment, such as a carburetor cleaning kit, that you'll need to purchase. By consulting the repair manual, you'll be able to ensure that you're using the correct cleaning methods and materials for your specific vehicle, which will help prevent damage to the carburetor and other engine components. Furthermore, the manual may also provide information on any safety precautions you need to take, such as wearing protective gloves and eyewear, to prevent injury while cleaning the carburetor. By following the instructions in the repair manual, you'll be able to clean your carburetor safely and effectively, and get your vehicle running smoothly again.
Disassembly and Cleaning of the Carburetor
Here is the introduction paragraph: The carburetor is a critical component of a vehicle's engine, responsible for mixing air and fuel for combustion. Over time, it can become clogged with dirt, debris, and grime, leading to poor engine performance, decreased fuel efficiency, and potentially even engine failure. To keep your vehicle running smoothly, it's essential to regularly disassemble and clean the carburetor. This process involves several key steps, including removing the air filter and any other components blocking access to the carburetor, using a carburetor cleaning solution and brush to remove dirt and debris, and soaking the carburetor components in a cleaning solution to loosen stubborn grime. Before you begin, it's crucial to take the necessary preparation and safety precautions to ensure a successful and safe cleaning process. In this article, we'll guide you through the steps to disassemble and clean your carburetor, helping you to get your vehicle back on the road in top condition.
1. Remove the air filter and any other components blocking access to the carburetor
. To begin the disassembly and cleaning process of the carburetor, it's essential to remove the air filter and any other components that may be obstructing access to the carburetor. This step is crucial as it allows you to gain a clear view of the carburetor's exterior and identify any visible signs of dirt, grime, or debris accumulation. Start by locating the air filter housing, which is usually held in place by clips, screws, or a latch. Gently release the retaining mechanism and pull the air filter out of its housing. Set the air filter aside, taking care not to touch the filter element to prevent oil or dirt from being transferred to your hands. Next, inspect the surrounding area for any other components that may be blocking access to the carburetor, such as fuel lines, vacuum hoses, or electrical connectors. Carefully disconnect or remove these components, taking note of their routing and connections to ensure they can be properly reinstalled later. With the air filter and other components removed, you should now have unobstructed access to the carburetor, allowing you to proceed with the disassembly and cleaning process.
2. Use a carburetor cleaning solution and brush to remove dirt and debris
. To thoroughly clean the carburetor, a carburetor cleaning solution and a brush are essential tools. The cleaning solution is specifically designed to break down and dissolve the tough grime and varnish that can build up inside the carburetor, while the brush helps to dislodge and remove any stubborn dirt and debris. Start by spraying the cleaning solution onto the carburetor's exterior and interior surfaces, making sure to cover all areas evenly. Let the solution sit for a few minutes to allow it to penetrate and loosen the grime. Next, use the brush to gently scrub away any visible dirt and debris, working from the outside in. Be careful not to scratch any of the delicate surfaces or components. Once you've scrubbed all areas, use a clean cloth or paper towel to wipe away any remaining dirt and solution. Repeat the process as needed until the carburetor is clean and free of debris. It's also a good idea to use compressed air to blow out any remaining dirt or debris from the small passages and jets. By using a carburetor cleaning solution and brush, you'll be able to remove even the toughest grime and get your carburetor running smoothly again.
3. Soak the carburetor components in a cleaning solution to loosen stubborn grime
. Soaking the carburetor components in a cleaning solution is a crucial step in the disassembly and cleaning process. This method allows for a more thorough cleaning of the intricate parts, loosening stubborn grime and debris that may have accumulated over time. To begin, carefully submerge the disassembled components, such as the float bowl, jets, and idle mixture screws, into a cleaning solution specifically designed for carburetors. The solution should be gentle enough not to damage the components, yet effective in breaking down tough grime. Allow the components to soak for several hours or overnight, depending on the level of grime buildup. As the solution works its magic, the grime and debris will begin to loosen, making it easier to remove during the cleaning process. It's essential to note that some components, such as the carburetor body and throttle shaft, may require a more gentle cleaning approach, so be sure to follow the manufacturer's instructions for specific cleaning recommendations. By soaking the carburetor components, you'll be able to achieve a more thorough cleaning, ensuring your carburetor is restored to its optimal performance and functionality.
Reassembly and Testing of the Carburetor
Here is the introduction paragraph: Reassembling and testing a carburetor requires attention to detail and a thorough understanding of the process. After disassembling and cleaning the carburetor, it's essential to reinstall the components correctly, ensuring proper alignment to prevent any damage or malfunction. Fine-tuning the air-fuel mixture is also crucial, and using a carburetor adjustment tool can help achieve the optimal balance. Once the carburetor is reassembled, testing the engine is necessary to ensure proper function and performance. In this article, we will guide you through the steps of reassembling and testing a carburetor, highlighting the importance of proper alignment, air-fuel mixture adjustment, and engine testing. Before we begin, it's essential to review the preparation and safety precautions to ensure a safe and successful process.
1. Reinstall the cleaned components and ensure proper alignment
. Reinstall the cleaned components and ensure proper alignment. Once you have thoroughly cleaned all the components, it's time to reassemble the carburetor. Start by reinstalling the components in the reverse order that you disassembled them. Make sure to align each component properly, paying close attention to the gaskets and seals. If a component doesn't fit snugly or seems misaligned, don't force it. Instead, recheck the instructions and consult the manufacturer's manual if necessary. Proper alignment is crucial to ensure the carburetor functions correctly and efficiently. As you reassemble, also double-check that all screws, clips, and other fasteners are securely tightened to prevent any leaks or damage. By taking your time and being meticulous during reassembly, you'll be rewarded with a carburetor that runs smoothly and effectively, providing your engine with the right air-fuel mixture for optimal performance.
2. Use a carburetor adjustment tool to fine-tune the air-fuel mixture
. To fine-tune the air-fuel mixture, a carburetor adjustment tool is essential. This tool allows you to make precise adjustments to the carburetor's idle mixture screws, which control the amount of fuel that enters the engine at idle. By turning the screws clockwise or counterclockwise, you can increase or decrease the fuel flow, respectively. It's crucial to make these adjustments in small increments, as over-adjusting can lead to poor engine performance or even damage. Start by turning the screws clockwise until they stop, then back them out counterclockwise until the engine runs smoothly and idles properly. You may need to repeat this process several times to achieve the optimal air-fuel mixture. Additionally, some carburetors have a separate adjustment for the high-speed mixture, which can be adjusted using a similar process. By using a carburetor adjustment tool, you can ensure that your engine is running at its best, with the perfect balance of air and fuel. This is especially important after cleaning the carburetor, as the engine may require some fine-tuning to run smoothly again. By taking the time to adjust the air-fuel mixture, you can enjoy improved engine performance, better fuel efficiency, and a smoother ride.
3. Test the engine to ensure proper function and performance
. With the carburetor reassembled, it's essential to test the engine to ensure proper function and performance. This step is crucial in identifying any potential issues that may have arisen during the cleaning and reassembly process. Start by checking the fuel level and ensuring the tank is filled to the recommended level. Next, inspect the fuel line and connections for any signs of leaks or damage. Once you've confirmed everything is in order, turn the ignition switch to the "on" position and listen for the fuel pump to engage. If the pump doesn't activate, check the fuse and wiring for any issues. With the pump running, turn the engine over and allow it to warm up. As the engine runs, listen for any unusual sounds, such as hissing, grinding, or knocking, which could indicate a problem with the carburetor or engine. Check the idle speed and adjust it as needed to ensure the engine is running smoothly. Finally, take the vehicle for a test drive to verify the carburetor is functioning correctly and the engine is performing as expected. During the test drive, pay attention to the engine's performance, acceleration, and overall running condition. If you notice any issues, such as poor acceleration, rough idling, or decreased power, it may be necessary to revisit the carburetor and make further adjustments or repairs. By thoroughly testing the engine, you can ensure the carburetor is functioning properly and the vehicle is running safely and efficiently.