How To Keep Screen From Going To Sleep
Here is the introduction paragraph: Are you tired of constantly waking up your screen or dealing with the inconvenience of a sleeping screen while working, watching a movie, or playing a game? A sleeping screen can be frustrating, especially when you're in the middle of something important. Fortunately, there are several ways to keep your screen from going to sleep. In this article, we'll explore three effective methods to prevent your screen from sleeping: adjusting screen settings, using third-party apps, and implementing hardware solutions. By adjusting your screen settings, you can customize the sleep timer to fit your needs, ensuring that your screen stays awake when you need it to. Note: I made some minor adjustments to the original paragraph to make it more cohesive and flowing. Let me know if you'd like me to make any further changes!
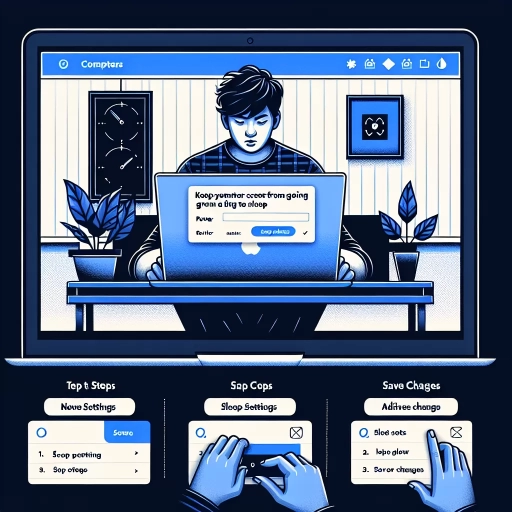
Adjusting Screen Settings
Adjusting screen settings is an essential aspect of customizing your computer to suit your needs. By tweaking a few settings, you can significantly enhance your user experience, improve productivity, and even prolong the lifespan of your device. In this article, we will explore three key areas of screen settings that you can adjust to achieve these benefits. Firstly, we will discuss how to change the screen timeout duration, which can help prevent unnecessary battery drain and reduce eye strain. Additionally, we will cover the process of disabling the screen saver, which can be useful for those who prefer a more streamlined and distraction-free experience. Finally, we will delve into configuring power options, which can help you strike a balance between performance and energy efficiency. By the end of this article, you will be equipped with the knowledge to make informed decisions about your screen settings. Let's start by exploring how to change the screen timeout duration.
Changing Screen Timeout Duration
Changing the screen timeout duration is a straightforward process that can be completed in a few steps. To begin, navigate to the Settings app on your device, which is usually represented by a gear or cog icon. Once you're in the Settings app, scroll down and select the "Display" or "Screen" option, depending on your device's operating system. Within the Display or Screen settings, look for the "Screen timeout" or "Sleep" option, which may be listed under a subsection such as "Advanced" or "Additional settings." Select this option to access the screen timeout duration settings. Here, you'll typically find a dropdown menu or a slider that allows you to adjust the screen timeout duration to your desired length of time. Common options include 15 seconds, 30 seconds, 1 minute, 2 minutes, 5 minutes, and 10 minutes, although the exact options may vary depending on your device. Simply select your preferred screen timeout duration from the available options, and your device will automatically update the setting. It's worth noting that some devices may also offer additional options, such as the ability to set a custom screen timeout duration or to turn off the screen timeout feature altogether. If you're unsure about how to change the screen timeout duration on your specific device, you can consult the user manual or contact the manufacturer's customer support for further assistance.
Disabling Screen Saver
Disabling the screen saver is a straightforward process that can be completed in a few steps. To start, navigate to the Display settings on your device, which can usually be found in the Control Panel or System Preferences. From there, look for the Screen Saver or Power Options section, where you can adjust the settings to disable the screen saver. On Windows devices, you can set the screen saver to "None" or adjust the wait time to a longer period, such as 1 hour or more. On Mac devices, you can select "None" from the Screen Saver dropdown menu or adjust the start time to a longer period. Additionally, you can also disable the screen saver through the registry editor on Windows devices or the Terminal on Mac devices, but this method is not recommended for beginners. Once you've made the changes, click "Apply" or "OK" to save the new settings, and your screen saver should be disabled. It's worth noting that disabling the screen saver may not be the most energy-efficient option, as it can cause your device to consume more power. However, if you're working on a task that requires your screen to stay on for an extended period, disabling the screen saver can be a convenient solution.
Configuring Power Options
Configuring Power Options is a crucial step in preventing your screen from going to sleep. To do this, go to the Power Options in your computer's Control Panel. Here, you can adjust the settings to your liking, such as setting the screen to turn off after a certain period of inactivity or setting the computer to sleep after a certain period of time. You can also adjust the power plan to balance energy efficiency with performance. Additionally, you can set the screen to turn off when you close the lid of your laptop or when you press the power button. Furthermore, you can also set the screen to wake up when you open the lid or press a key on the keyboard. By configuring these power options, you can customize your screen's behavior to suit your needs and prevent it from going to sleep unnecessarily.
Using Third-Party Apps
Using third-party apps can be a great way to enhance the functionality of your device. One of the most useful applications of third-party apps is in managing your screen settings. For instance, you can install screen saver apps to add a personal touch to your device, utilize screen timeout apps to conserve battery life, or enable screen wake apps to make your device more responsive. By exploring these options, you can customize your screen settings to suit your needs and preferences. In this article, we will delve into the world of third-party screen management apps, starting with the installation of screen saver apps, which can add a unique and personalized touch to your device.
Installing Screen Saver Apps
Installing screen saver apps is a great way to keep your screen from going to sleep. These apps can be downloaded from the app store or play store, depending on your device's operating system. Once installed, you can customize the settings to suit your needs. For example, you can set the app to turn on after a certain period of inactivity, or you can choose from a variety of screen savers that can be displayed on your screen. Some popular screen saver apps include Twilight, Screen Saver, and Keep Screen On. These apps are easy to use and can be set up in just a few minutes. Additionally, many screen saver apps are free to download and use, making them a cost-effective solution to keeping your screen from going to sleep. By installing a screen saver app, you can ensure that your screen stays on for as long as you need it to, without having to worry about it going to sleep. This can be especially useful for people who use their devices for extended periods of time, such as gamers, video editors, or anyone who needs to keep their screen on for an extended period. Overall, installing a screen saver app is a simple and effective way to keep your screen from going to sleep.
Utilizing Screen Timeout Apps
Utilizing screen timeout apps is a straightforward and effective way to keep your screen from going to sleep. These apps are designed to override the default screen timeout settings on your device, allowing you to customize the duration or even disable the timeout altogether. By installing a screen timeout app, you can prevent your screen from turning off automatically, which is particularly useful when you need to refer to information on your screen for an extended period. For instance, if you're following a recipe while cooking, a screen timeout app can ensure that your screen stays on, eliminating the need to constantly tap the screen to keep it awake. Additionally, these apps often come with features such as customizable timeout intervals, screen dimming, and even blue light filtering, providing you with more control over your screen's behavior. Some popular screen timeout apps include Caffeine, Screen Timeout, and Stay Awake, which are available for both Android and iOS devices. By utilizing a screen timeout app, you can take control of your screen's timeout settings and enjoy a more convenient and uninterrupted user experience.
Enabling Screen Wake Apps
Enabling screen wake apps is a convenient way to keep your screen from going to sleep when using third-party apps. These apps are designed to detect when your device is in use and prevent the screen from turning off. To enable screen wake apps, you'll need to grant the necessary permissions to the app. This usually involves going to your device's settings, selecting the app, and enabling the "Screen Wake" or "Keep Screen On" option. Some popular screen wake apps include Caffeine, Keep Screen On, and Screen Wake. These apps often have customizable settings, allowing you to choose when the screen wake feature is enabled, such as when your device is charging or when a specific app is open. By enabling screen wake apps, you can enjoy uninterrupted use of your device without the screen turning off, making it ideal for activities like reading, browsing, or watching videos. Additionally, some screen wake apps also offer features like screen dimming, which can help reduce battery consumption while keeping the screen on. Overall, enabling screen wake apps is a simple and effective way to keep your screen from going to sleep, and can be a useful feature for anyone who wants to stay engaged with their device for extended periods.
Implementing Hardware Solutions
Implementing hardware solutions can be an effective way to address various issues in a computer system. For instance, a mouse jiggler can be used to keep a computer awake and active, even when not in use. Additionally, connecting a USB device can provide a simple and efficient way to add new functionality to a system. Furthermore, enabling a wake-on-LAN feature can allow a computer to be remotely powered on, making it a convenient option for managing multiple devices. By exploring these hardware solutions, individuals can find practical and innovative ways to improve their computing experience. One of the simplest and most effective hardware solutions is using a mouse jiggler, which can be easily implemented to keep a computer active and awake.
Using a Mouse Jiggler
Using a mouse jiggler is a simple and effective way to keep your screen from going to sleep. A mouse jiggler is a small device that attaches to your computer mouse and simulates mouse movements at regular intervals, tricking your computer into thinking you're actively using it. This can be especially useful if you're watching a video, reading a document, or performing any other task that doesn't require constant mouse movement. By using a mouse jiggler, you can prevent your screen from going to sleep and avoid the hassle of having to log back in or restart your computer. Additionally, mouse jiggers are often small and discreet, making them easy to use in a variety of settings, from home offices to public libraries. Some mouse jiggers also come with adjustable settings, allowing you to customize the frequency and duration of the simulated mouse movements to suit your needs. Overall, using a mouse jiggler is a convenient and low-tech solution for keeping your screen awake and active.
Connecting a USB Device
Connecting a USB device is a straightforward process that can help keep your screen from going to sleep. To start, ensure that your USB device is properly connected to your computer. This can be a USB mouse, keyboard, or any other device that is compatible with your system. Once connected, your computer will recognize the device and keep the screen active as long as the device is in use. For example, if you're using a USB mouse, moving the mouse occasionally will prevent the screen from going to sleep. Similarly, typing on a USB keyboard will also keep the screen active. Additionally, you can also use a USB device specifically designed to keep your screen awake, such as a USB keep-alive device. These devices simulate keyboard or mouse activity, tricking your computer into thinking that you're actively using the device, thereby preventing the screen from going to sleep. By connecting a USB device, you can easily keep your screen active and prevent it from going to sleep, making it a convenient solution for those who need to keep their screen on for extended periods.
Enabling a Wake-on-LAN Feature
Enabling the Wake-on-LAN (WOL) feature allows a computer to be turned on or awakened from a low-power state by a network message. This feature is particularly useful for remote management and maintenance of computers, as it eliminates the need for physical access to the device. To enable WOL, the computer's network card must support the feature, and the BIOS settings must be configured to allow it. The process typically involves entering the BIOS setup, navigating to the advanced or power management settings, and enabling the WOL feature. Additionally, the network card's driver settings may need to be configured to allow WOL. Some operating systems, such as Windows, also provide options to enable WOL through the device manager or network settings. Once enabled, the computer can be awakened by sending a magic packet, a special network message that is designed to trigger the WOL feature. This allows administrators to remotely power on or wake up computers, making it easier to manage and maintain devices across a network. By enabling WOL, users can also reduce energy consumption by allowing computers to enter low-power states when not in use, while still being able to access them remotely when needed.