How To Adjust Margins In Google Docs
Here is the introduction paragraph: When working with Google Docs, one of the most important aspects to consider is the margin settings. Margins play a crucial role in determining the overall layout and appearance of your document, and adjusting them can greatly impact the readability and professionalism of your work. Whether you're creating a business report, academic paper, or personal document, understanding how to adjust margins in Google Docs is essential. In this article, we'll delve into the world of Google Docs margins, exploring what they are, how to adjust them, and how to customize them for specific needs. First, let's start by understanding the basics of Google Docs margins, including the default settings and how they affect your document's layout. By grasping this fundamental concept, you'll be better equipped to make informed decisions when adjusting margins in Google Docs, which we'll cover in the next section. Note: I made some minor changes to the original paragraph to make it more cohesive and engaging. Let me know if you'd like me to revise anything!
Understanding Google Docs Margins
Here is the introduction paragraph: When working with Google Docs, it's essential to understand the basics of document layout to create professional-looking documents. One crucial aspect of document layout is margins, which play a significant role in determining the overall appearance of your document. But what exactly are margins in Google Docs, and why are they important? In this article, we'll delve into the world of margins in Google Docs, exploring what they are, why they matter, and the default margin settings you can expect. By the end of this article, you'll have a solid understanding of Google Docs margins and be able to apply this knowledge to create well-formatted documents that make a lasting impression. Understanding Google Docs Margins is key to taking your document creation skills to the next level.
What are margins in Google Docs?
. In Google Docs, margins refer to the blank space between the edges of the page and the content of your document. They play a crucial role in determining the overall layout and appearance of your document. By default, Google Docs sets the margins to 1 inch on all sides, but you can easily adjust them to suit your needs. Understanding margins is essential to ensure that your document looks professional and is easy to read. When you adjust the margins, you can control the amount of white space around your text, images, and other elements, which can significantly impact the overall aesthetic of your document. For instance, if you're creating a document with a lot of images or tables, you may want to increase the margins to create more breathing room and prevent the content from feeling cluttered. On the other hand, if you're working on a document with a lot of text, you may want to decrease the margins to make the most of the available space. By mastering the art of adjusting margins in Google Docs, you can take your document from good to great and make a lasting impression on your readers.
Why are margins important in Google Docs?
. Margins are a crucial aspect of document formatting in Google Docs, playing a significant role in the overall appearance and readability of your document. Properly set margins ensure that your content is balanced, visually appealing, and easy to read. One of the primary reasons margins are important is that they help to create a clear distinction between the content and the edge of the page. This buffer zone prevents the text from getting too close to the edge, making it difficult to read. Moreover, margins provide a clean and professional look to your document, which is essential for academic, business, or formal purposes. Additionally, margins can be adjusted to accommodate headers, footers, and other elements, allowing for a more customized and organized layout. By setting the right margins, you can also control the amount of white space in your document, which can greatly impact the overall flow and readability of your content. In Google Docs, margins can be easily adjusted to suit your specific needs, making it a versatile and user-friendly tool for creating a wide range of documents. By understanding the importance of margins and how to adjust them effectively, you can take your document formatting to the next level and create professional-looking documents with ease.
Default margin settings in Google Docs
. Google Docs provides default margin settings that can be used as a starting point for your documents. These default settings are designed to provide a balanced and visually appealing layout, with sufficient space between the text and the edges of the page. The default margin settings in Google Docs are typically set to 1 inch (2.54 cm) on all sides, including the top, bottom, left, and right margins. This means that when you create a new document, the text will be automatically positioned 1 inch away from the edges of the page, providing a clean and uncluttered appearance. However, it's worth noting that these default settings can be adjusted to suit your specific needs, whether you're working on a formal report, a creative project, or a simple letter. By adjusting the margin settings, you can control the amount of white space around your text, which can greatly impact the overall look and feel of your document. For example, increasing the margin size can make your text appear more spacious and easier to read, while decreasing the margin size can make your text appear more compact and dense. Understanding the default margin settings in Google Docs and how to adjust them can help you create professional-looking documents that effectively communicate your message.
Adjusting Margins in Google Docs
Here is the introduction paragraph: When working with Google Docs, having control over the layout and design of your document is crucial for effective communication and presentation. One often overlooked aspect of document design is margin adjustment. Adjusting margins in Google Docs can greatly impact the overall appearance and readability of your document. In this article, we will explore three methods for adjusting margins in Google Docs: using the ruler, using the Page Setup menu, and using keyboard shortcuts. By mastering these techniques, you will be able to customize your document's layout to suit your needs and create a more polished final product. Understanding Google Docs Margins is key to unlocking the full potential of this powerful word processing tool.
Using the ruler to adjust margins
. Using the ruler to adjust margins in Google Docs is a straightforward and intuitive process. To begin, make sure the ruler is visible by going to the "View" menu and selecting "Show ruler." The ruler will appear at the top of the page, displaying the margin settings. To adjust the margins, simply click and drag the margin markers on the ruler. The margin markers are the small triangles located at the top and bottom of the ruler, and they indicate the current margin settings. By dragging these markers, you can increase or decrease the margin size. For example, to increase the top margin, click and drag the top margin marker upwards. As you drag the marker, the margin size will be displayed in inches, allowing you to make precise adjustments. You can also use the ruler to adjust the left and right margins by clicking and dragging the corresponding margin markers. Additionally, you can use the ruler to set the gutter margin, which is the space between the margin and the edge of the page. By adjusting the gutter margin, you can control the amount of space between the text and the edge of the page. Overall, using the ruler to adjust margins in Google Docs provides a quick and easy way to customize the layout of your document.
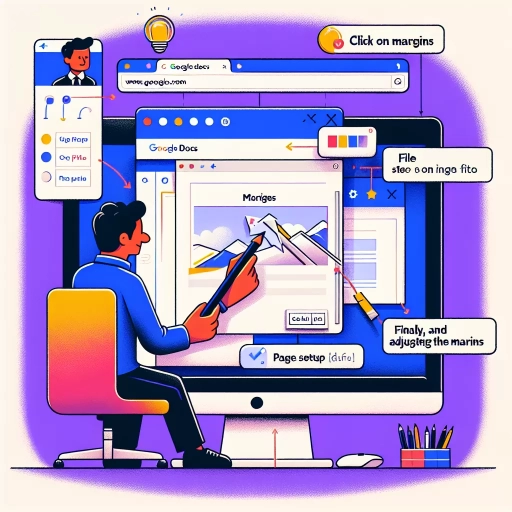
Using the Page Setup menu to adjust margins
. The Page Setup menu in Google Docs provides a convenient way to adjust margins with precision. To access the Page Setup menu, navigate to the "File" tab and select "Page setup" from the drop-down menu. This will open a new window with various settings, including margin adjustments. In the "Margins" section, you can enter specific values for the top, bottom, left, and right margins. You can also use the "Apply" button to apply your changes and see the updated margins in your document. Additionally, the Page Setup menu allows you to set the page orientation, paper size, and header and footer margins, giving you full control over the layout of your document. By using the Page Setup menu, you can easily adjust margins to suit your needs, whether you're working on a report, essay, or any other type of document. Furthermore, the Page Setup menu is a useful tool for ensuring consistency in margin settings throughout your document, which is especially important for academic or professional documents that require strict formatting guidelines. By taking advantage of the Page Setup menu, you can save time and effort in adjusting margins and focus on the content of your document.
Using keyboard shortcuts to adjust margins
. Using keyboard shortcuts to adjust margins in Google Docs can significantly boost your productivity and efficiency. By mastering these shortcuts, you can quickly make adjustments to your document's layout without having to navigate through menus or click on multiple buttons. To adjust the left margin, simply press "Ctrl + [" (Windows) or "Cmd + [" (Mac) to decrease the margin, and "Ctrl + ]" (Windows) or "Cmd + ]" (Mac) to increase it. Similarly, to adjust the right margin, use "Ctrl + ]" (Windows) or "Cmd + ]" (Mac) to decrease, and "Ctrl + [" (Windows) or "Cmd + [" (Mac) to increase. For the top and bottom margins, use "Ctrl + Shift + [" (Windows) or "Cmd + Shift + [" (Mac) to decrease, and "Ctrl + Shift + ]" (Windows) or "Cmd + Shift + ]" (Mac) to increase. By using these keyboard shortcuts, you can make precise adjustments to your margins in a matter of seconds, allowing you to focus on the content of your document rather than its layout. Additionally, these shortcuts can be especially useful when working on documents with complex layouts or multiple sections, where manual margin adjustments can be time-consuming and tedious. By incorporating these keyboard shortcuts into your workflow, you can streamline your document editing process and achieve professional-looking results with ease.
Customizing Margins for Specific Needs
Here is the introduction paragraph: Customizing margins is a crucial aspect of document design, as it can significantly impact the overall appearance and readability of a document. Whether you're printing a report, publishing an article online, or creating a specific type of document, such as a resume or a brochure, adjusting the margins can make all the difference. In this article, we'll explore how to customize margins for specific needs, including adjusting margins for printing, online publishing, and specific document types. By understanding how to tailor your margins to your document's purpose, you'll be able to create professional-looking documents that effectively communicate your message. So, let's dive in and explore the world of customizing margins, and by the end of this article, you'll have a solid understanding of how to work with margins in Google Docs, starting with Understanding Google Docs Margins.
Adjusting margins for printing
. When it comes to printing your Google Doc, adjusting the margins is crucial to ensure that your content fits perfectly on the page. By default, Google Docs sets the margins to 1 inch on all sides, but you may need to adjust them depending on your specific printing needs. For instance, if you're printing a document with a lot of images or tables, you may want to increase the margins to prevent the content from getting cut off. On the other hand, if you're printing a document with a lot of text, you may want to decrease the margins to fit more content on the page. To adjust the margins for printing, go to the "File" menu and select "Page setup." In the "Page setup" dialog box, you'll see the margin settings, which include the top, bottom, left, and right margins. You can adjust these settings by entering the desired margin size in inches or using the up and down arrows to increase or decrease the margin size. Additionally, you can also set the margin settings to "Mirror margins" if you're printing a document that will be bound, such as a booklet or a report. This will ensure that the margins are symmetrical and look professional. By adjusting the margins for printing, you can ensure that your Google Doc looks great on paper and is easy to read.
Adjusting margins for online publishing
. When it comes to online publishing, adjusting margins is crucial to ensure that your content is presented in a clear and readable format. Unlike print publishing, where margins are fixed, online publishing requires flexibility to accommodate different screen sizes, devices, and browsers. To adjust margins for online publishing, you need to consider the screen resolution, device type, and browser compatibility. A good starting point is to set your margins to a minimum of 10-15 pixels to ensure that your content is not too close to the edges of the screen. However, if you're publishing on a platform that requires a more traditional print layout, you may need to adjust your margins to 1-2 inches to mimic the look and feel of a printed page. Additionally, you should also consider the line spacing and font size to ensure that your content is easy to read on different devices. Google Docs provides a range of margin settings that can be adjusted to suit your online publishing needs. By adjusting the margins, you can control the amount of white space around your content, making it more readable and visually appealing to your online audience. Furthermore, adjusting margins can also help you to optimize your content for search engines, as it allows you to include more keywords and meta descriptions in your content. Overall, adjusting margins for online publishing is an essential step in creating a professional and engaging online presence.
Adjusting margins for specific document types
. When working with different types of documents in Google Docs, it's essential to adjust the margins to suit the specific needs of each document. For instance, if you're creating a resume, you may want to set narrower margins to fit more content on the page, while a research paper may require wider margins to accommodate citations and references. Adjusting margins for specific document types can significantly enhance the overall appearance and readability of your document. For example, if you're creating a business report, you may want to set the margins to 0.5 inches on all sides to create a clean and professional look. On the other hand, if you're working on a creative writing project, you may want to set the margins to 1 inch on all sides to give your text some breathing room. Additionally, if you're creating a document that will be printed, you may want to set the margins to accommodate the printer's requirements, such as setting the top margin to 0.75 inches to allow for a header. By adjusting the margins for specific document types, you can ensure that your document looks polished and professional, and that your content is presented in the best possible way. Furthermore, adjusting margins can also help you to save paper and ink when printing, making it a more sustainable option. Overall, taking the time to adjust the margins for specific document types can make a significant difference in the overall quality and effectiveness of your document.