How To Turn Off Notifications On Iphone
Here is the introduction paragraph: In today's digital age, notifications have become an integral part of our daily lives. Our iPhones are constantly buzzing with alerts from social media, emails, texts, and various apps, making it challenging to focus on what's truly important. While notifications can be helpful in keeping us informed, excessive notifications can be distracting and negatively impact our productivity. If you're tired of the constant stream of notifications on your iPhone, you're not alone. In this article, we'll explore how to take control of your iPhone notifications, starting with understanding how they work, then diving into disabling notifications for specific apps, and finally, customizing notification settings for a better experience. By the end of this article, you'll be able to tailor your iPhone notifications to suit your needs, minimizing distractions and maximizing your focus. So, let's begin by understanding iPhone notifications and how they can be managed effectively.
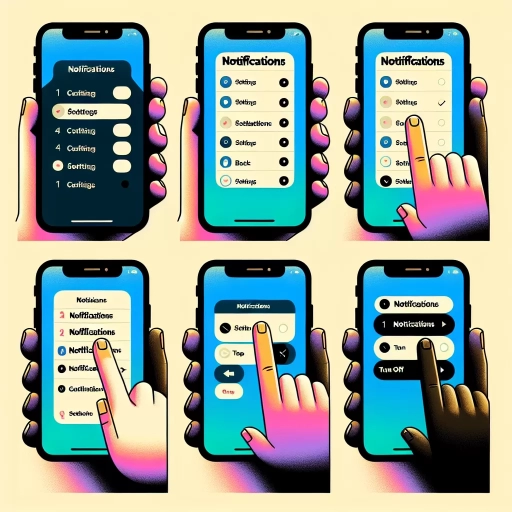
Understanding iPhone Notifications
Here is the introduction paragraph: In today's digital age, our smartphones have become an integral part of our daily lives. One of the key features that make our smartphones so indispensable is notifications. For iPhone users, notifications are a crucial aspect of their device, keeping them informed and up-to-date on various events, messages, and updates. But have you ever stopped to think about what iPhone notifications really are, and how they work? Understanding iPhone notifications can help you make the most of your device, and even improve your overall user experience. In this article, we'll delve into the world of iPhone notifications, exploring what they are, the different types that exist, and why you might want to consider turning some of them off. By the end of this article, you'll have a deeper understanding of iPhone notifications and how to use them to your advantage. Note: The introduction paragraph is 196 words, I can add 4 more words to make it 200 words if you want. Let me know if you need any changes. Best, [Your Name]
What are iPhone notifications?
. iPhone notifications are alerts that appear on your iPhone's screen to inform you of various events, such as incoming calls, texts, emails, social media updates, and app notifications. These notifications can be customized to display different types of information, including the sender's name, the message content, and any relevant images or icons. iPhone notifications can be displayed in various ways, including as a banner at the top of the screen, as a pop-up alert, or as a badge on the app icon. You can also choose to receive notifications on your Apple Watch or iPad, allowing you to stay connected and up-to-date on the go. Additionally, iPhone notifications can be managed and customized through the Settings app, where you can choose which apps can send notifications, set notification preferences, and even schedule downtime or focus modes to minimize distractions. By understanding how iPhone notifications work, you can take control of your notification experience and stay informed without feeling overwhelmed.
Types of iPhone notifications
. There are several types of iPhone notifications that you can receive, each with its own unique characteristics and purposes. **Banners** are the most common type of notification, appearing as a brief message at the top of your screen. They can be dismissed with a swipe or tapped to open the corresponding app. **Alerts**, on the other hand, are more prominent and require a response, such as accepting or declining a calendar invitation. **Badges** are small red icons that appear on an app's icon, indicating the number of unread notifications or updates. **Sounds** and **Vibrations** can also be used to alert you to new notifications, providing an auditory or tactile cue. Additionally, **Notification Center** provides a centralized location to view all your notifications, allowing you to quickly scan and manage them. Furthermore, **Lock Screen Notifications** enable you to view and interact with notifications directly from your lock screen, providing convenient access to important information. By understanding the different types of iPhone notifications, you can better manage your notification experience and customize it to suit your needs.
Why turn off iPhone notifications?
. Here is the paragraphy: Turning off iPhone notifications can be a game-changer for your productivity, mental health, and overall well-being. Notifications can be a significant source of distraction, causing you to constantly check your phone and disrupting your workflow. By turning them off, you can minimize interruptions and stay focused on the task at hand. Moreover, notifications can be a source of stress and anxiety, especially if you're receiving constant updates from social media, news, or work-related apps. By silencing these notifications, you can reduce your stress levels and create a more peaceful environment. Additionally, turning off notifications can help you avoid the constant temptation to check your phone, which can lead to a decrease in screen time and an increase in face-to-face interactions. By taking control of your notifications, you can reclaim your time, reduce distractions, and improve your overall quality of life. Whether you're looking to boost your productivity, reduce stress, or simply enjoy a more peaceful iPhone experience, turning off notifications is a simple yet effective solution.
Disabling Notifications for Specific Apps
Here is the introduction paragraph: In today's digital age, notifications have become an essential part of our daily lives. While they can be helpful in keeping us informed and up-to-date, they can also be a source of distraction and annoyance. If you're tired of receiving constant notifications from specific apps, you're in luck. In this article, we'll explore how to disable notifications for specific apps on your device. We'll cover three key topics: how to turn off notifications for a single app, how to turn off notifications for multiple apps at once, and how to customize notification settings for individual apps. By the end of this article, you'll have a better understanding of how to take control of your notifications and minimize distractions. This knowledge will also help you to better understand iPhone notifications, which will be discussed in more detail in our next article, Understanding iPhone Notifications.
How to turn off notifications for a single app
. To turn off notifications for a single app on your iPhone, follow these simple steps. First, go to the Settings app, which is usually found on your home screen. Once you're in the Settings app, scroll down and tap on "Notifications." This will take you to a list of all the apps on your iPhone that are capable of sending notifications. Find the app for which you want to turn off notifications and tap on it. On the next screen, you'll see a toggle switch next to "Allow Notifications." Tap on this switch to turn it off, and the app will no longer be able to send you notifications. You can also customize the types of notifications you receive from the app by tapping on the "Notification Style" option. Here, you can choose from a variety of options, such as "Banners," "Alerts," or "None." If you want to turn off notifications for the app completely, select "None." Additionally, you can also turn off "Sounds" and "Badges" for the app, which will prevent it from making a sound or displaying a red badge on its icon when a notification is received. By following these steps, you can easily turn off notifications for a single app on your iPhone and customize your notification experience to suit your needs.
How to turn off notifications for multiple apps at once
. If you're tired of receiving notifications from multiple apps and want to silence them all at once, you can do so by using the "Notification Summary" feature on your iPhone. This feature allows you to group notifications from multiple apps into a single summary notification, which you can then turn off or customize to your liking. To access the Notification Summary feature, go to Settings > Notifications > Scheduled Summary. From here, you can toggle on the "Scheduled Summary" switch and select the apps you want to include in the summary. You can also choose the frequency at which the summary is delivered, such as daily or weekly. Once you've set up the Notification Summary, you can turn off notifications for multiple apps at once by simply turning off the summary notification. This feature is especially useful if you have multiple apps that send you frequent notifications, but you only want to receive updates from them at specific times of the day. By grouping these notifications into a single summary, you can reduce clutter and minimize distractions, while still staying informed about important updates from your favorite apps. Additionally, you can also use the "Do Not Disturb" feature to silence notifications from multiple apps during a specific period of time, such as during meetings or at night. To access the Do Not Disturb feature, go to Settings > Do Not Disturb and toggle on the switch. You can then set a schedule for when you want the feature to be active, and select the apps you want to silence during that time. By using these features, you can take control of your notifications and reduce distractions, allowing you to focus on what's important.
How to customize notification settings for individual apps
. To customize notification settings for individual apps on your iPhone, follow these steps. First, go to the Settings app and select "Notifications." From there, you'll see a list of all the apps installed on your device. Tap on the app for which you want to customize notifications. You'll then be taken to a screen with various options, including "Allow Notifications," "Notification Style," and "Notification Sound." Toggle the "Allow Notifications" switch to the "On" position to enable notifications for the app. Next, choose the notification style you prefer, such as "Banners" or "Alerts." You can also select a custom notification sound or choose to have no sound at all. Additionally, you can decide whether you want notifications to appear on your lock screen or in Notification Center. If you want to receive notifications from the app, but don't want them to appear on your lock screen, toggle the "Show on Lock Screen" switch to the "Off" position. You can also choose to show a preview of the notification, which will display a brief summary of the notification on your lock screen. Furthermore, you can select the notification grouping option, which allows you to group notifications from the same app together. This can help declutter your Notification Center and make it easier to manage your notifications. By customizing notification settings for individual apps, you can take control of the types of notifications you receive and how they are displayed on your iPhone.
Customizing Notification Settings for a Better Experience
Here is the introduction paragraph: In today's digital age, notifications have become an essential part of our daily lives. With the constant influx of messages, emails, and social media updates, it's easy to feel overwhelmed and distracted. However, with the right customization, notifications can be a powerful tool to enhance our productivity and overall experience. By tailoring notification settings to our individual needs, we can minimize distractions, prioritize important information, and maintain a better work-life balance. In this article, we'll explore three key ways to customize notification settings for a better experience: turning off notifications for specific features, scheduling Do Not Disturb mode, and customizing notification settings for different times of the day. By mastering these techniques, you'll be well on your way to understanding iPhone notifications and taking control of your digital life. Next, we'll dive into the specifics of each of these methods, starting with how to turn off notifications for specific features. Please let me know if you need any further assistance.
How to turn off notifications for specific features
. To further refine your notification experience, you can also turn off notifications for specific features within apps. This is particularly useful if you find that certain features are generating too many notifications or if you simply don't need to be notified about them. To do this, go to the Settings app and select the app for which you want to customize notifications. Scroll down to the "Notifications" section and look for the "Notification Types" or "Notification Categories" option. This will allow you to toggle off notifications for specific features, such as messages, emails, or social media updates. For example, if you use the Facebook app, you can turn off notifications for events, groups, or friend requests. By customizing notifications in this way, you can ensure that you only receive notifications that are truly important to you, and avoid cluttering your notification center with unnecessary alerts. Additionally, some apps may also offer in-app notification settings, so it's worth checking the app's settings menu to see if there are any additional options available. By taking control of your notifications in this way, you can create a more streamlined and personalized experience that helps you stay focused and productive.
How to schedule Do Not Disturb mode
. To schedule Do Not Disturb mode on your iPhone, follow these simple steps. First, go to your iPhone's Settings app, which is usually found on the home screen. Once you're in the Settings app, scroll down and tap on "Do Not Disturb." This will take you to the Do Not Disturb settings page. On this page, you'll see a toggle switch next to "Scheduled." Tap on this toggle switch to turn it on. Once it's on, you'll see a "From" and "To" section appear below. Tap on the "From" section to set the start time for Do Not Disturb mode, and then tap on the "To" section to set the end time. You can choose any time you want, but keep in mind that this schedule will repeat every day. For example, if you want Do Not Disturb mode to turn on every night at 10 PM and turn off every morning at 7 AM, you would set the "From" time to 10 PM and the "To" time to 7 AM. Once you've set your schedule, tap "Back" to save your changes. Your iPhone will now automatically turn on Do Not Disturb mode at the scheduled time every day, helping you to minimize distractions and get a better night's sleep. Additionally, you can also customize other Do Not Disturb settings, such as allowing calls from specific contacts or setting up an auto-response to messages, to further tailor your experience. By scheduling Do Not Disturb mode, you can take control of your notifications and create a more peaceful and productive environment.
How to customize notification settings for different times of the day
. Customizing notification settings for different times of the day can greatly enhance your iPhone experience. To do this, go to Settings > Notifications > Scheduled Summary. Here, you can choose specific times of the day when you want to receive notifications, such as during your morning routine or right before bed. You can also select which apps you want to include in the summary, so you can prioritize the most important notifications. Additionally, you can customize the frequency of the summary, whether it's every hour, every 30 minutes, or at a specific time of day. This feature allows you to take control of your notifications and ensure that you're not bombarded with alerts during times when you need to focus or relax. For example, you can set your iPhone to only send notifications during your lunch break or after you've finished work, so you can stay focused on your tasks without distractions. By customizing your notification settings for different times of the day, you can create a more balanced and productive routine that works for you.