How To Remove Gridlines In Google Sheets
Here is the introduction paragraph: When working with Google Sheets, gridlines can be both a blessing and a curse. On one hand, they provide a helpful visual guide for organizing and aligning data, making it easier to read and understand. On the other hand, they can be distracting and make your spreadsheet look cluttered, especially when sharing or presenting it to others. If you're looking to remove gridlines in Google Sheets, you're in the right place. In this article, we'll explore the different methods to remove gridlines, as well as how to customize them to suit your needs. But before we dive into the removal methods, it's essential to understand what gridlines are and how they work in Google Sheets. Let's start by understanding gridlines in Google Sheets.
Understanding Gridlines in Google Sheets
Gridlines are a fundamental feature in Google Sheets that can greatly enhance the readability and organization of your spreadsheets. Understanding gridlines is essential for creating clear and concise tables, charts, and other visualizations. In this article, we will delve into the world of gridlines in Google Sheets, exploring what they are, why they are important, and how to identify them. By the end of this article, you will have a solid grasp of gridlines and be able to effectively utilize them in your own Google Sheets projects. So, let's start by answering the most basic question: What are Gridlines in Google Sheets?
What are Gridlines in Google Sheets?
Gridlines in Google Sheets are the horizontal and vertical lines that appear on the spreadsheet to help users distinguish between cells and make it easier to read and navigate the data. These lines are displayed by default and can be customized to suit the user's preferences. Gridlines can be useful for several purposes, such as creating tables, charts, and other visualizations, as well as for aligning data and making it more organized. However, some users may find gridlines distracting or unnecessary, especially when printing or presenting their spreadsheets. Fortunately, Google Sheets provides options to remove or customize gridlines, allowing users to tailor their spreadsheet's appearance to their specific needs.
Why are Gridlines Important in Google Sheets?
Gridlines are an essential feature in Google Sheets, serving as a visual aid to help users navigate and organize their data more efficiently. These horizontal and vertical lines create a grid-like pattern on the spreadsheet, making it easier to distinguish between cells, rows, and columns. The importance of gridlines lies in their ability to provide a clear and structured framework for data entry, editing, and analysis. By displaying gridlines, users can quickly identify the boundaries of each cell, ensuring accurate data placement and minimizing errors. Moreover, gridlines facilitate the alignment of data, making it easier to compare and contrast information across different rows and columns. This, in turn, enables users to make more informed decisions and gain valuable insights from their data. Additionally, gridlines play a crucial role in formatting and designing spreadsheets, allowing users to create visually appealing and well-organized reports, charts, and tables. Overall, gridlines are a fundamental component of Google Sheets, and their importance cannot be overstated, as they significantly enhance the user experience and productivity.
How to Identify Gridlines in Google Sheets?
To identify gridlines in Google Sheets, start by understanding what they are - the faint lines that separate rows and columns, helping you navigate and organize your data. By default, gridlines are visible in Google Sheets, but you can easily toggle their visibility on and off. To confirm if gridlines are visible, look for the thin, gray lines that crisscross your spreadsheet, separating each cell. If you're having trouble spotting them, try zooming in or out of your sheet, as this can affect their visibility. Additionally, if you're using a custom theme or template, the gridlines might be more or less prominent, so it's worth checking your sheet's settings. If you're still unsure, you can also use the "View" menu to toggle gridlines on and off, which will give you a clear indication of whether they're visible or not. By following these simple steps, you should be able to easily identify gridlines in your Google Sheets.
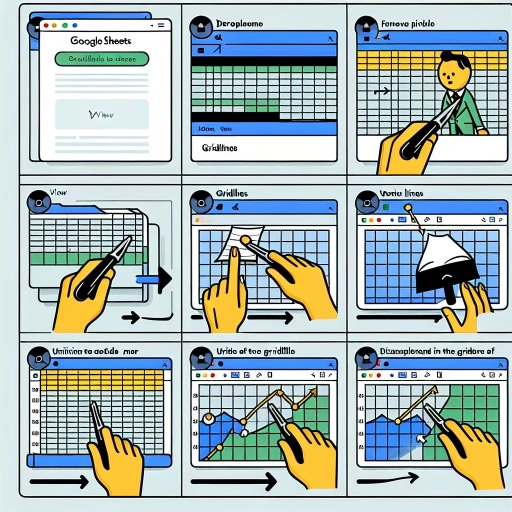
Methods to Remove Gridlines in Google Sheets
Here is the introduction paragraph: Gridlines in Google Sheets can be useful for organizing and formatting data, but they can also be distracting and make your spreadsheet look cluttered. Fortunately, there are several methods to remove gridlines in Google Sheets, giving you more control over the appearance of your spreadsheet. In this article, we will explore three methods to remove gridlines in Google Sheets: using the "View" menu, using the "Format" tab, and using keyboard shortcuts. By the end of this article, you will be able to choose the method that works best for you and create a clean and professional-looking spreadsheet. To start, let's take a look at the first method: using the "View" menu to remove gridlines.
Method 1: Using the "View" Menu to Remove Gridlines
To remove gridlines in Google Sheets using the "View" menu, start by opening your Google Sheets document and selecting the cells from which you want to remove the gridlines. Then, click on the "View" menu located at the top of the page. From the drop-down menu, hover over "Gridlines" and click on it. This will open a sub-menu with two options: "Horizontal gridlines" and "Vertical gridlines". To remove both, simply uncheck both boxes. Alternatively, you can uncheck only one of the boxes if you want to remove either the horizontal or vertical gridlines. Once you've made your selection, the gridlines will be removed from the selected cells. This method is quick and easy, and it allows you to customize the appearance of your spreadsheet by removing gridlines from specific cells or the entire sheet. Additionally, you can also use this method to remove gridlines from a specific range of cells by selecting those cells before accessing the "View" menu. By removing gridlines, you can make your spreadsheet look cleaner and more organized, which can be especially helpful when presenting data to others or creating reports.
Method 2: Using the "Format" Tab to Remove Gridlines
To remove gridlines in Google Sheets using the "Format" tab, follow these steps. First, select the cells or range of cells from which you want to remove the gridlines. You can do this by clicking and dragging your mouse over the cells or by typing the cell range into the "Name box" at the top left of the screen. Once you have selected the cells, click on the "Format" tab in the top menu bar. From the drop-down menu, select "Gridlines." This will open a sub-menu with options to customize the gridlines. To remove the gridlines entirely, uncheck the boxes next to "Horizontal lines" and "Vertical lines." You can also choose to remove gridlines from the entire sheet by selecting "None" from the "Gridlines" sub-menu. Alternatively, you can customize the appearance of the gridlines by selecting a different line style, color, or width. If you want to remove gridlines from a specific range of cells, make sure to select only those cells before accessing the "Gridlines" options. By using the "Format" tab, you can easily remove gridlines from your Google Sheets and customize the appearance of your spreadsheet to suit your needs.
Method 3: Using Keyboard Shortcuts to Remove Gridlines
To remove gridlines in Google Sheets using keyboard shortcuts, you can use the following methods. For Windows users, press "Ctrl + Shift + B" to toggle the gridlines on and off. This shortcut will instantly remove the gridlines from your spreadsheet, giving you a cleaner and more organized view. On the other hand, Mac users can use the shortcut "Command + Shift + B" to achieve the same result. This method is quick and easy, allowing you to focus on your data without the distraction of gridlines. Additionally, you can also use the keyboard shortcut "Ctrl + Shift + G" (Windows) or "Command + Shift + G" (Mac) to toggle the gridlines on and off. This shortcut will remove the gridlines from the entire spreadsheet, including the headers and footers. By using these keyboard shortcuts, you can easily remove gridlines in Google Sheets and customize your spreadsheet to suit your needs.
Customizing Gridlines in Google Sheets
Customizing gridlines in Google Sheets can greatly enhance the readability and visual appeal of your spreadsheets. By adjusting the color, size, and print settings of gridlines, you can create a more professional and polished look. In this article, we will explore three key aspects of customizing gridlines in Google Sheets: changing the color of gridlines, adjusting the size of gridlines, and printing gridlines. By the end of this article, you will have a comprehensive understanding of how to tailor your gridlines to suit your specific needs. Let's start by exploring how to change the color of gridlines in Google Sheets, a simple yet effective way to add some personality to your spreadsheets.
How to Change the Color of Gridlines in Google Sheets?
To change the color of gridlines in Google Sheets, start by selecting the range of cells you want to modify. Then, go to the "Format" tab in the top menu and click on "Borders and lines." In the "Borders and lines" sidebar, click on the "Gridlines" dropdown menu and select "Custom gridlines." Here, you can choose from a variety of colors to change the gridline color. You can also adjust the line style and width to further customize the appearance of your gridlines. Additionally, you can use the "Alternating colors" feature to create a checkerboard effect by alternating between two different colors for the gridlines. Once you've made your selections, click "Done" to apply the changes to your selected range of cells.
How to Adjust the Size of Gridlines in Google Sheets?
To adjust the size of gridlines in Google Sheets, start by selecting the range of cells you want to modify. Then, go to the "Format" tab in the top menu and click on "Gridlines." In the drop-down menu, select "Custom gridlines." This will open the "Custom gridlines" dialog box, where you can adjust the line width and style of the gridlines. To change the size of the gridlines, click on the "Line width" dropdown menu and select from the available options, which range from 0.5 to 6 points. You can also choose to display gridlines only for rows, columns, or both. Additionally, you can select the line style, such as solid, dashed, or dotted, to further customize the appearance of your gridlines. Once you've made your selections, click "OK" to apply the changes to your selected range of cells.
How to Print Gridlines in Google Sheets?
To print gridlines in Google Sheets, follow these steps: First, select the range of cells you want to print by clicking and dragging your cursor over the desired area. Next, go to the "File" menu and click on "Print" or use the keyboard shortcut Ctrl+P (Windows) or Command+P (Mac). In the print settings window, click on the "More settings" option. Under the "Gridlines" section, check the box next to "Print gridlines." You can also choose to print gridlines for the entire sheet by selecting the "Entire sheet" option. Additionally, you can customize the gridline style by clicking on the "Gridline style" dropdown menu and selecting from various options such as solid, dashed, or dotted lines. Once you've made your selections, click on the "Print" button to print your Google Sheet with gridlines.