How To Crop An Image On Mac
Cropping an image on a Mac is a straightforward process that can be accomplished using various built-in applications. Whether you're a professional graphic designer or an amateur photographer, knowing how to crop an image effectively is an essential skill. Fortunately, Mac users have several options to choose from, including the Preview app, Photos app, and alternative methods. In this article, we'll explore three convenient ways to crop an image on a Mac. We'll start by examining how to use the Preview app, a versatile and user-friendly application that allows you to crop images with ease. With its intuitive interface and robust features, the Preview app is an ideal choice for cropping images on a Mac. By the end of this article, you'll be able to crop images like a pro using the Preview app, Photos app, or alternative methods. Let's dive in and explore the first method: Using Preview App to Crop an Image on Mac.
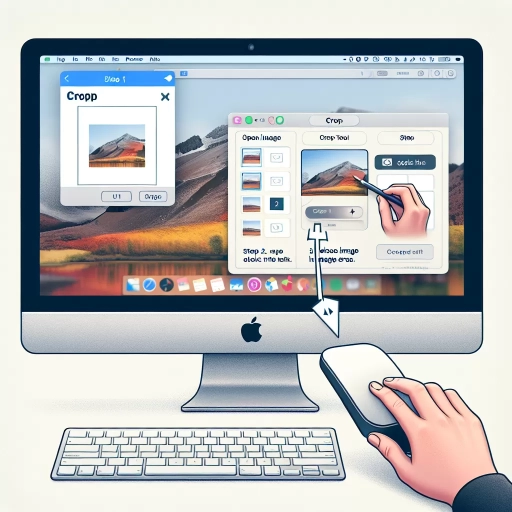
Using Preview App to Crop an Image on Mac
Cropping an image on a Mac can be a straightforward process, especially when using the Preview app. This built-in application offers a range of features that make it easy to edit and manipulate images. To crop an image using Preview, you'll first need to open the image in the app. This is a simple step that sets the stage for the rest of the editing process. Once the image is open, you'll need to select the crop tool, which is a crucial step in defining the area of the image that you want to keep. After selecting the crop tool, you'll need to adjust the crop area to your liking, which involves dragging the edges of the crop box to select the desired portion of the image. By following these steps, you can easily crop an image using Preview on your Mac. To get started, let's take a closer look at the first step: opening the image in Preview app.
Opening the Image in Preview App
Opening the image in the Preview app is a straightforward process that allows you to access various editing tools, including the cropping feature. To open an image in Preview, you can follow a few simple steps. First, locate the image you want to crop on your Mac, either on the desktop, in the Finder, or in the Photos app. Once you've found the image, right-click or control-click on it to open the context menu. From the menu, select "Open With" and then choose "Preview" from the list of available applications. Alternatively, you can also drag and drop the image into the Preview app icon in the Dock or double-click on the image to open it directly in Preview. If Preview is set as the default image viewer on your Mac, the image will open automatically in Preview when you double-click on it. Once the image is open in Preview, you can access the cropping tool and other editing features to modify the image as needed.
Selecting the Crop Tool
When it comes to cropping an image on Mac using the Preview app, selecting the crop tool is the first step. To do this, open the image you want to crop in Preview and click on the "Markup Toolbar" button, which looks like a pencil in a circle. This will open the Markup Toolbar, where you'll find the "Crop" tool. Alternatively, you can also use the keyboard shortcut "Command + K" to directly select the Crop tool. Once you've selected the Crop tool, your cursor will change to a crosshair, indicating that you're ready to start cropping your image. You can then click and drag the crosshair to select the area of the image you want to keep, and the rest will be cropped out. It's worth noting that you can also use the "Select" dropdown menu in the Markup Toolbar to choose from pre-defined crop sizes, such as "Original", "Fit", or "Fill", which can be useful if you want to crop your image to a specific size or aspect ratio. By selecting the Crop tool, you'll be able to easily and precisely crop your image to the desired size and shape.
Adjusting the Crop Area
Adjusting the crop area is a crucial step in the image cropping process. To do this, click and drag the corners or edges of the crop area to resize it. You can also use the handles to adjust the aspect ratio of the crop area. If you want to maintain the original aspect ratio of the image, hold down the Shift key while dragging the corners or edges. This will ensure that the crop area is resized proportionally. Additionally, you can also use the "Aspect Ratio" dropdown menu to select a predefined aspect ratio, such as 1:1, 3:2, or 16:9. This can be useful if you need to crop the image to a specific size or shape. Furthermore, you can also use the "Size" dropdown menu to enter a custom width and height for the crop area. This allows you to crop the image to a specific size, which can be useful for web design, social media, or other applications where image size is important. By adjusting the crop area, you can ensure that your image is cropped to the perfect size and shape for your needs.
Cropping an Image on Mac Using Photos App
Cropping an image is a fundamental editing task that can greatly enhance the composition and focus of a photo. When it comes to cropping an image on a Mac, the Photos app offers a user-friendly and efficient way to do so. To crop an image using the Photos app, you'll first need to open the image in the app, which is a straightforward process that sets the stage for the editing process. Once the image is open, you can switch to editing mode and access the crop tool, which provides a range of options for adjusting the aspect ratio and orientation of the image. By mastering these steps, you can effectively crop your images and improve their overall quality. In this article, we'll take a closer look at how to crop an image on a Mac using the Photos app, starting with the first step: opening the image in Photos App.
Opening the Image in Photos App
Opening the image in the Photos app is the first step in cropping an image on a Mac. To do this, you can either double-click on the image file or right-click on it and select "Open With" followed by "Photos." Alternatively, you can also open the Photos app directly and then select the image you want to crop from your library. Once the image is open, you can view it in full-screen mode or adjust the zoom level to get a better look at the area you want to crop. The Photos app also allows you to view the image's metadata, such as the date and time it was taken, the camera model, and the file size. Additionally, you can also use the Photos app to edit and enhance your image before cropping it, using tools such as the Adjust tab, which allows you to adjust the image's brightness, contrast, and saturation. By opening the image in the Photos app, you can take the first step in cropping your image and preparing it for use in your desired project.
Using the Crop Tool in Editing Mode
When editing an image on a Mac using the Photos app, the Crop tool is a powerful feature that allows you to refine your composition and focus attention on the subject. To access the Crop tool, simply select the image you want to edit and click on the "Edit" button in the top right corner of the Photos window. This will open the image in Editing mode, where you'll find the Crop tool in the toolbar at the top of the screen. To use the Crop tool, click on it and then drag the edges of the crop box to select the area of the image you want to keep. You can also use the aspect ratio controls to constrain the crop to a specific shape, such as a square or a 4:3 rectangle. As you crop the image, the Photos app will automatically adjust the zoom and positioning of the image to ensure that the cropped area is centered and fills the screen. Once you're happy with the crop, click "Done" to apply the changes and save the edited image. The Crop tool is a versatile feature that can be used to remove distractions, improve composition, and enhance the overall impact of your images. By using the Crop tool in Editing mode, you can take your photos to the next level and create stunning, professional-looking images that showcase your creativity and vision.
Adjusting the Aspect Ratio and Orientation
Adjusting the aspect ratio and orientation of an image is a crucial step in the cropping process. The aspect ratio refers to the proportional relationship between the width and height of an image, while the orientation refers to the direction in which the image is displayed. When cropping an image, it's essential to adjust the aspect ratio and orientation to ensure that the resulting image is visually appealing and meets the desired requirements. To adjust the aspect ratio, you can select from a range of pre-set options, such as square, 3:2, 4:3, or 16:9, or enter a custom ratio. This allows you to maintain the original proportions of the image or change them to suit your needs. Additionally, you can also adjust the orientation of the image by rotating it clockwise or counterclockwise, which is useful when working with images that were taken in portrait or landscape mode. By adjusting the aspect ratio and orientation, you can ensure that your cropped image is perfectly aligned and visually appealing, making it ideal for use in various applications, such as social media, web design, or printing.
Alternative Methods for Cropping an Image on Mac
When it comes to cropping an image on a Mac, many users rely on the built-in Photos app or Preview. However, these tools have limitations, and sometimes you need more advanced features to achieve the desired result. Fortunately, there are alternative methods for cropping an image on Mac that can help you achieve professional-looking results. One approach is to use third-party image editing software, which offers a wide range of features and tools to help you crop and edit your images with precision. Another option is to crop images online using web-based tools, which can be convenient and time-saving. Additionally, you can also use keyboard shortcuts in image editing apps to quickly crop and resize your images. In this article, we will explore these alternative methods in more detail, starting with using third-party image editing software.
Using Third-Party Image Editing Software
Using third-party image editing software is a viable alternative to cropping an image on Mac. There are numerous options available, each with its unique features and functionalities. Adobe Photoshop, for instance, is a popular choice among professionals, offering advanced tools and techniques for cropping and editing images. Other notable options include Skylum Luminar, Capture One, and Affinity Photo, which provide a range of features and effects to enhance and manipulate images. These software programs often offer more flexibility and control over the cropping process, allowing users to make precise adjustments and achieve desired results. Additionally, many third-party image editing software programs are compatible with Mac operating systems, making it easy to integrate them into your workflow. By exploring these alternatives, users can discover new ways to crop and edit their images, and unlock a world of creative possibilities.
Cropping Images Online with Web-Based Tools
Cropping images online with web-based tools is a convenient and efficient way to edit your photos without having to download and install any software. There are numerous online image cropping tools available, each with its own set of features and functionalities. Some popular options include Canva, PicMonkey, and Pixlr. These tools allow you to upload your image, select the desired crop area, and adjust the dimensions to your liking. Many online cropping tools also offer additional features such as resizing, rotating, and flipping, making it easy to fine-tune your image. Furthermore, some tools provide pre-set crop ratios and dimensions for popular social media platforms, ensuring your image is optimized for sharing. With online image cropping tools, you can access your edited images from anywhere, at any time, making it an ideal solution for those who need to make quick edits on-the-go. Additionally, most online cropping tools are free or offer a free version, making it an affordable option for those who only need to make occasional edits. Overall, cropping images online with web-based tools is a quick, easy, and convenient way to edit your photos without the need for specialized software.
Using Keyboard Shortcuts in Image Editing Apps
Using keyboard shortcuts in image editing apps can significantly enhance your productivity and efficiency. By mastering these shortcuts, you can quickly perform common tasks, such as cropping, resizing, and adjusting images, without having to navigate through menus and toolbars. For instance, in Adobe Photoshop, pressing the "C" key allows you to quickly access the Crop Tool, while pressing "Ctrl + Shift + C" (or "Command + Shift + C" on a Mac) enables you to crop an image to a specific aspect ratio. Similarly, in other image editing apps like GIMP or Sketch, you can use keyboard shortcuts to perform tasks such as duplicating layers, adjusting opacity, or applying filters. By learning and utilizing these shortcuts, you can streamline your workflow, reduce editing time, and focus on the creative aspects of image editing. Additionally, many image editing apps allow you to customize keyboard shortcuts to suit your specific needs and preferences, making it even easier to work efficiently. By incorporating keyboard shortcuts into your image editing routine, you can take your editing skills to the next level and achieve professional-looking results with ease.