How To Hang A Tapestry
Hanging a tapestry can be a daunting task, especially for those who are new to home decor. However, with the right guidance, it can be a fun and rewarding experience. In this article, we will walk you through the process of hanging a tapestry, from preparation to finishing touches. To start, it's essential to prepare your space and tapestry for hanging. This involves choosing the right location, selecting the appropriate hanging method, and ensuring your tapestry is clean and ready to go. Once you've completed the preparation stage, you can move on to the step-by-step hanging process, where you'll learn how to measure, mark, and hang your tapestry with ease. Finally, we'll cover the finishing touches and maintenance required to keep your tapestry looking its best. By following these simple steps, you'll be able to hang your tapestry with confidence and enjoy its beauty for years to come. So, let's get started with the first step: Preparation is Key.
Preparation is Key
Preparation is key to hanging a tapestry successfully. Before you start hammering nails into the wall, it's essential to take a step back and prepare everything you need. This includes choosing the right wall for your tapestry, preparing the necessary tools and materials, and measuring the tapestry and the wall to ensure a perfect fit. By taking the time to prepare, you can avoid costly mistakes and ensure that your tapestry looks great in its new home. One of the most critical steps in the preparation process is choosing the right wall for your tapestry. This is because the type of wall you have will determine the type of hanging method you can use, and it's essential to choose a wall that can support the weight of your tapestry.
Choose the Right Wall
When it comes to choosing the right wall for your tapestry, there are several factors to consider. First and foremost, think about the lighting in the room. If the room is very bright, you may want to choose a wall that is not directly in front of a window to avoid fading or discoloration of the tapestry. On the other hand, if the room is quite dark, a wall near a window can help to illuminate the tapestry and make it a focal point. Next, consider the color of the walls and the tapestry. You'll want to choose a wall that complements the colors in the tapestry, rather than clashing with them. For example, if your tapestry has a lot of cool tones like blues and greens, a wall with a warm tone like beige or yellow may not be the best choice. Additionally, think about the texture of the wall. If the wall is very rough or has a lot of bumps, it may not be the best surface for hanging a tapestry. A smooth wall is usually the best choice, as it will provide a clean and even surface for the tapestry to hang from. Finally, consider the location of the wall in relation to the rest of the room. You'll want to choose a wall that is easily visible and accessible, rather than one that is tucked away in a corner or behind a piece of furniture. By taking these factors into consideration, you can choose the perfect wall for your tapestry and ensure that it looks its best.
Prepare the Necessary Tools and Materials
To prepare the necessary tools and materials for hanging a tapestry, start by gathering a few essential items. You will need a sturdy tapestry rod or dowel, which can be made of wood, metal, or PVC, and is specifically designed to hold the weight of your tapestry. Choose a rod that is slightly longer than the width of your tapestry to ensure a secure fit. Next, select a set of wall brackets or hooks that are suitable for the type of wall you have, such as drywall, plaster, or concrete. You will also need a level to ensure that your tapestry is straight, a pencil to mark the wall, and a drill or screwdriver to make holes for the brackets. Additionally, consider using a tapestry hanging kit, which usually includes a rod, brackets, and screws, making it a convenient and cost-effective option. If you want to add a decorative touch, you can also use tapestry pins or tacks to secure the edges of the tapestry to the wall. Finally, make sure you have a ladder or step stool to safely reach the area where you will be hanging your tapestry. By having all the necessary tools and materials ready, you will be able to hang your tapestry quickly and efficiently.
Measure the Tapestry and the Wall
Here is the paragraphy: Before you start hanging your tapestry, it's essential to measure both the tapestry and the wall where you plan to hang it. This will ensure a proper fit and help you determine the best placement. Start by measuring the length and width of your tapestry, taking note of any irregularities or uneven edges. Next, measure the width of the wall where you plan to hang the tapestry, from one corner to the other. Make sure to measure at the height where you plan to hang the tapestry, as the width of the wall may vary slightly at different heights. If you're planning to hang the tapestry vertically, measure the length of the wall from the floor to the ceiling. If you're planning to hang it horizontally, measure the width of the wall from one corner to the other. Take note of any obstacles, such as electrical outlets, windows, or doors, that may affect the placement of the tapestry. By measuring both the tapestry and the wall, you'll be able to determine the best placement and ensure a secure and even hang.
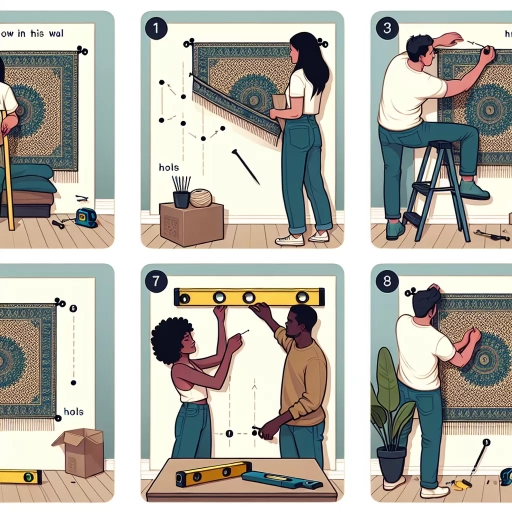
Step-by-Step Hanging Process
The process of hanging a tapestry can be a daunting task, especially for those who are new to DIY projects. However, with the right guidance, it can be a simple and rewarding experience. In this article, we will break down the step-by-step process of hanging a tapestry, covering essential steps such as locating the wall studs and determining the hanging method, marking the wall and drilling pilot holes, and finally, hanging the tapestry and adjusting as needed. By following these steps, you'll be able to achieve a professional-looking result that enhances the beauty of your tapestry. To begin, it's crucial to start with a solid foundation, which is why locating the wall studs and determining the hanging method is the first and most critical step in the process.
Locate the Wall Studs and Determine the Hanging Method
When it comes to hanging a tapestry, one of the most crucial steps is to locate the wall studs and determine the hanging method. To start, you'll need to find the wall studs, which are usually spaced 16 inches on center. You can use a stud finder to locate them, or knock gently on the wall to find the spot where the sound changes, indicating a stud. Once you've found a stud, measure 16 inches to the left or right to find the next one. With the studs located, you can then decide on the hanging method. If you're using a rod or dowel, you'll want to attach it to the wall studs using screws or nails. If you're using a command strip or adhesive hook, you can attach it directly to the drywall, but make sure to follow the manufacturer's instructions for weight limits. It's also important to consider the weight and size of your tapestry, as well as the type of wall you have, when choosing a hanging method. For example, if you have a large or heavy tapestry, you may need to use multiple screws or nails to secure it to the wall studs. On the other hand, if you have a small or lightweight tapestry, a command strip or adhesive hook may be sufficient. By taking the time to locate the wall studs and choose the right hanging method, you can ensure that your tapestry is securely and safely hung, and that it looks great on your wall.
Mark the Wall and Drill Pilot Holes
Mark the wall and drill pilot holes. To ensure that your tapestry hangs straight and level, it's essential to mark the wall accurately. Start by measuring the width of your tapestry and the distance between the hanging rods or hooks. Use a pencil to lightly mark the spot where you want to drill the pilot holes. Make sure the marks are level and aligned with the top of the tapestry. Next, use a drill bit to create pilot holes for the screws or nails. The pilot holes should be slightly smaller than the screws or nails to avoid splitting the wall. If you're using a stud finder, use it to locate the wall studs and mark the spot where you want to drill the pilot holes. This will ensure that your tapestry hangs securely and doesn't fall off the wall. Once you've drilled the pilot holes, you can proceed to hang your tapestry.
Hang the Tapestry and Adjust as Needed
Here is the paragraphy: Hang the tapestry and adjust as needed. Once you have determined the best placement for your tapestry, it's time to hang it. Start by holding the tapestry against the wall and ensuring it is level. You can use a level tool or ask a friend to help you hold the tapestry in place while you step back to check its alignment. If your tapestry has a rod pocket or a hanging sleeve, slide the rod or dowel through the pocket or sleeve and hang it on the wall hooks or nails. If your tapestry doesn't have a rod pocket or hanging sleeve, you can use command strips or adhesive hooks to hang it. Make any necessary adjustments to the tapestry's position to ensure it is straight and even. You may need to adjust the rod or dowel to get the tapestry to hang perfectly level. Take a step back and evaluate the tapestry's placement, making any final adjustments as needed.
Finishing Touches and Maintenance
Finishing touches and maintenance are crucial steps in the installation and upkeep of a tapestry. After hanging the tapestry, it's essential to add decorative elements and embellishments to enhance its aesthetic appeal. This can include adding a decorative rod or cornice, or incorporating other design elements that complement the tapestry's style and theme. Additionally, ensuring the tapestry is level and secure is vital to prevent it from becoming misshapen or damaged over time. Regular cleaning and maintenance are also necessary to preserve the tapestry's condition and extend its lifespan. By paying attention to these details, homeowners can enjoy their tapestry for years to come. To start, let's explore how to add decorative elements and embellishments to elevate the look and feel of your tapestry.
Add Decorative Elements and Embellishments
Adding decorative elements and embellishments is a great way to give your tapestry a personalized touch and make it stand out in your space. Consider adding a few well-placed throw pillows or a blanket in a complementary color to enhance the overall aesthetic of your room. You could also add some greenery, such as a potted plant or a vase with fresh flowers, to bring in a natural element and add some visual interest. If you want to add some extra texture and depth to your tapestry, consider adding a few pieces of wall decor, such as a mirror or a piece of artwork, nearby. Additionally, you could add some decorative trim or tassels to the edges of your tapestry to give it a more polished and finished look. Whatever decorative elements and embellishments you choose, make sure they complement the style and theme of your tapestry and don't overpower it. By adding a few thoughtful and well-placed decorative elements, you can take your tapestry from a simple wall hanging to a stunning focal point in your room.
Ensure the Tapestry is Level and Secure
Here is the paragraphy: When it comes to hanging a tapestry, ensuring it is level and secure is crucial for a professional-looking finish. To achieve this, start by using a level tool to check the wall and the tapestry itself. Make sure the wall is straight and the tapestry is aligned with the wall's edges. If the wall is not level, consider using a laser level or a carpenter's level to ensure accuracy. Next, use a pencil to mark the spot where you want to hang the tapestry, taking into account the height and placement you desire. Use a sturdy nail or screw to hang the tapestry, making sure it is securely fastened to the wall. If you're using a rod or dowel, attach it to the back of the tapestry and then hang it on the wall, ensuring it is level and secure. To add extra security, consider using wall anchors or screws to prevent the tapestry from falling or shifting over time. By taking the time to ensure your tapestry is level and secure, you'll be able to enjoy your beautiful piece of art without worrying about it falling or becoming damaged.
Clean and Maintain the Tapestry Regularly
To keep your tapestry looking its best, it's essential to clean and maintain it regularly. Start by gently vacuuming the tapestry using the upholstery attachment on your vacuum cleaner, paying particular attention to any areas with heavy foot traffic or where dust tends to accumulate. For more thorough cleaning, mix a solution of mild soap and warm water, and use a soft-bristled brush to gently scrub away any stains or dirt. Avoid using harsh chemicals or abrasive cleaners, as these can damage the fabric or cause colors to fade. For tapestries with delicate or intricate designs, consider spot cleaning with a damp cloth instead. In addition to cleaning, it's also important to maintain your tapestry's shape and prevent creases from forming. To do this, gently stretch the tapestry out to its full size and smooth out any wrinkles or folds. You can also use a steamer to remove any stubborn creases or wrinkles. Finally, to prevent dust and dirt from accumulating on your tapestry in the future, consider applying a fabric protector or Scotchgard to the surface. This will help repel stains and make cleaning easier. By following these simple cleaning and maintenance tips, you can keep your tapestry looking vibrant and beautiful for years to come.