How To Turn On Night Mode Iphone
 As the shift to a digitalized lifestyle leaves us spending countless hours on our devices, preserving eye health has become more critical than ever. This article takes you through the benefits of using a key feature for the modern smartphone user - the iPhone's Night Mode. Introduced to provide a solution to the potential harm caused by blue light exposure, Night Mode ensures a comfortable experience while using your device after sunset. We will begin with a comprehensive understanding of Night Mode on iPhone and its importance. Then, we will guide you through a detailed step-by-step process of enabling this critical feature. Finally, we will touch upon how you can get the most out of Night Mode by customizing it to your specific needs. Diving right in, let's start by understanding what Night Mode on iPhone really is and how it works to protect your eyes.
Understanding Night Mode on iPhone
The increasing use of smartphones in our daily lives has led Apple to develop innovative features to improve user experience. One such feature is Night Mode on the iPhone, which plays a crucial role not only in improving photo clarity in low-light conditions but also in ensuring eye health. This article will enlighten you about Night Mode, its multiple benefits, and how it functions on your iPhone. First, it's crucial to understand the functionality of Night Mode and its role in enhancing photography. Secondly, utilizing this feature is beneficial in numerous ways including improving your device's battery life, curbing potential eye strain, and enhancing the overall image quality under dim light scenery. Lastly, acquiring knowledge of the technology behind Night Mode will help you comprehend how Apple constantly ensures an optimal user experience. So we begin the exploration with the question, "What is Night Mode on iPhone?"
What is Night Mode?
A quintessential feature of the iPhone, Night Mode is a setting primarily aimed at enhancing photo quality in low-light conditions. Built into the iPhone’s camera interface, Night Mode operates by extending the shutter speed to let in more light, thus illuminating pictures clicked in under-exposed or nighttime settings. Unlike flash—which can be restraining in its light range and often results in washed-out images—Night Mode is more sophisticated, capable of evenly lighting subjects and preserving the ambient environment's overall feel. It's a blend of the algorithms and hardware of the iPhone, including the gyroscope, to account for motion and stability further while clicking. This potent amalgamation ensures photos come out stunningly clear, sharp, and well-lit, even when the lighting condition doesn't favour you. Moreover, the Night Mode is automatic in its functioning, kicking in when it detects the lack of adequate light. Users can manually adjust the exposure length as well. This feature also dovetails beautifully with the image signal processor on the iPhone, rendering brilliant results without compromising on the quality or causing noticeable noise or grain. The darker the environment, the longer an iPhone takes to capture an image in Night Mode, thus allowing more light to enter and revealing hidden details in the photo.
Benefits of Using Night Mode
Night Mode on an iPhone is not just a display aesthetic; it comes with a plethora of significant benefits. The key advantage of using Night Mode is that it significantly reduces the amount of blue light emitted by the screen. Research has shown that blue light can interfere with the natural production of melatonin, a hormone that regulates sleep-wake cycles. Hence, using Night Mode can have substantial benefits for your nighttime phone usage, potentially leading to better and more sound sleep. Moreover, it has been observed that exposing your eyes to excessive blue light straining the eyes, causing discomfort, dryness, and potentially exacerbating problems like computer vision syndrome. This issue becomes even more concerning when using your phone at night or in dimly lit environments. Night Mode mitigates this by reducing screen brightness and changing the color temperature to a warmer spectrum, which is easier on the eyes. Beyond the health benefits, using Night Mode also enhances user experience in several ways. For instance, by reducing screen brightness, Night Mode can help extend your battery life as the screen is one of the most power-consuming elements of your phone. Also, with Night Mode's darker theme, text becomes simpler to read in low-light conditions without causing discomfort, enhancing your overall nighttime phone usage experience. Furthermore, Night Mode helps in making nighttime photography a breeze. The feature optimizes your camera settings for low light photography, thereby, enhancing the quality of the photographs captured at night or in low light situations. This helps in removing the hassle of manually changing the settings and provides an easy way to ensure better picture quality. Lastly, Night Mode is designed to integrate seamlessly with the iPhone's system interface and native apps, ensuring that it works well across all aspects of your phone usage. From browsing the web to reading an e-book or checking your emails, everything becomes more comfortable and less taxing on your eyes when Night Mode is enabled. In conclusion, utilizing Night Mode on your iPhone isn't just a matter of convenience or preference. It's a feature that can potentially have tangible benefits for your eye health, sleep patterns, battery life, and user experience, along with enhancing the quality of your nighttime photography. Therefore, understanding and using Night Mode can truly augment the overall iPhone experience.
How Night Mode Works
Night Mode is a groundbreaking feature in iPhones that enables users to take high-quality photographs even in poorly-lit environments and essentially, turns on automatically in low-light conditions. This innovative feature is designed by Apple to optimize the camera’s ability to capture sharp images, maintaining the resolution and bringing forth the vividness of colors, even at night time or in gloomier hours of the day. Night Mode works technically through the fusion of software and the advanced A-series chipset in iPhones. When Night Mode is activated, the camera's sensor takes multiple shots of the scene with varying exposures. Once the images are captured, they are synthesized by the system using 'adaptive bracketing', an intelligent process that blends the long exposures to reduce motion and blur caused by the natural slight movement of your hand, with the short exposures that distinctly capture the detailed darker areas. This adaptive bracketing allows for a well-balanced image that computes the different levels of brightness and contrasting ranges to reproduce a sharp and crisp photograph. Following this, the advanced machine learning technology in iPhones identifies objects in the scene in order to customize the photos individually thereby preserving the true and precise colors of the photograph. To add natural appearing textures and remove noise, iPhone uses what's called a denoising algorithm. Next, it applies what’s known as Semantic Rendering. This works remarkably to recognize faces and other significant attributes of the photograph applying detailed processing to those segments. At the end, sophisticated software algorithms come into play to finely tune the contrast, color, and detail of the final photo making them look more vibrant and lucid. They adjust shadows and black points to highlight details, avoid overexposing light sources and maintain consistent color composition, thereby delivering superior quality images. Another noteworthy point is that Night Mode also operates effortlessly with the front camera and ultra-wide camera on the iPhone, offering fantastic low-light selfies and woodscapes. In conclusion, Night Mode is a powerful feature on iPhones that employs a blend of advanced technologies and intelligent software to deliver striking, detailed, and bright photographs even in low-light conditions. It's the integration of hardware and smarter software that makes Night Mode a standout feature in iPhone photography. The practicality and simplicity of Night Mode's automatic functioning further enhance the appeal of an already sterling tool, designed to sculpt the beauty of moments despite the ambient lighting.
Enabling Night Mode on iPhone
The omnipresent digital screens that dominate our modern existence can strain our eyes, especially when viewed for long periods during the night time. Knowing how to enable night mode on your iPhone can save your eyes from unnecessary stress and enhance your user experience. This article aims to take you through various methods that can assist you in enabling night mode on your smartphone. First, we will explore how to use the camera app to switch your iPhone to night mode for better low-light photos. Then, our focus will shift to the comprehensive features found within the settings app that can facilitate the transition to night mode. Lastly, we will delve into the expansive world of third-party apps, designed specifically to help you enable night mode on your iPhone. Now, allow us to guide you through the process of using the iPhone's camera app to enable night mode. Understanding these methods allows you to pick the technique that works best with your routine and needs, providing a more personalized and relaxing iPhone experience even in the darkest hours.
Using the Camera App
The camera app on an iPhone plays a pivotal role in photography, acting as a central node that enables several key features including Night Mode. It is a user-friendly interface that provides seamless navigation to cater to your creativity in capturing images and videos. Regardless of the iPhone model, the Camera app is always ready to cater to your various photographic requirements. Understanding and utilizing the Camera app optimally is not rocket science. You just have to open the application, and you will be greeted with several modes like Photo, Video, Pano, Slo-mo, Portrait, and the sought-after Night mode. These modes are the arsenal of tools that give your creativity wings to soar high. Night Mode, as the name suggests, becomes your go-to feature to capture unbelievable shots in low light conditions. It's one of those features that don't need manual enabling, as it turns on automatically in low-light situations. However, this doesn’t mean you have no control over it. The Night Mode icon at the top left of your iPhone screen allows you to adjust the time slider, giving you the flexibility to customize the intensity of the Night Mode effect. The more you get familiar with the Camera app and its features, the more you realize the true potential of iPhone's photography capabilities. Every feature nested in the app is designed intricately to enhance the overall photography experience. Whether it’s adjusting the brightness or the depth of field in portrait mode or using Night Mode to capture vivid, well-detailed images in scarce light, mastering the Camera app elevates the quality of your photos astronomically. Finally, it is essential to grasp that while the iPhone's hardware plays a vital role in the image quality, the real prowess lies in the software. The Camera app is a testament to this fact. The precision, adaptability, and user-friendliness of the Camera app amalgamate with the impressive hardware of the iPhone to produce stunning photographs, irrespective of the environment and light conditions. Consequently, understanding and harnessing the Camera App efficiently will surely pave the way for commanding superb shots, especially in night mode.
Using the Settings App
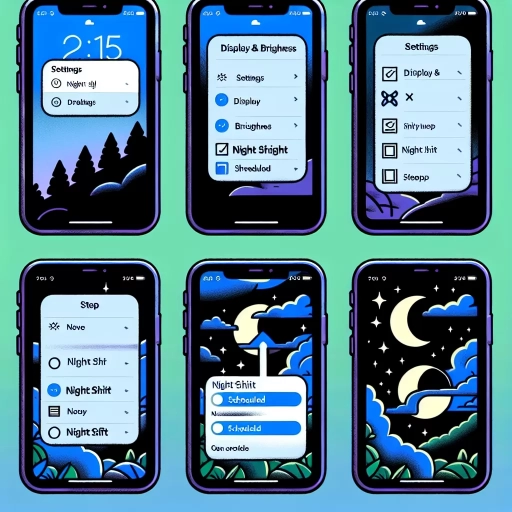
Using the Settings app is a stepping stone towards enabling and managing the Night Mode on your iPhone. This built-in platform offers a multitude of options that can maximize your device's performance, personalize your experience, and ultimately improve your vital phone interactions. The process commences by identifying the 'Settings' app icon on your iPhone's home screen, which is designed to symbolize a set of gears. Tapping on this icon will usher you into a space that is earmarked for personalizing your iPhone to suit your unique needs and preferences. Inside the Settings app, you will discover a plethora of controls and configurations that are essential for your iPhone's smooth operation. You'll see options related to WiFi, Bluetooth, Display & Brightness, Sound & Haptics, and so forth. For enabling Night Mode, you'll focus explicitly on the 'Display & Brightness,' option, which regulates your iPhone's screen light. It's within this well-established layout that Apple hides the specific settings for the 'Night Mode' feature on your iPhone. Once you tap on 'Display & Brightness,' a new interface promising further customization options should pop up, showcasing the nuanced functionality of the Settings app. Here, you can adjust your screen light's intensity, choose light or dark themes, adjust text size, and enable or disable auto-lock. However, the most novel and crucial option here is the one named 'Night Shift.' The Settings app has empowered you to access this vital feature that gives your eyes a much needed reprieve from harsh screen light as night falls. The 'Night Shift' is your gateway to activating the 'Night Mode' on your iPhone. Once you tap on this option, a new display unfolds which allows you to manually enable the feature or schedule it according to your typical bedtime routine. The Settings app provides you with an adjuster to define the color temperature of your screen during 'Night Shift,' meaning you can create a warmer or cooler display to further cushion your eyes from strenuous light conditions. The ease of navigation, clear-cut icons, and the well-defined layout of functionalities within the Settings app is crucial to enhancing your iPhone experience. By merely comprehending and exploring the Settings App, you can optimize the 'Night Mode' feature to preserve your eye health, improve your sleep, and enjoy a more comfortable smartphone interaction in the heart of the night. The Settings app is undeniably the heart that powers the customization and personalization potential of your iPhone, helping you derive maximum productivity, comfort, and convenience from a remarkable device.
Using Third-Party Apps
Using third-party apps to enable Night Mode on your iPhone can be a highly effective solution, especially if your device lacks the built-in Night Shift or Dark Mode features. These third-party applications, mostly available on the App Store, come up with innovative ways to adjust your iPhone's brightness and color temperature according to the time of day or night, ensuring minimal strain on your eyes and improving your usage experience during nighttime significantly. The advantage of using these apps is that they offer customizable settings and additional features that may not be available with the in-built Apple features. For instance, some apps allow users to schedule the Night Mode, adjust the color temperature beyond what's available in the default iOS settings or even vary the screen brightness based on the ambient light. The process of using these apps is relatively straightforward. After downloading and installing the desired app from the App Store, you simply provide the necessary permissions, usually access to device location and screen overlay, and then configure the settings to your preference. You may set the color temperature to a warmer tint, choose when the night mode should kick in and out, and decide how much screen dimming you prefer. This level of customization ensures an optimized and personalized viewing experience for each user. Important to note, however, is that even though these apps are designed to improve your iPhone usage in darkened environments, effectiveness varies across different apps. Hence, it's crucial to research and select an app that fits your specific needs and has reliable positive reviews. Also, because these apps usually work by overlaying a filter on your screen, they might interfere with certain iPhone functions such as screenshot capabilities or color accuracy when editing photos. Furthermore, while third-party apps can effectively enable Night Mode, ensure that you only download apps from trusted developers. This caution is due to the permissions these apps require, which, if granted to malicious apps, could compromise your device's security. It's always a good practice to check the ratings, reviews, and privacy policy of the developer before installation. In conclusion, using third-party apps for enabling Night Mode on your iPhone can be a handy workaround if you lack the default iOS feature or are looking for more customization options. By providing a range of innovative features and settings to enhance your nighttime phone usage, these apps help make your iPhone more user-friendly in a variably lit world. Always ensure you use trusted and reviewed apps to protect your device's security and enjoy the benefits of their creative solutions for night time viewing.
Customizing Night Mode on iPhone
The article, "Customizing Night Mode on iPhone" aims to provide a concise, comprehensive guide to iPhone users about the adaptive night mode and how to enhance low-light photos. It acquaints readers with an in-depth understanding and hands-on application of the Night Mode function on their iPhones. The article's key topics include "Adjusting Exposure and ISO," which covers how to modify camera settings to achieve perfect low-light photos. The second discussion point, "Using Night Mode with Other Camera Features," explains how Night Mode can be combined with other inbuilt camera applications such as Live Photo, Portrait Mode, or the Ultra-wide lens to get incredible results. Lastly, the article provides a step-by-step guide on "Creating Custom Night Mode Presets," which will enable iPhone users to save and easily access their favorite night mode settings for future applications. By properly adjusting the exposure and ISO settings, which is the subject of our next section, you can get optimal results with night mode, regardless of the lighting conditions.
Adjusting Exposure and ISO
When customizing the Night Mode on your iPhone, understanding how to adjust Exposure and ISO settings can greatly enhance the quality of your images. The key to striking night mode photos lies heavily on the correct balance of these two crucial elements of photography. Exposure, in essence, is the amount of light that the camera sensor receives. Ideally, when shooting in Night Mode, you'd want to reduce the exposure to avoid overexposing the less detailed parts of the scene, such as bright city lights in the background. This can be done by simply tapping the screen and swiping down on the sun icon that appears next to the focus box. On the other hand, ISO refers to the sensitivity of your camera’s sensor to light. The higher the ISO setting, the brighter the photo. However, going too high might result in unnecessary grain or "noise". Now, adjusting the ISO in iPhone's Night Mode is a bit trickier because technically, Apple doesn’t allow manual control of this setting directly. However, when you decrease the exposure, the ISO compensates to maintain the brightness, which subtly gives you control over the ISO too. It's a delicate balancing act that requires a bit of practice and experience. Consider the exposure as the base of your photo – it determines how well-lit your entire scene is. ISO, then, is the fine-tuning - it can brighten the shadows without affecting the well-lit parts or just generally brighten the picture if it's too dark. When dealing with night photography, it's usually beneficial to have a higher ISO to capture as much detail as possible in the dark, but remember, this should not be at the expense of overexposure or extreme noise. In short, learning how to manipulate exposure and ISO effectively gives you control over the lighting of your pictures, enabling you to unveil the beauty of the night in every shot. Whether it's the calm beauty of a quiet moonlit landscape or the vibrant life of a city at night, with these subtle adjustments in your settings, your Night Mode iPhone photography can reach a new level of depth and detail. It's about exploring, experimenting, and finding the best settings that suit the particular scene you are trying to capture. After all, what matters the most is how your photo feels, connecting the viewer to the experience and emotion of the moment, which, in the end, is the true essence of photography.
Using Night Mode with Other Camera Features
One of the most advantageous features of the iPhone is the ability to customize the Night Mode setting, which becomes an incredibly beneficial tool when utilized in conjunction with other camera features. Night Mode, a feature available on iPhone 11 and newer models, allows users to take well-lit photos in dark environments. However, its effectiveness increases tenfold when used alongside other enhancements like Long Exposure and Tap to Focus. Long Exposure is a creative control found in the Camera application, often used in night photography. By blending together multiple shots taken over a period, this control creates a smooth, continuous effect, making it optimal for capturing scenes with movement, like a bustling city at night or a starry sky. When used in conjunction with Night Mode, Long Exposure can significantly improve the image's brightness and detail, all without sacrificing quality. On the other hand, Tap to Focus allows the user to pinpoint the camera's focus on a specific location within their composition. When Night Mode is activated, focusing can be difficult due to the lack of light. By utilizing Tap to Focus, users can ensure their subject is in sharp detail, even in dimly lit conditions. Furthermore, by adjusting the exposure level after tapping to focus, users can control the amount of light in the photograph, thus making the Night Mode function even more powerful. There's also the Night mode Time-lapse, which gives you the extraordinary ability to capture low-light scenes as beautiful time-lapse videos. It uses adaptive frame rates to record scenes with dramatically improved lighting and more details at night. Finally, the immersive, Dolby Vision HDR recording offering 60 times more color than before can enhance the Night Mode feature. It gives a tremendously detailed image even in the darkness, allowing a peak brightness that's 40% higher, and blacks that are 10 times darker. Dolby Vision grading is processed live while recording, and sustained during editing, whether in the Photos app, iMovie, or Clips. The beauty of these features lies not only in their standalone functionalities but the ability to mix and match these controls to capture the perfect shot. By experimenting with different combinations, users can truly get creative and find the style that best suits their needs, all the while enhancing their night-time iPhone photography experience. To conclude, the iPhone's Night Mode, coupled with its stellar array of other camera features, provides an unconventional yet effective gateway into the domain of night-time photography.
Creating Custom Night Mode Presets
Creating custom Night Mode presets on your iPhone involves more than just toggling the default switch on or off. This innovative feature of iOS allows users to personalize their screen display based on their viewing preference during the night. For people who spend a lot of time on their devices during evening hours, this feature takes into account their eye comfort and reduces eye strain by adjusting screen brightness and colors. Users can customize Night Mode by going to the display and brightness settings, where there is an option for Night Shift. Once inside the Night Shift, you have the opportunity to schedule a time for Night Mode to activate automatically. This eliminates the need to manually enable it every night. For those who wish to have a mix of both worlds, there is an option “Manually Enable Until Tomorrow”, which temporarily turns on Night Shift. In addition, you can adjust the color temperature to suit your preference. The temperature scale varies from Less Warm to More Warm, allowing you to choose how much blue light is emitted by your screen. Less Warm being on the cooler end of the scale means your screen will resemble daytime light since it emits more blue light, while choosing More Warm brings about an orangish hue, which is suitable for nighttime since it emits less blue light. Creating custom Night Mode presets provides an improved user experience. It is particularly beneficial for those who have sensitive eyes or engage in prolonged screen-time before bed. It has been scientifically proven that exposure to less blue light before sleeping can improve your sleep quality. With this setting, Apple bridges technological advancement with user experience and health benefits. Moreover, the Night Mode feature isn’t limited to adjusting your display settings. Several apps are integrated with Night Mode for a better reading or viewing experience during the evening hours. For instance, some ebooks and news readers allow for automatic Night Mode, where the background becomes black, and the texts turn white or gray. This makes onscreen items less bright and harsh, thereby reducing the chances of experiencing eye fatigue. In conclusion, customizing Night Mode presets on your iPhone gives you a tailored-to-fit and more comfortable viewing experience especially during nighttime usage. By adjusting color temperature and scheduling activation, each user can enjoy a personalized mix of display settings that best suit their visual needs and lifestyle. With user accessibility and comfort in mind, this provides a more pleasant and healthier screen time experience. So whether you’re finishing up an e-book, watching a video, or scrolling through social media late at night, customizing your Night Mode will ensure your eyes are cushioned from excessive strain.