How To Change Airpod Name
Here is the introduction paragraph: Are you tired of your AirPods being labeled as "AirPods" in your device's Bluetooth settings? Do you want to personalize your AirPods with a unique name that reflects your personality or style? Changing the name of your AirPods is a simple process that can be done on various Apple devices. In this article, we will guide you through the steps to change the name of your AirPods on iOS devices, Mac, and other Apple devices. We will also troubleshoot common issues that may arise during the process. First, let's start with the basics - changing AirPods name on iOS devices.
Changing AirPods Name on iOS Devices
Changing the name of your AirPods on an iOS device is a simple process that can be completed in a few steps. If you're looking to personalize your AirPods or distinguish them from other devices, renaming them is a great option. There are three ways to change the name of your AirPods on an iOS device: accessing AirPods settings through Bluetooth, renaming AirPods through the Settings app, and using Siri to change the name. By following these methods, you can easily give your AirPods a unique name that suits your style. To get started, let's first explore how to access AirPods settings through Bluetooth.
Accessing AirPods Settings through Bluetooth
To access AirPods settings through Bluetooth, start by opening the Bluetooth settings on your device. On an iOS device, go to Settings > Bluetooth, while on an Android device, navigate to Settings > Connections > Bluetooth. Ensure that your AirPods are connected to your device and visible in the Bluetooth list. On iOS devices, you'll see your AirPods listed under "My Devices," while on Android devices, they'll be listed under "Available devices." Tap on the "i" icon next to your AirPods' name on iOS or the gear icon on Android to access their settings. From here, you can adjust various settings, such as renaming your AirPods, customizing the double-tap action, and more. Note that the exact steps may vary slightly depending on your device and operating system. Additionally, if you're using a Mac or PC, you can access AirPods settings through the Bluetooth preferences or settings panel. By accessing AirPods settings through Bluetooth, you can personalize your listening experience and get the most out of your AirPods.
Renaming AirPods through the Settings App
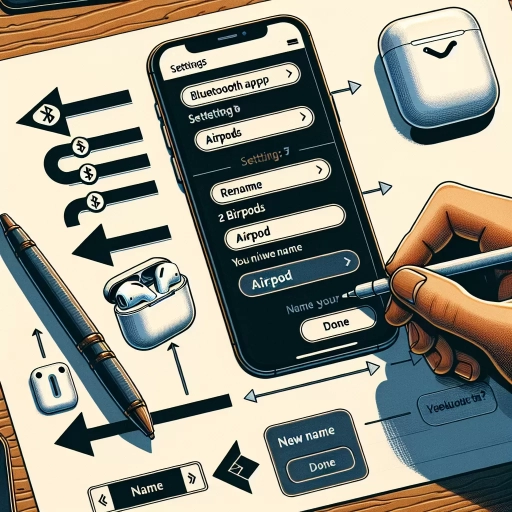
To rename your AirPods through the Settings app, start by opening the app on your iOS device. Then, navigate to the Bluetooth section, where you'll find a list of all connected devices. Locate your AirPods in the list and tap the "i" icon next to them. This will take you to the AirPods settings page, where you can tap on the "Name" field to edit the current name. Type in your desired new name, and then tap "Done" to save the changes. Your AirPods will now be recognized by their new name on your iOS device. This method is quick and easy, and it's a great way to personalize your AirPods and make them more easily identifiable. Additionally, renaming your AirPods can also help you to distinguish between multiple pairs of AirPods if you have more than one. By giving each pair a unique name, you can easily switch between them and avoid any confusion. Overall, renaming your AirPods through the Settings app is a simple and convenient process that can enhance your overall AirPods experience.
Using Siri to Change AirPods Name
To change the name of your AirPods using Siri, you can simply activate Siri on your iOS device and give a voice command. To do this, press and hold the Home button on your iPhone or iPad until Siri appears, or say "Hey Siri" if your device supports it. Once Siri is activated, say "Change AirPods name" or "Rename my AirPods." Siri will then ask you to provide a new name for your AirPods. You can respond with the desired name, and Siri will confirm the change. For example, you can say "Rename my AirPods to 'WorkBuds'" or "Change AirPods name to 'GamingPods'." Siri will then update the name of your AirPods, and you can verify the change by going to the Bluetooth settings on your device. Using Siri to change the name of your AirPods is a quick and convenient way to personalize your earbuds and make them easier to identify.
Changing AirPods Name on Mac and Other Apple Devices
Changing the name of your AirPods on a Mac or other Apple devices is a simple process that can be completed in a few steps. If you're looking to personalize your AirPods or distinguish them from other devices, renaming them is a great option. To change the name of your AirPods, you can start by locating them in the Bluetooth preferences on your Mac. This will allow you to access the settings and make the necessary changes. Alternatively, you can also edit the AirPods name in the Bluetooth menu or use the AirPods settings on macOS. By following these steps, you can easily change the name of your AirPods and give them a personalized touch. To get started, let's first locate your AirPods in the Bluetooth preferences.
Locating AirPods in the Bluetooth Preferences
To locate your AirPods in the Bluetooth preferences on your Mac, follow these steps. First, click the Apple menu and select System Preferences. Then, click on Bluetooth. You will see a list of all the devices connected to your Mac via Bluetooth. Look for your AirPods in the list, which should be listed under their current name. If you're having trouble finding them, make sure they're connected to your Mac and that Bluetooth is enabled. You can also check the status of your AirPods by clicking on the "i" icon next to their name. This will open a new window with more information about your AirPods, including their battery level and connection status. From here, you can also rename your AirPods by clicking on the "Rename" button. This will allow you to change the name of your AirPods to something more personalized and easy to identify. By following these steps, you can easily locate your AirPods in the Bluetooth preferences on your Mac and make any necessary changes to their settings.
Editing AirPods Name in the Bluetooth Menu
To edit the name of your AirPods in the Bluetooth menu, follow these straightforward steps. First, ensure your AirPods are connected to your device. Then, navigate to the Bluetooth settings on your device. For iOS devices, go to Settings > Bluetooth, while for Android devices, the path may vary slightly depending on the manufacturer but generally, it's Settings > Connections > Bluetooth. Once in the Bluetooth menu, locate your AirPods in the list of connected devices. Tap on the "i" icon next to your AirPods' name. This will open a new menu where you can see the current name of your AirPods. Tap on the name to edit it. You will then be able to type in a new name for your AirPods. After typing in the new name, tap "Done" to save the changes. Your AirPods will now be listed under their new name in the Bluetooth menu. This method is particularly useful if you have multiple pairs of AirPods or other Bluetooth devices and want to easily distinguish between them. By changing the name, you can quickly identify which device you are connecting to, making the process more efficient and less confusing. This simple edit can significantly enhance your user experience, especially in environments where multiple devices are in use.
Using the AirPods Settings on macOS
To access the AirPods settings on macOS, click the Apple menu and select System Preferences. Then, click Bluetooth and look for your AirPods in the list of devices. Select your AirPods to view their settings. Here, you can adjust the microphone, enable or disable Automatic Ear Detection, and customize the double-tap action. You can also reset your AirPods or view their serial number. Additionally, you can use the AirPods settings to check the battery level of your AirPods and charging case. If you're using AirPods Pro, you can also adjust the Active Noise Cancellation and Transparency settings. By accessing the AirPods settings on macOS, you can personalize your listening experience and troubleshoot any issues you may be experiencing with your AirPods.
Troubleshooting Common Issues with Changing AirPods Name
Troubleshooting common issues with changing AirPods name can be a frustrating experience, especially when you're not sure where to start. Fortunately, there are several steps you can take to resolve the problem. If you're having trouble changing the name of your AirPods, it's likely due to a software or connectivity issue. To start, you can try resetting your AirPods to their default settings, which can often resolve the problem. Additionally, checking for software updates on your Apple devices can also help to resolve any compatibility issues that may be preventing you from changing the name of your AirPods. If the issue persists, restarting your Apple devices can also help to resolve connectivity issues that may be contributing to the problem. By following these steps, you can troubleshoot common issues with changing AirPods name and get back to enjoying your music and podcasts. To start, let's take a closer look at resetting your AirPods to their default settings.
Resetting AirPods to their Default Settings
If you're experiencing issues with your AirPods, such as connectivity problems or poor sound quality, resetting them to their default settings may resolve the issue. To reset your AirPods, start by putting them in their charging case and closing the lid. Next, open the lid and locate the small button on the back of the case. Press and hold this button until the light on the front of the case starts flashing amber. This indicates that the AirPods are in reset mode. Release the button and wait for the light to flash white, which signals that the reset is complete. Your AirPods will now be restored to their default settings, and you can reconnect them to your device. Note that resetting your AirPods will erase any custom settings, such as a custom name, so you may need to reconfigure these settings after the reset. If you're having trouble changing the name of your AirPods, resetting them to their default settings may be a necessary step in resolving the issue.
Checking for Software Updates on Apple Devices
To ensure you're running the latest software on your Apple devices, it's essential to regularly check for updates. This is particularly important when troubleshooting issues with your AirPods, as outdated software can often be the culprit. To check for software updates on your iPhone or iPad, go to Settings > General > Software Update. If an update is available, tap "Download and Install" to begin the process. For your AirPods, make sure they're connected to your device and go to Settings > Bluetooth, then tap the "i" icon next to your AirPods' name. If an update is available, you'll see a prompt to update your AirPods. Additionally, you can also check for updates on your Mac by clicking the Apple menu and selecting "System Preferences" > "Software Update." By keeping your Apple devices up-to-date, you can resolve many common issues, including those related to changing your AirPods' name. For instance, if you're having trouble renaming your AirPods, updating your software may resolve the issue. Furthermore, updating your software can also improve the overall performance and security of your devices, making it an essential part of maintaining your Apple ecosystem. By regularly checking for software updates, you can ensure that your devices are running smoothly and efficiently, and troubleshoot common issues with ease.
Restarting Apple Devices to Resolve Connectivity Issues
Restarting your Apple devices can often resolve connectivity issues with your AirPods. If you're experiencing problems with your AirPods not connecting or staying connected to your device, try restarting both your AirPods and the device you're trying to connect them to. To restart your AirPods, put them in their charging case, close the lid, wait for 30 seconds, and then open the lid again. For your Apple device, go to Settings, select General, and tap Shut Down or Restart. Alternatively, you can press and hold the Sleep/Wake button until the "slide to power off" slider appears, then slide it to the right to turn off your device. Wait for a few seconds, then press and hold the Sleep/Wake button again until the Apple logo appears. Restarting your devices can resolve connectivity issues by clearing out any temporary software glitches or conflicts that may be preventing your AirPods from connecting properly. Additionally, restarting your devices can also help to refresh the Bluetooth connection between your AirPods and your device, which can help to resolve any connectivity issues. If restarting your devices doesn't resolve the issue, you may want to try resetting your AirPods or seeking further assistance from Apple support.