How To Cut Vinyl Flooring
Cutting vinyl flooring can be a daunting task, especially for DIY enthusiasts who are new to the world of flooring installation. However, with the right tools and techniques, anyone can achieve professional-looking results. To ensure a successful installation, it's essential to break down the process into manageable steps. In this article, we'll explore the three crucial stages of cutting vinyl flooring: preparation, cutting, and finishing. First, we'll discuss the importance of preparation, highlighting the necessary tools and materials needed to get started. Then, we'll dive into the cutting process, providing expert tips and tricks for achieving precise cuts. Finally, we'll cover the finishing touches, including how to seal and protect your newly installed vinyl flooring. By following these steps, you'll be well on your way to a beautiful and durable floor that will last for years to come. So, let's start with the first and most critical stage: Preparation is Key.
Preparation is Key
Preparation is key to a successful vinyl flooring installation. Many homeowners make the mistake of rushing into the installation process without properly preparing the room and the flooring material. This can lead to a variety of problems, including uneven flooring, bubbles, and gaps. By taking the time to prepare the room and the flooring material, homeowners can ensure a smooth and successful installation. To achieve this, it's essential to measure the room and calculate the number of planks needed, choose the right tools for cutting the vinyl flooring, and prepare the subfloor for installation. By following these steps, homeowners can avoid common mistakes and achieve a professional-looking finish. So, the very first step is to measure the room and calculate the number of planks needed.
Measure the Room and Calculate the Number of Planks Needed
To accurately measure the room and calculate the number of planks needed, start by measuring the length and width of the room in feet. Record these measurements and multiply them together to get the total square footage of the room. Next, measure the width of the vinyl planks you've chosen, taking into account any overlap or waste. A general rule of thumb is to add 10-15% to the total square footage to account for cuts and waste. For example, if the room is 12 feet by 15 feet, the total square footage would be 180 square feet. Adding 10-15% would bring the total to 198-207 square feet. Divide this number by the square footage of a single plank to determine how many planks you'll need. It's also a good idea to measure any obstructions, such as heating vents or doorways, to ensure you have enough planks to work around them. Additionally, consider the direction of the planks and how they will be laid out in the room. If you're unsure, it's always better to have a little extra material on hand, rather than not enough. By taking the time to accurately measure the room and calculate the number of planks needed, you'll be able to ensure a successful and stress-free installation.
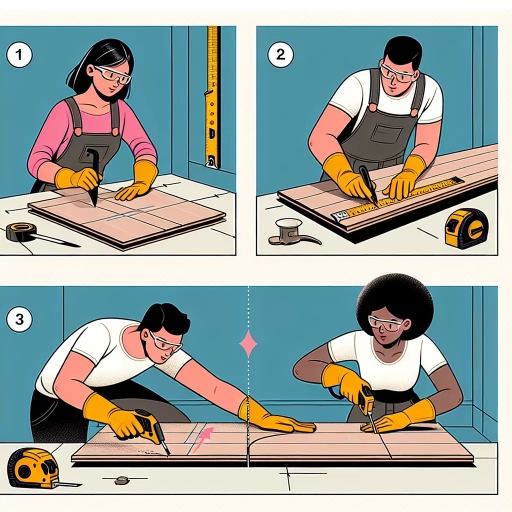
Choose the Right Tools for Cutting Vinyl Flooring
When it comes to cutting vinyl flooring, having the right tools is essential for a successful installation. A utility knife or a vinyl flooring cutter is the most common tool used for cutting vinyl flooring. A utility knife is a cost-effective option and can be used for both dryback and glue-down installations. However, it may not be as efficient as a vinyl flooring cutter, which is specifically designed for cutting vinyl flooring and can make precise cuts. A vinyl flooring cutter typically has a rotating blade that can be adjusted to different angles, allowing for clean and accurate cuts. Additionally, a straightedge or a ruler can be used to guide the cutter and ensure straight cuts. For more complex cuts, such as curved or angled cuts, a jigsaw or a circular saw can be used. It's also important to have a cutting mat or a piece of plywood to protect the work surface and prevent damage. Furthermore, a pencil and a marker can be used to mark the cutting lines and patterns on the vinyl flooring. By having the right tools, you can ensure a professional-looking installation and avoid costly mistakes.
Prepare the Subfloor for Installation
Before installing vinyl flooring, it is crucial to prepare the subfloor to ensure a smooth, even, and long-lasting installation. The subfloor is the foundation of your flooring, and any imperfections can lead to uneven surfaces, cracks, and damage to the vinyl flooring. To prepare the subfloor, start by inspecting it for any cracks, unevenness, or old adhesive. Clean the subfloor thoroughly to remove any dirt, dust, or old adhesive, and fill any cracks or holes with a self-leveling compound. Allow the compound to dry completely before proceeding. Next, check the subfloor's moisture levels, as excessive moisture can damage the vinyl flooring. Use a moisture meter to determine the moisture levels, and if necessary, apply a moisture barrier to the subfloor. Finally, ensure the subfloor is level and even by using a spirit level and a straightedge. Make any necessary adjustments to the subfloor to achieve a smooth and even surface. By taking the time to properly prepare the subfloor, you can ensure a successful and long-lasting vinyl flooring installation.
Cutting Vinyl Flooring Like a Pro
Cutting vinyl flooring can be a daunting task, especially for those who are new to DIY projects. However, with the right tools and techniques, it can be done like a pro. In this article, we will explore three effective methods for cutting vinyl flooring, including using a utility knife, a vinyl flooring cutter, and a jigsaw. By mastering these techniques, you'll be able to achieve professional-looking results and complete your flooring project with confidence. We'll start by discussing the most basic and essential tool for cutting vinyl flooring: the utility knife. With a utility knife, you can make precise cuts and achieve a smooth finish. In the next section, we'll dive into the details of using a utility knife to cut vinyl flooring, including the best practices and tips for getting the job done efficiently.
Using a Utility Knife to Cut Vinyl Flooring
When it comes to cutting vinyl flooring, a utility knife is a popular choice among DIYers and professionals alike. A utility knife, also known as a box cutter or Stanley knife, is a versatile tool that can be used to cut a variety of materials, including vinyl flooring. To use a utility knife to cut vinyl flooring, start by placing the flooring on a flat surface and marking the area where you want to make the cut. Use a ruler or straightedge to draw a line along the mark, and then place the utility knife along the line. Apply gentle pressure and start cutting the flooring, using a smooth, even motion. It's essential to use a sharp blade to avoid tearing the flooring, and to change the blade frequently to maintain a clean cut. When cutting curves or irregular shapes, use a utility knife with a curved or angled blade to make the process easier. Additionally, use a cutting mat or old piece of plywood to protect the surface underneath the flooring and prevent damage. To make a straight cut, use a utility knife with a straightedge attachment or a laser guide to ensure accuracy. By following these tips and using a utility knife, you can make clean, precise cuts in your vinyl flooring and achieve a professional-looking finish.
How to Use a Vinyl Flooring Cutter for Straight Cuts
To use a vinyl flooring cutter for straight cuts, start by ensuring the cutter is properly calibrated and the blade is sharp. Place the vinyl flooring on a flat surface, with the side to be cut facing up. Align the cutter's guide rail with the edge of the vinyl, making sure it's parallel to the direction of the cut. Hold the cutter firmly and apply gentle pressure, starting the cut from one end of the vinyl and moving the cutter smoothly along the guide rail. Apply consistent pressure to maintain a straight cut, using the cutter's built-in measuring system to ensure accuracy. For longer cuts, use a straightedge or a laser guide to help maintain a straight line. To make a precise cut, use a cutting mat or a sacrificial surface to prevent damage to the underlying surface. When cutting multiple strips, use a spacer or a jig to maintain consistent spacing and prevent errors. Always follow the manufacturer's instructions for the specific vinyl flooring cutter being used, and take necessary safety precautions, such as wearing protective eyewear and keeping loose clothing tied back. By following these steps, you can achieve professional-looking straight cuts with your vinyl flooring cutter.
Making Curved Cuts with a Jigsaw or a Vinyl Flooring Cutter
Making curved cuts with a jigsaw or a vinyl flooring cutter requires some skill and patience, but with the right techniques, you can achieve professional-looking results. To start, use a pencil to mark the curved line on the vinyl flooring, taking care to make the mark as smooth and continuous as possible. If you're using a jigsaw, choose a blade with a fine tooth count and a curved or angled design, which will allow for more precise control and a smoother cut. For a vinyl flooring cutter, select a blade with a curved or beveled edge, which is specifically designed for making curved cuts. When cutting, apply gentle to moderate pressure, depending on the thickness of the vinyl, and use a slow and steady motion to follow the marked line. It's essential to keep the blade or cutter at a consistent angle and to avoid applying too much pressure, which can cause the vinyl to tear or the blade to bind. To make tighter curves, use a smaller blade or cutter, and for more gradual curves, use a larger one. Additionally, you can use a template or a guide to help you make more accurate and consistent curved cuts. With practice and patience, you'll be able to make curved cuts with ease and precision, adding a professional touch to your vinyl flooring installation.
Finishing Touches
The final stage of installing cut vinyl flooring involves adding the finishing touches to complete the job. This crucial step ensures a professional-looking finish and a long-lasting installation. To achieve this, three key tasks must be undertaken: seaming and securing the cut vinyl flooring, removing excess vinyl and debris, and conducting a final inspection and touch-ups. By paying attention to these details, you can guarantee a flawless finish that meets your expectations. In this article, we will delve into each of these tasks, starting with the process of seaming and securing the cut vinyl flooring, which is essential for creating a seamless and secure bond between the vinyl sheets.
Seaming and Securing the Cut Vinyl Flooring
Here is the paragraphy: Seaming and securing the cut vinyl flooring is a crucial step in the installation process. To ensure a seamless and professional-looking finish, it's essential to use the right tools and techniques. Start by applying a thin layer of seam sealer to the back of the vinyl flooring, making sure to follow the manufacturer's instructions. Next, use a seam roller or a J-roller to press the seams together, applying gentle to moderate pressure. This will help to remove any air bubbles and ensure a tight seal. For more stubborn seams, you can use a seam iron or a heat gun to apply heat and pressure. Once the seams are secure, use a utility knife or a seam cutter to trim any excess vinyl from the edges. Finally, apply a bead of seam sealer to the edges of the vinyl flooring, making sure to wipe away any excess with a clean cloth. This will help to prevent moisture from seeping under the flooring and ensure a long-lasting, watertight seal. By following these steps, you can achieve a professional-looking finish and ensure that your vinyl flooring installation is both durable and long-lasting.
Removing Excess Vinyl and Debris
Removing excess vinyl and debris is a crucial step in the vinyl flooring installation process. After cutting the vinyl flooring to size, it's essential to remove any excess material and debris to ensure a smooth and even finish. Start by using a utility knife or a vinyl cutter to carefully trim the excess vinyl along the edges, making sure to leave a small margin around the perimeter of the room. Next, use a vacuum cleaner or a damp mop to remove any debris, dust, or dirt that may have accumulated during the cutting process. For more stubborn debris, such as adhesive residue or old flooring material, use a gentle adhesive remover or a scraper to carefully remove the excess material. Be careful not to scratch the subfloor or damage the surrounding surfaces. Once the excess vinyl and debris have been removed, inspect the area to ensure it's clean and free of any obstructions. This will help ensure a successful installation and a professional-looking finish.
Final Inspection and Touch-ups
The final inspection and touch-ups are crucial steps in the vinyl flooring installation process. After completing the installation, it's essential to conduct a thorough inspection to ensure that the flooring is properly aligned, securely fastened, and free of any defects or imperfections. Check the entire floor for any gaps, unevenness, or loose seams, and make any necessary adjustments. Additionally, inspect the flooring for any scratches, dents, or other damage that may have occurred during the installation process. If any issues are found, address them promptly to prevent further damage or complications. Once the inspection is complete, perform any necessary touch-ups, such as applying additional adhesive or sealing any gaps. This attention to detail will help ensure a professional-looking finish and a long-lasting, durable floor. By taking the time to inspect and touch up the flooring, you can guarantee a high-quality installation that meets your expectations and provides years of satisfaction.