How To Lock Iphone Screen For Kids
As a parent, it's natural to worry about your child's iPhone usage, especially when it comes to their screen time and online safety. With the numerous features and apps available, it can be overwhelming to determine the best way to lock their iPhone screen and ensure their digital well-being. Fortunately, there are several effective methods to achieve this. By setting up parental controls on your child's iPhone, you can restrict access to certain features and apps, and even limit their screen time. Additionally, using Guided Access can help lock their iPhone screen and prevent them from accessing unauthorized content. Furthermore, exploring additional features such as Screen Time and Ask to Buy can provide an extra layer of security and peace of mind. In this article, we will delve into these methods, starting with the essential step of setting up parental controls on your child's iPhone.
Setting Up Parental Controls on iPhone
As a responsible parent, it's essential to set up parental controls on your child's iPhone to ensure their online safety and well-being. With the ever-increasing amount of time kids spend on their devices, it's crucial to establish boundaries and guidelines to protect them from harmful content, excessive screen time, and other potential risks. Setting up parental controls on an iPhone involves several key steps, including enabling Screen Time, creating a child profile, and setting up Downtime and App Limits. By following these steps, you can have peace of mind knowing that your child is using their device in a safe and healthy manner. To begin, let's start with the first step: enabling Screen Time.
Enabling Screen Time
Here is the paragraphy: Enabling Screen Time is a crucial step in setting up parental controls on your iPhone, allowing you to monitor and limit your child's screen time. To enable Screen Time, go to Settings > Screen Time, and toggle the switch to the right. You will be prompted to set up a Screen Time Passcode, which will be required to access Screen Time settings and make changes. This passcode should be different from your iPhone passcode to ensure your child cannot access Screen Time settings. Once you've set up the passcode, you can start configuring Screen Time settings, such as setting time limits for specific apps, scheduling downtime, and setting up content and privacy restrictions. You can also set up Family Sharing, which allows you to share Screen Time settings with other family members and monitor their screen time as well. By enabling Screen Time, you can help your child develop healthy screen use habits and ensure their safety online.
Creating a Child Profile
Creating a child profile is a crucial step in setting up parental controls on an iPhone. This profile allows you to customize the iPhone experience for your child, restricting access to certain features, apps, and content. To create a child profile, go to Settings > Screen Time > Turn On Screen Time, then tap on "This is My Child's iPhone." You will be prompted to create a passcode, which will be used to control the parental controls. Next, you will be asked to set up a child's profile, where you can add their name, birthday, and other information. You can also set up a family member's profile, which will allow you to share your location and other information with them. Once the child's profile is set up, you can start configuring the parental controls, such as setting time limits, blocking certain apps, and restricting access to certain websites. You can also set up a downtime schedule, which will lock the iPhone during certain times of the day or night. Additionally, you can set up a bedtime schedule, which will remind your child to go to bed at a certain time. By creating a child profile, you can ensure that your child is using their iPhone responsibly and safely.
Setting Up Downtime and App Limits
Setting up downtime and app limits is a crucial step in establishing a healthy balance between screen time and other activities for kids. To set up downtime, go to the Screen Time settings on your child's iPhone, tap on Downtime, and toggle the switch to the right. Then, choose the times when you want the iPhone to be locked, such as during bedtime or meal times. You can also customize the downtime schedule for different days of the week. Additionally, you can set up app limits to restrict the amount of time your child spends on specific apps or categories of apps, such as social media or games. To do this, tap on App Limits, select the category or app, and set a time limit. You can also set up a block on certain apps during downtime or at any time. For example, you can block social media apps during bedtime or block games during homework time. Furthermore, you can also set up Screen Time to send you a weekly report on your child's screen time, providing you with insights on how they are using their iPhone and helping you make informed decisions about their screen time limits. By setting up downtime and app limits, you can help your child develop healthy screen use habits and ensure that their iPhone is a tool for learning and fun, rather than a distraction.
Using Guided Access to Lock iPhone Screen
Using Guided Access to lock your iPhone screen can be a game-changer for individuals who need to restrict access to their device or certain features. This feature allows you to temporarily restrict your iPhone to a single app, making it ideal for kids, individuals with disabilities, or even for kiosk-style displays. To get started with Guided Access, you'll need to activate it, which is a straightforward process. Once activated, you can set a passcode to prevent others from exiting the guided access mode, adding an extra layer of security. Additionally, you can customize the Guided Access settings to suit your specific needs, such as disabling certain features or setting a time limit. In this article, we'll explore how to activate Guided Access, set a passcode, and customize the settings to get the most out of this feature. First, let's start with activating Guided Access.
Activating Guided Access
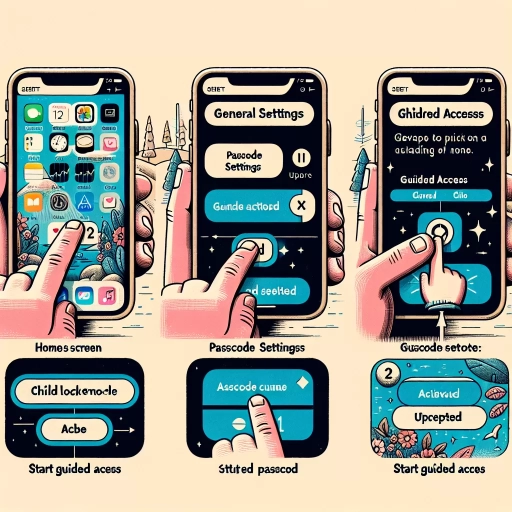
Here is the paragraphy: Activating Guided Access on your iPhone allows you to restrict your child's access to a single app, preventing them from switching to other apps or accessing sensitive features. To activate Guided Access, go to Settings > Accessibility > Guided Access. Toggle the switch next to Guided Access to the right to enable it. You will then be prompted to set a passcode, which will be required to exit Guided Access. Choose a passcode that your child won't be able to guess, and make sure to remember it yourself. Once you've set the passcode, you can start a Guided Access session by triple-clicking the Home button (or the side button on iPhone X and later). This will lock your child into the current app, and they won't be able to exit it without the passcode. You can also customize the Guided Access settings to restrict certain features, such as the volume buttons or the Sleep/Wake button. By activating Guided Access, you can ensure that your child stays focused on a single app and doesn't accidentally access anything they shouldn't.
Setting a Passcode for Guided Access
Setting a passcode for Guided Access is a crucial step in ensuring that your child can only access the approved app or feature on your iPhone. To set a passcode, go to Settings > Accessibility > Guided Access, and toggle the switch next to "Guided Access" to the right. Then, tap on "Passcode Settings" and select "Set Guided Access Passcode." You will be prompted to enter a four-digit passcode, which you will need to enter again to confirm. You can also set a Face ID or Touch ID to use as an alternative to the passcode. Once you have set the passcode, you can use it to end a Guided Access session or to make changes to the settings. It's essential to choose a passcode that is easy for you to remember but difficult for your child to guess, to prevent them from accessing unauthorized content. By setting a passcode for Guided Access, you can have peace of mind knowing that your child is only accessing the content you have approved, and that they cannot exit the app or make any changes to the settings without your permission.
Customizing Guided Access Settings
Customizing Guided Access settings allows you to tailor the feature to your child's specific needs and preferences. To access Guided Access settings, go to Settings > Accessibility > Guided Access. Here, you can set a passcode or use Touch ID/Face ID to end a Guided Access session. You can also set a time limit for the session, which can be useful for limiting screen time. Additionally, you can customize the accessibility features available during Guided Access, such as turning off the volume buttons or disabling the Sleep/Wake button. You can also enable the "Time Limits" feature, which allows you to set a specific time limit for the app or game being used. Furthermore, you can add a "Triple-Click Home" or "Triple-Click Side" shortcut to quickly end a Guided Access session. By customizing these settings, you can ensure that Guided Access is used effectively and safely, providing your child with a secure and controlled environment to use their iPhone.
Additional Features to Enhance iPhone Security for Kids
As a parent, ensuring your child's iPhone security is a top priority. With the numerous features available, it can be overwhelming to determine which ones to enable. However, there are three key features that can significantly enhance your child's iPhone security: Enabling Ask to Buy, Restricting App Store Purchases, and Setting Up Family Sharing. By implementing these features, you can have peace of mind knowing that your child's device is protected from unauthorized purchases, explicit content, and other potential threats. In this article, we will explore each of these features in detail, starting with Enabling Ask to Buy, which allows you to approve or decline purchases made by your child, giving you complete control over their spending habits.
Enabling Ask to Buy
Enabling Ask to Buy is a feature that allows parents to approve or decline purchases made by their kids on their iPhone. This feature is especially useful for parents who want to monitor and control their child's spending habits. When Ask to Buy is enabled, any purchase made by the child will require the parent's approval before it can be completed. The parent will receive a notification on their device, and they can choose to approve or decline the purchase. This feature can be enabled by going to the Settings app, selecting the child's name, and then tapping on "Ask to Buy." From there, parents can set up the feature and start receiving notifications for any purchases made by their child. By enabling Ask to Buy, parents can have peace of mind knowing that their child's spending habits are being monitored and controlled, and they can help teach their child the value of responsible spending.
Restricting App Store Purchases
To further enhance iPhone security for kids, parents can restrict App Store purchases, ensuring their child's online safety and preventing unauthorized transactions. By enabling this feature, parents can control the types of content their child can access, including apps, music, movies, and books. To restrict App Store purchases, go to Settings > Screen Time > Content & Privacy Restrictions > iTunes & App Store Purchases. From here, parents can choose to require a password for every purchase, or set up a specific password for free downloads. Additionally, parents can restrict in-app purchases, which can help prevent kids from making unintended purchases within apps. By restricting App Store purchases, parents can have peace of mind knowing their child is protected from accessing mature content and making unauthorized transactions. This feature is especially useful for parents who want to limit their child's exposure to certain types of content or prevent them from spending money without permission. By taking control of App Store purchases, parents can create a safer and more secure iPhone experience for their kids.
Setting Up Family Sharing
Here is the paragraphy: Setting up Family Sharing is a great way to manage and control your child's iPhone usage. To set up Family Sharing, go to Settings > [Your Name] > Family Sharing. Tap on "Set Up Family Sharing" and follow the prompts to add family members. You can add up to six family members, and each member will need to have their own Apple ID. Once you've added family members, you can set up features like Screen Time, which allows you to monitor and limit your child's screen time, as well as set up content restrictions to block access to certain apps, websites, and media. You can also use Family Sharing to share purchases, such as music, movies, and apps, with your family members. Additionally, you can set up location sharing, which allows you to see the location of your family members on a map. This feature can be especially useful for keeping track of your child's whereabouts. By setting up Family Sharing, you can have more control over your child's iPhone usage and ensure their safety and well-being.