How To Take A Long Screenshot On Iphone
Taking a long screenshot on an iPhone can be a bit tricky, but with the right techniques, you can capture an entire webpage, document, or conversation with ease. Whether you want to share a lengthy article, a funny chat, or a detailed recipe, knowing how to take a long screenshot on your iPhone can be a game-changer. In this article, we'll explore the basics of iPhone screenshots, including how to take a standard screenshot and the different types of screenshots available. We'll also dive into the various methods for taking long screenshots on your iPhone, from using the built-in screenshot feature to third-party apps. Finally, we'll cover how to edit and share your long screenshots, making it easy to send them to friends, family, or colleagues. By the end of this article, you'll be a pro at taking long screenshots on your iPhone. So, let's start with the basics – Understanding the Basics of iPhone Screenshots.
Understanding the Basics of iPhone Screenshots
Capturing and sharing moments from your iPhone screen has become an essential part of our digital lives. Whether you want to save a funny meme, document a problem, or share a triumph, screenshots are an easy way to do so. But have you ever stopped to think about the basics of iPhone screenshots? In this article, we will delve into the world of iPhone screenshots, exploring what they are, how to take them, and their limitations. We will start by understanding the fundamentals of screenshots, including what they are and why they are useful. Then, we will move on to the practical aspect of taking a standard screenshot on an iPhone. Finally, we will discuss the limitations of standard screenshots, highlighting areas where they fall short. By the end of this article, you will have a deeper understanding of iPhone screenshots and how to use them effectively. So, let's begin by exploring what is a screenshot and why is it useful.
What is a Screenshot and Why is it Useful
A screenshot, also known as a screen capture or screen grab, is a digital image that captures the content displayed on a computer or mobile device screen at a specific moment in time. It is a useful tool that allows users to save and share visual information, such as images, text, and videos, from their screen. Screenshots can be taken on various devices, including iPhones, and are commonly used for a variety of purposes, including documentation, communication, and education. For instance, a user can take a screenshot of a webpage to share with others, or to save a recipe from a cooking app. Additionally, screenshots can be used to troubleshoot technical issues, provide visual evidence, or create tutorials and guides. In the context of iPhone screenshots, users can capture and save entire web pages, emails, messages, and other content, making it a convenient and efficient way to preserve and share information. Overall, screenshots are a valuable tool that can enhance productivity, facilitate communication, and provide a visual record of digital content.
How to Take a Standard Screenshot on an iPhone
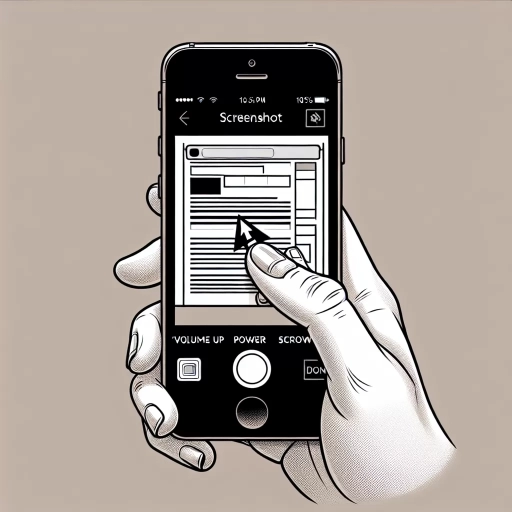
To take a standard screenshot on an iPhone, start by locating the Sleep/Wake button, which is typically found on the top right side of the device. Next, identify the Home button, which is usually located at the bottom center of the screen. For iPhone X and later models, the Home button is replaced by a gesture-based interface, so you'll need to use the Volume Up button instead. To capture a screenshot, simultaneously press and hold the Sleep/Wake button and the Home button (or Volume Up button on iPhone X and later). You'll know the screenshot has been taken when you hear a camera shutter sound and see a flash on the screen. The screenshot will be automatically saved to your Screenshots album in the Photos app, where you can view, edit, and share it as needed. If you're using an iPhone X or later, you can also use the AssistiveTouch feature to take a screenshot, which can be enabled in the Settings app under Accessibility. By following these simple steps, you can easily capture standard screenshots on your iPhone.
Limitations of Standard Screenshots
Here is the paragraphy: While standard screenshots are useful, they have limitations. One of the main limitations is that they only capture a small portion of the screen at a time. This can make it difficult to capture long web pages, emails, or documents that require scrolling. Additionally, standard screenshots do not capture any interactive elements, such as animations or videos, which can be important for demonstrating a process or showing how an app works. Furthermore, standard screenshots can be cumbersome to organize and share, especially if you need to capture multiple screenshots of a single process. This is where long screenshots come in, allowing you to capture an entire web page or document in a single image, making it easier to share and reference later.
Methods for Taking Long Screenshots on iPhone
Capturing long screenshots on an iPhone can be a bit tricky, but there are several methods to achieve this. One approach is to use the built-in screen recording feature, which allows you to record your screen and then take a screenshot of the entire recording. Another method is to utilize third-party apps that are specifically designed for taking extended screenshots. These apps often provide additional features such as editing and sharing capabilities. A third approach is to stitch multiple screenshots together, which can be a bit more time-consuming but provides more control over the final result. In this article, we will explore these methods in more detail, starting with the built-in screen recording feature.
Using the Built-in Screen Recording Feature
Here is the paragraphy: If you want to capture a long screenshot on your iPhone, you can use the built-in screen recording feature. To do this, go to the Settings app and select Control Center. Then, tap the "+" icon next to Screen Recording to add it to your Control Center. Next, open the Control Center and tap the Screen Recording icon to start recording your screen. Navigate to the content you want to capture, such as a webpage or document, and scroll through it while the screen recording is active. Once you've captured the entire content, stop the screen recording by tapping the Screen Recording icon again. Then, go to the Photos app to find the screen recording video. You can then edit the video to create a long screenshot by trimming it to the desired length and taking a screenshot of the video. Alternatively, you can use a third-party app to convert the screen recording video into a long screenshot. This method is useful if you need to capture a long piece of content that doesn't fit on a single screen.
Utilizing Third-Party Apps for Extended Screenshots
Taking extended screenshots on an iPhone can be a challenge, but utilizing third-party apps can provide a solution. There are several apps available on the App Store that allow users to capture long screenshots, including Stitch It!, Tailor, and Long Screen. These apps work by allowing users to take multiple screenshots and then stitch them together into a single image. Some apps also offer additional features, such as the ability to edit and annotate the screenshot, or to share it directly to social media. To use these apps, simply download and install the app, then follow the in-app instructions to capture and stitch together your screenshots. For example, with Stitch It!, users can take multiple screenshots and then select the "Stitch" option to combine them into a single image. The app also offers a range of editing tools, including the ability to crop, resize, and add text to the screenshot. By utilizing third-party apps, iPhone users can easily capture extended screenshots and share them with others.
Stitching Multiple Screenshots Together
Stitching multiple screenshots together is a simple and effective method for capturing long screenshots on an iPhone. This technique involves taking multiple screenshots of a webpage, document, or image, and then combining them into a single, seamless image. To stitch multiple screenshots together, start by taking individual screenshots of the content you want to capture, making sure to leave a small overlap between each screenshot. This will help you align the images correctly when combining them. Next, use a photo editing app, such as Adobe Photoshop or Canva, to import the individual screenshots and arrange them in the correct order. Use the app's alignment tools to ensure the images are perfectly aligned, and then merge them into a single image. You can also use online tools, such as screenshot stitching software, to automate the process. Once the images are combined, you can crop and edit the resulting image to remove any unwanted borders or edges. The final result is a long screenshot that captures the entire content of the webpage or document, making it easy to share or save for later reference. This method is particularly useful for capturing long web pages, documents, or emails, and can be a convenient alternative to using the iPhone's built-in screenshot feature. By stitching multiple screenshots together, you can create a single, high-quality image that showcases the entire content of the page, without having to scroll through multiple screenshots.
Editing and Sharing Long Screenshots
When it comes to capturing and sharing content on our mobile devices, screenshots are an essential tool. However, traditional screenshots can be limiting, especially when trying to convey information that spans multiple screens. Long screenshots, which allow you to capture an entire webpage or document in a single image, have become increasingly popular. But what happens after you've taken a long screenshot? How do you edit and share it effectively? In this article, we'll explore the various ways to edit and share long screenshots, from using basic editing tools in the Photos app to advanced editing with third-party apps, and finally, sharing them via email, messages, or social media. By the end of this article, you'll be equipped with the knowledge to enhance and share your long screenshots with ease. Let's start with the basics - editing your long screenshot using the built-in Photos app.
Basic Editing Tools in the Photos App
When it comes to editing and sharing long screenshots on your iPhone, the Photos app offers a range of basic editing tools that can enhance your image. To access these tools, simply open the screenshot in the Photos app and tap the "Edit" button. The first tool you'll see is the "Crop" tool, which allows you to trim the edges of your screenshot and remove any unwanted parts. Next to the Crop tool is the "Filters" button, which provides a range of pre-set filters that can instantly change the mood and style of your screenshot. You can also use the "Adjust" tool to fine-tune the brightness, contrast, and saturation of your image. Additionally, the "Markup" tool allows you to add text, drawings, and other annotations to your screenshot, making it easy to highlight important information or add context. If you're not satisfied with the original orientation of your screenshot, you can use the "Rotate" tool to flip it horizontally or vertically. Furthermore, the "Red-eye" tool can be used to remove any unwanted red-eye effects from your screenshot. By using these basic editing tools, you can quickly and easily enhance your long screenshots and make them more engaging and shareable.
Advanced Editing with Third-Party Apps
When it comes to advanced editing with third-party apps, the possibilities are endless. For instance, you can use apps like Adobe Photoshop Express or PicsArt to add text, filters, or effects to your long screenshot. These apps offer a wide range of tools and features that can help you enhance the visual appeal of your screenshot. You can also use apps like Skitch or Markup to add annotations, arrows, or other graphics to highlight important information or draw attention to specific areas of the screenshot. Additionally, apps like Canva or Pixlr can help you resize, crop, or adjust the layout of your screenshot to fit your specific needs. With these advanced editing capabilities, you can take your long screenshot to the next level and make it more engaging, informative, and shareable. Whether you're a student, professional, or social media enthusiast, advanced editing with third-party apps can help you unlock the full potential of your long screenshot and make it a valuable tool for communication, collaboration, or self-expression.
Sharing Long Screenshots via Email, Messages, or Social Media
When you want to share your long screenshot, you have several options to choose from, including email, messages, or social media. To share via email, simply tap the "Share" icon and select "Mail" from the list of available options. You can then add a recipient's email address, type in a subject line and message, and hit send. If you prefer to share via messages, tap the "Share" icon and select "Messages" instead. You can then choose a contact to send the screenshot to, add a message if desired, and tap the "Send" button. Sharing on social media is also a breeze. Simply tap the "Share" icon and select the social media platform you want to use, such as Facebook, Twitter, or Instagram. You can then add a caption, choose who to share with, and post your screenshot. Additionally, you can also use the "Save to Files" option to save your long screenshot to your iPhone's Files app, where you can access it later and share it via other methods. Regardless of which method you choose, sharing your long screenshot is quick and easy, allowing you to get your content out to others in no time.