How To Snip On Macbook
Here is the introduction paragraph: Capturing screenshots on a MacBook is a fundamental skill that can be incredibly useful for a variety of tasks, from creating tutorials and presentations to sharing information with colleagues and friends. However, many MacBook users are unaware of the various snipping tools and techniques available to them. In this article, we will explore the world of snipping on MacBook, covering the basics of snipping, built-in snipping tools, and advanced techniques and tools. First, we will start by understanding the basics of snipping on MacBook, including the different types of screenshots and how to capture them. By mastering the fundamentals, you'll be able to take your snipping skills to the next level and discover the full range of possibilities available on your MacBook. Let me know if you need any changes.
Understanding the Basics of Snipping on MacBook
Snipping is a fundamental feature on MacBook that allows users to capture and save screenshots of their screen. Understanding the basics of snipping on MacBook is essential for anyone who wants to enhance their productivity and workflow. In this article, we will delve into the world of snipping on MacBook, exploring what snipping is and why it's useful, the default snipping tools available on MacBook, and the third-party snipping tools that can take your snipping experience to the next level. By the end of this article, you will have a comprehensive understanding of snipping on MacBook and be able to utilize this feature to its full potential. So, let's start by understanding what snipping is and why it's useful.
What is Snipping and Why is it Useful
Snipping, also known as screenshotting, is a useful feature that allows users to capture a portion of their screen or the entire screen and save it as an image file. This feature is particularly useful for various purposes, including creating tutorials, capturing errors or bugs, and sharing information with others. On a MacBook, snipping can be done using a few different methods, including using keyboard shortcuts, the Preview app, or third-party apps. By snipping a portion of the screen, users can highlight specific information, annotate it, and share it with others, making it a valuable tool for communication, collaboration, and problem-solving. Additionally, snipping can also be used to capture and save images from websites, documents, or other digital sources, allowing users to easily reference or share them later. Overall, snipping is a simple yet powerful feature that can enhance productivity, facilitate communication, and provide a convenient way to capture and share visual information.
Default Snipping Tools on MacBook
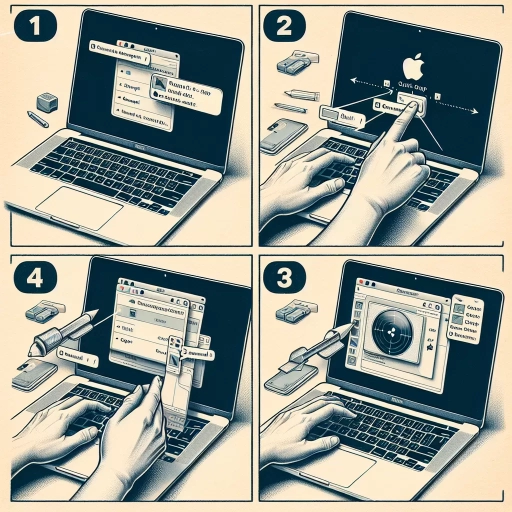
The default snipping tool on MacBook is called Screenshot, which can be accessed by pressing Command (⌘) + Shift + 3. This tool allows users to capture the entire screen, a selected window, or a specific region. To capture a selected window, press Command (⌘) + Shift + 4, and then click on the window you want to capture. To capture a specific region, press Command (⌘) + Shift + 4, and then drag the crosshair pointer to select the area you want to capture. The screenshot will be saved as a .png file on the desktop. Additionally, users can also use the Preview app to annotate and edit their screenshots. The Screenshot tool also allows users to record their screen by pressing Command (⌘) + Shift + 5, which can be useful for creating tutorials or demonstrations. Overall, the default snipping tool on MacBook provides a convenient and easy-to-use way to capture and edit screenshots.
Third-Party Snipping Tools Available for MacBook
Here are some third-party snipping tools available for MacBook: Skitch, Snagit, and Monosnap. Skitch is a popular tool that allows users to capture and annotate screenshots, with features such as arrows, text, and shapes. Snagit is a powerful tool that offers advanced features like video recording, image editing, and sharing options. Monosnap is a simple yet effective tool that allows users to capture screenshots and record videos, with features like annotation and sharing. These tools offer more advanced features than the built-in snipping tool on MacBook, making them ideal for users who need more control and flexibility when capturing and editing screenshots.
Using Built-in Snipping Tools on MacBook
When it comes to capturing and editing screenshots on a MacBook, there are several built-in snipping tools that can help you achieve professional-looking results. One of the most useful features is the ability to capture a selected area of the screen using Command + Shift + 4, which allows you to crop and edit specific parts of the image. Additionally, you can also capture the entire screen using Command + Shift + 3, which is perfect for creating tutorials or presentations. Furthermore, the Preview app offers a range of annotation and editing tools that enable you to enhance and customize your snipped images. In this article, we will explore these features in more detail, starting with how to use Command + Shift + 4 to capture a selected area of the screen.
Using Command + Shift + 4 to Capture a Selected Area
Using Command + Shift + 4 to capture a selected area is a convenient and efficient way to take a screenshot of a specific part of your MacBook screen. To do this, simply press the Command (⌘) key, the Shift key, and the number 4 key simultaneously. Your cursor will then turn into a crosshair, allowing you to select the area of the screen you want to capture. Click and drag the crosshair to choose the desired area, and release the mouse button or trackpad to capture the screenshot. The screenshot will be saved as a .png file on your desktop, labeled with the date and time it was taken. This method is particularly useful when you need to capture a specific section of a webpage, document, or image, and don't want to have to crop the screenshot afterwards. Additionally, you can also use this method to capture a screenshot of a specific window or menu, by pressing the Spacebar after pressing Command + Shift + 4, which will turn the crosshair into a camera icon, allowing you to select a window or menu to capture.
Using Command + Shift + 3 to Capture the Entire Screen
Using Command + Shift + 3 to capture the entire screen is a simple and efficient way to take a screenshot of everything visible on your MacBook screen. To do this, simultaneously press the Command (⌘) key, the Shift key, and the number 3 key. This will capture a screenshot of the entire screen, including all windows, icons, and the menu bar. The screenshot will be saved as a .png file on your desktop, labeled with the date and time it was taken. This method is particularly useful when you need to capture a screenshot of a full-screen application or a complex layout that spans multiple windows. Additionally, using Command + Shift + 3 allows you to capture the screenshot quickly, without having to open any additional applications or navigate through menus. This makes it a convenient option for users who need to take frequent screenshots, such as developers, designers, or technical writers. Overall, using Command + Shift + 3 to capture the entire screen is a straightforward and effective way to take a screenshot on your MacBook.
Using Preview to Annotate and Edit Snipped Images
Using Preview to Annotate and Edit Snipped Images. Once you've captured a screenshot or snipped an image using the built-in snipping tools on your MacBook, you can use the Preview app to annotate and edit the image. Preview is a powerful tool that allows you to add text, shapes, and other annotations to your images, as well as make basic edits such as cropping and resizing. To access the annotation tools in Preview, simply open the image you want to edit and click on the "Markup" toolbar button. From here, you can select from a range of tools, including text, shapes, and drawing tools, to add annotations to your image. You can also use the "Adjust" toolbar button to make basic edits to the image, such as adjusting the brightness and contrast. Additionally, Preview allows you to export your annotated image in a variety of formats, including JPEG, PNG, and PDF, making it easy to share your edited image with others. Overall, Preview is a versatile and user-friendly tool that makes it easy to annotate and edit snipped images on your MacBook.
Advanced Snipping Techniques and Tools
When it comes to capturing and editing screenshots on a MacBook, the built-in snipping tool is a great starting point. However, for those who need more advanced features and flexibility, there are several techniques and tools that can take their snipping game to the next level. One approach is to explore third-party snipping tools that offer a range of features not available in the native tool. Another strategy is to create custom keyboard shortcuts to streamline the snipping process and boost productivity. Additionally, integrating snipping with other productivity tools on the MacBook can also enhance the overall workflow. By leveraging these advanced snipping techniques and tools, users can capture and edit screenshots with greater precision and efficiency. For those looking to upgrade their snipping capabilities, one of the most effective ways to start is by exploring third-party snipping tools that offer advanced features.
Using Third-Party Snipping Tools for Advanced Features
Using third-party snipping tools can elevate your screenshot game on a MacBook, offering advanced features that go beyond the built-in snipping capabilities. One popular option is Skitch, a free app that allows you to annotate and edit your screenshots with ease. With Skitch, you can add arrows, text, and shapes to highlight important areas of the screenshot, making it perfect for creating tutorials or explaining complex concepts. Another powerful tool is Snagit, a paid app that offers advanced features like video recording, image editing, and a vast library of customizable templates. Snagit also allows you to capture scrolling screenshots, making it ideal for capturing long web pages or documents. Additionally, you can use third-party tools like Monosnap, which offers features like automatic image upload, customizable hotkeys, and a built-in image editor. By exploring these third-party snipping tools, you can unlock a world of advanced features and take your screenshot game to the next level.
Creating Custom Keyboard Shortcuts for Snipping
Creating custom keyboard shortcuts for snipping can significantly enhance your productivity and efficiency when capturing screenshots on your MacBook. To create a custom shortcut, go to System Preferences > Keyboard > Shortcuts > Screenshots. Click on the "+" icon at the bottom left corner of the window to add a new shortcut. Select "Screenshots" from the dropdown menu, then choose the type of screenshot you want to capture (e.g., "Capture Selected Portion"). In the "Shortcut" field, press the desired key combination (e.g., Command + Shift + 4). You can also choose to display a notification when the shortcut is used. Once you've created your custom shortcut, you can use it to capture screenshots quickly and easily. Additionally, you can also create custom shortcuts for other screenshot types, such as capturing a window or the entire screen. By creating custom keyboard shortcuts, you can streamline your workflow and reduce the time spent on capturing screenshots, allowing you to focus on more important tasks.
Integrating Snipping with Other Productivity Tools on MacBook
Integrating Snipping with Other Productivity Tools on MacBook can significantly enhance your workflow and efficiency. For instance, you can combine snipping with note-taking apps like Evernote or OneNote to annotate and organize your screenshots. By doing so, you can add context to your snips, making them more meaningful and easier to reference later. Additionally, you can integrate snipping with project management tools like Trello or Asana to attach screenshots to specific tasks or projects, providing visual context and facilitating collaboration. Furthermore, you can use snipping in conjunction with mind mapping tools like MindMeister or XMind to create visual representations of your ideas and concepts. By integrating snipping with these tools, you can streamline your workflow, reduce clutter, and increase productivity. For example, you can use the snipping tool to capture a screenshot of a webpage, then use a note-taking app to annotate it and add it to a specific notebook or project. This way, you can keep all your relevant information organized and easily accessible, making it easier to review and reference later. By leveraging the power of snipping in combination with other productivity tools, you can take your productivity to the next level and achieve your goals more efficiently.