How To Remove Paint From Plastic
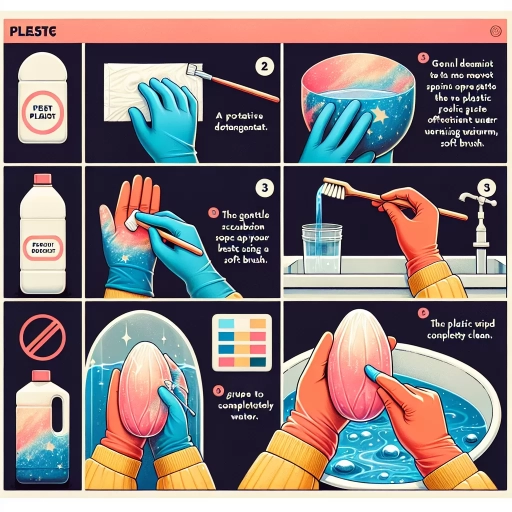 When you embark on a DIY project or undertake a home renovation, sometimes unwanted paint splashes can end up on your plastic surfaces. While this may seem a daunting task to reverse, don't worry! This comprehensive guide will equip you with knowledge on how to effectively and safely remove paint from plastic. We’ll walk you through key preparatory measures you need to take and then delve into two convenient removal techniques. Creating a clean slate will be simpler than you think with our trusted advice on 'Preparation is Key,' followed by methods employing both 'Chemical Paint Removers' and 'Non-Chemical Paint Removers.' Now, let’s get started by focusing on the cornerstone of any successful project: Preparation is Key.
Preparation is Key
The secret to success in any venture lies in thorough, careful preparation. Whether we're baking a cake, building a house, or taking on a DIY project, the steps we take before we begin directly influence the outcome. This principle applies equally to painting a room in your home. Selecting the right color is vital, but it is just the tip of the iceberg when it comes to the necessary preparation. There are three essential aspects to preparing for this task. First, we must secure the right solvent that will both clean the surfaces effectively and facilitate smooth application of paint. Second, it is essential to safeguard the surrounding area from inevitable spills and splashes. Finally, we need to ensure we wear adequate protective gear, shielding us from harmful fumes and messy accidents. Without a dedicated commitment to these three pillars of preparation, our painting endeavors might fall short of our expectations. With this in mind, let us delve into the first component- choosing the right solvent. A good solvent is instrumental in setting the stage for a seamless, efficient painting process that maximizes coverage while minimizing waste.
Choosing the Right Solvent
Preparation is key when you decide to engage in any DIY project, and when it comes to removing paint from plastic bedrock, it is no different. It is crucial to choose the right solvent as it plays a significant role in determining the success of your project. The misuse of solvents can potentially lead to damaging the surface, resulting in additional costs for repair or replacement. So, your first step after deciding to remove the paint is selecting the correct solvent. The market offers an overwhelming array of solvents, making it a Herculean task to select the right one. It can leave you swinging between decision paralysis and the fear of ruining your beautiful plastic bedrock. Fear not, we will guide you through the maze. When choosing a solvent, look for options that are specifically designed for plastic surfaces. This is because plastic is a non-permeable, slick surface that can be easily damaged if the wrong solvent is used, rendering your efforts moot. Several factors need consideration when choosing the optimal solvent. Firstly, the composition of the plastic bedrock must be taken into account. The wrong solvent can cause discolouration or even melting of the plastic surface. Secondly, the type of paint to be removed is also important as different kinds of paint respond differently to various solvents. For instance, oil-based paints require stronger solvents, while water-based paints can be removed with milder cleaning solutions. Lastly, your safety and that of the environment should be valued. Preferably, choose a solvent that is non-toxic and environmentally friendly to avoid health hazards and environmental damage. A popular choice of solvent for plastic surfaces is Isopropyl alcohol. It is typically safe for use on most plastic surfaces, and it does a fantastic job of breaking down several types of paint. Additionally, it evaporates quickly, reducing the risk of any potential damage to the plastic surface. However, it is always wise to perform a small patch test to confirm compatibility. While the method of using solvent involves application, allowing it to work, and then scraping or wiping off the dissolved paint, it is essential to remember that the key to success is moderation and patience. In a haste to see quick results, don't rush the process by using too much solvent or scraping aggressively, as it might mar the surface. In conclusion, while the task may seem daunting, armed with the right knowledge, it becomes less intimidating. Choosing the right solvent is an essential first step in the paint removal process to retain the integrity of your plastic bedrock. By being cautious and applying the correct procedures, we can guarantee the result that not only meets but exceeds your expectations.
Protecting the Surrounding Area
When it comes to executing a project like removing paint from plastic bedrock, safeguarding the surrounding area is an indispensable consideration. This preventive measure orients towards minimizing unnecessary mess and potential damage that might occur during the paint stripping process. One of the most effective ways to ensure the protection of the surrounding area is by employing high-quality drop cloths or heavy-duty plastic sheets. These materials provide a substantial barrier to the underlying surface, protecting it from the destructive impact of harsh chemicals, accidental spills, or a deluge of paint flecks. Another crucial thing to account for is the ventilation of the workspace. Paint stripping agents can produce potentially hazardous fumes that may pose harm to both human health and the environment. Assuring adequate air circulation within the working space helps dissipate these harmful emissions, precluding the risk of suffocation or poisoning. Supplementing natural ventilation with mechanical devices such as fans or air filters can help safeguard both the operator and the surrounding vicinity. Contingent upon the nature and size of the project, containment might also be necessary. Erecting a temporary wall or partition around the work area can help confine the dust, debris, and volatilized chemicals within the defined boundary. Moreover, it creates a physical barrier that prevents unauthorized or accidental entrance into the workspace, thereby ensuring optimal safety and protection. Never underestimate the protection of adjacent areas that do not require paint removal, like walls, furniture, or fixtures, by masking them off using painter’s tape. The tape will act as a preventer to keep those areas free from inadvertent contact with the paint stripper, fly-off particles, and the removed paint, ensuring they remain unmarred during the process. Regardless of how straightforward the task of paint removal may seem, it is always prudent to prioritize protection measures. This approach not only helps preserve the legacy of the worksite but also significantly mitigates risks related to health, safety, and environmental conservation. Remember, preparation is key, and encompassing an all-encompassing protection strategy in your preparatory plan can make the difference between a sloppy outcome and a flawless paint removal process.
Wearing Protective Gear
Wearing Protective Gear is of paramount importance when removing paint from plastic surfaces like Bedrock. Preparation, being the key, involves the approach towards safety measures too. Protective gear is not just about safeguarding oneself but it is an essential preventive step towards potential harmful incidents. The process may have several health risks, such as emissions of toxic fumes or accidental splatters of the stripping solution, that can cause injuries or allergic reactions. Therefore, it's imperative to wear appropriate safety gear before performing the task. Coveralls are the first line of defense against paint splatter and chemical splashes. Always opt for full-sleeve, light, breathable coveralls that fully cover your body. Your skin needs maximum protection against the harsh chemicals present in the paint stripping solutions. Second, safety goggles are absolutely non-negotiable. They protect your eyes from chemical splashes that may occur during the process. Also, dust particles in the air or small paint chips may inadvertently find their way towards the eye. Gloves further provide critical protection for your hands. Go for chemical-resistant gloves that will shield your hands from both the paint and the stripping solution. Respirators play a remarkable role in guarding against toxic fumes. The stripping solutions often emit harmful fumes and the respirator keeps you safe from inhaling these dangerous gases. Ventilation is usually recommended during such tasks, but a respirator adds an extra layer of safety. This is especially important for indoor tasks where ventilation might be limited. In addition, earplugs can be handy if you are using noisy machinery or tools during the process. The feet, often overlooked, also need protection because they are susceptible to chemical spills and falling objects. Hence, safety shoes, preferably waterproof ones, are suggested. Lastly, an apron is also recommended for an extra layer of protection, especially if you are performing the task standing. Using the right protective gear not only ensures a safe work environment but also enhances productivity. It builds confidence in the user, making the task less daunting and more efficient. With the assurance that you're less likely to be injured, you can focus more effectively on the task at hand. Remember, no task is as important as your safety. Regardless of your comfort level or familiarity with the job, never forego safety gear. In summary, wearing protective gear - from goggles and gloves to respirators and coveralls - is an integral part of the preparation process when removing paint from plastic surfaces such as Bedrock. It not only serves to minimize risks and protect you from hazards, but it also contributes to making the process more seamless and efficient. Make safety a priority – always.
Method 1: Using Chemical Paint Removers
Chemical paint removers, a powerful solution to strip layers of old paint off surfaces, can be an effective and time-saving method when conducting renovation or restoration projects. This process often entails three crucial steps: accurately identifying the type of paint, efficiently applying the paint remover, and diligently monitoring the removal process. Each of these stages are stunningly intricate and demand careful attention to ensure safety and to accomplish a flawless, smooth surface. Incorrect identification of the paint type can lead to ineffective or potentially harmful results. Upon successfully determining the paint type, the application of the chemical paint remover requires special techniques and safety measures, such as properly ventilating the workspace, wearing protective gear, and adhering to the manufacturer's specific application process. Subsequently, overseeing the removal process is vital to ensure all layers of paint have been adequately stripped, and there’s no residue left. Following these steps in the correct order inevitably leads to better outcomes. Now let's delve into the first stage – identifying the type of paint – to understand why it plays a pivotal role in using chemical paint removers effectively.
Identifying the Type of Paint
While paint can significantly improve the aesthetic appeal of plastic bedrock, there can be times when you need to remove the current paint for repainting or other purposes. Before you can begin using chemical paint removers, it's crucial to identify the type of paint you're dealing with. There are primarily two types of paint that are commonly used on plastic objects: oil-based paint and water-based paint or latex paint. Both types have their unique characteristics and knowing which one is applied to your plastic bedrock would guide your choice of paint removal methods. Oil-based paints are known for their durability and resistance to harsh conditions. They create a sleek, glossy finish that's impermeable to water, which can make the paint quite stubborn to remove. On the other hand, water-based paints (which are often referred to as latex paints), are easy to manage because they're soluble in water. They are famous for their quick-drying property and pose fewer health risks compared to oil-based paints. Nonetheless, due to their waterborne nature, they are less resilient than their oil-based counterparts. Identifying the paint type can be done by rubbing a small section with a rag soaked in denatured alcohol. If the paint comes off easily, it is likely a latex paint; if nothing happens or there's negligible effect, it's most likely an oil-based paint. Once you've correctly identified the paint type, you can proceed with the correct chemical paint remover. Oil-based paints require a strong chemical paint stripper that can break down the paint molecules' binding chemicals. However, for latex paints, since they are water-based, moisture-infusing techniques might work, or you can choose a milder chemical remover specially formulated for water-based paints. Remember throughout this process that safety should always remain a priority, so ensure to wear protective gloves, eyewear, and ensure proper ventilation while working with chemical paint removers. In conclusion, identifying the type of paint you're dealing with is an essential first step in successfully removing paint from your plastic bedrock. It allows you to choose the correct and most effective chemical paint stripper, which is pivotal in achieving the desired result without causing damage to the plastic bedrock. Knowledge of paint types can save you time, money, and effort, which allows the paint removal process to be much more effective and efficient.
Applying the Paint Remover
After selecting the suitable chemical paint remover for the type of plastic and paint you're dealing with, the application process begins. Start by ensuring that you are in a well-ventilated area to prevent the inhalation of potentially harmful chemical fumes. You should also consider wearing protective clothing, including gloves and safety goggles, to protect your skin and eyes from the chemical remover. Once prepared, you can commence the paint removal process. The first step is to apply a generous amount of the paint remover onto a clean, dry cloth or sponge. Be mindful not to oversaturate the material to the point of dripping as it might cause unnecessary mess or damage to surrounding surfaces. Thoroughly, but gently, spread the product over the surface of the painted plastic, ensuring full coverage over the paint you wish to remove. It's essential to apply the chemical remover evenly, avoiding blotches or unnecessary clustering of the product, to ensure a neat and evenly distributed paint removal process. Once the paint removal chemical is applied to the desired area, let it sit for the time stipulated on the product's instructions. This pause allows the chemical remover to penetrate the layers of the paint and soften it, making it more manageable to remove later. Most chemical removers take between 5 to 30 minutes to take effect, but it could vary depending on the nature of the paint and remover. Upon the completion of the waiting period, you should notice a visible change in the paint's texture. It gradually loosens up, and often forms a wrinkled or bubbled appearance, indicating that the paint is ready for removal. At this point, do not rush to scrape off the paint. Instead, take the time to examine every area to ensure the product has worked on everything. This phase is crucial to prepare for the next step in the paint removal process: scrapping and washing the plastic surface clean. When applying chemical paint removers, patience and attention to detail are crucial. Haphazardly or quickly conducted applications may not yield the desired result and could also potentially lead to damage or discoloration of the plastic surface. Therefore, ensure that you follow the instructions specified on the paint remover label and proceed with a controlled and cautious approach.
Monitoring the Removal Process
Monitoring the removal process is a crucial step when using chemical paint removers to strip paint off plastic materials. It's a delicate procedure that requires vigilance in order to achieve the desired result while ensuring the integrity of the original plastic material is preserved. The potency of the chemical paint removers allows them to penetrate the layers of paint rapidly, thereby necessitating regular checks during the process. Failing to monitor can lead to over-exposure of the plastic item to the chemical, potentially causing irreversible damage such as warping or discoloration. As soon as the chemical paint remover is applied, the paint begins to bubble and peel off. The bubbling effect indicates that the paint remover is at work and should be left to set for a specific amount of time that's usually stated on the product's packaging. However, one should not rely solely on the manufacturer's suggested time frame as different aspects such as temperature, paint type, and thickness can directly influence the duration required for the paint removal process. During monitoring, examining the peeling paint's condition is paramount. If a significant amount of the paint is not loosening, this may signify that further application of the remover is required, or that the remover should be left on the surface for a longer period. A clean, plastic scraper is handy for this purpose, allowing you to lightly test the readiness of the paint removal without exposing your hands to harmful chemicals. Furthermore, closely monitoring the process gives an individual the ability to halt the procedure immediately in case signs of damage to the plastic appear. If discoloration or warping is detected, immediately wash off the remover with water. Lastly, the removal process's most challenging aspect is possibly dealing with stubborn paint layers. You may find traces of paint in grain or texture, even after extensive chemical treatment. For such scenarios, patience and gentle application of chemical removers over a longer period can help extract the last vestiges of paint. In conclusion, the monitoring phase is as important as any other step in the chemical paint removal process. It mitigates potential failure or damage, provides room for corrective measures, and ultimately ensures a neat and clean plastic surface. Whether you're a professional or a DIY enthusiast, undivided attention to detail in monitoring the removal process can significantly increase the chances of a successful paint removal project.
Method 2: Using Non-Chemical Paint Removers
One of the most effective ways to remove paint without resorting to harsh or potentially harmful chemicals is to use non-chemical means. These methods, which are simple but incredibly effective, provide a safer, cleaner alternative to traditional paint removals. The three primary non-chemical methods for effectively removing paint are heat application, adhesives, and manual removal using scrapers. Applying heat to the painted surface helps in loosening the paint, making it easier for removal. Likewise, certain adhesive products can be used to pull off paint from surfaces without causing any damage. The use of scrapers, on the other hand, requires a little bit of elbow grease, yet this technique is useful, especially in removing stubborn layers of paint. Though they may require more time and effort, these non-chemical paint removal methods ensure the safety and preservation of surfaces and the environment. In the following sections, we will take a closer look at these methods starting with how heat can be effectively used to loosen and remove paint.
Using Heat to Loosen the Paint
Using heat effectively to dislodge paint is one of the most harmless and environmentally-friendly methods to remove stubborn paint from plastics. The approach is beneficial because it doesn't require any chemicals which ensures that the plastic is preserved in its original form after the paint removal process. To effectively use this method, it's crucial to have a heat gun or any other reliable source of heat. A heat gun is essentially a tool that operates much like a hair dryer but is far more powerful, capable of producing heat up to 1000-degree Fahrenheit. Start by adjusting the heat of your tool to a suitable level. It's advisable to start with a temperature level that won't melt the underlying plastic. Test the heat on a small area first and notice how the plastic and the paint react. If the paint loosens without the plastic softening, you've found a suitable temperature level. Next, aim the heat gun at the painted area and start heating; however, remember to keep the gun moving to ensure that the heat is evenly distributed and there's no particular spot getting overexposed to heat. It's also crucial to hold the heat source at a reasonable distance from the plastic surface; too close might result in melting the plastic, while too far away will not efficiently loosen the paint. What happens when you apply heat is that it softens the paint, making it elastic and easier to strip off. After the paint starts to flex, you can use a plastic scraping tool to peel off the loosened paint. The trick here is to synchronously heat and scrape the paint. Continually apply heat in front of the area where you're removing the paint, so it stays flexible for easy elimination. Continue this process until all the paint is removed, always remembering that patience is critical; rapid or forced scraping might damage the plastic. This heat method to loosen paint can be a bit time-consuming but it's highly rewarding. In comparison to the use of chemicals, it’s significantly safer for health and environmentally-friendly. Furthermore, it effectively preserves the integrity of the underlying plastic, making it an excellent choice for items that require maintenance of their form and aesthetic appeal. It's also worth mentioning that proper ventilation is necessary while using a heat gun to dissolve paint out of safety concerns. In conclusion, the use of heat to loosen paint provides a safe, non-toxic, gentle-on-plastic, and cost-effective solution for your paint removal tasks. Its benefit extends beyond just its non-chemical nature; it also assures the preservation of your desired surface with minimal chance of causing unwanted surface damage. Hence, when it comes to removing paint from plastic, using a simple yet effective method like heat should be prioritized.
Using Adhesives to Remove Paint
Adhesives can be a surprisingly effective non-chemical method for removing paint from plastic surfaces. They can be an advantageous alternative if you're sensitive to harsh chemicals used in other paint-removers or are looking for a safer option to use around children and pets. The principle behind this method involves the adhesive bonding with the dry paint's surface layer, and upon removal, it brings the paint along with it. It's worth noting that this method works best on relatively smooth surfaces and on paint layers that aren't too thick. For thick layers of hardened paint, you may need other physical methods like scraping or sanding, in addition to using adhesives. To implement this method, start by measuring the required quantity of adhesive—depending on the size of the area from which you need to remove paint. Spread the adhesive evenly over the painted area and let it soak in. The time you wait can vary depending on the type of adhesive and the thickness of the paint. Sometimes you may need to leave it overnight for the adhesive to sufficiently bond with the paint. As the adhesive hardens, it grips the paint, and you can then peel it off, taking the paint along with it. This process may be repeated to remove stubborn paint spots. Generally, the adhesives used are safe for the plastic and don't leave any harmful residue. However, a word of caution: not all adhesives are suitable for all types of plastic. It's advisable to test a small amount of adhesive on an inconspicuous part of the plastic before applying it to the area where the paint needs to be removed. Opt for an adhesive that is easy to apply, safe for the specific plastic surface you are working on, and one that can be removed without leaving a sticky residue or damaging the plastic. Be sure to clean the plastic surface thoroughly after removing the paint to ensure that all traces of adhesive and loose paint are gone. Overall, using adhesives to remove paint is an innovative and safer alternative, especially for those who are concerned about the potential health hazards associated with chemical paint-removers. This method brings together the dual attributes of effectiveness and safety in paint removal from plastic surfaces. Remember, the ultimate goal is to remove paint without inflicting damage to the underlying plastic material. So, it always pays to exercise patience and use gentle techniques such as this one, compared to abrasive or harsh methods. Environmental considerations are also becoming increasingly important, making non-chemical methods like this an even more pivotal choice today.
Using Scrapers to Remove Paint
Scrapers are a tried-and-true method for manually removing paint. They can be especially effective when combined with other non-chemical paint removal strategies. When using a scraper, it's crucial to use a light but firm touch to avoid damaging the underlying plasticBedrock. Depending on how much paint needs to be scraped away, you may require both larger and smaller-sized scrapers to ensure precise, effective work. The first step in this method is to choose the right kind of scraper. Broad blade scrapers are typically most effective when dealing with large areas. Gusseted, narrow-blade, and triangle scrapers are ideal for smaller sections and for chipping away at tricky corners or intricate detailing. These specialized tools are easy to use and are largely self-explanatory — like using a knife to scrape butter off toast. The scraping process should be done systematically. Start by cleaving off large chunks of paint, gradually reducing the size of the scraper as less and less paint remains. Applying constant but gentle pressure, push the blade of the scraper under the edges of the paint. It's vital not to dig too deeply, as doing this could gouge the plasticBedrock. While scrapers are highly effective, they're also labor-intensive. Multi-task tools that integrate a scraper with a blow-dryer or heat gun can make the job easier and quicker, by warming the paint just enough to help it peel off more neatly. After sweeping away the initial layers with a wide-blade scraper, these smart tools can be used for a finer finish, ensuring the plasticBedrock is left as clean and undamaged as possible. Above all, remember that patience is key when using scrapers to remove paint. It's a methodical process that requires an expertise that is accrued over time. So, don't get discouraged if the paint doesn’t come off immediately. Persist, and you'll be rewarded with a pristine surface, ready for your next do-it-yourself project. As a best practice, always wear appropriate clothing and ensure your work area is well ventilated to avoid inhaling dust and debris. In conclusion, using scrapers is an effective, non-chemical method to remove paint from plasticBedrock. It's a hands-on approach, which results in not just a clean surface, but also the satisfaction of a job well done. By understanding the process, correctly choosing and using your scraper, combined with a little patience, you can remove practically any paint from this versatile material.