How To Make Patches
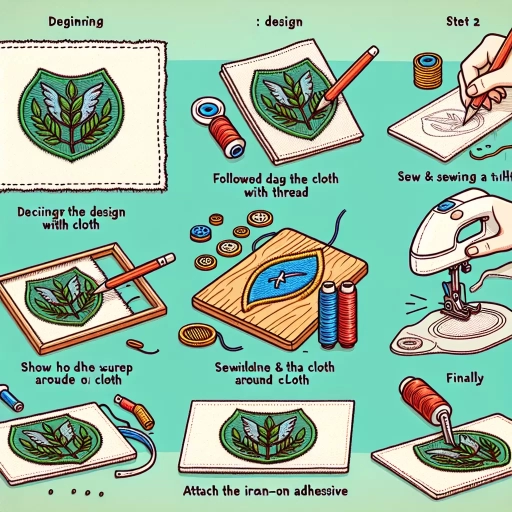
Patches have been a popular way to add a personal touch to clothing, accessories, and other items for centuries. From military insignia to punk rock emblems, patches have been used to convey identity, affiliation, and style. With the rise of DIY culture and the increasing accessibility of sewing machines, making your own patches has become a fun and rewarding hobby. In this article, we'll take you through the process of creating your own patches, from understanding the basics of patches to designing and creating your own unique designs, and finally, applying and finishing your patch to make it a permanent part of your favorite item. To get started, it's essential to understand the basics of patches, including the different types of patches, materials, and techniques used to create them. Let's dive in and explore the world of patches, starting with the fundamentals.
Understanding the Basics of Patches
Patches have become an essential part of our daily lives, from fashion to functionality. They are used to repair, decorate, and even convey messages. Understanding the basics of patches is crucial to appreciate their significance and versatility. In this article, we will delve into the world of patches, exploring what they are and their various uses, the different types of patches available, including iron-on, sew-on, and more, and the materials needed to make them. By grasping these fundamental concepts, you will be able to unlock the full potential of patches and discover new ways to incorporate them into your life. So, let's start by examining what patches are and their uses, and how they have become an integral part of our daily lives.
What are Patches and Their Uses
Patches are small pieces of fabric or other materials used to repair, reinforce, or decorate clothing, textiles, and other items. They can be made from various materials, such as cotton, polyester, or leather, and come in different shapes, sizes, and colors. Patches are commonly used to mend tears, holes, or worn-out areas on clothing, upholstery, and other fabrics. They can also be used to add decorative elements, such as logos, emblems, or designs, to clothing, hats, or bags. In addition, patches can be used to identify individuals or groups, such as military personnel, sports teams, or clubs. They can also be used to commemorate events, such as festivals, concerts, or anniversaries. Furthermore, patches can be used to add functional elements, such as reflective strips or padding, to clothing or gear. Overall, patches are versatile and can be used in a variety of ways to enhance, repair, or customize items.
Types of Patches: Iron-On, Sew-On, and More
Here is the answer: Patches come in various types, each with its own unique characteristics and uses. Iron-on patches are the most common type and are applied using heat and pressure. They have a heat-activated adhesive on the back that melts when ironed, bonding the patch to the fabric. Sew-on patches, on the other hand, require stitching to attach them to the fabric. They are a popular choice for those who want a more permanent and durable attachment. Hook and loop patches, also known as Velcro patches, have a hook side and a loop side that attach to each other, making them easy to remove and reattach. Embroidered patches are made using embroidery floss and are often used for decorative purposes. Woven patches are made using a weaving process and are known for their high-quality appearance. Printed patches are made using a printing process and are often used for custom designs. Leather patches are made from real or synthetic leather and are often used for a more premium look. PVC patches are made from polyvinyl chloride and are known for their durability and water resistance. Reflective patches are made with reflective materials and are often used for safety purposes. Glow-in-the-dark patches are made with glow-in-the-dark materials and are often used for decorative purposes. Each type of patch has its own unique characteristics, and the choice of patch depends on the intended use, fabric type, and personal preference.
Materials Needed for Making Patches
To make patches, you will need a few basic materials. First and foremost, you will need fabric for the patch itself. This can be cotton, polyester, or a blend, depending on the desired texture and durability. You will also need a stabilizing material, such as interfacing or fusible web, to give the patch structure and prevent it from stretching or distorting. Additionally, you will need a needle and thread for sewing the patch onto the desired surface. If you want to add any embellishments, such as embroidery floss or appliques, you will need those materials as well. It's also a good idea to have some scissors, a sewing machine, and a hot iron on hand to make the process easier and more efficient. Depending on the type of patch you are making, you may also need other materials, such as felt, leather, or vinyl. It's also important to have a design or pattern to follow, which can be created using paper, cardboard, or digital software. By having all of these materials on hand, you can create high-quality patches that are both functional and visually appealing.
Designing and Creating Your Patch
Designing and creating your own patch can be a fun and rewarding experience, allowing you to express your creativity and showcase your personality. To get started, it's essential to have a clear idea of what you want your patch to look like. This involves sketching and refining your patch design, choosing the right fabric and colors, and adding embellishments and details. By taking the time to carefully plan and execute each step, you can create a high-quality patch that reflects your unique style. In this article, we'll explore the process of designing and creating your own patch, starting with the first step: sketching and refining your patch design. (Note: The supporting paragraph should be 200 words and the last sentence should be a transition to the first supporting paragraph)
Sketching and Refining Your Patch Design
Sketching and refining your patch design is a crucial step in the patch-making process. It's essential to take your time and be meticulous when creating your design, as it will ultimately determine the final product's appearance. Start by brainstorming ideas and sketching out rough drafts of your design. Consider the size, shape, and color scheme of your patch, as well as any text or images you want to include. Use a pencil and paper to sketch out your ideas, and don't be afraid to experiment and try out different concepts. Once you have a solid idea of what you want your patch to look like, refine your design by adding more details and making any necessary adjustments. Use a ruler or other straightedge to ensure your lines are straight and your shapes are symmetrical. You can also use a computer program or app to create a digital version of your design, which can be helpful for making precise adjustments and experimenting with different colors and layouts. As you refine your design, keep in mind the type of fabric you'll be using and the size of the patch. Make sure your design is proportional to the size of the patch and that the details are clear and visible. Finally, take a step back and evaluate your design as a whole. Make any final adjustments and ensure that you're happy with the final product. By taking the time to carefully sketch and refine your patch design, you'll be able to create a high-quality patch that accurately represents your brand or message.
Choosing the Right Fabric and Colors
When it comes to designing and creating your patch, choosing the right fabric and colors is crucial. The type of fabric you select will determine the durability and texture of your patch, while the colors you choose will impact its visibility and overall aesthetic. For a standard embroidered patch, a tightly woven fabric such as cotton or polyester is ideal. These fabrics provide a smooth surface for embroidery and can withstand the wear and tear of being sewn onto clothing or accessories. If you're looking for a more premium feel, you may consider using a fabric with a bit of texture, such as wool or fleece. However, keep in mind that these fabrics may be more prone to pilling or fraying. When it comes to colors, it's essential to choose hues that are both visually appealing and relevant to your brand or message. Consider the colors of your logo, website, or packaging to ensure consistency across all platforms. You may also want to consider the color of the item your patch will be sewn onto, as you'll want the patch to stand out rather than blend in. A good rule of thumb is to choose colors that are bold and contrasting, as these will be more visible and eye-catching. Additionally, consider the emotional impact of different colors, as certain hues can evoke feelings of warmth, coolness, or energy. By carefully selecting the right fabric and colors for your patch, you can create a high-quality, visually appealing design that effectively communicates your message and represents your brand.
Adding Embellishments and Details
Here is the paragraphy: Adding embellishments and details is a crucial step in creating a unique and eye-catching patch. Embellishments can include a variety of elements such as sequins, beads, appliques, and embroidery floss. These details can add texture, dimension, and visual interest to your patch, making it stand out from the crowd. When choosing embellishments, consider the theme and style of your patch, as well as the color palette and fabric type. For example, if you're creating a patch for a sports team, you may want to use bold, bright colors and geometric shapes, while a patch for a music festival might feature more free-spirited, bohemian-inspired designs. You can also experiment with different techniques, such as hand-stitching or machine embroidery, to add intricate details and patterns to your patch. Additionally, consider adding a clear coat of varnish or sealant to protect your embellishments and ensure they remain secure and intact over time. By incorporating embellishments and details, you can take your patch from a simple design to a truly show-stopping piece of art.
Applying and Finishing Your Patch
Applying and finishing your patch can be a fun and rewarding experience, especially when done correctly. To ensure a professional-looking finish, it's essential to follow a few key steps. First, you'll need to prepare your fabric for patch application, which involves cleaning, ironing, and stabilizing the area where the patch will be applied. Next, you'll need to attach your patch using a suitable method, such as sewing, ironing, or using a patch adhesive. Finally, you'll need to add some finishing touches to seal and protect your patch, which can include applying a clear coat or using a fabric sealant. By following these steps, you can achieve a high-quality finish that will make your patch stand out. In this article, we'll take a closer look at each of these steps, starting with preparing your fabric for patch application.
Preparing Your Fabric for Patch Application
Preparing your fabric for patch application is a crucial step in ensuring a successful and long-lasting patch. Before you start applying your patch, make sure to inspect the fabric for any dirt, dust, or debris that may interfere with the adhesive. Gently brush off any loose particles using a soft-bristled brush or a lint roller. If the fabric is heavily soiled, consider washing and drying it before proceeding. It's also essential to iron the fabric to remove any wrinkles or creases that may affect the patch's adhesion. Use a low-heat setting and avoid applying too much pressure, as this can damage the fabric or cause it to shrink. Additionally, if you're working with a particularly delicate or stretchy fabric, consider using a stabilizing material like interfacing or fusible web to provide extra support and prevent distortion. By taking the time to properly prepare your fabric, you'll ensure a strong bond between the patch and the fabric, resulting in a durable and long-lasting finish.
Attaching Your Patch: Sewing, Ironing, and More
Here is the paragraphy: Attaching your patch is a crucial step in the patch-making process. There are several methods to attach a patch, including sewing, ironing, and using adhesives. Sewing is a popular method, as it provides a strong and durable bond between the patch and the fabric. To sew a patch, start by placing the patch on the desired location and pinning it in place. Then, thread your needle and sew around the edges of the patch using a simple running stitch or a more decorative stitch. Make sure to sew in the same direction as the fabric's weave to avoid puckering. Ironing is another method, which involves applying heat and pressure to attach the patch. This method is suitable for patches with a heat-activated adhesive backing. Place the patch on the fabric, cover it with a cloth, and iron it using a hot iron. The heat will activate the adhesive, bonding the patch to the fabric. For a more permanent bond, you can use a combination of sewing and ironing. Additionally, you can use adhesives like fabric glue or hot glue to attach the patch. However, these methods may not be as durable as sewing or ironing. Regardless of the method, make sure to follow the manufacturer's instructions and test the patch on a scrap piece of fabric before attaching it to your final project.
Finishing Touches: Sealing and Protecting Your Patch
Here is the paragraphy: The final step in creating your custom patch is applying the finishing touches. This involves sealing and protecting your patch to ensure it remains durable and long-lasting. To seal your patch, you can use a clear acrylic spray or a fabric sealant. These products will help protect your patch from fading, water damage, and wear and tear. Apply a thin layer of the sealant to the patch, making sure to cover the entire surface. Allow the sealant to dry completely before handling the patch. Additionally, you can also use a hot fix applicator to apply a clear plastic film over the patch, which will provide extra protection and give your patch a glossy finish. This step is especially important if you plan to use your patch on a item that will be exposed to the elements, such as a jacket or backpack. By sealing and protecting your patch, you can ensure that it remains vibrant and intact for years to come.